|
|
CFC CG 4 PBP Commentary |
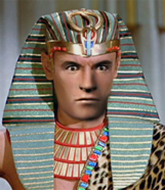
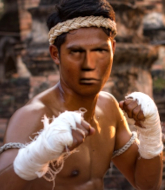
This TWGC bout is 1 fifteen minute round in the super heavyweight division. Introducing today's competitors. In the red corner, competing out of Las Vegas, with a TWGC record of 0 wins and 0 losses; Walad Anubis! And in the blue corner, fighting out of Las Vegas, with a TWGC record of 0 wins and 3 losses; Minoari Amida!
The judges for this bout are Gregory Folan, Alec Ball and Yves DeLean.
The fighters connect hands in the middle of the mat and we are under way.
Amida shoots in for a takedown. "I don't think so" says Anubis as he avoids it easily.
Amida shoots for a double leg takedown but Anubis sprawls well. He's pushed Amida's face into the mat and manages to get back to his feet relatively easily.
Anubis has been working on his boxing with his coaches at HELLCADEMY in the buildup to the fight.
No luck with that takedown attempt from Anubis.
Amida darts in looking for a takedown but Anubis gets double underhooks and turns Amida into the ropes.
Walad Anubis has stuffed three takedown attempts in the round now. That's going to take a lot out of Minoari Amida.
Amida fails to land the takedown.
Amida changes levels and looks for a double leg takedown. Anubis tries to avoid it but Amida manages to keep hold of a leg and drag Anubis to the ground. Anubis escapes though and pops straight back up to his feet.
Anubis attempts a counter takedown but Amida avoids it well and moves away.
Anubis shoots in with a takedown attempt and he has Amida pinned against the ropes. Amida gets the underhooks and manages to circle away.
Amida fails with the takedown.
Anubis shoots in but no luck this time.
Horrible takedown attempt by Amida or perhaps it was just good defense by Anubis, which made it look bad.
Amida has done a lot of speed work in the buildup to this fight.
We've had a slow start to the round here - hopefully the action picks up.
No luck for Amida with that takedown attempt.
Amida shoots in for a takedown. "Ole!" shouts Anubis as he jumps to the side.
Amida looks winded!
Anubis fails with a rather predictable takedown attempt.
A telegraphed takedown attempt from Anubis is defended easily by Amida.
Amida with the counter takedown but Anubis avoids it easily.

That's one minute gone in the round.
Anubis shoots in for a takedown - he's clinched up with Amida but Amida pushes him off and we're back to square one.
Amida shoots in looking for a double leg takedown. Anubis defends it nicely.
Anubis fails with a takedown attempt.
Amida goes for a double leg but Anubis avoids the attempt and the two fighters end up clinched against the ropes as Anubis continues to drive forward.
Amida tries for a takedown but Anubis sees it coming a mile off and avoids it easily.
Anubis changes levels and looks for a double leg takedown. Amida tries to avoid it but Anubis manages to keep hold of a leg and drag Amida to the ground. Amida escapes though and pops straight back up to his feet.
Amida dives in and grabs Anubis's left leg, looking for a takedown. Anubis pushes down on Amida's head and hops out.
Anubis fails with a takedown attempt.
Anubis looks for a takedown but Amida sprawls well.
Amida misses with a takedown attempt. He shot from a bit too far out.
Anubis shoots in but no luck this time.

That's two minutes gone in the round.
Amida shoots for a takedown but Anubis saw that one coming a mile off and avoided it easily.
Amida keeps the fight standing with a nice sprawl.
Amida looks for a takedown here. Will he get it? Anubis is fending him off so far but Amida persists. Nope, Anubis circles away and we're back to standing.
Amida shoots in for a takedown. "Ole!" shouts Anubis as he jumps to the side.
Amida fails with a takedown attempt.
Amida leaves Anubis with his face pressed against the mat as he sprawls beautifully, defending against a solid takedown attempt.
Amida tries to score a power double leg takedown but Anubis sees that one coming and sprawls well. That will dishearten Amida somewhat.
Anubis looks for a takedown but Amida sprawls well.
Anubis has a takedown stuffed.
Anubis tries to score a power double leg takedown but Amida sees that one coming and sprawls well. That will dishearten Anubis somewhat.

That's three minutes gone in the round.
Amida shoots in with a takedown attempt and he has Anubis pinned against the ropes. Anubis gets the underhooks and manages to circle away.
Amida tries to drive through with a takedown attempt but Anubis defends well and Amida ends up having to push Anubis into the ropes where they will battle it out in the clinch.
Anubis shoots in for a takedown. He's persisting with it as Amida sprawls well. Amida wins this battle and keeps the fight standing. Anubis gets slowly back to his feet.
Amida has a takedown stuffed.
Amida shoots in for a takedown. "Ole!" shouts Anubis as he jumps to the side.
Amida misses with a takedown attempt. He shot from a bit too far out.
Anubis changes levels and looks for a double leg takedown. Amida tries to avoid it but Anubis manages to keep hold of a leg and drag Amida to the ground. Amida escapes though and pops straight back up to his feet.
Anubis darts in looking for a takedown but Amida gets double underhooks and turns Anubis into the ropes.
Amida is working for a takedown up against the ropes. He can't get it on this occasion though.
Amida is looking to take this one to the mat.
Anubis stops a takedown attempt from Amida.
Anubis drops down looking for an ankle pick but Amida pulls his leg out and moves away.
Wow, both these guys are really going for it!

That's four minutes gone in the round.
Amida shoots in for a takedown - he's clinched up with Anubis but Anubis pushes him off and we're back to square one.
Anubis goes for a double leg but Amida avoids the attempt and the two fighters end up clinched against the ropes as Amida continues to drive forward.
Anubis is looking to take this one to the mat.
Anubis looking for a takedown.
Amida is trying to drag Anubis to the mat but Anubis just about manages to keep his footing. He used the ropes to his advantage there.
Anubis is working for a takedown up against the ropes. He can't get it on this occasion though.
Amida has Anubis pressed up against the ropes and is working for takedown. Anubis manages to improve position though and keeps the fight standing.
Anubis can't get the takedown.
Amida is a painfully thin specimen of a man. You do wonder whether a good body kick would snap him clean in two.
Anubis wants a takedown but no success here.
Anubis prevents the takedown attempt.
Anubis is working for a takedown up against the ropes. He can't get it on this occasion though.
Anubis prevents a takedown attempt there.
Amida goes for a takedown attempt but Anubis pushes him away and we're back to fighting at a distance.
Anubis shoots for a double leg takedown but Amida sprawls well. He's pushed Anubis's face into the mat and manages to get back to his feet relatively easily.
A telegraphed takedown attempt from Amida is defended easily by Anubis.

That's five minutes gone in the round.
Anubis looks for a takedown here. Will he get it? Amida is fending him off so far but Anubis persists. Nope, Amida circles away and we're back to standing.
No luck for Amida with that takedown attempt.
Amida fails with a takedown attempt from distance.
Anubis shoots in for a double leg but Amida sprawls well. That's going to sap some energy.
Amida drops down looking to force a counter takedown but Anubis defends it well.
Anubis shoots in with a takedown attempt and he has Amida pinned against the ropes. Amida gets the underhooks and manages to circle away.
Amida changes levels for a counter takedown but doesn't follow through with his attempt.
Anubis fails to land the takedown.
Amida shoots in looking for a takedown but Anubis manages to keep the fight standing, pushing Amida's face into the canvas for good measure before circling away.
Anubis fails miserably with a takedown attempt.
Amida dives in and grabs Anubis's left leg, looking for a takedown. Anubis pushes down on Amida's head and hops out.
Anubis appears to be looking for a counter takedown.
Anubis fails with a takedown attempt.

That's six minutes gone in the round.
Amida shoots in looking for a double leg takedown. Anubis defends it nicely.
Anubis shoots for a takedown but Amida saw that one coming a mile off and avoided it easily.
Horrible takedown attempt by Amida or perhaps it was just good defense by Anubis, which made it look bad.
Amida has a takedown stuffed.
Nice takedown defense from Amida. No joy for Anubis on that attempt.
Anubis looks for a takedown here. Will he get it? Amida is fending him off so far but Anubis persists. Nope, Amida circles away and we're back to standing.
Amida with the counter takedown but Anubis avoids it easily.
Amida fails with a rather predictable takedown attempt.
Anubis leaves Amida with his face pressed against the mat as he sprawls beautifully, defending against a solid takedown attempt.
No luck with that takedown attempt from Anubis.
Anubis shoots in for a takedown but Amida shows good takedown defense.
Amida misses with a takedown attempt. He shot from a bit too far out.

That's seven minutes gone in the round.
Nice takedown defense from Anubis. No joy for Amida on that attempt.
Anubis shoots in but no luck this time.
Nice takedown defense from Anubis. No joy for Amida on that attempt.
Anubis misses with a takedown attempt. He shot from a bit too far out.
Amida with the counter takedown but Anubis avoids it easily.
Nice takedown defense from Anubis. No joy for Amida on that attempt.
Amida slaps away a takedown attempt from Anubis, before circling back to the center of the mat.
Amida has a takedown stuffed.
Amida defends well against a solid takedown attempt from Anubis.
Amida looks frustrated there after his takedown attempt is stuffed easily.
Anubis looks frustrated there after his takedown attempt is stuffed easily.
Anubis keeps the fight standing with a nice sprawl.
Anubis shoots in but Amida avoids the takedown attempt easily.

That's eight minutes gone in the round.
Amida fails with a takedown attempt.
Horrible takedown attempt by Amida or perhaps it was just good defense by Anubis, which made it look bad.
Anubis tries to drive through with a takedown attempt but Amida defends well and Anubis ends up having to push Amida into the ropes where they will battle it out in the clinch.
Amida gets underhooks to prevent Anubis's takedown attempt.
Amida is pressed up against the ropes. Anubis has hold of a leg and is looking to drag Amida down to the mat. Amida avoids the attempt though and has circled away. We're back to striking at a distance.
Amida dives in and grabs Anubis's left leg, looking for a takedown. Anubis pushes down on Amida's head and hops out.
No luck for Amida with that takedown attempt.
Amida fails with a takedown attempt.
Anubis shoots in for a takedown but Amida shows good takedown defense.
Horrible takedown attempt by Amida or perhaps it was just good defense by Anubis, which made it look bad.
Anubis tries to counter with a takedown but Amida is quick to defend against it.
Amida shoots for a takedown but Anubis saw that one coming a mile off and avoided it easily.

That's nine minutes gone in the round.
Anubis fails with the takedown.
Amida shoots for a double leg takedown but Anubis sprawls well. He's pushed Amida's face into the mat and manages to get back to his feet relatively easily.
Anubis changes levels and looks for a double leg takedown. Amida tries to avoid it but Anubis manages to keep hold of a leg and drag Amida to the ground. Amida escapes though and pops straight back up to his feet.
Amida darts in looking for a takedown but Anubis gets double underhooks and turns Amida into the ropes.
Anubis will have to do better than that with his takedown attempts.
Anubis defends well against a solid takedown attempt from Amida.
Anubis looks for a takedown but Amida sprawls well.
Amida fails with a takedown attempt from distance.
Amida stuffs the takedown.
Anubis stuffs a takedown. It's all about dictating where the fight takes place and Anubis wants it to stay on the feet.
Anubis drops down looking for a counter takedown but Amida sprawls and moves away.
No luck with that takedown attempt from Anubis.
Amida shoots in for a takedown. "I don't think so" says Anubis as he avoids it easily.
Amida displays good takedown defense there as he swats away a double leg from Anubis.
Amida shoots in for a takedown. "Ole!" shouts Anubis as he jumps to the side.

That's ten minutes gone in the round.
Anubis looks for a takedown but Amida sprawls well.
A really sloppy takedown attempt there from Amida.
Nice sprawl there from Amida as Anubis shoots in.
Amida looks frustrated there after his takedown attempt is stuffed easily.
Nice sprawl there from Amida as Anubis shoots in.
Amida shoots in but no luck this time.
Anubis shoots for a takedown but Amida saw that one coming a mile off and avoided it easily.
Anubis stuffs a takedown. It's all about dictating where the fight takes place and Anubis wants it to stay on the feet.
Anubis misses with a takedown attempt. He shot from a bit too far out.
Amida dives in for a single leg takedown but Anubis sprawls and the fighters end up clinched against the ropes.
Anubis dives in for a single leg takedown but Amida sprawls and the fighters end up clinched against the ropes.
Amida drops to a knee looking for a takedown but Anubis gets the underhooks and prevents it.
Anubis is trying to drag Amida to the mat but Amida just about manages to keep his footing. He used the ropes to his advantage there.

That's eleven minutes gone in the round.
Amida drops down for a takedown but doesn't get it.
Anubis has hold of a leg and is looking for a trip takedown. Amida avoids it nicely though and we remain in the clinch.
Amida has hold of a leg and is looking for a trip takedown. Anubis avoids it nicely though and we remain in the clinch.
Anubis drops down for a takedown but doesn't get it.
Amida is working on a leg, looking for a takedown but Anubis is defending well.
Amida tries to score a body lock takedown but Anubis shows good agility there to stay on his feet.
Amida can't get the takedown.
Anubis tries to score a body lock takedown but Amida shows good agility there to stay on his feet.
Amida has dropped down and is looking to force the takedown but it's defended by Anubis after a bit of a struggle.
Anubis prevents a takedown attempt there.
Anubis drops to a knee looking for a takedown but Amida gets the underhooks and prevents it.

That's twelve minutes gone in the round.
Amida prevents a takedown attempt there.
Anubis is looking for a takedown.
Anubis is trying to work for a single leg takedown but Amida pulls him back up using the underhooks.
Anubis wants to take the fight to the mat but Amida manages to get underhooks and keep the fight in the clinch.
Amida is pressed up against the ropes. Anubis has hold of a leg and is looking to drag Amida down to the mat. Amida avoids the attempt though and has circled away. We're back to striking at a distance.
Anubis stuffs a takedown. It's all about dictating where the fight takes place and Anubis wants it to stay on the feet.
Anubis leaves Amida with his face pressed against the mat as he sprawls beautifully, defending against a solid takedown attempt.
Amida shoots in for a takedown. "I don't think so" says Anubis as he avoids it easily.
Anubis dives in and grabs Amida's left leg, looking for a takedown. Amida pushes down on Anubis's head and hops out.
Amida fails with a takedown attempt from distance.
Anubis looks frustrated there after his takedown attempt is stuffed easily.
Amida closes the distance and clinches up with Anubis, looking for a takedown. Amida pushes Anubis against the ropes but Anubis circles to the side and manages to break the clinch.
Anubis looks for a takedown but Amida sprawls well.

That's thirteen minutes gone in the round.
Amida will have to do better than that with his takedown attempts.
Horrible takedown attempt by Anubis or perhaps it was just good defense by Amida, which made it look bad.
Amida fakes high and shoots in for a takedown but Anubis avoids it really well and circles away.
Anubis shoots in but no luck this time.
And Amida tries to counter it with a takedown but Anubis pushes his down on his head and steps out.
Amida shoots in but no luck this time.
Anubis fails with a takedown attempt from distance.
Amida tries to shoot in for a takedown. He's got hold of a leg but Anubis swivels and escapes.
Anubis shoots in but no luck this time.
Amida fails with the takedown.
Anubis has a takedown stuffed.
Amida dives in and grabs Anubis's left leg, looking for a takedown. Anubis pushes down on Amida's head and hops out.
Anubis half commits to a counter takedown before pushing away, out of range.
Anubis shoots in with a takedown attempt and he has Amida pinned against the ropes. Amida gets the underhooks and manages to circle away.
And Amida tries to counter it with a takedown but Anubis pushes his down on his head and steps out.

That's fourteen minutes gone in the round.
Amida fails with a rather predictable takedown attempt.
Amida fails with a takedown attempt.
Anubis tries for a takedown but Amida sees it coming a mile off and avoids it easily.
Anubis slaps away a takedown attempt from Amida, before circling back to the center of the mat.
A really sloppy takedown attempt there from Anubis.
Amida has a takedown stuffed.
Amida keeps the fight standing with a nice sprawl.
Amida goes for a double leg but Anubis avoids the attempt and the two fighters end up clinched against the ropes as Anubis continues to drive forward.
Anubis tries to shoot in for a takedown. He's got hold of a leg but Amida swivels and escapes.
And that's the end of the fight!
As we have tied on points and both fighters attempted the same number of subs, we will decide the bout based on the toss of a coin! Anubis is heads and Amida is tails.
The coin is in the air and it lands... tails!
Amida wins on points by 1 to 0.
After winning the bout, Minoari Amida thanked all his fans and promised he'd do even better in his next fight. The crowd seemed to love his humility. |
|
|
|
|
|