|
|
PBP Commentary |
Coming up we have a welterweight MMA rules bout between Lionel Crumb Porpier (ranked 2845 p4p, 3045 weight class) and John Saunders (ranked 0 p4p, 0 weight class). The key to victory for Lionel Crumb Porpier has got to be keeping the fight on the feet.
 |
|
 |
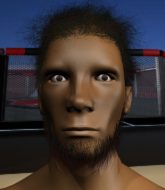
| 188 cm
22
177
0 - 0 - 0 |
|
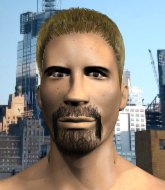
185 cm
25
180
1 - 0 - 0 |
BJJ White Belt
Great elbows
Granite chin |
|
BJJ White Belt
Excellent MT
Solid chin |
|
| |
|
Ladies and gentlemen. This fight is 3 rounds, in the welterweight division.
Introducing the fighter to my left, fighting out of the red corner.
With a record of 0 - 0 - 0, fighting out of The Island, Lionel Crumb Porpier!
And introducing the fighter to my right, fighting out of the blue corner.
With a record of 1 - 0 - 0, fighting out of The Island, John Saunders!
The judges for this bout are David Hoff, Santiago Holmes and Michael Johnstone.

The bell rings for round one and we are underway!

Saunders moves into the clinch.
Saunders scores with a hook to the body.
Saunders lands a left hand.
Crumb Porpier wants to take the fight to the mat but Saunders manages to get underhooks and keep the fight in the clinch.
Saunders lands a hook to the body. It's hard to tell if that hurt Crumb Porpier or not.
Saunders lands with a short head shot on the inside.
A right handed body shot lands from Saunders.
Saunders gets through Crumb Porpier's defenses to land a nice punch to the side of the head.
A short right from Saunders on the inside.
Saunders lands with a left to the head.
Saunders throws a hook to the body. More of an arm punch but it's all scoring with the judges.
Saunders lands a hook that snaps the head of Crumb Porpier backwards.
This is a great period of action - very entertaining stuff!
Saunders lands with a short head shot on the inside.
A short uppercut from Saunders.
Crumb Porpier tries to stall but Saunders uses the opportunity to gain a better position.
Saunders lands a left hand that snaps the head of Crumb Porpier backwards.
Saunders lands with a short punch from the clinch.
Nice body punch from Saunders.

That's one minute gone in the round.
Crumb Porpier tries for a takedown but Saunders manages to get underhooks.
Saunders keeps the fight in the clinch, despite Crumb Porpier's efforts to push away.
A short right from Saunders on the inside.
A short left from Saunders.

Saunders gets double underhooks and manages to take the fight to the ground.
The ref warns both fighters not to hold the cage as they work up against the meshing.
Crumb Porpier wants to control the position but Saunders says "no thanks buddy" and passes to half guard.
Saunders working to pass to mount. He's got his hand pressing down on Crumb Porpier's thigh. Crumb Porpier counters though and makes it back to full guard.
Crumb Porpier not looking particularly offensive just at the moment.
Crumb Porpier is trying to stand up but he's not managed so far.

That's two minutes gone in the round.
Crumb Porpier wants to improve his position but instead Saunders has moved into half guard.
Saunders performing his best blanket impression for a moment.

Saunders decides to stand and escape the position.
Crumb Porpier tries to clinch but Saunders moves out of range.
Saunders wants to counter with a clinch but Crumb Porpier pushes him away.
Crumb Porpier tries to keep at a distance but Saunders has taken the fight into the clinch.
Saunders pushes Crumb Porpier back against the cage and lands a hook to the side of the head.
This is a great period of action - very entertaining stuff!
Saunders lands a nice shot to the body.

That's three minutes gone in the round.
Saunders lands a hook that snaps the head of Crumb Porpier backwards.
Saunders throws a blind hook that connects with the side of Crumb Porpiers head.
Saunders stays in close to his opponent and throws a right hand to the body.
Crumb Porpier looks like he'd prefer to be striking at range right now.
Saunders cracks Crumb Porpier with a nice body shot.
Crumb Porpier is breathing heavily.
Saunders lands a body punch in the clinch.
Saunders lands with a short punch from the clinch.
Saunders cracks Crumb Porpier with a nice body shot.
Saunders lands punches inside but they're not really causing much damage.
Saunders lands a hook to the side of the head.
Saunders is stalling here.
Saunders working some nice short punches in the clinch.
A short uppercut from Saunders.
Saunders throws a blind hook that connects with the side of Crumb Porpiers head.

That's four minutes gone in the round.
Wooooo! Give it up for these two warriors! They are putting on a show!
Crumb Porpier is trying to break the clinch but Saunders is controlling him.
Saunders digs a right hand into Crumb Porpier's ribs. Those have got to be taking their toll on Crumb Porpier's gas tank.
Crumb Porpier wants to get back to striking at distance but Saunders won't allow it.
A short right from Saunders.
Saunders lands with a left to the head.
A short left from Saunders.
Saunders lands a right hand.
Saunders pushes Crumb Porpier back against the cage and unloads with a body punch.
Saunders lands a shoulder strike.
Saunders lands a shoulder strike that jolts his opponent's head backwards.
Saunders working some nice short punches in the clinch.
Crumb Porpier has had enough of the clinch and is looking to separate.
Crumb Porpier takes a shot to the head.
Crumb Porpier stalling in the clinch but Saunders improves position.
Saunders stays in close to his opponent and throws a right hand to the body.
Saunders lands a nice shot to the body.
And that is the end of the round. The fighters go back to their corners.
John Saunders dominated that round.
Well, the break between rounds is over. Let's get back to the scrappin!

Saunders swings wildly with a hook that is half blocked by Crumb Porpier.
Crumb Porpier wants to clinch.
Crumb Porpier wants to clinch.
Saunders leaves Crumb Porpier with his face pressed against the mat as he sprawls beautifully, defending against a solid takedown attempt.
Saunders has been the more effective fighter overall so far.
Crumb Porpier takes a shot to the eye socket. That's gotta hurt.
We've had a slow start to the round here - hopefully the action picks up.
Crumb Porpier tries to close the distance and clinch but Saunders swats him to one side with an open hand palm strike and circles away.
Saunders has taken the fight to the clinch.
Saunders works for underhooks and lands a body shot in the process.
Both fighters are absolutely exhausted here.
Saunders lands a body shot in the clinch.
We've been informed that Saunders has been working hard on his conditioning in the buildup to the fight.
A left hand lands to the body for Saunders.
That's one minute gone in the round.
Saunders pushes Crumb Porpier back against the cage and unloads with a body punch.
Saunders lands a nice shot to the body.
Saunders throws a blind hook that connects with the side of Crumb Porpiers head.
Saunders lands a right uppercut that snaps the head of Crumb Porpier backwards.
A short right hand to the side of the head by Saunders.
Saunders lands punches inside but they're not really causing much damage.
Saunders lands a hook that snaps the head of Crumb Porpier backwards.
Saunders stays in close to his opponent and throws a right hand to the body.
A nice right hand lands inside from Saunders.
Saunders lands a right hand that snaps the head of Crumb Porpier backwards.
A right hand to the body from Saunders.
Saunders lands with a left to the head.
We've seen a great period of action over the last minute or so - credit to both fighters for going all out!
Saunders is working Crumb Porpier over against the cage.
Saunders scores with an uppercut up the middle.
Saunders blocks a body shot from Crumb Porpier.
That's two minutes gone in the round.
Saunders lands with a good tight uppercut to the head.
Saunders works on Crumb Porpier's body with a couple of short punches.
A right handed body shot lands from Saunders.
Saunders presses Crumb Porpier against the cage and delivers a mid-strength body shot.
Saunders lands a left hand that snaps the head of Crumb Porpier backwards.
A nice left hand lands by Saunders.
Saunders working some nice short punches in the clinch.
Saunders works for underhooks and lands a body shot in the process.
Crumb Porpier takes a shot to the head.
A right handed body shot lands from Saunders.
A short right hand to the side of the head by Saunders.
Saunders cracks Crumb Porpier with a nice body shot.
Saunders pushes Crumb Porpier back against the cage and unloads with a body punch.
Saunders working on landing some head shots here - that one got through nicely.
Crumb Porpier's head jolts backwards as he takes an uppercut right on the button!
That's three minutes gone in the round.
Saunders lands an uppercut.
Saunders lands with a light punch inside.
Saunders lands a nice uppercut.
Saunders gets through Crumb Porpier's defenses to land a nice punch to the side of the head.
Saunders makes some space for himself and lands an uppercut.
A right hand to the body from Saunders.
Saunders digs a right hand into Crumb Porpier's ribs. Those have got to be taking their toll on Crumb Porpier's gas tank.
A short body shot lands from Saunders as the two fighters clinch.
An uppercut to the body lands inside from Saunders.
Saunders stalling against the cage.
Saunders scores with a shot to the side of Crumb Porpier's head.
Saunders lands with a short punch from the clinch.
Saunders working on landing some head shots here - that one got through nicely.
This has been an exciting period of action!
Saunders lands on the inside with an uppercut.
That's four minutes gone in the round.
Saunders digs a right hand into Crumb Porpier's ribs. Those have got to be taking their toll on Crumb Porpier's gas tank.
Saunders lands a right hand that snaps the head of Crumb Porpier backwards.
Saunders working on landing some head shots here - that one got through nicely.
Crumb Porpier takes a shot to the head.
Saunders working some nice short punches in the clinch.
Saunders lands with a short head shot on the inside.

Crumb Porpier is rocked!
Saunders digs a right hand into Crumb Porpier's ribs. Those have got to be taking their toll on Crumb Porpier's gas tank.
Oh Crumb Porpier is still all over the place! His legs are completely gone! Will he be able to recover?!!
Saunders presses Crumb Porpier against the cage and delivers a mid-strength body shot.
Good body shot from Saunders.
An uppercut to the body lands inside from Saunders.
A short right hand to the side of the head by Saunders.
Saunders lands with a good tight uppercut to the head.
A right hook to the body lands for Saunders.
Nice body punch from Saunders.
The crowd applaud the fighters' efforts here as the round comes to an end.
A short right from Saunders on the inside.
Saunders is working Crumb Porpier over against the cage.
With the fighters clinched against the cage, Saunders creates a bit of distance for himself and scores with a nice uppercut.
Crumb Porpier wants to take the fight to the mat but Saunders manages to get underhooks and keep the fight in the clinch.
Saunders lands a big right hand that drops Crumb Porpier! The killer instinct kicks in and Saunders finishes his opponent with a series of strikes from mount. A dominating finish by Saunders!
Ladies and gentlemen, after 4:55 of round 2, we have a winner by way of TKO (Strikes). John Saunders!
During a confident post fight interview, John Saunders thanked all his fans. He seemed very genuine when describing how motivated his fans keep him.
|
|
|
|
|
|
|
|
|
|
|
|
|
|
|
|
|
|
|
|
|
|
|
| S |
C
A |
G |
S |
C
B |
G |
|
S |
C |
G |
|
energy
A | B |
|
hype
A | B |
|
pop
A | B |
|
mgr
A | B |
|
FIGHT
RATING
76% |
|
|
|
|
|
|
