|
|
GFY 43 - yeah, I can count PBP Commentary |
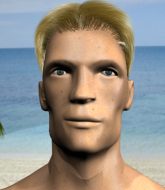
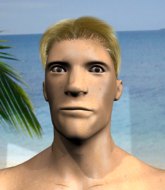
This TWGC bout is 1 fifteen minute round in the super heavyweight division. Introducing today's competitors. In the red corner, competing out of Las Vegas, with a TWGC record of 38 wins and 15 losses; Rumsfeld Shart! And in the blue corner, fighting out of St Petersburg, with a TWGC record of 15 wins and 12 losses; Phol Boxaaja!
The judges for this bout are Chris Downing, Daniel Franklin and Wesley Smith.
The official calls the fighters to the middle and the contest is under way.
Shart darts in looking for a takedown but Boxaaja gets double underhooks and turns Shart into the ropes.
Shart fails to pull the fight into his guard.
Shart jumps guard but his hands slip and he falls flat on his back. Well, he's made himself look a right mug there, as Boxaaja walks away with a smile on his face. Shart gets slowly back to his feet and shakes his head.
That's three failed takedown attempts in the round for Rumsfeld Shart. That's going to take a lot out of him.

Shart scores a trip takedown into side control. Nice. Score +4 for clean takedown past guard: Shart (4) vs (0) Boxaaja

Shart goes for an armbar here - this could be all over! But no, Boxaaja has escaped beautifully and is now on top in side control! Oh, that's unlucky for Shart but great work by Boxaaja. Score +4 for clean sweep to past guard: Shart (4) vs (4) Boxaaja

Boxaaja tries for an arm triangle. That looks pretty tight to me. Is this one over!?! Possibly, maybe, no Boxaaja has let go of the choke. Obviously it wasn't as tight as we thought!
Boxaaja is trying to land an Americana. He has the arm isolated but Shart is keeping cool and he's avoided the danger for now.
We've had a slow start to the round here - hopefully the action picks up.
Shart manages to get one leg in to regain half guard.
Boxaaja perhaps working for something from half guard, or maybe not. It looks like he's just sitting there.

That's one minute gone in the round.
Shart trying to control but Boxaaja postures up.
Boxaaja not doing much here.
Boxaaja wants to lay and pray for a moment but Shart keeps working.
Shart's coaches at Beating a Dead Horse to Death Again have been working on his defensive grappling in preparation for this fight so let's see if he can get out of this tricky position.
Boxaaja is trying to work for a kimura but Shart is defending well.
Shart is trying to control but can't.
Boxaaja is looking to stall here but Shart recovers full guard.

That's two minutes gone in the round.
Shart working a defensive guard here.
Shart keeping moving, preventing Boxaaja from controlling successfully.
Shart looking to hit a scissor sweep but Boxaaja is one step ahead there.
Shart pulls Boxaaja in to control the position.
The fighters are trapped in the ropes so we're going to have a reposition here. The ref calls for a break and repositions the fighters in the center of the ring.
Boxaaja trying to control the position from guard on top but Shart is wriggling around, looking for whatever he can.

That's three minutes gone in the round.
Shart controls Boxaaja momentarily but Boxaaja frees himself.
Boxaaja stands up and looks to throw the legs aside to pass to side control. Shart swivels though and keeps the full guard.
Boxaaja slips nicely into half guard.

That's four minutes gone in the round.
Shart is trying to control but can't.
Boxaaja is keen to just control but Shart is a slippery customer.
Shart wants to control but Boxaaja is keeping busy and won't allow it.
Boxaaja is working for submissions here but there's nothing on.
Shart desperately trying to maintain half guard.
Boxaaja is sneakily working for an arm triangle but Shart sees it coming and defends easily.
Boxaaja not doing much here.

That's five minutes gone in the round.
Boxaaja is looking to take a break and control but Shart is keeping him honest, looking to work from the bottom.
Boxaaja is looking for a kimura but he's never going to get it from there.
The fighters are battling for position here. Shart manages to regain full guard. Nice work.
Boxaaja drops back looking for a heel hook - he quickly realises he's not going to get it but Shart manages to dive on top of him before he can escape and now Boxaaja has Shart in his guard. Score +2 for sweep to guard / half guard: Shart (6) vs (4) Boxaaja
Boxaaja is looking for a guillotine. You can't force these things though and Shart defends well.

That's six minutes gone in the round.
Shart stopping the sweep attempt from Boxaaja.
Shart passes Boxaaja's left leg - he's now in half guard.
Shart seems to be looking for submissions.
Boxaaja is not content to let Shart control the position.
Shart is looking for an arm triangle, whilst trying to pass to side control. Boxaaja doesn't seem that keen to cooperate though. No luck this time Shart.

That's seven minutes gone in the round.
Boxaaja trying to get back to full guard but Shart takes advantage of the position and moves to full mount! Score +3 for passing guard: Shart (9) vs (4) Boxaaja
Shart swings around for an armbar but it's a sloppy attempt and Boxaaja is now in Shart's guard. A big mistake from Shart there, giving up the dominant position! Score +2 for sweep to guard / half guard: Shart (9) vs (6) Boxaaja
Boxaaja wants to control from the top but Shart keeps moving.
Boxaaja trying to pass the guard but can't manage it just yet.

That's eight minutes gone in the round.
Shart trying to keep a closed guard but Boxaaja is proving a slippery customer.
Shart is working actively off his back, looking to secure an arm or perhaps work for a triangle.
Boxaaja trying to control the position from guard on top but Shart is wriggling around, looking for whatever he can.
Boxaaja looking to sit in guard and control but Shart gets the butterfly guard and sweeps. He's now in the guard on the top. Score +2 for sweep to guard / half guard: Shart (11) vs (6) Boxaaja
Shart wants to control from the top but Boxaaja keeps moving.

That's nine minutes gone in the round.
Shart passes easily into side control. Nice work. Score +3 for passing guard: Shart (14) vs (6) Boxaaja
Shart advances nicely into full mount. Score +2 for reaching mount: Shart (16) vs (6) Boxaaja
Shart wants to control the pace but Boxaaja is squirming around nicely.
Shart controlling from the full mount.
Shart has controlled the position for a good 20 seconds, which will no doubt be starting to frustrate his opponent.

That's ten minutes gone in the round.
Boxaaja is trying to escape the mount.
Boxaaja wants to control but Shart is having none of it.
Shart wants to control the action but instead Boxaaja gets a body lock and reverses into Shart's guard! Nice work! Score +2 for sweep to guard / half guard: Shart (16) vs (8) Boxaaja
Boxaaja trying to control the position from guard on top but Shart is wriggling around, looking for whatever he can.
Shart pulls Boxaaja in close to prevent any damage.

That's eleven minutes gone in the round.
Boxaaja trying to control but Shart is working from the bottom.
Boxaaja controlling from the top position.
Boxaaja wants to control from the top but Shart keeps moving.
Shart throwing his legs up looking for a triangle.
Boxaaja stopping the sweep attempt from Shart.

That's twelve minutes gone in the round.
Shart is looking for a guillotine. You can't force these things though and Boxaaja defends well.
Boxaaja trying to control but Shart is working from the bottom.
Shart is active off his back here, looking for submissions.
Shart keeping moving, preventing Boxaaja from controlling successfully.
Shart bucks up whilst keeping hold of a body lock, managing to reverse the position. Now he's in top in Boxaaja's guard. Score +2 for sweep to guard / half guard: Shart (18) vs (8) Boxaaja

That's thirteen minutes gone in the round.
Boxaaja wants to sweep but no luck.
Shart stands and throws Boxaaja's legs to the side, diving into side control. Score +3 for passing guard: Shart (21) vs (8) Boxaaja
Boxaaja is not content to let Shart control the position.
Boxaaja struggling a bit here.
Boxaaja tries to work a leg under to get back to half guard but Shart wriggles his own leg back out and remains in side control.

That's fourteen minutes gone in the round.
Boxaaja is not content to let Shart control the position.
The fighters are tangled up in the ropes here. We might need a restart if the fighters can't break free themselves.
You can see the frustration on Boxaaja's face, being in this tough position on the bottom.
Shart trying to control the position but Boxaaja is working away.
Shart is going to have to think about doing something other than just controlling because Boxaaja is managing to avoid having the position dictated to him.
Boooooooooooooooooooo!!! God, this has been a terrible round. Come on you two, sort yourselves out!
Boxaaja is trying to control Shart's posture but Shart avoids it.
And that's the end of the fight!
Shart takes the fight on points by 21 to 8.
Rumsfeld Shart really struggled to get his t-shirt on before his hand was raised. Making sure that The Huntington New Age Wellness Community logo gets some air time is pretty tricky when you're all sweaty. |
|
|
|
|
|