|
|
PBP Commentary |
Coming up we have a heavyweight MMA rules bout between Bas Darwich (ranked 0 p4p, 0 weight class) and Sam Stan (ranked 0 p4p, 0 weight class). Over to our ring announcer for the fighter introductions!
 |
|
 |
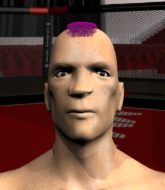
| 196 cm
22
255 lbs
3 - 0 - 0 |
|
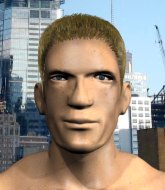
180 cm
18
280 lbs
2 - 0 - 0 |
BJJ Purple Belt
Counter striker
Cuts easily |
|
Good takedowns
Counter striker
Likes ground |
|
| |
|
Ladies and gentlemen. This fight is 3 rounds, in the heavyweight division.
Introducing the fighter to my left, fighting out of the red corner.
With a record of
3 - 0 - 0, fighting out of Amsterdam, Bas Darwich!
And introducing the fighter to my right, fighting out of the blue corner.
With a record of
2 - 0 - 0, fighting out of Amsterdam, Sam Stan!
The judges for this bout are Albert Achterberg, Radbod Blank and Nard Betker.

The bell rings for round one and we are underway!

Stan shoots in and scores a nice double leg takedown into half guard.
Stan wants to take a breather but Darwich is having none of it.
Stan slows the pace down in half guard.
Stan trying to mount his opponent but Darwich defends it.
Darwich is not content to let Stan control the position.
Darwich is trying to get back to full guard.
Neither fighter is being very active at the moment, with Stan in particular looking to stall.
Darwich is trying to control but can't.
Stan lands with a punch from half guard.

Stan stands up out of the half guard.
Stan looking for a takedown here - he's got it.

That's one minute gone in the round.

Darwich looking for submissions off his back, moving his hips, looking for an opening.
Stan postures up in Darwich's guard and throws a big left but Darwich blocks it.
Stan looking to pass the guard.
Stan works a leg free and moves into half guard.
We're hearing some news coming in from back stage. It's official - Stan has eaten all the pies!
Stan is sneakily working for an arm triangle but Darwich sees it coming and defends easily.
The ref warns both fighters not to hold the cage as they work up against the meshing.
Stan wants to pass the guard but Darwich is defending well.
Stan is working for submissions here but there's nothing on.
Stan looks gassed!
Darwich is trying to control but can't.
Stan is keen to just control but Darwich is a slippery customer.

That's two minutes gone in the round.
My god... these two guys really need to pick up the pace or everyone will leave to go get a beer.
Stan prevents Darwich from improving his position.
Stan wants to stand up but Darwich has a hold of him and won't allow it.

The referee decides to stand the fighters back up.
Darwich fails with the takedown
and Stan counters with a nice double leg into side control. Darwich won't be happy with that.
Darwich is trying to improve his position.
Stan thinks about going for a far side armbar but bails out and retains the dominant position instead.
Darwich struggling a bit here.

That's three minutes gone in the round.
Stan tries for a kimura but Darwich is defending well.
Darwich tries to bench press Stan off him but Stan keeps the position.
Stan swings around for an armbar but Darwich sees it coming a mile off and turns beautifully into Stan's guard.
Darwich working some strikes from top position.
Darwich tries to free his leg and advance position but Stan is retaining full guard.
Stan has a butterfly guard looking to sweep but Darwich has passed into side control.
Stan is looking for a sweep.
Stan is moving his hips around well on the bottom and has managed to get back to half guard.
Stan won't allow Darwich to pass to mount.
Darwich will need to keep those long limbs tucked in whilst he's on the ground, to prevent any submissions.

That's four minutes gone in the round.
Darwich sitting and controlling from the half guard.
Stan is pressing down on Darwich's left leg trying to get back to full guard. He's managed it.
Darwich stands up and looks to throw the legs aside to pass to side control. Stan swivels though and keeps the full guard.
Stan looking for submissions from the bottom here. Moving his hips around, possibly looking for an armbar.
Stan looking for a sweep. Not yet Stan, not yet.
Stan manages to land a sweep and now he's in mount on top!
Stan looking to secure an arm triangle but Darwich defends it well.
The fighters are pressed up against the cage, both looking to find a bit of space to work.
Darwich avoids a series of strikes thrown by Stan.
And thats the end of the round the fighters go back to their corners.
Sam Stan dominated that round.
The minute break is over - no more time for sponges and pep talks - back to the action!

Stan is looking to clinch but Darwich is avoiding it.
Darwich shoots and misses
and Stan counters with a nice double leg into guard.
Stan forces his way into half guard.
Stan has freed up his trapped foot and advances to mount.
Darwich bucks up and manages to get a nice reversal! He's in guard on the top - nicely done!
Stan keeping moving, preventing Darwich from controlling successfully.
Both fighters are absolutely exhausted here.
That's one minute gone in the round.
Stan looking to control the pace of the fight rather than finish it.
Stan wants to sweep here but Darwich controlling him for the moment.
Darwich wants to control from the top but Stan keeps moving.
Stan looking for submissions from the bottom here. Moving his hips around, possibly looking for an armbar.
Darwich preventing the sweep.
Darwich sitting in guard here, content to control.
Darwich throwing shots from guard but he's hitting more mat than opponent.
Stan had isolated an arm as going for an omaplata. Darwich is defending the submission well but is in a very vulnerable position. Stan Is leaning forward trying to finish the omaplata but decides to abandon it, and take Darwich's back instead.
That's two minutes gone in the round.
Stan is working really hard to secure the rear naked choke. Darwich defends successfully for a significant amount of time. Both fighters are looking very determined.
Darwich is in a bad position with Stan working for a choke. Darwich manages to spin nicely into guard and the danger is over for the moment.
Darwich won't allow Stan to sweep him here.
Darwich avoids a guillotine attempt easily.
Stan keeping full guard, as Darwich tries to pass.
Stan looking to hit a scissor sweep but Darwich is one step ahead there.
That's three minutes gone in the round.
Darwich is stalling in the full guard.
Stan keeping moving, preventing Darwich from controlling successfully.
Neither fighter is doing enough for the referee's liking and he's decided to stand them back up.
Stan doesn't manage to clinch there - Darwich circles away.
That's four minutes gone in the round.
A lull in the action here being met with boos from the crowd.
Darwich misses with a half-hearted attempt at a head kick.
Darwich throws a jab when Stan was well out of range.
Stan feints and then dives in with a takedown. That was a long way out but the feint bought him enough time to close the distance and complete the takedown. Now we'll play guard for a bit and see who can get the better of that position.
Stan sneaks a leg through and gets to half guard. That was like a knife through butter how easily he passed Darwich's guard.
Darwich tries to get to full guard but Stan has control of the leg.
Darwich is not content to let Stan control the position.
Stan works his foot free and advances to mount.
Darwich in a bad spot here, taking shots to the head.
And thats the end of the round the fighters go back to their corners.
Sam Stan showed his class in that round. I'd imagine he'll take it on all the scorecards.
Well, the break between rounds is over. Let's get back to the scrappin! This is the final round!

Stan drives through with a takedown into guard.
Stan slips nicely into half guard.
Stan tries to pass the half guard into mount. Darwich knows what he's doing though and prevents the attempt.
Stan is persisting with the attempt to improve his position.
Stan prevents Darwich from improving his position.
Stan is working for a kimura but Darwich is defending it quite comfortably.
Stan is thwarting Darwich's attempts to control the position.
That's one minute gone in the round.
Stan tries to pass the half guard into mount. Darwich knows what he's doing though and prevents the attempt.
Both fighters are breathing heavily.
Stan is looking to stall here but Darwich recovers full guard.
There's a bit of a scramble here and now Darwich is on top in guard.
Darwich drops back for a leg! It's a sloppy attempt though and Darwich jumps back into guard quickly, to retain the dominant position.
Darwich wants to pass the guard but Stan is keeping the position.
Stan controls Darwich momentarily but Darwich frees himself.
That's two minutes gone in the round.
A few boos can be heard. I'm sure they will multiply if the fighters don't pick up the pace.
Stan is looking for a guillotine. You can't force these things though and Darwich defends well.
Stan working a defensive guard here.
Stan working from the bottom, still in full guard. He's managed to get a loose triangle. Darwich doesn't seem to be doing much to defend here, obviously he feels comfortable in the position. Oh but Stan is tightening it up a little... Darwich has to be careful here... He's got his foot tucked under now, this looks tight! Darwich reacted too slowly and this one could be over in a matter of seconds! YES! Darwich taps out! nice BJJ there by Stan!
Ladies and gentlemen, after 2:41 of round 3, we have a winner by way of Submission (Triangle Choke). Sam Stan!
|
|
|
|
|
|
|
|
|
|
|
|
|
|
|
|
|
|
|
|
|
|
|
| S |
C
A |
G |
S |
C
B |
G |
|
S |
C |
G |
|
energy
A | B |
|
hype
A | B |
|
pop
A | B |
|
mgr
A | B |
|
FIGHT
RATING
85% |
|
|
|
|
|
|
