|
|
PBP Commentary |
Coming up we have a super heavyweight MMA rules bout between Yoishi Uzomaki (ranked 0 p4p, 0 weight class) and Chairman Mao (ranked 0 p4p, 0 weight class). Mao has chosen RENEGADE MASTER as his entrance music. Over to our ring announcer for the fighter introductions!
 |
|
 |
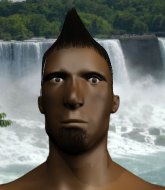
| 210 cm
23
300 lbs
4 - 4 - 0 |
|
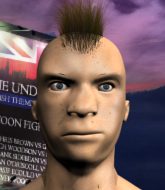
225 cm
24
295 lbs
3 - 3 - 0 |
BJJ Blue Belt
Basic striking
Experienced |
|
BJJ White Belt
Dangerous knees
Solid chin |
|
| |
|
Ladies and gentlemen. This fight is 3 rounds, in the super heavyweight division.
Introducing the fighter to my left, fighting out of the red corner.
With a record of
4 - 4 - 0, fighting out of Tokyo, Yoishi Uzomaki!
And introducing the fighter to my right, fighting out of the blue corner.
With a record of
3 - 3 - 0, fighting out of Tokyo, Chairman Mao!
The judges for this bout are Shirou Masuda, Shigeki Sano and Shigeki Fujiwara.

The bell rings for round one and we are underway!
Uzomaki tries to close the distance and clinch up but Mao swats him away and circles back towards the center.
Uzomaki is trying hard to land a takedown here. Mao sprawls well and keeps this one on the feet.
Mao misses with the combination.
Uzomaki dives in and grabs Mao's left leg, looking for a takedown. Mao pushes down on Uzomaki's head and hops out.

Uzomaki closes the distance and clinches up, looking for a takedown. He shifts his weight and gets a nice trip into half guard.
Mao pushes Uzomaki off looking to stand but Uzomaki dives back in and keeps control.

Uzomaki looking for a kimura but he'll have to free his other leg if he wants to finish that. Perhaps he's just using it as a distraction technique.
Uzomaki wants to control but Mao is keeping him busy.
Uzomaki is really struggling to control Mao but he's trying to hold on to the position.

That's one minute gone in the round.
Uzomaki prevents Mao from improving his position.
Mao avoiding damage under a succession of punches from Uzomaki.
Uzomaki is looking for a kimura here.

Neither fighter is doing enough for the referee's liking and he's decided to stand them back up.
Uzomaki shoots in for a takedown. "I don't think so" says Mao as he avoids it easily.
That's three failed takedown attempts in the round for Yoishi Uzomaki. That's going to take a lot out of him.
Mao doesn't manage to clinch there - Uzomaki circles away.
Uzomaki shoots in for a double leg but Mao sprawls well. That's going to sap some energy.

That's two minutes gone in the round.
A few boos can be heard. I'm sure they will multiply if the fighters don't pick up the pace.
Uzomaki darts in and lands a nice takedown into half guard.
Mao really doesn't want to stay on the ground with Uzomaki. If he can't get it back to his feet, it's only a matter of time before he'll be tapping out.
Uzomaki wants to control but Mao is keeping him busy.
Uzomaki is working for submissions here but there's nothing on.
Uzomaki is breathing heavily.
Mao is looking to improve his position.
Mao is trying to stand.
Uzomaki trying to control from half guard but Mao is working away.

That's three minutes gone in the round.
Mao controlling the leg, holding on to half guard.
We get told so often about how wrestlers don't like to be on their backs. Let's see if Mao can do anything to dispel that myth.
Mao blocking the ground and pound attempt from Uzomaki.
The referee decides to stand the fighters back up.
Mao shoots for a double leg takedown but Uzomaki sprawls well. He's pushed Mao's face into the mat and manages to get back to his feet relatively easily.
Mao displays good takedown defense there as he swats away a double leg from Uzomaki.
Uzomaki changes levels and looks for a double leg takedown. Mao tries to avoid it but Uzomaki manages to keep hold of a leg and drag Mao to the ground. Mao escapes though and pops straight back up to his feet.
Mao scores with a nice head shot.

It looks like Yoishi Uzomaki has been cut.
A clash of legs there as Uzomaki blocks the low kick.
Uzomaki scores a trip takedown into side control. Nice.

That's four minutes gone in the round.
Mao is trying to improve his position.
The fighters are starting to get a bit slippery now, which will make submissions a bit more difficult.
Mao is trying to escape and get back to his feet.

Mao throws Uzomaki to one side and escapes!
This has been an exciting period of action!

The fight moves into the clinch position.
Mao gets underhooks to prevent Uzomaki's takedown attempt.
Mao tries to circle away but Uzomaki has him pinned against the cage.
Uzomaki jumps guard but his hands slip and he falls flat on his back. Well, he's made himself look a right mug there, as Mao walks away with a smile on his face. Uzomaki gets slowly back to his feet and shakes his head.
Mao keeps the fight on the outside.
Yoishi Uzomaki seems to be the more aggressive standup fighter in this bout.
Mao misses with a head kick.
Jab by Mao.

That's five minutes gone in the round.
Some wild striking there from Mao.
Uzomaki showing good head movement there, avoiding the strikes from Mao.
Uzomaki shoots in for a takedown - he's clinched up with Mao but Mao pushes him off and we're back to square one.
Mao throws a wild combination but nothing lands.
Uzomaki doesn't succeed with the takedown
and Mao counters with a straight right hand.
Yoishi Uzomaki's cut is getting worse.
Uzomaki has managed to clinch.

That's six minutes gone in the round.
Mao can't break the clinch.
Mao can't break the clinch.
Mao tries to break free but Uzomaki pushes him back against the cage.
Mao wants to break free but Uzomaki has control.
Uzomaki is looking for a takedown up against the cage. Mao gets underhooks though and prevents the takedown attempt.
Uzomaki keeps the fight in the clinch, despite Mao's efforts to push away.
Mao looking to stall.
Mao tries to score a body lock takedown but Uzomaki shows good agility there to stay on his feet.
Uzomaki tries to pull guard but Mao holds him up against the cage and eventually Uzomaki drops back down to his feet.
Uzomaki keeps control of Mao as he tries to wriggle out of the double underhooks.
Uzomaki looking for a takedown.
Mao tries to break the clinch but Uzomaki is controlling the position.
Mao is trying to break the clinch but Uzomaki has him pressed against the cage.
A left hand lands to the body for Mao.
Mao tries to break free but Uzomaki pushes him back against the cage.
Mao working hard to break the clinch.

That's seven minutes gone in the round.
Mao can't break the clinch.
Mao tries a shoulder strike but it doesn't do any damage.
Uzomaki has Mao pressed against the cage, preventing Mao from circling away and getting back to striking at range.
Uzomaki has managed to pull guard. Let's see whether he can work an aggressive guard. It will also be interesting to see what tactics Mao uses from the top position.
Uzomaki lands a couple of shots from the bottom.
Uzomaki will have to put a bit more behind his punches if he's going to do any damage from this position.
Uzomaki has a loose triangle. He'll be looking to tighten that up but Mao can see exactly what he's planning and manages to posture up and free himself.
Uzomaki is trying to control the position but Mao postures up.
Mao seems content to control from guard here. He's going to have to remain active though if he doesn't want to get stood back up.
Mao must be cautious of submissions here, given that his opponent has the superior Jiu Jitsu.

That's eight minutes gone in the round.
Well. There's a bit of a lull in the action here and the crowd are starting to get restless.
Uzomaki working from the bottom, still in full guard. He's managed to get a loose triangle. Mao doesn't seem to be doing much to defend here, obviously he feels comfortable in the position. Mao manages to throw the legs off his shoulder and he's back into guard - no problem.
The ref warns both fighters not to hold the cage as they work up against the meshing.
Mao wants to get up but he can't break Uzomaki's closed guard. He needs to be careful trying to break the legs open, as he's open to submissions here.
Uzomaki might be looking to lock onto one of his opponent's long limbs for a submission, whilst we're on the ground.
Uzomaki is trying to control the position from the bottom.
Mao sitting in guard, not really doing much.
Uzomaki had isolated an arm as going for an omaplata. Mao is defending the submission well but is in a very vulnerable position. Uzomaki Is leaning forward trying to finish the omaplata but decides to abandon it, and take Mao's back instead.

That's nine minutes gone in the round.
Mao is really stuck here.
Uzomaki goes for a risky armbar from back mount and it's not paid off. Mao escapes and is now in half guard on top.
Uzomaki trying to control but Mao postures up.
Mao perhaps working for something from half guard, or maybe not. It looks like he's just sitting there.
And thats the end of the round the fighters go back to their corners.
Chairman Mao dominated that round.
The cut man is working on Yoishi Uzomaki's cut.
The fighters' corners scream their final instructions, as the referee calls time. Here we go, back to the action!

Uzomaki displays good takedown defense there as he swats away a double leg from Mao.
Uzomaki is looking for a takedown here. He's shot in and has managed to get it, finishing up in Mao's half guard.
Mao won't allow Uzomaki to pass to mount.
Uzomaki is looking for a kimura here.
Uzomaki passes the guard and advances to mount!
Uzomaki is thinking about an arm triangle here, looking to tighten it up before moving to side control. Mao can see it coming though and defends well with a couple of strikes to the head and some good arm positioning.
Both fighters are absolutely exhausted here.
That's one minute gone in the round.
Mao regains half guard.
Uzomaki looking for a kimura but he'll have to free his other leg if he wants to finish that. Perhaps he's just using it as a distraction technique.
Mao has one foot on Uzomaki's thigh - he pushes off and manages to get back to his feet.
That's two minutes gone in the round.
Mao fails with the takedown
and Uzomaki decides to take the opportunity to score a takedown. He's landed in Mao's guard.
Uzomaki trying to control but Mao is working from the bottom.
Uzomaki wants to pass the guard but Mao is keeping the position.
Mao controlling the position.
Uzomaki missing there with some ground and pound from the guard.
Uzomaki trying to control but Mao is working from the bottom.
That's three minutes gone in the round.
Uzomaki looking to sit in guard and control but Mao gets the butterfly guard and sweeps. He's now in the guard on the top.
Mao stands up and looks to throw the legs aside to pass to side control. Uzomaki swivels though and keeps the full guard.
Uzomaki is active off his back here, looking for submissions.
The referee decides to stand the fighters back up.
Mao fails to land with the punch combination there - jab, cross, hook, miss, miss, miss.
Mao tries to bum rush Uzomaki with a series of wild strikes but Uzomaki uses good footwork to avoid the assault.
Uzomaki fails with a rather predictable takedown attempt.
That's four minutes gone in the round.
A few boos can be heard. I'm sure they will multiply if the fighters don't pick up the pace.
Mao shoots in for a takedown but Uzomaki shows good takedown defense.
Yoishi Uzomaki has stuffed three takedown attempts in the round now. That's going to take a lot out of Chairman Mao.
Uzomaki with a lazy takedown attempt
and Mao counters with a good right hand that lands right on the jaw.
Uzomaki shoots for a takedown but Mao saw that one coming a mile off and avoided it easily.
Mao tries to shoot in for a takedown. He's got hold of a leg but Uzomaki swivels and escapes.
Mao stuffs the takedown.
Nice sprawl there from Uzomaki as Mao shoots in.
Uzomaki gets the takedown into side control.
Uzomaki creates a bit of distance and throws down some hard shots.
Mao tries to buck Uzomaki off but Uzomaki is having none of it.
Yoishi Uzomaki overall seems to be getting the better of the ground position in the fight so far.
That's five minutes gone in the round.
Uzomaki is looking to take a break and control but Mao is keeping him honest, looking to work from the bottom.
Mao tries to bench press Uzomaki off him but Uzomaki keeps the position.
Uzomaki looks up at the clock and then as Mao takes his cue and looks up at the clock too, Uzomaki smacks him right in the chops with a big elbow! How rude!
Uzomaki creates some space and throws a big elbow, but Mao sees it coming and moves his head just enough to avoid the strike.
Mao tries to improve position but can't.
The referee has ruled that neither fighter is active enough on the ground and has stood them back up.
Uzomaki fails with a takedown attempt.
Mao is using his reach advantage to land shots from outside his opponent's range.
Uzomaki shoots in looking for a double leg takedown. Mao defends it nicely.
That's six minutes gone in the round.
The crowd are getting on the fighters' backs, as the pace has dropped off in the last minute or so.
Uzomaki misses with a takedown attempt. He shot from a bit too far out.
Uzomaki showing good head movement there, avoiding the strikes from Mao.
Mao fails with a takedown attempt.
Uzomaki shoots in for a takedown and gets it. Let's see what he's got on the mat.
That's seven minutes gone in the round.
Uzomaki being controlled here momentarily.
Uzomaki cracks Mao with a solid left hand.
Uzomaki lands a couple of decent looking shots.
Uzomaki trying to land body shots but he keeps hitting the mat.
Mao looking for a sweep. Not yet Mao, not yet.
Uzomaki pushes down on Mao's leg and manages to get into half guard.
The referee walks around the fighters to get a better view of the action. Uzomaki lands a nice short elbow.
That's eight minutes gone in the round.
Neither fighter has done anything of merit for a good minute or two here and the crowd are not happy about it.
Mao wants to get back to his feet.
Uzomaki missing with the ground and pound from half guard.
Uzomaki trying to control the action but Mao is working from the bottom.
Uzomaki thumps the canvas. Not on purpose obviously - he just missed Mao's head.
Uzomaki is trying to work for a kimura but Mao is defending well.
Uzomaki tries to pass the half guard into mount. Mao knows what he's doing though and prevents the attempt.
That's nine minutes gone in the round.
Mao wants to get back to his feet.
The referee decides to stand the fighters back up.
Uzomaki shoots in for a takedown. He's persisting with it as Mao sprawls well. Mao wins this battle and keeps the fight standing. Uzomaki gets slowly back to his feet.
Uzomaki shoots in and drives through. Mao sprawls well.
A punch combination from Mao misses.
Uzomaki drops down and drives through with a powerful takedown into guard.
Uzomaki trying to pass the guard but can't manage it just yet.
Mao controlling Uzomaki's posture.
And thats the end of the round the fighters go back to their corners.
Yoishi Uzomaki dominated that second round.
The cut man is working on Yoishi Uzomaki's cut.
The referee calls time. The cornermen exit stage left and we're back to business. Let's get this one finished - here comes the final round!

Uzomaki fails to land the takedown.
Uzomaki misses with a takedown
and Mao counters with a stiff right hand.
Uzomaki closes this distance looking for a takedown but Mao circles away.
That's three failed takedown attempts in the round for Yoishi Uzomaki. That's going to take a lot out of him.
A combination from Mao does no damage.
Mao tries to score a power double leg takedown but Uzomaki sees that one coming and sprawls well. That will dishearten Mao somewhat.
Uzomaki misses with a takedown attempt
and Mao counters with a left and a right that stings Uzomaki.
Both fighters are breathing heavily.
Uzomaki with a nice cross.
Uzomaki shoots in for a takedown - he's clinched up with Mao but Mao pushes him off and we're back to square one.
That's one minute gone in the round.
Uzomaki has closed the distance and engaged Mao in a clinch.
Mao has had enough of the clinch but Uzomaki keeps him there for the moment.
Uzomaki prevents Mao from breaking the clinch.
A right hand to the body from Mao.
Mao lands a right hand.
Uzomaki tries for a takedown but Mao manages to get underhooks.
Uzomaki prevents Mao from breaking the clinch.
Mao can't break the clinch.

Mao pushes off and circles away, back to the middle of the mat.
Uzomaki changes levels and drives through with a really nice takedown into side control. Mao looks really pissed at himself for not defending that better.
Uzomaki trying to control the position but Mao is working away.
Uzomaki stands up and we're back to a striking position.
That's two minutes gone in the round.
Mao scores with a hook to the body. Uzomaki takes a step back and tries to catch his breath.
Mao fails with a rather predictable takedown attempt.
Uzomaki clinches with his opponent.
Mao working hard to break the clinch.
Uzomaki successfully pulls guard.
Uzomaki throwing his legs up looking for a triangle.
Uzomaki looking for submissions off his back, moving his hips, looking for an opening.
That's three minutes gone in the round.
Mao won't allow Uzomaki to sweep him here.
Uzomaki working for submissions but it's allowed Mao to get to half guard.
Uzomaki looking for submissions off his back.
Mao perhaps working for something from half guard, or maybe not. It looks like he's just sitting there.
That's four minutes gone in the round.
My god... these two guys really need to pick up the pace or everyone will leave to go get a beer.
Uzomaki tries to get to full guard but Mao has control of the leg.
Mao is looking to pass the guard... He's managed it - he's now in full mount!
Uzomaki sneaks a leg under to get to half guard.
Uzomaki misses with some strikes from the bottom.
Mao is scoring with some nice ground and pound from the dominant position.
That's five minutes gone in the round.
Uzomaki looking to work for a kimura from the bottom.
Mao with a momentary lay and pray from half guard.
Uzomaki trying to control from the bottom.
Uzomaki is working for an escape here. He's hooked one of Mao's legs and he's managed to sneak out and take Mao's back!
Uzomaki working for a choke but Mao is defending well.
Mao defending nicely against the rear naked choke attempt.
That's six minutes gone in the round.
Mao tries to escape the position - he's now mounted. Is that better or worse? Hard to tell!
Uzomaki is looking to secure an arm. He's managed it! He's pivoting for an armbar - that looks tight! But Mao has managed to get out of it and now he's in a dominant position. Nice work from Mao!
Uzomaki looking for a guillotine here but Mao defends easily.
That's seven minutes gone in the round.
Uzomaki working a defensive guard but Mao passes into half guard.
Uzomaki trying to control from the bottom.
Mao controlling the action here.
Uzomaki trying to control from the bottom.
Mao is figuring out what he wants to do next.
That's eight minutes gone in the round.
The crowd are starting to boo a lack of action.
Uzomaki is looking to control Mao's leg but it's slowly edging free. Can Uzomaki avoid being mounted?
Uzomaki actively working from the bottom here.
Uzomaki wants to control but Mao is keeping busy and won't allow it.
It looks like we're going to have a standup here. Neither fighter is doing enough on the ground.
Uzomaki tries a head kick but it misses.
Mao misses with a takedown
and Uzomaki counters with a single leg into guard. Mao didn't expect that.
That's nine minutes gone in the round.
Uzomaki loading up with the ground and pound but he's missing more than he's landing in this flurry.
Uzomaki won't allow Mao to get back to his feet.
Mao tries to land a sweep but no joy.
A big thud reverberates around the arena there as Uzomaki accidentally thumps the mat. Hopefully he's not broken his hand.
Uzomaki trying to pass the guard but can't manage it just yet.
Mao wants to stand but Uzomaki is controlling the position.
Uzomaki has decided he wants to stand but the closed guard of Mao is proving hard to escape from.
And that's the end of the fight!
Yoishi Uzomaki showed his dominance in that final round.
I think Uzomaki has won this one but let's see what the judges have to say. Over to the ring announcer for the scorecards.
Ladies and gentlemen, after 3 rounds of action, we go to the scorecards for a decision.
Judge Shirou Masuda scores the fight for Yoishi Uzomaki!
Judge Shigeki Sano scores the fight for Yoishi Uzomaki!
Judge Shigeki Fujiwara scores the fight for Yoishi Uzomaki!
Yoishi Uzomaki wins by unanimous decision!
|
|
|
|
|
|
|
|
|
|
|
|
|
|
|
|
|
|
|
|
|
|
|
| S |
C
A |
G |
S |
C
B |
G |
|
S |
C |
G |
|
energy
A | B |
|
hype
A | B |
|
pop
A | B |
|
mgr
A | B |
|
FIGHT
RATING
33% |
|
|
|
|
|
|

