|
|
PBP Commentary |
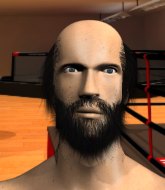
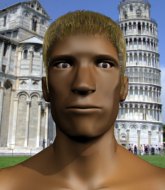
Coming up we have a light heavyweight MMA rules bout between Nnamdi Asomugha (ranked 0 p4p, 0 weight class) and Robert Bingisser (ranked 0 p4p, 0 weight class). Nnamdi Asomugha has the edge in experience - let's see if he can make that count tonight.
 |
|
 |
| 185 cm
19
205 lbs
0 - 4 - 0 |
|
188 cm
21
215 lbs
0 - 0 - 0 |
BJJ Blue Belt
Brawler
Good chin |
|
BJJ White Belt
Excellent boxer
Very confident |
|
| |
|
Ladies and gentlemen. This fight is 3 rounds, in the light heavyweight division.
Introducing the fighter to my left, fighting out of the red corner.
With a record of
0 - 4 - 0, fighting out of Las Vegas, Nnamdi Asomugha!
And introducing the fighter to my right, fighting out of the blue corner.
With a record of
0 - 0 - 0, fighting out of Las Vegas, Robert Bingisser!
The judges for this bout are Wesley Smith, Robert Twigg and Frank Dennis.

The bell rings for round one and we are underway!
Bingisser scores with a nice looking left hook and follows it up with an uppercut!

It looks like Nnamdi Asomugha has been cut.
Asomugha looks exhausted already! Oh dear, he should have come in in better shape than this!
Bingisser throws a head kick but Asomugha moves out of range.

Bingisser gets to the clinch - let's see what his plan is here.
Asomugha tries a body shot but Bingisser blocks it.
Bingisser tries to pull guard but Asomugha holds him up against the cage and eventually Bingisser drops back down to his feet.
Bingisser gets double underhooks to prevent a takedown attempt from Asomugha.
Bingisser can't break the clinch.
Bingisser taking a break, stalling in the clinch.

Bingisser manages to break the clinch.
Bingisser fails with a rather predictable takedown attempt.
Asomugha wants to clinch
and Bingisser counters by moving into the clinch.
Bingisser on the defensive, avoiding the knees to the body.
Bingisser jumps guard but his hands slip and he falls flat on his back. Well, he's made himself look a right mug there, as Asomugha walks away with a smile on his face. Bingisser gets slowly back to his feet and shakes his head.
Nnamdi Asomugha has stuffed three takedown attempts in the round now. That's going to take a lot out of Robert Bingisser.
Bingisser throws a head kick that misses.
Bingisser closes the distance and clinches.
Asomugha tries a shoulder strike but it doesn't do any damage.
Asomugha is trying to work out of this bad position, with his back against the cage.
Bingisser is trying to break the clinch but Asomugha is controlling him.
Bingisser can't break the clinch.
Bingisser working hard to break the clinch.
Bingisser has had enough of the clinch but Asomugha keeps him there for the moment.
Bingisser is trying to force a seperation but Asomugha has the dominant position.
Bingisser manages to break the clinch.
Bingisser closes the distance and lands a one-two.

That's one minute gone in the round.
Bingisser lets the fists fly and connects with a left straight followed by a right hook.
Bingisser clinches up with Asomugha and pushes him back against the cage.
Asomugha keeps control of Bingisser as he tries to wriggle out of the double underhooks.
Bingisser is looking to break free of the clinch but Asomugha has double underhooks.
Bingisser lands a body shot.
Asomugha prevents Bingisser from breaking the clinch.
A right hook to the body lands for Bingisser.
Bingisser can't break the clinch.
Bingisser pushes off and circles away, back to the middle of the mat.
Bingisser throws a shot to the body.

Bingisser darts in and lands a nice takedown into half guard.
This is a great period of action - very entertaining stuff!
Bingisser wants to pass to mount but Asomugha is defending the position.
Bingisser takes advantage of the dominant position to land a couple of big hammer fists.
Bingisser takes advantage of the dominant position to land a couple of big hammer fists.
Asomugha is trying to stand back up but Bingisser is controlling him

That's two minutes gone in the round.
Bingisser looks over to his corner - he wants some instructions but his corner are not responding.
Bingisser seems to be taking a bit of a break to think of his next move. He lands a short punch in the meantime.
The referee walks around the fighters to get a better view of the action. Bingisser lands a nice short elbow.
Asomugha is looking to improve his position.
The fighters are pressed up against the cage, both looking to find a bit of space to work.
Bingisser is keen to just control but Asomugha is a slippery customer.
The ref warns both fighters not to hold the cage as they work up against the meshing.

Well, the referee has seen enough. Neither fighter is active enough on the ground so he's stood them back up.
Bingisser throws a one two combo.
Bingisser lands with a nice combination. Asomugha backs away looking to recover.
Bingisser lands a glancing blow to the side of Asomugha's head.
Bingisser lands a nice shot that snaps Asomugha's head back.
Asomugha takes one to the side of the head.
Bingisser lets the fists fly and connects with a left straight followed by a right hook.
Bingisser tries a switch kick but it misses it's target.
Bingisser scores to the head and body with a nice combination!
Bingisser tries to score with a leg kick but it misses it's target.

That's three minutes gone in the round.
Bingisser lands a two punch combo.
Bingisser's corner calls for a 1,2 combination and Bingisser duly obliges.
A left and a right from Bingisser both land. Nice combination.
Bingisser shoots in for a takedown. He's persisting with it as Asomugha sprawls well. Asomugha wins this battle and keeps the fight standing. Bingisser gets slowly back to his feet.
Bingisser is working the combinations to good effect here.
Bingisser pivots, looking for a leg kick but Asomugha is out of range and Bingisser settles back down.
No luck for Bingisser with that takedown attempt.
Bingisser circles away from the clinch attempt
and Bingisser counters with a left and a right that stings Asomugha.
The fight moves into the clinch position.
The fighters are going at a pretty good pace and they're both starting to sweat now.
Bingisser tries to land a knee to the head but Asomugha blocks with his arms.
Bingisser wants a takedown.
Asomugha has a body lock and is looking for a takedown. Bingisser is bouncing around trying to prevent the takedown and somehow he has indeed managed to stay on his feet.
Bingisser is trying to work out of this bad position, with his back against the cage.
Asomugha throws a punch but it's blocked by Bingisser.
Bingisser wants to break free but Asomugha has control.

That's four minutes gone in the round.
Asomugha fails to land with a short punch on the inside.
Bingisser breaks the clinch and we're back to striking at distance.
Asomugha tries to keep at a distance but Bingisser has taken the fight into the clinch.
Asomugha lands with a short punch from the clinch.
Asomugha tries to break free but Bingisser pushes him back against the cage.
Bingisser controlling the action here for a moment.
Bingisser has had enough of the clinch but Asomugha keeps him there for the moment.
Asomugha is working for takedown but Bingisser is calmly controlling the position for now.
Bingisser looks like he'd prefer to be striking at range right now.
Bingisser breaks the clinch and we return to the middle of the mat.
Bingisser closes the distance and presses his opponent up against the cage.
Asomugha manages to break the clinch.
Bingisser clinches.
As the round comes to an end the crowd are showing their appreciation for a great round of action.
A nice left hand lands by Bingisser.
Asomugha breaks the clinch.
Bingisser swinging wilding here.
Bingisser misses with a series of wild punches.
And thats the end of the round the fighters go back to their corners.
Robert Bingisser dominated that round.
The cut man is working on Nnamdi Asomugha's cut.
That's time! Back to the action!

Bingisser fakes with a right hand and throws a good leg kick, right into the thigh. That had to hurt Asomugha.
Asomugha throws an overhand right that lands on Bingisser's shoulder, as Bingisser tries to avoid the shot.
Bingisser lands a body shot.
Asomugha has his head slapped from side to side by a 3 punch combination. That must have hurt him.
Danga de danga de dang - Bingisser scores with a four punch combination!
Bingisser displaying good standup as he scores with a three punch combination.
Wow, both these guys are really going for it!
Bingisser throws a head kick that misses.
Bingisser has taken the fight to the clinch.
Asomugha is trying to force a seperation but Bingisser has the dominant position.
Bingisser lands a body punch.
Bingisser escapes the clinch and we're back to striking.
Asomugha wants to clinch
and Bingisser counters with a takedown into full mount! That could mean trouble for Asomugha!
We've seen a great period of action over the last minute or so - credit to both fighters for going all out!
Asomugha is trying to escape the mount.
Both fighters are absolutely exhausted here.
Bingisser wants to control the pace but Asomugha is squirming around nicely.
That's one minute gone in the round.
Asomugha tries to reverse the position but Bingisser maintains control.
Asomugha is trying to escape but when you're mounted that's not too easy.
Bingisser can't quite control the action as he would like just now, as Asomugha is looking to escape.
Bingisser really doesn't want to stay on the ground with Asomugha. If he can't get it back to his feet, it's only a matter of time before he'll be tapping out.
Asomugha flailing away with punches but nothing is landing.
Asomugha is in all sorts of trouble here.
Bingisser scoring with some good ground and pound from mount here. Will he manage to finish Asomugha?
Bingisser lands with some strikes.
Bingisser trying to control but he's not successful this time.
A nice elbow there by Bingisser.
That's two minutes gone in the round.
Neither fighter has done anything of merit for a good minute or two here and the crowd are not happy about it.

Bingisser with some aggressive grappling here. He's looking for submissions here, rather than waiting for the opportunity to counter.
Asomugha tries to get back to half guard but can't.
Bingisser lands with some vicious ground and pound - can Asomugha hang on?
Bingisser sitting in mount, just looking to control for the moment.
Bingisser trying to control but he's not successful this time.
Asomugha is trying to get back to his feet but can't.
That's three minutes gone in the round.
Bingisser looking to secure an arm triangle but Asomugha defends it well.
Asomugha sneaks a leg under to get to half guard.
Asomugha moves into full guard.

Asomugha kicks Bingisser off and gets to his feet.
Bingisser closes the distance and pushes Asomugha back into the cage.
Bingisser breaks the clinch and we return to the middle of the mat.
Bingisser lands a two punch combo.
Asomugha tries to clinch up but Bingisser circles away and keeps his distance.
Bingisser connects with a nice looking jab.
Asomugha wants to clinch but Bingisser slips to the side
and Bingisser counters with a three punch combination, finished off with a leg kick. Nice work.
Bingisser throws a low kick, looking for Asomugha's leg but Asomugha calmly moves out of range.
Asomugha clinches but Bingisser breaks the clinch
and Bingisser counters with a one-two to the body.
That's four minutes gone in the round.
Bingisser lands three nice shots there - that looked like it hurt!
Bingisser lands with a two punch combination before moving back out of range.
Asomugha wants to clinch
and Bingisser counters with a series of strikes. Asomugha will be more careful next time no doubt.
Bingisser clinches up with Asomugha and pushes him back against the cage.
Bingisser breaks the clinch and we return to the middle of the mat.
Asomugha on the wrong end of a nice jab.
Bingisser shoots in looking for a takedown. Asomugha tries to sprawl out of it but Bingisser keeps driving through. The fighters are pinned against the cage. Asomugha manages to get underhooks and after a bit of a struggle, circles away and we're back to standing.
Asomugha clinches but Bingisser breaks the clinch
and Bingisser counters with a single leg into guard. Asomugha didn't expect that.
The crowd are loving this. Great action here.
Bingisser would like to get this fight back to the feet but can't get free from the closed guard.
The crowd applaud the fighters efforts here as the round comes to an end.
Asomugha trying to strike from the bottom but really, it's not the best position to be doing that from!
Asomugha wants to stand up but Bingisser is controlling him.
And thats the end of the round the fighters go back to their corners.
Robert Bingisser showed his class in that round. I'd imagine he'll take it on all the scorecards.
The cut man is working on Nnamdi Asomugha's cut.
The corners get their ten second warning. Both fighters stand from their stools and stare eachother down, ready to get back to the action. Let's get this one finished - here comes the final round!

Bingisser lands a two punch combo.
Bingisser looks to land a combination. Asomugha sees it coming but can only parry a couple of the shots.
Bingisser moves into range and clinches up with Asomugha.
Bingisser is trying to force a seperation but Asomugha has the dominant position.
Asomugha prevents Bingisser from breaking the clinch.
Bingisser has been the more effective fighter overall so far.
Bingisser blocks a knee to the body. He'll have a nicely bruised forearm in the morning.
Bingisser managing to block the knees to the body from Asomugha.
Bingisser scores with a hook to the body.
Bingisser tries to break free but Asomugha pushes him back against the cage.
Bingisser pushes off and circles away, back to the middle of the mat.
Bingisser is looking to score with low kicks.
Bingisser shoots in for a takedown but Asomugha shows good takedown defense.
Asomugha closes the distance but Bingisser moves to the side
and Bingisser counters with a lovely straight right hand!
Robert Bingisser seems to be getting the better of the standup.
Both fighters are breathing heavily.
Bingisser moves into range and throws a lovely three punch combination.
Bingisser misses with a body kick.
Asomugha tries to clinch up
and Bingisser counters with a shoot takedown. Asomugha fights it but they end up in guard.
That's one minute gone in the round.
Asomugha kicks Bingisser off and gets to his feet.
Asomugha wants to clinch
and Bingisser counters with a one-two to the body.
Bingisser lands a jab followed by a nice looking cross.
Nnamdi Asomugha is looking to keep the fight on the feet at all costs.
Asomugha throws a right hand that Bingisser ducks under and follows up with a left that Bingisser also avoids with ease.
Bingisser gets the takedown into side control.
Asomugha is moving his hips around well on the bottom and has managed to get back to half guard.
Asomugha tries to kick Bingisser off but Bingisser keeps his base steady and stays in half guard.
Asomugha missing with punches from the bottom.
Asomugha tries to roll over but Bingisser keeps him under control.
Bingisser wants to get back to his feet.
Bingisser is working for a submission of some sort.
That's two minutes gone in the round.
Asomugha wants to get back to his feet.
Bingisser is keeping good posture, landing some ground and pound.
Neither fighter is doing enough for the referee's liking and he's decided to stand them back up.
Bingisser changes levels and looks for a double leg takedown. Asomugha tries to avoid it but Bingisser manages to keep hold of a leg and drag Asomugha to the ground. Asomugha escapes though and pops straight back up to his feet.
Asomugha moves in looking to clinch but Bingisser pushes him off.
Bingisser lands with a shot to the body.
Bingisser throws a one two combo.
Asomugha tries to clinch
and Bingisser counters with a kick to the head that grazes his opponent. Asomugha is lucky that one didn't land flush.
Bingisser decides to change it up a bit and drives through with a nice takedown into half guard.
Asomugha manages to escape and get back to his feet!
Asomugha looks to clinch
and Bingisser counters with a driving takedown into guard. Nice work there by Bingisser.
The crowd are loving this. Great action here.
Bingisser preventing the sweep.
That's three minutes gone in the round.
Bingisser would like to get this fight back to the feet but can't get free from the closed guard.
Bingisser wants to pass the guard but Asomugha is keeping the position.
Bingisser won't allow Asomugha to get back to his feet.
Asomugha manages to sweep nicely, so he's now on top. Bingisser manages to get himself to full guard.
Asomugha postures up and lands a big shot to Bingisser's brow.
Asomugha with a couple of shots to the head there. Not particularly brutal.
Bingisser looking to sweep here. No luck so far.
Robert Bingisser is fighting for a decision here - he's started to take the cautious approach.
Asomugha chips away with some ground and pound.
Asomugha trying to control the position from guard on top but Bingisser is wriggling around, looking for whatever he can.
Asomugha loading up with the ground and pound but he's missing more than he's landing in this flurry.
Bingisser looking for a sweep. Not yet Bingisser, not yet.
That's four minutes gone in the round.
Neither fighter has done anything of merit for a good minute or two here and the crowd are not happy about it.
Asomugha working some strikes from top position.
The referee has ruled that neither fighter is active enough on the ground and has stood them back up.
Asomugha tries to clinch but Bingisser moves away
and Bingisser counters with a straight right hand.
Bingisser swings wildly with a couple of big hooks
and Bingisser takes a counter punch right on the button for his troubles.
A left and a right from Bingisser both land. Nice combination.
Bingisser misses with a head kick.
A really sloppy takedown attempt there from Bingisser.
Nnamdi Asomugha has stuffed three takedown attempts in the round now. That's going to take a lot out of Robert Bingisser.
Asomugha tries to clinch
and Bingisser counters with a good right hand that lands right on the jaw.
Asomugha tries to clinch up
and Bingisser counters with a nice double leg into guard.
Nnamdi Asomugha has stepped it up - he knows he needs a finish here!
Asomugha wants to get back to his feet but Bingisser is in a dominant position and won't allow it.
Asomugha doesn't do any damage with a couple of strikes from the bottom.
As the round comes to an end the crowd are showing their appreciation for a great round of action.
Asomugha manages to land a sweep and now he's in mount on top!
Asomugha is in full mount, looking to secure a guillotine but Bingisser is surviving well by controlling Asomugha's body position as best he can.
And that's the end of the fight!
Robert Bingisser comfortably won the final round on my scorecard.
Well Bingisser has outworked and out performed his opponent in all aspects of the game today. He was simply too good and the decision should be no more than a formality. Over to the ring announcer for the scorecards.
Ladies and gentlemen, after 3 rounds of action, we go to the scorecards for a decision.
Judge Wesley Smith scores the fight 27:30
Judge Robert Twigg scores the fight 27:30
Judge Frank Dennis scores the fight 27:30
In favor of your winner, by unanimous decision... Robert Bingisser!
|
|
|
|
|
|
|
|
|
|
|
|
|
|
|
|
|
|
|
|
|
|
|
| S |
C
A |
G |
S |
C
B |
G |
|
S |
C |
G |
|
energy
A | B |
|
hype
A | B |
|
pop
A | B |
|
mgr
A | B |
|
FIGHT
RATING
100% |
|
|
|
|
|
|
