|
|
PBP Commentary |
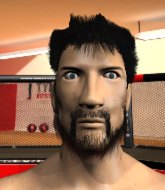
Coming up we have a welterweight MMA rules bout between Hiro Miyagi (ranked 0 p4p, 0 weight class) and Chris Santi (ranked 0 p4p, 0 weight class). I can't wait for this one - let's get the fighter introductions out of the way and get this one started!
 |
|
 |
| 177 cm
25
181 lbs
10 - 0 - 0 |
|
177 cm
19
178 lbs
4 - 0 - 0 |
Powerful takedowns
Basic striking
Very strong |
|
BJJ Purple Belt
Brawler
Determined |
|
| |
|
Ladies and gentlemen. This fight is 5 rounds, for the welterweight championship of the world!
Introducing the champion to my left, fighting out of the red corner.
With a record of
10 - 0 - 0, fighting out of Tokyo, Hiro Miyagi!
And introducing the challenger to my right, fighting out of the blue corner.
With a record of
4 - 0 - 0, fighting out of Tokyo, Chris Santi!
The judges for this bout are Ren Mimura, Yukihiro Shimada and Shigeki Fujiwara.

The bell rings for round one and we are underway!
Santi looks to throw the jab but Miyagi is out of range.
Miyagi fails miserably with a takedown attempt.

Miyagi scores with a nice takedown into half guard. Let's see what he's got on the ground.
Miyagi is trying to control. Santi wants to improve his position but can't escape this time.
Miyagi tries to pass to full mount but Santi defends it.

Miyagi is working for submissions here but there's nothing on.
Santi has no desire to be mounted, so is trying to control. Miyagi is working away from the top position though.
Santi is trying to get back to full guard.
Miyagi wants to pass to mount but Santi is defending the position.
Miyagi content to control rather than advance.
Miyagi trying to control the action but Santi is working from the bottom.

That's one minute gone in the round.

The referee has ruled that neither fighter is active enough on the ground and has stood them back up.
A big left from Santi misses.
Miyagi showing good head movement there, avoiding the strikes from Santi.
Miyagi dives in and grabs Santi's left leg, looking for a takedown. Santi pushes down on Miyagi's head and hops out.
Miyagi looks frustrated there after his takedown attempt is stuffed easily.
That's three failed takedown attempts in the round for Hiro Miyagi. That's going to take a lot out of him.
Miyagi shoots in for a double leg but Santi sprawls well. That's going to sap some energy.
Miyagi avoids the body shot from Santi.
Miyagi ducks down and throws a hook to the body but Santi moves away.
Santi misses with the combination.
Excellent takedown into side control there by Santi.
Santi is trying to land an Americana. He has the arm isolated but Miyagi is keeping cool and he's avoided the danger for now.
Santi is looking to take a break and control but Miyagi is keeping him honest, looking to work from the bottom.

That's two minutes gone in the round.
Santi tries for a kimura. Not really close to a finish though.
Miyagi wants to control but Santi postures up.
Miyagi is trying to get back to half guard. He's pushing on Santi's leg. He's managed it. Nice work.
Miyagi is working for an escape here. He's hooked one of Santi's legs and he's managed to sneak out and take Santi's back!
Miyagi looking for the RNC.
Santi trying to control the position but Miyagi manages to sink in the hooks.

That's three minutes gone in the round.
Santi rolls and manages to get back to half guard. Nicely done.
Miyagi sitting and controlling from the half guard.
Santi wants to get back to full guard but Miyagi has mounted him!
Santi tries to lock up and control but Miyagi gives him a forearm to the face and pushes him away.
Miyagi moves to take his opponent's back.
Miyagi wants to control the position but Santi frees himself and scrambles - Miyagi manages to regain control in side control.
Miyagi tries to advance to mount but can't.
Miyagi is looking to finish here, going for an Americana. Santi knows the correct defense though, so he's OK.
Santi is letting Miyagi control him for a moment.

That's four minutes gone in the round.
Santi is moving his hips around well on the bottom and has managed to get back to half guard.
Santi trying to control but Miyagi postures up.
Miyagi trying to pass the guard but Santi defending well.
Miyagi is keen to just control but Santi is a slippery customer.
Miyagi tries to pass to full mount but Santi defends it.
Santi is trying to control but can't.
Santi is not content to let Miyagi control the position.
Santi is pressing down on Miyagi's left leg trying to get back to full guard. He's managed it.
And thats the end of the round the fighters go back to their corners.
That was a close round but I would say that Hiro Miyagi will probably get the nod.
That's the end of the round. The referee orders the cornermen out of the ring so we can get back down to business.

Santi misses with a few strikes there.
Santi shoots and misses
so Miyagi counters with a double leg into guard. Good agility.
Miyagi wants to pass the guard but Santi is keeping the position.
Miyagi slips effortlessly into side control - very nice.
Santi is looking to regain half guard here but Miyagi keeps moving and retains side control.
Santi keeping his opponent close.
Miyagi wants to control but Santi is keeping him busy.
Santi tries to get back to half guard but can't.
Miyagi advances to full mount.
That's one minute gone in the round.
Santi is desperately trying to get back to half guard.
Miyagi is looking to secure an arm. He's managed it! He's pivoting for an armbar - that looks tight! But Santi has managed to get out of it and now he's in a dominant position. Nice work from Santi!
Miyagi is working an open guard here, looking to improve his position. No doubt that will leave him open to counters but at least he's being more offensive.
Santi is intent on slowing down the pace of the fight, simply looking to control.
Santi advances to half guard.
Santi seems very keen to just sit and control from half guard but Miyagi does not like that idea so much and is remaining active off his back.
Santi is trying a forearm choke
I don't think that's going to do much at this level of the game.
Santi is breathing heavily.
Santi is working for a kimura but Miyagi is defending it quite comfortably.
That's two minutes gone in the round.
A few boos can be heard. I'm sure they will multiply if the fighters don't pick up the pace.
The fighters are battling for position here. Miyagi manages to regain full guard. Nice work.
Miyagi working a defensive guard here.
Miyagi is looking for a guillotine. You can't force these things though and Santi defends well.
Miyagi looking for a guillotine here but Santi defends easily.
Miyagi is avoiding any damage by keeping wrist control.
That's three minutes gone in the round.
Santi preventing the sweep.
The fighters are trapped in the ropes so we're going to have a reposition here. The ref calls for a break and repositions the fighters in the center of the ring.
Miyagi preventing the ground and pound from doing any damage.
Miyagi manages to sweep nicely, so he's now on top. Santi manages to get himself to full guard.
Santi is working from a closed guard but he's struggling to control his opponent.
Miyagi in full guard, throwing the ground and pound. No damage this time.
Hiro Miyagi overall seems to be getting the better of the ground position in the fight so far.
Santi not looking particularly offensive just at the moment.
Miyagi trying to control but Santi is working from the bottom.
Santi manages to land a sweep and now he's in mount on top!
That's four minutes gone in the round.
The crowd are hurling abuse towards the fighters... You can hardly blame them though because there isn't a lot going on in the fight.
Miyagi is trying desperately to improve position.
Santi throwing strikes here but Miyagi is writhing around nicely and avoiding any serious damage.
Santi tries to control but Miyagi wriggling away.
Santi looking to finish with strikes here!
Miyagi keeping his composure momentarily, calmly looking to get back to half guard.
Santi looking to control and managing it successfully.
Miyagi is desperately trying to improve his position but Santi has a good base and remains in mount.
And thats the end of the round the fighters go back to their corners.
Hiro Miyagi dominated that second round.
OK. That's time! The bell goes and we're back to the action.

Santi gets his takedown attempt stuffed easily
and Miyagi counters with a nice double leg into side control. Santi won't be happy with that.
Santi stops Miyagi from passing to mount.
Miyagi is looking for a kimura. He might have it! No, Santi has escaped the position, nice work there.
Miyagi tries to move to mount but Santi blocks the move with his legs.
Santi manages to get back to half guard.
Miyagi is trying to work for a kimura. He's got his hands clasped together - this could be trouble! No, Santi has managed to free his arm - good work.
Miyagi passes to side control.
Santi gets back to half guard.
That's one minute gone in the round.
Santi tries to roll over but Miyagi keeps him under control.
Both fighters are breathing heavily.
Santi is persisting with the attempt to improve his position.
Miyagi trying to control the action but Santi is working from the bottom.
Santi wants to get back to full guard.
Santi is working for an escape here. He's hooked one of Miyagi's legs and he's managed to sneak out and take Miyagi's back!
Santi not allowing Miyagi to control his hands.
Santi doesn't have the hooks in and Miyagi manages to turn into his guard.
Santi lands a beautiful switch and he's in full mount! That could spell trouble for Miyagi!
That's two minutes gone in the round.
The crowd are starting to boo a lack of action.
Santi trying to control but Miyagi is having none of it.
Miyagi is trying desperately to improve position.

Santi gets to his feet and calls his opponent to stand. Here come the fireworks!
Donk. Santi catches Miyagi right on the button with a cross.
Miyagi has his takedown stuffed
and Santi counters with a nice uppercut.
Santi is the aggressor but that punch slipped nicely by Miyagi.
Santi cracks Miyagi with a nice right hand that draws applause from the crowd.
That's three minutes gone in the round.
Miyagi tries for a takedown but Santi circles away easily
and Santi counters with a body kick.
Santi misses with an uppercut. Miyagi saw that one coming.
Miyagi with a lazy takedown attempt
and Santi counters with a single leg into guard. Miyagi didn't expect that.
That's three failed takedown attempts in the round for Hiro Miyagi. That's going to take a lot out of him.
Santi decides he's had enough of playing guard and decides to stand. Come on Miyagi, up you get!
No joy there for Santi, who threw a few shots but didn't land.
Miyagi ducks under a wild hook from Santi.
Santi fails to land with a series of punches.
Santi throws a lazy right hand but Miyagi sees it coming a mile off and sidesteps it easily.
Santi fails to land with the punch combination there - jab, cross, hook, miss, miss, miss.
Excellent takedown into side control there by Miyagi.
Santi is looking for a sweep.
Miyagi trying to control the action but Santi is working from the bottom.
That's four minutes gone in the round.
Santi sneaks a leg under to get back to half guard.
Miyagi controlling the pace.
We've seen a great period of action over the last minute or so - credit to both fighters for going all out!
Miyagi is working for a kimura but Santi is defending it quite comfortably.
Santi trying to hold on to Miyagi's head to control him but Miyagi postures up.
The crowd applaud the fighters efforts here as the round comes to an end.
Miyagi wants to control but Santi is keeping him busy.
Santi blocking the ground and pound attempt from Miyagi.
Santi works his way to full guard. Good work.
And thats the end of the round the fighters go back to their corners.
Chris Santi really dominated that round.
That's the end of the round. The referee orders the cornermen out of the ring so we can get back down to business.

Miyagi tries for a takedown but Santi circles away easily
and Santi counters with a lovely straight right hand!
Miyagi moves out of range as Santi strikes.
Miyagi avoids the head kick by Santi.
Miyagi shoots in looking for a single leg takedown. Santi is trying to defend but Miyagi finishes it well and ends up in half guard. Let's see if he can advance position further.
Santi wants to improve his position but Miyagi is controlling well.
Santi won't allow Miyagi to pass to mount.
Miyagi is looking to pass Santi's guard but actually Santi recovers to full guard.
It's got to the stage where if one of these guys blows hard enough, the other might fall over.
Santi is working actively off his back, looking to secure an arm or perhaps work for a triangle.
Santi looking to sweep here. No luck so far.
That's one minute gone in the round.
Miyagi looking to pass the guard.
Miyagi wants to control from the top but Santi keeps moving.
Miyagi preventing the sweep.
The referee decides to stand the fighters back up.
Santi swings and misses with a shot to the body
and Miyagi counters with a nice double leg into guard.
Miyagi trying to control but Santi is working from the bottom.
Santi wants to sweep here but Miyagi controlling him for the moment.
Miyagi won't allow Santi to get back to his feet.
That's two minutes gone in the round.
Miyagi pushing down on Santi's thigh, trying to pass to half guard. He's managed it... Nice work.
Santi is looking to regain full guard. He's left an arm up in the air though and Miyagi has latched onto it... Big trouble! Miyagi pivots for an armbar - it's in tight and it Santi is tapping in no time flat! Great counter grappling there from Miyagi!
Ladies and gentlemen, after 2:25 of round 4, we have a winner by way of Submission (Armbar). Hiro Miyagi!
Hiro Miyagi retains his welterweight title!
|
|
|
|
|
|
|
|
|
|
|
|
|
|
|
|
|
|
|
|
|
|
|
| S |
C
A |
G |
S |
C
B |
G |
|
S |
C |
G |
|
energy
A | B |
|
hype
A | B |
|
pop
A | B |
|
mgr
A | B |
|
FIGHT
RATING
100% |
|
|
|
|
|
|
