|
|
PBP Commentary |
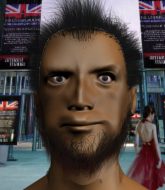
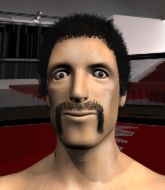
Coming up we have a bantamweight MMA rules bout between Rick Cartside (ranked 0 p4p, 0 weight class) and Matt Murdock (ranked 0 p4p, 0 weight class). Man, I cannot wait for this one!
 |
|
 |
| 170 cm
21
140 lbs
2 - 6 - 0 |
|
170 cm
24
146 lbs
4 - 6 - 0 |
BJJ Purple Belt
Basic striking
Experienced |
|
BJJ Purple Belt
Decent boxing
Knockout power |
|
| |
|
Ladies and gentlemen. This fight is 3 rounds, in the bantamweight division.
Introducing the fighter to my left, fighting out of the red corner.
With a record of
2 - 6 - 0, fighting out of Sydney, Rick Cartside!
And introducing the fighter to my right, fighting out of the blue corner.
With a record of
4 - 6 - 0, fighting out of Sydney, Matt Murdock!
The judges for this bout are John Mangel, Winston Howard and Bruno Hogan.

The bell rings for round one and we are underway!

Murdock instigates a clinch.
Cartside takes an elbow to the temple.
Cartside managing to block the knees to the body from Murdock.
Murdock tries to land a knee to the head but misses.

Cartside pulls Murdock into guard.
Cartside is trying to control the position from the bottom.
Murdock tries to stand but Cartside is controlling from the bottom.
Cartside not looking particularly offensive just at the moment.

Murdock gets to his feet and steps away from his opponent.
Wow, both these guys are really going for it!
Cartside tries to shoot in for a takedown. He's got hold of a leg but Murdock swivels and escapes.
A solid body kick from Murdock.
Cartside shoots in for a takedown. "Ole!" shouts Murdock as he jumps to the side.
Cartside dives in and grabs Murdock's left leg, looking for a takedown. Murdock pushes down on Cartside's head and hops out.
That's three failed takedown attempts in the round for Rick Cartside. That's going to take a lot out of him.
Cartside tries to score a power double leg takedown but Murdock sees that one coming and sprawls well. That will dishearten Cartside somewhat.
Cartside will have to do better than that with his takedown attempts.
Nice sprawl there from Murdock as Cartside shoots in.
Murdock tries to close the distance and clinch but Cartside swats him to one side with an open hand palm strike and circles away.

That's one minute gone in the round.
Cartside gets a takedown into half guard.
Cartside wants to free his trapped foot but Murdock is holding on for dear life with his legs.
The ref warns both fighters not to hold the cage as they work up against the meshing.
Cartside wants to control but Murdock is keeping him busy.

Cartside is looking for an arm triangle, whilst trying to pass to side control. Murdock doesn't seem that keen to cooperate though. No luck this time Cartside.
Cartside is breathing heavily.
Cartside stops Murdock from getting back to his feet.

That's two minutes gone in the round.
There's not a lot going on here and the crowd are letting the fighters know they're not willing to tolerate a lack of action.

Well, the referee has seen enough. Neither fighter is active enough on the ground so he's stood them back up.
Cartside dives in and grabs Murdock's left leg, looking for a takedown. Murdock pushes down on Cartside's head and hops out.
Murdock wants to clinch.
Cartside is looking for a takedown here. He's shot in and has managed to get it, finishing up in Murdock's half guard.
Cartside wants to lay and pray for a moment but Murdock keeps working.
Cartside trying to control from Murdock's half guard. Murdock has other ideas though and has regained full guard.
Cartside trying to control but Murdock is working from the bottom.

That's three minutes gone in the round.
Cartside controls from within his opponent's guard.
Cartside stops Murdock from standing up.
Cartside wants to pass the guard but Murdock is keeping the position.
Murdock keeping moving, preventing Cartside from controlling successfully.
Murdock pushes Cartside off and gets back to his feet.
Cartside tries to shoot in for a takedown. He's got hold of a leg but Murdock swivels and escapes.

That's four minutes gone in the round.
A lull in the action here being met with boos from the crowd.
Murdock misses with a half-hearted attempt at a head kick.
A really sloppy takedown attempt there from Cartside.
Murdock is looking to take this fight into the clinch.
Murdock clinches up against the cage.
Murdock lands a glancing elbow in the clinch.
Murdock tries to land a knee to the body but he is off balance and Cartside avoids it.
Cartside looking for a takedown.
Murdock missing with knees to the body.
Murdock throws a blind hook that connects with the side of Cartsides head.
Cartside jumps guard but his hands slip and he falls flat on his back. Well, he's made himself look a right mug there, as Murdock walks away with a smile on his face. Cartside gets slowly back to his feet and shakes his head.
Cartside is looking for a takedown here. He's shot in and has managed to get it, finishing up in Murdock's half guard.
Murdock pushes Cartside off and gets back to his feet.
Murdock slaps away a takedown attempt from Cartside, before circling back to the center of the mat.
Murdock keeps the fight standing with a nice sprawl.
And thats the end of the round the fighters go back to their corners.
Matt Murdock dominated that round.
The corners get their ten second warning. Both fighters stand from their stools and stare eachother down, ready to get back to the action.

Cartside swats away the attempt to clinch by Murdock.
No luck with that takedown attempt from Cartside.
Cartside clinches up against the cage.
A short body shot lands from Murdock as the two fighters clinch.
A nice left hand lands by Murdock.
A short uppercut from Murdock.
Cartside takes a knee right on the jaw!
Cartside jumps guard but Murdock stands there with Cartside around his waist. Cartside gives up and drops back to his feet. We remain in the clinch.

Murdock breaks from the clinch.
Murdock tries to clinch but Cartside is having none of it.
Cartside dives in and grabs Murdock's left leg, looking for a takedown. Murdock pushes down on Cartside's head and hops out.
That's three failed takedown attempts in the round for Rick Cartside. That's going to take a lot out of him.
Murdock pushes Cartside up against the cage in a clinch.
Murdock is looking to score with knees to the body. Maybe he'll change it up and go body then head. Cartside is defending well for now.
Cartside blocks an elbow strike.
Murdock with the Thai clinch, lands a knee to the head.
Cartside takes an elbow to the forehead.
Murdock is breathing heavily.
A head punch on the inside from Murdock fails to land.
Murdock tries to land a knee to the body but he is off balance and Cartside avoids it.
Murdock wants to strike at distance but he can't break free of the clinch.
That's one minute gone in the round.
Knees in the clinch landing for Murdock.
Murdock misses the knee to the body. Nice hip positioning from Cartside.
Murdock is pressed up against the cage. Cartside has hold of a leg and is looking to drag Murdock down to the mat. Murdock avoids the attempt though and has circled away. We're back to striking at a distance.
Murdock closes the distance and pushes Cartside back into the cage.
Cartside is trying to work for a single leg takedown but Murdock pulls him back up using the underhooks.
Cartside fails to pull the fight into his guard.
Cartside tries to pull guard but can't drag his opponent to the mat. Murdock just stands there and leans against the cage.
A body shot lands from Murdock.
Cartside jumps guard.
Murdock stopping the sweep attempt from Cartside.
Cartside seems keen to control rather than go for a submission, at least for now.
Murdock has decided he wants to stand but the closed guard of Cartside is proving hard to escape from.
Cartside is pulling down on Murdock's head. It's preventing any offense from Murdock, at least for the moment.
Cartside lands a beautiful switch and he's in full mount! That could spell trouble for Murdock!
That's two minutes gone in the round.
Cartside tries to control but Murdock wriggling away.
Murdock wants to try and get back to his feet.
Cartside looking to control and managing it successfully.
Cartside won't let Murdock get back to his feet... He wants to keep the fight where it is for now.
Cartside tries to control but Murdock wriggling away.
That's three minutes gone in the round.
Cartside looking to control and managing it successfully.
Cartside trying to control but Murdock is having none of it.
Cartside sitting in mount, just looking to control for the moment.
That's four minutes gone in the round.
The crowd are getting on the fighters' backs, as the pace has dropped off in the last minute or so.
The referee stands the fighters back up. Rick Cartside just wasn't active enough from the dominant position.
Murdock stuffs the takedown attempt from Cartside. Cartside gets slowly back to his feet.
Murdock fails with an attempt to clinch.
Murdock tries to clinch
and Cartside counters with a nice shoot takedown that brings the fighters to the ground.
Cartside won't allow Murdock to get back to his feet.
Cartside tries to free his leg and advance position but Murdock is retaining full guard.
Murdock avoiding any damage from the ground and pound.
Murdock is looking to get back to his feet but can't, whilst Cartside is controlling him.
And thats the end of the round the fighters go back to their corners.
That was a close second round but I would say that Rick Cartside will probably get the nod.
The corners get their ten second warning. Both fighters stand from their stools and stare eachother down, ready to get back to the action. So, we enter the final round. Let's see if either fighter can bring us a finish, or whether we're going to the judges scorecards.

Cartside tries for a takedown but Murdock sees it coming a mile off and avoids it easily.
Cartside shoots in but Murdock avoids the takedown attempt easily.
Murdock defends well against a solid takedown attempt from Cartside.
That's three failed takedown attempts in the round for Rick Cartside. That's going to take a lot out of him.
Murdock looks to clinch
and Cartside counters with a driving takedown into guard. Nice work there by Cartside.
Cartside trying to control the position from guard on top but Murdock is wriggling around, looking for whatever he can.
Cartside controls the pace of the fight for a moment.
Murdock wants to stand but Cartside is controlling the position.
Cartside passes Murdock's right leg, so he's now in half guard.
Murdock takes a big intake of breath there - he's definitely tired.
Murdock pushes Cartside off looking to stand but Cartside dives back in and keeps control.
That's one minute gone in the round.
Cartside tries to pass to full mount but Murdock defends it.
Cartside slows the pace down in half guard.
Cartside wants to control but Murdock is keeping him busy.
That's two minutes gone in the round.
There's not a lot going on here and the crowd are letting the fighters know they're not willing to tolerate a lack of action.
Cartside is going to have to think about doing something other than just controlling because Murdock is managing to avoid having the position dictated to him.
Cartside looking to pass the half guard. Not this time.
Murdock looks like he's trying to stand up.
Cartside works his way into side control.
Cartside wants to control but Murdock is keeping him busy.
That's three minutes gone in the round.
The referee stands the fighters back up. Rick Cartside just wasn't active enough from the dominant position.
Cartside fails with a takedown attempt.
Murdock rushes Cartside and pushes him back against the cage in a clinch.
Murdock with an attempt at a knee that misses.
Cartside tries to pull guard but Murdock holds him up against the cage and eventually Cartside drops back down to his feet.
Murdock tries to land knees in the clinch but Cartside avoids the damage to the body.
Murdock tries a knee to the head but he's missed.
Cartside drags the fight down to the ground.
Cartside is working from a closed guard but he's struggling to control his opponent.
Murdock has decided he wants to stand but the closed guard of Cartside is proving hard to escape from.
Both fighters really going for it on the ground here!
Cartside tries to land a sweep but no joy.
Rick Cartside overall seems to be getting the better of the ground position in the fight so far.
Cartside bucks up whilst keeping hold of a body lock, managing to reverse the position. Now he's in top in Murdock's guard.
That's four minutes gone in the round.
Cartside is stalling in the full guard.
Cartside trying to control the position from guard on top but Murdock is wriggling around, looking for whatever he can.
The fighters are pressed up against the cage, both looking to find a bit of space to work.
Cartside is just sitting in guard, looking to avoid any submissions.
Cartside stops Murdock from standing up.
Cartside wants to pass the guard but Murdock is keeping the position.
Cartside is trying to work a guillotine from the top, or something like that? Don't know how he thinks he's going to get a finish from there.
And that's the end of the fight!
Rick Cartside showed his dominance in that final round.
I think Cartside has won this one but let's see what the judges have to say. Over to the ring announcer for the scorecards.
Ladies and gentlemen, after 3 rounds of action, we go to the scorecards for a decision.
Judge John Mangel scores the fight 29:28
Judge Winston Howard scores the fight 29:28
Judge Bruno Hogan scores the fight 29:28
In favor of your winner, by unanimous decision... Rick Cartside!
|
|
|
|
|
|
|
|
|
|
|
|
|
|
|
|
|
|
|
|
|
|
|
| S |
C
A |
G |
S |
C
B |
G |
|
S |
C |
G |
|
energy
A | B |
|
hype
A | B |
|
pop
A | B |
|
mgr
A | B |
|
FIGHT
RATING
42% |
|
|
|
|
|
|
