|
|
PBP Commentary |
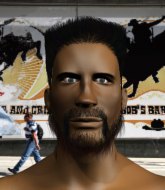
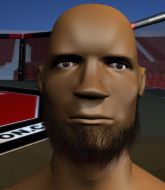
Coming up we have a featherweight MMA rules bout between Tony Abiezer (ranked 0 p4p, 0 weight class) and Roy Rage (ranked 0 p4p, 0 weight class). These two fighters really are very evenly matched on the feet - it will be fascinating to see who can assert themselves in that aspect of the fight.
 |
|
 |
| 168 cm
23
159 lbs
4 - 1 - 0 |
|
170 cm
19
150 lbs
3 - 0 - 0 |
BJJ Blue Belt
Counter striker
Very strong |
|
BJJ Purple Belt
Decent boxing
Determined |
|
| |
|
Ladies and gentlemen. This fight is 3 rounds, in the featherweight division.
Introducing the fighter to my left, fighting out of the red corner.
With a record of
4 - 1 - 0, fighting out of Hilo, Tony Abiezer!
And introducing the fighter to my right, fighting out of the blue corner.
With a record of
3 - 0 - 0, fighting out of Hilo, Roy Rage!
The judges for this bout are , and .

The bell rings for round one and we are underway!
A jab from Abiezer misses.
Rage avoids a lazy jab quite easily.

Rage feints and as Abiezer raises his hands in defense, Rage changes levels and drives through with a takedown into guard.

Rage drops back for a leg! It's a sloppy attempt though and Rage jumps back into guard quickly, to retain the dominant position.

Rage gets to his feet - Abiezer follows without any prompting.
Rage gets the takedown into side control.
Rage working the ground and pound.
Rage landing with strikes to the head and body from side control.
Rage wants to control but Abiezer is keeping him busy.
Abiezer is moving his hips around well on the bottom and has managed to get back to half guard.
The ref warns both fighters not to hold the cage as they work up against the meshing.
Abiezer is looking for a sweep. Rage is wise to his cunning plan and keeps the top position.
Abiezer is working hard here to advance position.
Abiezer looking to work for a kimura from the bottom.
Abiezer is pressing down on Rage's left leg trying to get back to full guard. He's managed it.

That's one minute gone in the round.
Rage is stalling in the full guard.
Rage with a nice head shot there.
Abiezer had isolated an arm as going for an omaplata. Rage is defending the submission well but is in a very vulnerable position. Abiezer Is leaning forward trying to finish the omaplata but decides to abandon it, and take Rage's back instead.
Abiezer is looking to finish the fight by rear naked choke. Rage knows exactly what he's got planned though, so he's defending well. Maybe a few strikes would soften Rage for a finish.
Abiezer is breathing heavily.
Rage breaks Abiezer's hooks off and manages to turn into his guard.
Rage stands up from guard. Let's bang!
Abiezer misses with a takedown attempt
and Rage decides to take the opportunity to score a takedown. He's landed in Abiezer's guard.
The fighters are pressed up against the cage, both looking to find a bit of space to work.
Rage landing some decent shots from guard.
Abiezer can't keep his opponent in guard - Rage advances to half guard, no doubt looking to mount.

That's two minutes gone in the round.
Rage wants to pass the guard but Abiezer is defending well.
Abiezer is trying to defend against the ground and pound but Rage scores with a couple of nice shots.
Abiezer on the receiving end of some nice ground and pound.
The fighters are starting to get a bit slippery now, which will make submissions a bit more difficult.
Rage lands with an elbow from half guard - that looked like it hurt.
Abiezer wants to get back to full guard.
Abiezer is defending against the submission attempts here by Rage.
Rage wants to take a breather but Abiezer is having none of it.
Rage works his foot free and advances to mount.
Rage is working for a guillotine from mount but Abiezer frees his head quite easily.

That's three minutes gone in the round.
Rage is still in mount, landing shots to his trapped opponent. Abiezer can't stay in a position like this for much longer.
Abiezer is trying to escape the mount.
Abiezer sneaks a leg back under and regains half guard and is working straight away to try and get back to guard. He hasn't managed just yet though.
Rage is looking to advance position but Abiezer won't allow it.
Rage is looking for a kimura here.
Abiezer makes his way to full guard. A much better position for Abiezer.

That's four minutes gone in the round.
There's not a lot going on here and the crowd are letting the fighters know they're not willing to tolerate a lack of action.
Abiezer has his foot on Rage's thigh. He's trying to push off and get in position for a triangle, I think. Rage works his way back into a safe position though.
Rage pushes down on Abiezer's leg and manages to get into half guard.
Rage seems to be taking a bit of a break to think of his next move. He lands a short punch in the meantime.
Abiezer is looking to regain full guard. Not this time though.
Rage looking for a kimura but he'll have to free his other leg if he wants to finish that. Perhaps he's just using it as a distraction technique.
Abiezer is looking to get back to full guard here but Rage has managed to pass to side control instead.
The crowd applaud the fighters efforts here as the round comes to an end.
Abiezer sneaks a leg back under and regains half guard and is working straight away to try and get back to guard. He hasn't managed just yet though.
And thats the end of the round the fighters go back to their corners.
Roy Rage dominated that round.
OK. That's time! The bell goes and we're back to the action.

A swing and a miss from Abiezer.
Tony Abiezer seems to be the more aggressive standup fighter in this bout.
Rage throws a series of punches but Abiezer avoids them all with ease.
Rage doesn't succeed with the takedown
and Abiezer counters with a nice double leg into guard.
Abiezer wants to pass the guard but Rage is keeping the position.
Rage looking to sweep here. No luck so far.
Abiezer slips nicely into half guard.
Rage wants to control but Abiezer is keeping busy and won't allow it.
Abiezer looking to pass the half guard. Not this time.
Rage is looking to control Abiezer's leg but it's slowly edging free. Can Rage avoid being mounted?
Both fighters are absolutely exhausted here.
That's one minute gone in the round.
Rage is looking for a sweep. Abiezer is wise to his cunning plan and keeps the top position.
Rage regains full guard. Nicely done.
Rage trying to control the position.
Rage manages to land a sweep and now he's in mount on top!
Rage prevents Abiezer from getting the reversal.
BOOM! Rage connects with a massive shot to the dome!
Abiezer tries to reverse the position but Rage maintains control.
Rage dominating with strikes here.
Both fighters really going for it on the ground here!
Abiezer is desperately trying to get back to half guard.
Roy Rage has got the better of the ground game so far.
Rage unloading with bombs!
Rage looks like he's working for a submission but he's not found anything just yet.
Rage lands a big shot there that rocks Abiezer but he's holding on and managing to survive for now.
That's two minutes gone in the round.
Abiezer is wriggling around trying to escape.
Rage is landing with some decent strikes but Abiezer is trying to advance his position so the referee is letting the fight continue.
Rage scores with a couple of good head shots there.
Rage dominating with strikes here.
Rage working for a guillotine from mount but Abiezer is in no mood to give up.
Abiezer regains half guard.
Abiezer wants to get back to full guard.
Rage wants to pass the guard but Abiezer is defending well.
Abiezer is looking for a sweep. Rage is wise to his cunning plan and keeps the top position.
That's three minutes gone in the round.
Abiezer gets full guard.
Rage passes into half guard.
Rage has the superior BJJ but he's also working some ground strikes into his gameplan.
Rage prevents Abiezer from improving his position.
Rage seems to be working for a kimura but Abiezer defends the submission attempt.
Rage wants to take a breather but Abiezer is having none of it.
Rage thumps the canvas. Not on purpose obviously - he just missed Abiezer's head.
Abiezer is looking for a sweep. Rage is wise to his cunning plan and keeps the top position.
Ground and pound from Rage.
That's four minutes gone in the round.
The crowd are starting to boo a lack of action.
Rage is keeping good posture, landing some ground and pound.

Well, the referee has seen enough. Neither fighter is active enough on the ground so he's stood them back up.
Rage getting the better of the striking in that exchange.
Rage is looking to take this fight into the clinch.
Rage drops his hands momentarily and Abiezer takes advantage with a crisp shot to the head.
Rage misses with a double jab.
Rage closes the distance and scores a nice trip takedown into half guard. Abiezer did well to prevent Rage getting side control.
Abiezer is staying active underneath Rage, who seems content to just control the action from this position.
Abiezer is trying to defend against the ground and pound but Rage scores with a couple of nice shots.
Abiezer is looking to improve his position.
And thats the end of the round the fighters go back to their corners.
A close second round but Roy Rage will probably get the nod - 10:9.
That's time! Abiezer's corner gives him a slap on the ass as he gets ready to fight. This is the final round!

Abiezer keeps the fight on the outside.
Abiezer shoots in with a lovely double leg takedown. Rage manages to land in full guard to minimise the damage.
Abiezer stands and throws Rage's legs to the side, diving into side control.
Abiezer wants to work for a kimura but he's foiled early by Rage, who protects the arm well.
Rage manages to get one leg in to regain half guard.
Rage moves his hips nicely and gets into full guard.
Both fighters are breathing heavily.
Rage manages to land a sweep and now he's in mount on top!
Rage looks like he's working for a submission but he's not found anything just yet.
That's one minute gone in the round.
Rage wants to control the pace but Abiezer is squirming around nicely.
Abiezer tries to reverse the position but Rage maintains control.
A nice elbow there by Rage.
Abiezer slips a leg in and gets back to half guard.
Rage works his foot free and advances to mount.
Abiezer is desperately trying to get back to half guard.
Rage trying to control but Abiezer is having none of it.
That's two minutes gone in the round.
Abiezer in a bad spot here, taking shots to the head.
Rage working the ground and pound effectively.
Rage landing strikes from the mount and Abiezer is in trouble!
Rage fakes a shot to the body and cracks his opponent in the head. Nice ground and pound there!
Rage lands a couple of nice shots there from mount.
Rage fakes a shot to the body and cracks his opponent in the head. Nice ground and pound there!
Rage looking to control but Abiezer is working nicely, looking to advance position himself.
Abiezer really trying hard to get back to half guard here.
Rage looking to finish Abiezer with some ground and pound. This is bad for Abiezer!
Rage throws some shoulder strikes here and then postures up. Oh, he's gone for an armbar! Abiezer has his hands clasped together but Rage breaks the hold and Abiezer is forced to tap! This one is aaaaaaaaaaall over! That was lightning fast by Rage!
Ladies and gentlemen, after 3:04 of round 3, we have a winner by way of Submission (Armbar). Roy Rage!
|
|
|
|
|
|
|
|
|
|
|
|
|
|
|
|
|
|
|
|
|
|
|
| S |
C
A |
G |
S |
C
B |
G |
|
S |
C |
G |
|
energy
A | B |
|
hype
A | B |
|
pop
A | B |
|
mgr
A | B |
|
FIGHT
RATING
89% |
|
|
|
|
|
|

