|
|
PBP Commentary |
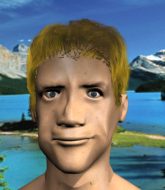
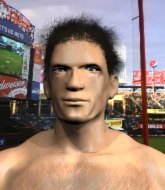
Coming up we have a light heavyweight MMA rules bout between Jimmy Bridger (ranked 0 p4p, 0 weight class) and Bob Harrison (ranked 0 p4p, 0 weight class). We have two fighters making their debuts here, so let's see who comes out of this one with their first professional victory.
 |
|
 |
| 188 cm
22
205 lbs
0 - 0 - 0 |
|
190 cm
18
200 lbs
0 - 0 - 0 |
BJJ Blue Belt
Brawler
Cuts easily |
|
BJJ White Belt
Counter striker
Tends to cut |
|
| |
|
Ladies and gentlemen. This fight is 3 rounds, in the light heavyweight division.
Introducing the fighter to my left, fighting out of the red corner.
With a record of
0 - 0 - 0, fighting out of Amsterdam, Jimmy Bridger!
And introducing the fighter to my right, fighting out of the blue corner.
With a record of
0 - 0 - 0, fighting out of Amsterdam, Bob Harrison!
The judges for this bout are Aafke Stam, Radbod Blank and Daniel Blasius.

The bell rings for round one and we are underway!
Bridger swinging wilding here.
Harrison slips a jab and a cross from Bridger.
Harrison shoots in for a double leg but Bridger sprawls well. That's going to sap some energy.
Bridger misses with a jab and misses with a cross straight after too.
Bridger tries to close the distance and clinch up against the ropes but Harrison paws at him with a jab and circles away.
Harrison showing good head movement there, avoiding the strikes from Bridger.
Jimmy Bridger seems to be the more aggressive standup fighter in this bout.
Bridger connects with the punch.

It looks like Bob Harrison has been cut.
Bridger throws a combination but it was largely blocked by Harrison.
Bridger throws a combination but it was largely blocked by Harrison.
Harrison circles away from the clinch attempt.
We've had a slow start to the round here - hopefully the action picks up.
Bridger fails to land with the punch combination there - jab, cross, hook, miss, miss, miss.

Harrison closes the distance and presses his opponent up against the ropes.
Harrison drops to a knee looking for a takedown but Bridger gets the underhooks and prevents it.
Harrison lands a knee to the body.

Bridger manages to pull guard.

That's one minute gone in the round.
Bridger pulls Harrison in close to prevent any damage.
Harrison trying to control the position from guard on top but Bridger is wriggling around, looking for whatever he can.
Bridger is working an open guard here, looking to improve his position. No doubt that will leave him open to counters but at least he's being more offensive.
Bridger trying to keep a closed guard but Harrison is proving a slippery customer.
Bridger wants to sweep here but Harrison controlling him for the moment.
Bridger is working from a closed guard but he's struggling to control his opponent.

That's two minutes gone in the round.
Neither fighter has done anything of merit for a good minute or two here and the crowd are not happy about it.

It looks like we're going to have a standup here. Neither fighter is doing enough on the ground.
Bridger throws a right hand that Harrison ducks under and follows up with a left that Harrison also avoids with ease.
No joy there for Bridger, who threw a few shots but didn't land.
Harrison has closed the distance and engaged Bridger in a clinch.
Bridger changes levels and goes for a takedown here. Harrison fights it off and pushes away nicely.
Harrison scores with a kick to the body.
Bridger is breathing heavily.
Bridger tries to clinch
and Harrison counters by clinching up.

Harrison escapes the clinch and we're back to striking.
Bridger doesn't succeed with the takedown
and Harrison counters with a series of strikes. Bridger will be more careful next time no doubt.
Harrison clinches.

That's three minutes gone in the round.
Harrison makes some space for himself and lands an uppercut.
Harrison presses Bridger against the ropes and delivers a mid-strength body shot.
Bridger goes for a takedown attempt but Harrison pushes him away and we're back to fighting at a distance.
That's three failed takedown attempts in the round for Jimmy Bridger. That's going to take a lot out of him.
A nice leg kick lands there from Harrison.
Harrison rushes Bridger and presses him up against the ropes.
Harrison has moved round to his opponent's back and is looking for a suplex! Oh snap! He's tossed Bridger clear over his head and slammed him to the mat!
Harrison lands strikes to the head.
Bridger trying to control the hands but Harrison won't let him.
Bridger is defending well here and trying to improve his position.
Bridger staying busy and making it hard for Harrison to control.

That's four minutes gone in the round.
Harrison throwing lazy shots from the back mount that aren't doing any damage.
Harrison trying to control momentarily.
Harrison lands a punch to the side of the head from the back.
Harrison is throwing strikes from the back here. Oh that last one was to the back of the head. Harrison gets a warning from the referee. He throws another strike to the back of the head straight away though and the referee has seen enough. He breaks up the two fighters and stands them back up. Harrison gets a real talking to here and is lucky not to get a point deducted. Harrison apologises and we restart here on the feet.
Harrison gets to the clinch - let's see what his plan is here.
The crowd cheering loudly, showing their appreciation for the quality fight we're seeing here.
Bridger stops a takedown attempt from Harrison.
Harrison prevents a takedown attempt there.
Bridger tries to pull guard but can't drag his opponent to the mat. Harrison just stands there and leans against the ropes.
Harrison has a body lock and is looking for a takedown. Bridger is bouncing around trying to prevent the takedown and somehow he has indeed managed to stay on his feet.
Bridger trying to control the position but instead, Harrison has worked for underhooks and has pushed Bridger into the ropes.
The crowd applaud the fighters efforts here as the round comes to an end.
Harrison gets a nice trip takedown into half guard.
Harrison is trying to control the action in half guard but Bridger is working away on the bottom, looking perhaps to get back to full guard.
And thats the end of the round the fighters go back to their corners.
Bob Harrison dominated that round.
The cut man is working on Bob Harrison's cut.
That's time! Back to the action!

Harrison tries to clinch up.
Bridger looking for a takedown here - he's got it.
Harrison keeping moving, preventing Bridger from controlling successfully.
Bridger won't allow Harrison to get back to his feet.
Bridger stands up over Harrison, holding his feet. He dives back in and lands a decent shot to the head.
There's a bit of a scramble here and now Harrison is on top in guard.
Harrison is just sitting in guard, looking to avoid any submissions.
Both fighters are absolutely exhausted here.
Harrison trying to control but Bridger is working from the bottom.
That's one minute gone in the round.
Bridger lands a beautiful switch and he's in full mount! That could spell trouble for Harrison!
Harrison is looking to get to half guard.
Bridger tries to control but Harrison wriggling away.
Harrison is working to get back to half guard.
Harrison is bucking up trying to escape but Bridger cracks him with another couple of good strikes.
That's two minutes gone in the round.
The crowd are hurling abuse towards the fighters... You can hardly blame them though because there isn't a lot going on in the fight.
Bridger thowing strikes but they're hitting the gloves, not doing any damage.
We get told so often about how wrestlers don't like to be on their backs. Let's see if Harrison can do anything to dispel that myth.
Bridger avoids the attempt from Harrison to control.
Harrison is looking to get to half guard.
Harrison tries to hold on but Bridger postures up.
Bridger tries to control but Harrison wriggling away.
Bridger raining down shots from the mount!
That's three minutes gone in the round.
Bridger raining down shots from the mount!
The fighters are tangled up in the ropes here. We might need a restart if the fighters can't break free themselves.
Bridger thuds his fist into the canvas! Oooouch!
Bridger with good strikes from the mount here!
Bridger lands a big shot there that rocks Harrison but he's holding on and managing to survive for now.
Harrison is writhing around trying to get back to his feet.
Harrison is trying to escape the mount.
Bridger lands a heavy elbow.
That's four minutes gone in the round.
Harrison tries to reverse the position but Bridger maintains control.
Bridger has been looking to land a fair amount of strikes on the ground. He might be looking to soften his opponent up in order to work for a submission.
Bridger trying to control but Harrison is having none of it.
Harrison is trying desperately to improve position.
Harrison is squirming around, avoiding Bridger's attempts to control the action.
The referee warns Harrison that he has to improve his position here as he takes two more clean shots to the head.
Bridger putting on the heat here with some good ground and pound!

Bridger is working on an americana here. Ooh, that looks pretty nasty! Nope, Harrison has managed to escape the submission attempt.
And thats the end of the round the fighters go back to their corners.
Jimmy Bridger dominated that second round.
The cut man is working on Bob Harrison's cut.
OK. That's time! The bell goes and we're back to the action. This is the final round!

Harrison fails in his attempt to clinch.
Bridger is looking for a takedown here. He's shot in and has managed to get it, finishing up in Harrison's half guard.
Neither fighter is being very active at the moment, with Bridger in particular looking to stall.
Harrison wants to improve his position but Bridger is controlling well.
Bridger looks over to his corner - he wants some instructions but his corner are not responding.
Both fighters are breathing heavily.
Harrison is looking to get back to is feet but Bridger passes into side control.
That's one minute gone in the round.
Harrison is looking to work his way out of this bad position but Bridger is controlling him well.
Harrison tries to buck Bridger off but Bridger is having none of it.
You can see the frustration on Harrison's face, being in this tough position on the bottom.
The fighters are trapped in the ropes so we're going to have a reposition here. The ref calls for a break and repositions the fighters in the center of the ring.
Bridger working hard here to secure a kimura but he's not really in the right position for it.
Harrison manages to get one leg in to regain half guard.
Harrison blocking the ground and pound attempt from Bridger.
That's two minutes gone in the round.
There's not a lot going on here and the crowd are letting the fighters know they're not willing to tolerate a lack of action.
Bridger seems to be working for a kimura but Harrison defends the submission attempt.
Harrison trying to control from the bottom.
Bridger working the head and body with strikes.
Harrison is trying to get back to full guard.
Harrison throws a strike from the bottom that misses.
Harrison trying to control but Bridger postures up.
That's three minutes gone in the round.
Neither fighter is doing enough for the referee's liking and he's decided to stand them back up.
Harrison drives through and clinches with Bridger against the ropes.
Harrison lands a knee to the head there! That was nasty!
It looks like Jimmy Bridger has been cut.
Harrison has hold of a leg and is looking for a trip takedown. Bridger avoids it nicely though and we remain in the clinch.
Harrison has double underhooks and is working for a body lock takedown. He's got it. The fighters land in half guard but Bridger regains guard immediately.
Harrison postures up in Bridger's guard and throws a big left but Bridger blocks it.
Bridger manages to land a sweep and now he's in mount on top!
Bridger working for a guillotine from mount but Harrison is in no mood to give up.
Bridger punching from mount but Harrison doing a good job of avoiding damage.
Jimmy Bridger overall seems to be getting the better of the ground position in the fight so far.
That's four minutes gone in the round.
Bridger working Harrison over with strikes here.
Harrison really trying hard to get back to half guard here.
Bridger tries to push Harrison's head away but Harrison is holding on tight.
Harrison blocking the ground and pound.
Harrison wants to hold on but Bridger pushes him away.
Harrison is working to get back to half guard.
And that's the end of the fight!
Jimmy Bridger showed his dominance in that final round.
I think Bridger has won this one but let's see what the judges have to say. Over to the ring announcer for the scorecards.
Ladies and gentlemen, after 3 rounds of action, we go to the scorecards for a decision.
Judge Aafke Stam scores the fight 29:28
Judge Radbod Blank scores the fight 29:28
Judge Daniel Blasius scores the fight 29:28
In favor of your winner, by unanimous decision... Jimmy Bridger!
|
|
|
|
|
|
|
|
|
|
|
|
|
|
|
|
|
|
|
|
|
|
|
| S |
C
A |
G |
S |
C
B |
G |
|
S |
C |
G |
|
energy
A | B |
|
hype
A | B |
|
pop
A | B |
|
mgr
A | B |
|
FIGHT
RATING
50% |
|
|
|
|
|
|

