|
|
PBP Commentary |
Coming up we have a light heavyweight MMA rules bout between Hammer Rage (ranked 0 p4p, 0 weight class) and Rocky Blyer (ranked 0 p4p, 0 weight class). Blyer has chosen Eye Of The Tiger as his entrance music. Hammer Rage is staring across the ring at his opponent, tweaking his nipples... Tweaking his own nipples that is.
 |
|
 |
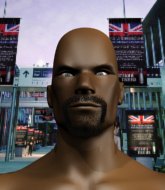
| 185 cm
23
215 lbs
1 - 0 - 0 |
|
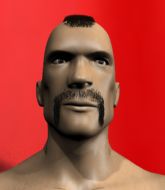
185 cm
19
210 lbs
2 - 2 - 0 |
BJJ Purple Belt
Counter striker
Big heart |
|
BJJ White Belt
Decent boxing
Determined |
|
| |
|
Ladies and gentlemen. This fight is 3 rounds, in the light heavyweight division.
Introducing the fighter to my left, fighting out of the red corner.
With a record of
1 - 0 - 0, fighting out of Hilo, Hammer Rage!
And introducing the fighter to my right, fighting out of the blue corner.
With a record of
2 - 2 - 0, fighting out of Hilo, Rocky Blyer!
The judges for this bout are , and .

The bell rings for round one and we are underway!
Rage tries to clinch up.
Rage takes a shot to the eye socket. That's gotta hurt.

It looks like Hammer Rage has been cut.
Blyer misses with a jab and misses with a cross straight after too.
Blyer drops Rage with a right and a left! Blyer comes rushing in but Rage regains his composure and manages to keep Blyer in guard.

Rage is rocked!
Wooooo! Give it up for these two warriors! They are putting on a show!
Blyer wants to get up but he can't break Rage's closed guard. He needs to be careful trying to break the legs open, as he's open to submissions here.
Oh Rage is still in real trouble! Will he be able to recover?!!
Blyer postures up.
Rage seems to have got his legs back now.
Rage wants to sweep here but Blyer controlling him for the moment.
Rage is working from a closed guard but he's struggling to control his opponent.
Blyer wants to control from the top but Rage keeps moving.
Rage is trying to control the position from the bottom.

That's one minute gone in the round.

Well, the referee has seen enough. Neither fighter is active enough on the ground so he's stood them back up.
Blyer misses with a jab, cross combination.
Rage shoots in for a takedown. "Ole!" shouts Blyer as he jumps to the side.
Blyer throws a series of punches but Rage avoids them all with ease.
Blyer misses with the combination.
Rage blocks a jab.

Rage feints and as Blyer raises his hands in defense, Rage changes levels and drives through with a takedown into guard.
Rage stopping the sweep attempt from Blyer.

That's two minutes gone in the round.
Rage pressing down on his opponent's thigh, looking to pass guard. Blyer is keeping the position for now.
Rage is working hard here to advance position.
Rage postures up to throw the ground and pound strikes but they don't connect.
Blyer is adopting a defensive guard.
Rage trying to control but Blyer is working from the bottom.

That's three minutes gone in the round.
Blyer avoiding any damage from the ground and pound.
Blyer working the defensive guard well to avoid strikes from Rage.
Neither fighter is doing enough for the referee's liking and he's decided to stand them back up.
Blyer misses with a jab, cross combination.
Rage ducks under an overhand right and circles away with a smile on his face.
Rage changes levels and looks for a double leg takedown. Blyer tries to avoid it but Rage manages to keep hold of a leg and drag Blyer to the ground. Blyer escapes though and pops straight back up to his feet.
Blyer throws a big shot that misses.
Blyer looks for a takedown here. Will he get it? Rage is fending him off so far but Blyer persists. Nope, Rage circles away and we're back to standing.
Blyer fails to land with a series of punches.
A telegraphed takedown attempt from Rage is defended easily by Blyer.
That's three failed takedown attempts in the round for Hammer Rage. That's going to take a lot out of him.
Blyer looks to land a right hand but Rage moved out of range.

That's four minutes gone in the round.
There's not a lot going on here and the crowd are letting the fighters know they're not willing to tolerate a lack of action.
A combination from Rage does no damage.
Blyer with a lazy takedown attempt
and Rage counters with a shoot takedown. Blyer fights it but they end up in guard.
Rage looking to sit in guard and control but Blyer gets the butterfly guard and sweeps. He's now in the guard on the top.

Rage is active off his back here, looking for submissions.
Blyer wants to get up but he can't break Rage's closed guard. He needs to be careful trying to break the legs open, as he's open to submissions here.
The crowd applaud the fighters efforts here as the round comes to an end.
Rage striking off his back but it's not causing Blyer any problems.
Rage has an active guard here but Blyer has managed to pass into half guard.
And thats the end of the round the fighters go back to their corners.
Rocky Blyer dominated that round.
The cut man is working on Hammer Rage's cut.
The minute break is over - no more time for sponges and pep talks - back to the action!

Blyer throws a left and a right that both miss
and Rage counters with a driving takedown into guard. Nice work there by Rage.
Blyer managing to control the position.
Rage passes easily into side control. Nice work.
Rage tries for a kimura but Blyer is defending well.
Rage scores with a couple of short elbows.
That's one minute gone in the round.
Rage wants to lay and pray for a moment but Blyer keeps working.
Rage throwing shots but missing, from side control.
Blyer struggling a bit here.
The fighters are tangled up in the ropes here. We might need a restart if the fighters can't break free themselves.
Rage tries to land with some ground and pound but misses.
Rage is looking to take a break and control but Blyer is keeping him honest, looking to work from the bottom.
Blyer is trying to escape and get back to his feet.
That's two minutes gone in the round.
A few boos can be heard. I'm sure they will multiply if the fighters don't pick up the pace.
Rage looking to punish the body of his opponent here but Blyer is avoiding damage well.
Rage sitting in side control, looking to soften his opponent up with elbows and hammerfists but Blyer is avoiding damage well and looking to escape the position.
The fighters are trapped in the ropes so we're going to have a reposition here. The ref calls for a break and repositions the fighters in the center of the ring.
Neither fighter is doing enough for the referee's liking and he's decided to stand them back up.
Blyer misses with a combination
and Rage counters with a takedown into full mount! That could mean trouble for Blyer!
Rage lands a shot to the body, followed up by a shot to the exposed head of his trapped opponent.
Rage lands a nice shot to the head.
Rage looking to finish with strikes here!
Blyer really doesn't want to stay on the ground with Rage. If he can't get it back to his feet, it's only a matter of time before he'll be tapping out.
Rage throwing sloppy strikes, which aren't doing any damage.
Rage trying to control but Blyer is having none of it.
That's three minutes gone in the round.
Rage controlling from mount.
Blyer is looking to improve his position but Rage isn't that keen on the idea.
That's four minutes gone in the round.
The crowd are showing their displeasure at the lack of action as loud boos ring out around the arena.
The crowd growing excited in anticipation of a finish here! Right on cue, Rage cracks his opponent with a massive right hand that draws loud cheers!
Rage throwing strikes here but Blyer is writhing around nicely and avoiding any serious damage.
Rage wants to control the pace but Blyer is squirming around nicely.

Rage gets to his feet and calls his opponent to stand. Here come the fireworks!
Rage throws the overhand right but ducks down into a quick takedown attempt. Blyer was covering up waiting for the punch and Rage finishes the takedown easily into guard.
Rage has been looking to land a fair amount of strikes on the ground. He might be looking to soften his opponent up in order to work for a submission.
Rage won't allow Blyer to get back to his feet.
And thats the end of the round the fighters go back to their corners.
Hammer Rage dominated that second round.
The cut man is working on Hammer Rage's cut.
OK. That's time! The bell goes and we're back to the action. The crowd applaud as we get ready to start the final round!

Blyer throws an uppercut from half a mile away. Rage sees it coming and avoids it easily.
Rage fails with a rather predictable takedown attempt.
Rage tries to shoot in for a takedown. He's got hold of a leg but Blyer swivels and escapes.
Blyer scores with a shot to the body.
Rocky Blyer seems to be getting the better of the standup.
Rage uses decent footwork to sidestep a right hand from Blyer.
Blyer throws a nice looking combination but Rage bobs and weaves to avoid any damage.
Blyer throws a right hand that Rage ducks under and follows up with a left that Rage also avoids with ease.
Blyer closes the distance and clinches up with Rage, looking for a takedown. Blyer pushes Rage against the ropes but Rage circles to the side and manages to break the clinch.
Rage moves away from the strike by Blyer.
Blyer swings wildly with a couple of big hooks
and Rage counters with a nice double leg into half guard.
Rage is trying to control. Blyer wants to improve his position but can't escape this time.
Rage is working for submissions here but there's nothing on.
Hammer Rage overall seems to be getting the better of the ground position in the fight so far.
Both fighters are breathing heavily.
Rage missing with the ground and pound from half guard.
That's one minute gone in the round.
Blyer wants to improve his position but Rage is controlling well.
Rage sitting in half guard, looking to land shots. Blyer defending well though.
Rage content to control rather than advance.
Rage prevents Blyer from standing back up.
We get told so often about how wrestlers don't like to be on their backs. Let's see if Blyer can do anything to dispel that myth.
That's two minutes gone in the round.
Well. There's a bit of a lull in the action here and the crowd are starting to get restless.
Rage missing with some ground and pound from the half guard.
It looks like we're going to have a standup here. Neither fighter is doing enough on the ground.
Blyer throws a jab when Rage was well out of range.
Rage staying out of range there.
Blyer misses with a jab and misses with a cross straight after too.
Rage will need to tighten up his combinations if he doesn't want to gas himself out, swinging at thin air.
Rage fails with a takedown attempt.
That's three failed takedown attempts in the round for Hammer Rage. That's going to take a lot out of him.
Rage will have to do better than that with his takedown attempts.
Blyer is trying hard to land a takedown here. Rage sprawls well and keeps this one on the feet.
Rage fails miserably with a takedown attempt.
Blyer has his takedown stuffed
so Rage counters with a double leg into guard. Good agility.
That's three minutes gone in the round.
Rage pressing down on his opponent's thigh, looking to pass guard. Blyer is keeping the position for now.
Rage wants to control from the top but Blyer keeps moving.
Rage wants to pass the guard but Blyer is keeping the position.
Rage trying to control the position from guard on top but Blyer is wriggling around, looking for whatever he can.
Rage slips nicely into half guard.
That's four minutes gone in the round.
Well. There's a bit of a lull in the action here and the crowd are starting to get restless.
Blyer is not content to let Rage control the position.
Rage tries to pass the half guard into mount. Blyer knows what he's doing though and prevents the attempt.
Rage throwing shots but they're hitting the canvas more than the man.
Well, the referee has seen enough. Neither fighter is active enough on the ground so he's stood them back up.
Blyer gets his takedown attempt stuffed easily
and Rage counters with a three punch combination, finished off with a leg kick. Nice work.
Rocky Blyer seems to be the more aggressive standup fighter in this bout.
Rage closes the distance and takes a jab right on the nose as he does so.
Rage shoots in for a takedown and gets it. Let's see what he's got on the mat.
And that's the end of the fight!
Hammer Rage showed his dominance in that final round.
I think Rage has won this one but let's see what the judges have to say. Over to the ring announcer for the scorecards.
Ladies and gentlemen, after 3 rounds of action, we go to the scorecards for a decision.
Judge Andi Peters scores the fight for Hammer Rage!
Judge Gordon Ramsey scores the fight for Hammer Rage!
Judge Frank Skinner scores the fight for Hammer Rage!
Hammer Rage wins by unanimous decision!
|
|
|
|
|
|
|
|
|
|
|
|
|
|
|
|
|
|
|
|
|
|
|
| S |
C
A |
G |
S |
C
B |
G |
|
S |
C |
G |
|
energy
A | B |
|
hype
A | B |
|
pop
A | B |
|
mgr
A | B |
|
FIGHT
RATING
56% |
|
|
|
|
|
|
