|
|
PBP Commentary |
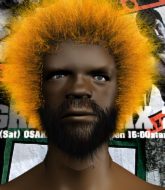
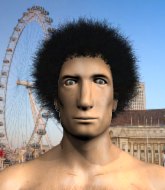
Coming up we have a middleweight MMA rules bout between Jrock Mandela (ranked 0 p4p, 0 weight class) and Jack Rackham (ranked 0 p4p, 0 weight class). Both fighter's entrance songs getting the crowd jumping here.
 |
|
 |
| 180 cm
22
195 lbs
4 - 2 - 0 |
|
182 cm
22
190 lbs
2 - 0 - 0 |
BJJ Blue Belt
Basic striking
Experienced |
|
Good takedowns
Basic striking
Granite chin |
|
| |
|
Ladies and gentlemen. This fight is 3 rounds, in the middleweight division.
Introducing the fighter to my left, fighting out of the red corner.
With a record of
4 - 2 - 0, fighting out of Las Vegas, Jrock Mandela!
And introducing the fighter to my right, fighting out of the blue corner.
With a record of
2 - 0 - 0, fighting out of Las Vegas, Jack Rackham!
The judges for this bout are Stewart Dunkirk, Cecil Peabody and Gwen Towbar.

The bell rings for round one and we are underway!
Rackham avoids the head kick by Mandela.
Jack Rackham seems to be the more aggressive standup fighter in this bout.
Mandela with a nice looking leg kick. You could hear that one land in a back row.

Mandela bobs and weaves into range and then changes levels and scores with a nice takedown into side control.

Mandela is looking to finish here, going for an Americana. Rackham knows the correct defense though, so he's OK.
Mandela is looking to take a break and control but Rackham is keeping him honest, looking to work from the bottom.
Mandela tries to advance to mount but can't.
Rackham tries to work a leg under to get back to half guard but Mandela wriggles his own leg back out and remains in side control.
Mandela is looking to take a break and control but Rackham is keeping him honest, looking to work from the bottom.
Mandela advances nicely into full mount.
Both fighters really going for it on the ground here!

Mandela is standing up out of mount! Strange tactic there - he must really want this one on the feet!

That's one minute gone in the round.
Mandela tries to clinch but Rackham moves out of range.
Mandela gets a takedown into half guard.
Mandela is looking to take a break and control but Rackham is keeping him honest, looking to work from the bottom.
Rackham slips a foot under and gets full guard. Nice work.
Mandela has to be careful here, sitting in the guard of a superior BJJ player.
Mandela has decided he wants to stand but the closed guard of Rackham is proving hard to escape from.
Rackham is working an open guard here, looking to improve his position. No doubt that will leave him open to counters but at least he's being more offensive.
Mandela wants to control from the top but Rackham keeps moving.
Rackham looking for a guillotine here but Mandela defends easily.
Rackham looks gassed!
Mandela loading up with the ground and pound but he's missing more than he's landing in this flurry.

That's two minutes gone in the round.
Mandela won't allow Rackham to get back to his feet.
Mandela thows a big elbow that misses.
Rackham can't do much from the bottom at the moment, as Mandela controls the pace.
Rackham keeping moving, preventing Mandela from controlling successfully.
Rackham had isolated an arm as going for an omaplata. Mandela is defending the submission well but is in a very vulnerable position. Rackham Is leaning forward trying to finish the omaplata but decides to abandon it, and take Mandela's back instead.
Mandela trying to control but he's just got himself in more trouble.
Mandela manages to reverse the position and now he's in Rackham's guard. Nice work there by Mandela.
Mandela trying to control the position from guard on top but Rackham is wriggling around, looking for whatever he can.
Rackham utilising some decent striking defenses from the guard, preventing the ground and pound.
Mandela is stalling in the full guard.

That's three minutes gone in the round.
Rackham keeping moving, preventing Mandela from controlling successfully.
Rackham is working the butterfly guard. He manages to land a nice scissor sweep and is now in half guard on the top. Nice move.
Mandela is looking to improve his position.
Mandela is pressing down on Rackham's left leg trying to get back to full guard. He's managed it.
Mandela working for a triangle but Rackham defends it easily.
Rackham sitting in guard, not really doing much.
Mandela looking for submissions off his back, moving his hips, looking for an opening.

That's four minutes gone in the round.
The crowd are starting to boo a lack of action.
Mandela wants to sweep but no luck.
Rackham lands a nice shot whilst sitting in his opponent's guard.
Mandela striking off his back but it's not causing Rackham any problems.
Rackham trying to control the position from guard on top but Mandela is wriggling around, looking for whatever he can.

It looks like we're going to have a standup here. Neither fight is doing enough on the ground.
No joy there for Mandela, who threw a few shots but didn't land.

Mandela has taken the fight to the clinch.
Mandela looking to slow down the pace here.
Rackham jumps guard but Mandela stands there with Rackham around his waist. Rackham gives up and drops back to his feet. We remain in the clinch.
Mandela crunches a lovely knee into Rackham's ribcage.
Mandela landing knees to the body. They look like they could hurt.
Mandela is working on a single leg takedown against the cage. Rackham can't fight it off and eventually Mandela manages to take the fight to the floor. Rackham looks annoyed but at least he's managed to land in guard.
Rackham has momentary wrist control but Mandela slips an elbow through the middle.
And thats the end of the round the fighters go back to their corners.
Jrock Mandela dominated that round.
The cut man is working on Jrock Mandela's cut.
The referee calls time. The cornermen exit stage left and we're back to business.

Mandela shoots in for a takedown and gets it. Oh and he's advanced to full mount straight away.
Rackham is wriggling around trying to escape.
Mandela punishing his opponent with strikes.
Mandela controlling the position easily from mount.
The referee warns Rackham that he has to improve his position here as he takes two more clean shots to the head.
Rackham wants to control but Mandela is having none of it.
Mandela trying to control but Rackham is having none of it.
Mandela sitting in mount, just looking to control for the moment.
The ref warns both fighters not to hold the cage as they work up against the meshing.
Rackham is desperately trying to improve his position but Mandela has a good base and remains in mount.
Mandela landing shots from mount.
Mandela wants to control the pace but Rackham is squirming around nicely.
Rackham tries to hold on but Mandela pushes him away.
That's one minute gone in the round.
Mandela landing shots from mount.
Both fighters are absolutely exhausted here.
Mandela trying to control but Rackham is having none of it.
Mandela lands a big shot there that rocks Rackham but he's holding on and managing to survive for now.
Mandela landing punches.
The fighters are pressed up against the cage, both looking to find a bit of space to work.
Mandela blocks Rackham's feeble attempts to strike from the bottom.
Mandela looking to secure an arm triangle but Rackham defends it well.
Rackham keeping his composure momentarily, calmly looking to get back to half guard.
Mandela landing punches.
Mandela working the ground and pound effectively.
Rackham is in all sorts of trouble here.
Mandela get's back to his feet.
Mandela clinches up against the cage.
That's two minutes gone in the round.
Mandela working some nice short punches in the clinch.
Some stalling of biblical proportions here from Mandela.
Mandela wants the takedown. Rackham is fighting it off but Mandela persists and manages to bring the fight to the ground, ending up in Rackham's guard against the cage.
Mandela wants to control from the top but Rackham keeps moving.
Rackham controls Mandela momentarily but Mandela frees himself.
Mandela is just sitting in guard, looking to avoid any submissions.
Rackham is controlling Mandela's posture.
Mandela slips effortlessly into side control - very nice.
Mandela stands up and we're back to a striking position.
We've seen a great period of action over the last minute or so - credit to both fighters for leaving it all in the cage!
Mandela throws a combination but it was largely blocked by Rackham.
That's three minutes gone in the round.
Mandela clinches with his opponent.

Mandela breaks the clinch.
Mandela closes the distance, clinches up and gets a nice trip takedown into side control. Very smooth.
Rackham being controlled for a moment.
Mandela trying to control the action but Rackham is working from the bottom.
Mandela is looking for a kimura. He might have it! No, Rackham has escaped the position, nice work there.
Rackham tries to bench press Mandela off him but Mandela keeps the position.
Mandela wants to work for a kimura but he's foiled early by Rackham, who protects the arm well.
Rackham avoids any damage from the ground and pound of Mandela.
That's four minutes gone in the round.
Mandela tries for a kimura but Rackham is defending well.
Mandela tries for a kimura but Rackham is defending well.
Mandela controlling the position from side mount.
Rackham manages to get one leg in to regain half guard.
Mandela trying to control the action but Rackham is working from the bottom.
Rackham is trying to maintain the position but Mandela is very close to passing his half guard.
Mandela is trying to work for a kimura. He's got his hands clasped together - this could be trouble! No, Rackham has managed to free his arm - good work.
The crowd applaud the fighters efforts here as the round comes to an end.
Mandela is working for submissions here but there's nothing on.
And thats the end of the round the fighters go back to their corners.
Jrock Mandela dominated that second round.
The cut man is working on Jrock Mandela's cut.
That's the end of the interval. I'm sure that seemed a lot quicker than a minute for our two fighters! Back to the action. This is the final round!

Rackham looking for a takedown here - he's got it.
Mandela wants to sweep here but Rackham controlling him for the moment.
Mandela trying to punch from his back but it's not doing any damage.
Mandela throwing his legs up looking for a triangle.
Mandela pulls Rackham in close to his closed guard and prevents Rackham from doing any damage or advancing position.
Rackham postures up in Mandela's guard and throws a big left but Mandela blocks it.
Rackham preventing the sweep.
Mandela looking to control.
Mandela throws a couple of shots from the bottom but they don't land.
It looks like we're going to have a standup here. Neither fight is doing enough on the ground.
Mandela clinches up with Rackham and pushes him back against the cage.
Mandela is trying to trip Rackham. He has hold of a leg but Rackham is hopping around, keeping his balance for the moment. Mandela persists though and gets the takedown into guard.
Mandela is stalling in the full guard.
Rackham takes a big intake of breath there - he's definitely tired.
That's one minute gone in the round.
Mandela is holding a leg here, probably looking for an ankle lock - he drops back and goes for it! Rackham is in trouble! Is it all over??? No! Rackham has escaped and now he's on top!
Rackham tries to free his leg and advance position but Mandela is retaining full guard.
Mandela is active off his back here, looking for submissions.
Mandela is pulling down on Rackham's head to control his posture.
Mandela looking for a sweep. Not yet Mandela, not yet.
Rackham trying to pass the guard but can't manage it just yet.
Mandela is working from a closed guard but he's struggling to control his opponent.
That's two minutes gone in the round.
There's not a lot going on here and the crowd are letting the fighters know they're not willing to tolerate a lack of action.
Rackham avoids a guillotine attempt easily.
Mandela has a loose triangle. He'll be looking to tighten that up but Rackham can see exactly what he's planning and manages to posture up and free himself.
Rackham thinks about going for a leg but decides against it, in order to maintain the position.
Mandela looking to sweep here. No luck so far.
The referee has ruled that neither fighter is active enough on the ground and has stood them back up.
Mandela shoots in and bounces Rackham off the cage to secure the takedown into guard.
Mandela passes Rackham's left leg - he's now in half guard.
Rackham is looking to improve his position.
Mandela trying to control from half guard but Rackham is working away.
That's three minutes gone in the round.
Mandela wants to pass to mount but Rackham is defending the position.
Rackham makes his way to full guard. A much better position for Rackham.
Mandela forces his way into half guard.
Mandela is pressing down on Rackham's thigh, looking to free his foot. Rackham is holding on for now.
Rackham is not content to let Mandela control the position.
Rackham tries to get to full guard but Mandela has control of the leg.
Mandela wants to free his trapped foot but Rackham is holding on for dear life with his legs.
Rackham trying to control but Mandela postures up.
Rackham tries to kick Mandela off but Mandela keeps his base steady and stays in half guard.
Mandela controlling the action here.
That's four minutes gone in the round.
There's not a lot going on here and the crowd are letting the fighters know they're not willing to tolerate a lack of action.
Rackham tries to roll over but Mandela keeps him under control.
The referee has ruled that neither fighter is active enough on the ground and has stood them back up.
Rackham throws a wild combination but nothing lands.
Rackham avoids a punch combination nicely.
Rackham gets caught flat footed, as Mandela shoots in with a quick takedown into guard.
Mandela trying to stand up but can't free himself from Rackham's guard.
Mandela lands a nice shot whilst sitting in his opponent's guard.
Mandela decides he's had enough of playing guard and decides to stand. Come on Rackham, up you get!
Rackham tries for a takedown but Mandela circles away easily
and Mandela counters with a single leg into guard. Rackham didn't expect that.
The crowd applaud the fighters efforts here as the round comes to an end.
Mandela throws a big right hand that misses.
Rackham tries to land a sweep but no joy.
Rackham not looking particularly offensive just at the moment.
Jack Rackham has stepped it up - he knows he needs a finish here!
Jrock Mandela overall seems to be getting the better of the ground position in the fight so far.
Mandela stands up from guard. Let's bang!
Rackham swings wildly with a couple of big hooks
and Mandela decides to take the opportunity to score a takedown. He's landed in Rackham's guard.
And that's the end of the fight!
Jrock Mandela showed his dominance in that final round.
Well Mandela has outscored his opponent in every aspect of the fight today. Only a scarily incompetent judge or two will keep him from a well deserved win... Over to the ring announcer for the scorecards.
Ladies and gentlemen, after 3 rounds of action, we go to the scorecards for a decision.
Judge Stewart Dunkirk scores the fight for Jrock Mandela!
Judge Cecil Peabody scores the fight for Jrock Mandela!
Judge Gwen Towbar scores the fight for Jrock Mandela!
Jrock Mandela wins by unanimous decision!
|
|
|
|
|
|
|
|
|
|
|
|
|
|
|
|
|
|
|
|
|
|
|
| S |
C
A |
G |
S |
C
B |
G |
|
S |
C |
G |
|
energy
A | B |
|
hype
A | B |
|
pop
A | B |
|
mgr
A | B |
|
FIGHT
RATING
43% |
|
|
|
|
|
|

