|
|
PBP Commentary |
Coming up we have a light heavyweight MMA rules bout between Shunsuke Yamamoto (ranked 0 p4p, 0 weight class) and Ratto Macfedries (ranked 0 p4p, 0 weight class). There are an array of beautiful celebrities at ringside tonight! I wonder if any of them paid for their tickets.
 |
|
 |
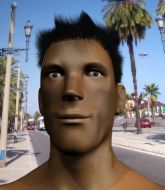
| 194 cm
18
223 lbs
3 - 0 - 1 |
|
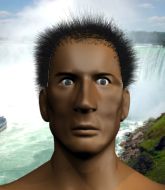
193 cm
19
205 lbs
7 - 14 - 0 |
Good wrestling
Basic striking
Big heart |
|
BJJ Blue Belt
Solid Muay Thai
Knockout power |
|
| |
|
Ladies and gentlemen. This fight is 3 rounds, in the light heavyweight division.
Introducing the fighter to my left, fighting out of the red corner.
With a record of
3 - 0 - 1, fighting out of Tokyo, Shunsuke Yamamoto!
And introducing the fighter to my right, fighting out of the blue corner.
With a record of
7 - 14 - 0, fighting out of Tokyo, Ratto Macfedries!
The judges for this bout are Yukihiro Shimada, Hirohito Nitta and Taro Takaoka.

The bell rings for round one and we are underway!

Yamamoto has Macfedries up against the ropes in a clinch.

Macfedries's corner calls for him to break the clinch, which he does.
Macfedries throws a head kick that misses and slips in the process. He scrambles back to his feet and the fighters circle.
Yamamoto tries to clinch but Macfedries is having none of it.
Yamamoto avoids the head kick by Macfedries.
Yamamoto tries to clinch up but Macfedries circles away and keeps his distance.
Yamamoto avoids a low kick by using good footwork.
Macfedries tries a head kick but it misses.
Macfedries throws a sloppy head kick and Yamamoto moves out of range easily.
Yamamoto is looking to clinch.
Yamamoto tries to clinch but Macfedries moves out of range.
Macfedries swats away the attempt to clinch by Yamamoto.
Macfedries avoids the clinch attempt nicely.
We've had a slow start to the round here - hopefully the action picks up.
Yamamoto gets to the clinch - let's see what his plan is here.
Macfedries is trying to break the clinch but Yamamoto has him pressed against the ropes.
Yamamoto fails to land with a short punch on the inside.
Macfedries throws a knee to the head but misses.
Yamamoto takes a knee right on the jaw!
Yamamoto is looking to score with knees to the body. Maybe he'll change it up and go body then head. Macfedries is defending well for now.
Macfedries avoids a wild elbow strike from Yamamoto.
Yamamoto tries to land knees in the clinch but Macfedries avoids the damage to the body.

That's one minute gone in the round.
Yamamoto stays in close to his opponent and throws a right hand to the body.
Macfedries blocks an elbow strike.
Macfedries throws a vicious knee straight up the middle but Yamamoto blocks it with crossed arms.
Macfedries lands a shoulder strike.
Macfedries on the defensive, avoiding the knees to the body.
Yamamoto swings away with an uppercut that misses.
Yamamoto misses with a hook from the clinch.

Yamamoto has hold of one of Macfedries's legs. Macfedries is fighting the takedown attempt but Yamamoto gets the trip and lands the takedown into guard.
Yamamoto not doing a lot at the moment. He'll have to show some more aggression or the fight will get stood up.
Yamamoto throwing shots from guard but he's hitting more mat than opponent.
Macfedries preventing the ground and pound from doing any damage.
Yamamoto has been looking to land a fair amount of strikes on the ground. He might be looking to soften his opponent up in order to work for a submission.
Yamamoto throwing strikes from guard but Macfedries blocks nicely.
Macfedries tries to land a sweep but no joy.
Yamamoto missing there with some ground and pound from the guard.
Yamamoto throwing strikes but missing.

That's two minutes gone in the round.
Yamamoto thows a big elbow that misses.

The referee decides to stand the fighters back up.
Macfedries pulls out of a head kick attempt.
Macfedries tries a head kick but it misses.
Yamamoto is looking to take this fight into the clinch.
Yamamoto closes the distance and clinches.
Yamamoto tries to score a body lock takedown but Macfedries shows good agility there to stay on his feet.
Macfedries blocks an elbow strike.
Yamamoto using the Thai plumb to throw knees but Macfedries has his back arched nicely, preventing the strike.
Macfedries tries to land a knee to the body but he is off balance and Yamamoto avoids it.
Yamamoto keeps control of Macfedries as he tries to wriggle out of the double underhooks.
Yamamoto dodges an elbow strike from Macfedries.
Yamamoto digs a right hand into Macfedries's ribs. Those have got to be taking their toll on Macfedries's gas tank.
Macfedries looks gassed!
A short uppercut from Yamamoto.
Yamamoto can't get the takedown.
Macfedries is looking to control Yamamoto's arms but Yamamoto gets an underhook and turns him. Now Macfedries has his back to the ropes.
Macfedries avoids the elbow strike from Yamamoto, against the ropes.
Yamamoto lands a glancing elbow in the clinch.
Macfedries blocks a knee to the body. He'll have a nicely bruised forearm in the morning.

That's three minutes gone in the round.
With the two fighters working up against the ropes, Yamamoto just misses with a elbow thrown towards Macfedries's brow.
Yamamoto throws an elbow that misses.
Yamamoto misses with a hook to the ribs.
Yamamoto looks to throw an elbow but misses.
With the fighters up against the ropes, Yamamoto throws an elbow but misses.
Macfedries with the Thai clinch. He's looking to land a big knee but he's not managed it this time.
Yamamoto tries to land knees in the clinch but Macfedries avoids the damage to the body.
Macfedries tries a shoulder strike but it doesn't do any damage.
Macfedries tries to break the clinch but Yamamoto is controlling the position.
Yamamoto lands a left hand.
Macfedries avoids the elbow strike from Yamamoto, against the ropes.
Macfedries avoids the elbow strike from Yamamoto, against the ropes.
Yamamoto tries to throw a body punch but Macfedries avoids it by throwing Yamamoto back against the cage.
Yamamoto trying to land knees to the body.
Yamamoto misses with some punches.
Macfedries tries a knee to the head but he's missed.
Yamamoto fails to land with a short punch on the inside.
Macfedries wants to break free but Yamamoto has control.
Macfedries tries a knee to the head but Yamamoto blocks it.
Yamamoto lands with a right to the head.
Yamamoto pushes off an throws an elbow but Macfedries leans to the side and avoids it. We're back to clinching against the ropes.
Macfedries avoiding damage as Yamamoto throws knees to the body.
Yamamoto goes for a body shot but it's blocked.
Yamamoto misses with a short punch on the inside.
Macfedries dodges an elbow strike from Yamamoto.
Yamamoto is looking for a takedown up against the ropes. Macfedries gets underhooks though and prevents the takedown attempt.
That's three failed takedown attempts in the round for Shunsuke Yamamoto. That's going to take a lot out of him.
Macfedries wants to get back to striking at distance but Yamamoto won't allow it.
Yamamoto trying to land knees to the body.

That's four minutes gone in the round.
The crowd are getting on the fighters' backs, as the pace has dropped off in the last minute or so.
Macfedries throws a vicious knee straight up the middle but Yamamoto blocks it with crossed arms.
Yamamoto on the defensive, avoiding the knees to the body.
Yamamoto pushes off an throws an elbow but Macfedries leans to the side and avoids it. We're back to clinching against the ropes.
A shot in the inside from Macfedries.
Yamamoto pushes off and fires off an elbow that misses, before clinching up again, against the ropes.
A frustrated look appears on Macfedries's face as he tries to break the clinch.
Macfedries throws a knee to the head but misses.
Macfedries tries to land knees in the clinch but Yamamoto avoids the damage to the body.
Yamamoto has Macfedries pressed against the ropes, preventing Macfedries from circling away and getting back to striking at range.
Macfedries managing to block the knees to the body from Yamamoto.
Macfedries is trying to break the clinch but Yamamoto has him pressed against the ropes.
Yamamoto pushes off and fires off an elbow that misses, before clinching up again, against the ropes.
Macfedries is trying to stall.
An uppercut on the inside fails to land for Yamamoto.
Macfedries tries to stall but Yamamoto uses the opportunity to gain a better position.
Yamamoto tries a knee to the head but he's missed.
Yamamoto lands a nice shot to the body.
Yamamoto pushes off an throws an elbow but Macfedries leans to the side and avoids it. We're back to clinching against the ropes.
Macfedries misses the knee to the body. Nice hip positioning from Yamamoto.
Macfedries trying to stall but Yamamoto improves his position.
Macfedries on the defensive, avoiding the knees to the body.
Macfedries tries to land a knee to the head but misses.
Yamamoto drops down looking for an ankle pick but Macfedries pulls his leg out and moves away.
Yamamoto tries to clinch there but Macfedries circles away.
And thats the end of the round the fighters go back to their corners.
Shunsuke Yamamoto dominated that round.
That's the end of the interval. I'm sure that seemed a lot quicker than a minute for our two fighters! Back to the action.

Yamamoto changes levels and looks for a double leg takedown. Macfedries tries to avoid it but Yamamoto manages to keep hold of a leg and drag Macfedries to the ground. Macfedries escapes though and pops straight back up to his feet.
Yamamoto moves into the clinch successfully.
Yamamoto misses with an elbow over the top.
With the two fighters working up against the ropes, Yamamoto just misses with a elbow thrown towards Macfedries's brow.
A nice left hand lands by Yamamoto.
Macfedries wants to push off and get back to the center of the mat but Yamamoto has him pressed against the ropes.
A hook to the body from Yamamoto.
A frustrated look appears on Macfedries's face as he tries to break the clinch.
Yamamoto tries a shoulder strike but it doesn't do any damage.
Yamamoto throws a nice elbow but it doesn't land.
Macfedries's corner calls for him to break the clinch, which he does.
Macfedries pivots as if he's going to throw a leg kick but stops half way.
Yamamoto drives through and clinches with Macfedries against the ropes.
Yamamoto is trying to wear down his opponent with knees to the body.
Yamamoto lands a short shot on the inside that snaps the head of Macfedries backwards.
Macfedries tries to land a knee to the head but misses.
Yamamoto pushes Macfedries back against the ropes and lands a hook to the side of the head.
Macfedries avoids a wild elbow strike from Yamamoto.
Macfedries working hard to break the clinch.
Macfedries is trying to break the clinch but Yamamoto has him pressed against the ropes.
Both fighters are absolutely exhausted here.
Macfedries misses with a knee strike.
Yamamoto misses with an elbow strike.
Yamamoto lands with a light punch inside.
Macfedries blocks an elbow strike.
Yamamoto tries to land a knee to the body but he is off balance and Macfedries avoids it.
That's one minute gone in the round.
Macfedries misses with a knee to the head.
Yamamoto pushes off and fires off an elbow that misses, before clinching up again, against the ropes.
Yamamoto is working for a takedown up against the ropes. He can't get it on this occasion though.
Yamamoto lands with a left to the head.
Yamamoto lands a hook to the side of the head.
Nice body punch from Yamamoto - that landed with a thud.
Macfedries misses with a knee strike.
Macfedries blocks a couple of punches on the inside.
Macfedries blocks an elbow strike.
Yamamoto looking to throw knees to the head but Macfedries is blocking nicely.
Macfedries lands an elbow inside that Yamamoto shrugs off.
A frustrated look appears on Macfedries's face as he tries to break the clinch.
Yamamoto lands a hook to the body. It's hard to tell if that hurt Macfedries or not.
Macfedries is trying to break the clinch but Yamamoto is controlling him.
Yamamoto avoiding damage as Macfedries throws knees to the body.
Yamamoto comes over the top with an elbow. That landed flush.
Macfedries tries a knee to the head but he's missed.
Macfedries misses with a knee to the head.
A quick uppercut on the inside from Yamamoto.
Macfedries blocks the elbow strike.
Yamamoto throws an elbow but it misses.
Macfedries connects with a knee to the head.
Macfedries blocks an elbow strike from Yamamoto.
Yamamoto goes for a takedown in the clinch but Macfedries prevents it.
That's three failed takedown attempts in the round for Shunsuke Yamamoto. That's going to take a lot out of him.
Yamamoto prevents Macfedries from breaking the clinch.
Yamamoto wants a takedown but no success here.
That's two minutes gone in the round.
Macfedries looking to throw knees to the head but Yamamoto is blocking nicely.
Macfedries wants to stall.
Macfedries avoiding damage as Yamamoto throws knees to the body.
With the two fighters working up against the ropes, Yamamoto just misses with a elbow thrown towards Macfedries's brow.
Yamamoto tries to land knees in the clinch but Macfedries avoids the damage to the body.
Macfedries looking to throw knees to the head but Yamamoto is blocking nicely.
Yamamoto lands on the inside with an uppercut.
Yamamoto tries a knee to the head but Macfedries blocks it.
Macfedries looking to throw knees to the head but Yamamoto is blocking nicely.
Macfedries tries to circle away but Yamamoto has him pinned against the ropes.
Yamamoto throws a vicious knee straight up the middle but Macfedries blocks it with crossed arms.
Macfedries's corner calls for him to break the clinch, which he does.
Shunsuke Yamamoto seems to be the more aggressive standup fighter in this bout.
Yamamoto is looking to clinch.
Yamamoto tries to clinch up.
Macfedries throws a head kick but Yamamoto moves out of range.
Yamamoto clinches with his opponent.
A hook to the body from Yamamoto.
Macfedries with an attempt at a knee that misses.
A hook to the body from Yamamoto.
Yamamoto makes some space for himself and lands an uppercut.
Macfedries wants to push off and get back to the center of the mat but Yamamoto has him pressed against the ropes.
That's three minutes gone in the round.
Macfedries struggles to land a body shot inside as Yamamoto controls his hands.
Macfedries stalling in the clinch but Yamamoto improves position.
Macfedries's head jolts backwards as he takes an uppercut right on the button!
Macfedries wants to get back to striking at distance but Yamamoto won't allow it.
Yamamoto misses with an elbow over the top.
Yamamoto pushes Macfedries back against the ropes and lands a hook to the side of the head.
Macfedries takes an elbow to the temple.
Macfedries blocks an elbow strike.
Macfedries throws a nice elbow but it doesn't land.
Macfedries is trying to break the clinch but Yamamoto is controlling him.
Macfedries tries to break free but Yamamoto pushes him back against the ropes.
Yamamoto throws an elbow but it misses.
Yamamoto lands with a light punch inside.
Macfedries tries to land a knee to the head but Yamamoto blocks with his arms.
Yamamoto scores with a shoulder strike.
Macfedries working hard to break the clinch.
Yamamoto misses with an elbow strike.
Yamamoto lands with a right to the head.
With the two fighters working up against the ropes, Yamamoto just misses with a elbow thrown towards Macfedries's brow.
Yamamoto prevents Macfedries from breaking the clinch.
Yamamoto trying to land knees to the body.
Macfedries blocks a body shot from Yamamoto.
Macfedries blocks an elbow strike from Yamamoto.
Macfedries blocks the elbow strike.
Macfedries misses with an elbow strike.
Yamamoto is looking for a takedown up against the ropes. Macfedries gets underhooks though and prevents the takedown attempt.
Macfedries has had enough of the clinch and is looking to separate.
That's four minutes gone in the round.
A few boos can be heard. I'm sure they will multiply if the fighters don't pick up the pace.
Macfedries tries to land a knee to the head but Yamamoto blocks with his arms.
Yamamoto looking to throw knees to the head but Macfedries is blocking nicely.
A looping hook to the body misses from Macfedries. Yamamoto does a little dance to reset his feet.
Yamamoto fails in his attempt to clinch.
Macfedries swats away the attempt to clinch by Yamamoto.
Yamamoto throws a looping left and ducks down for a takedown. He's got his arms around Macfedries's waist but Macfedries gets an underhook and avoids the takedown by throwing Yamamoto off to one side.
Ouch! a nice leg kick from Macfedries, right into the meat.
Yamamoto fails in his attempt to clinch.
Yamamoto avoids the head kick by Macfedries.
Shunsuke Yamamoto is looking to throw some combinations by the looks of things.
Yamamoto wants to clinch.
Yamamoto wants to clinch.
Macfedries circles away from the clinch attempt.
And thats the end of the round the fighters go back to their corners.
Shunsuke Yamamoto dominated that second round.
Well, the break between rounds is over. Let's get back to the scrappin! And we move into the final round!

Yamamoto blocks a head kick by Macfedries.
Macfedries keeps the fight on the outside.
Macfedries throws a monster uppercut resembling something out of street fighter but it doesn't land.
Macfedries circles away from the clinch attempt.
Yamamoto moves in looking to clinch but Macfedries pushes him off.
Macfedries throws a head kick that misses.
Yamamoto tries to clinch but Macfedries moves out of range.
Yamamoto tries to clinch there but Macfedries circles away.
Macfedries keeps the fight on the outside.
Yamamoto tries to clinch up but Macfedries circles away and keeps his distance.
We've had a slow start to the round here - hopefully the action picks up.
Yamamoto fails to land the takedown.
Macfedries throws a quick head kick that skims the top of Yamamoto's head.
Both fighters are breathing heavily.
Yamamoto wants to clinch.
Yamamoto tries to clinch up.
That's one minute gone in the round.
Macfedries misses with a body kick.
Macfedries swats away the attempt to clinch by Yamamoto.
Yamamoto fails with the takedown.
Yamamoto gets to the clinch - let's see what his plan is here.
Yamamoto throws an elbow that misses.
Macfedries tries to break the clinch but Yamamoto is controlling the position.
Macfedries avoiding damage as Yamamoto throws knees to the body.
Macfedries looking to throw knees to the head but Yamamoto is blocking nicely.
Yamamoto tries to throw a body punch but Macfedries avoids it by throwing Yamamoto back against the cage.
Yamamoto with an attempt at a knee that misses.
Yamamoto misses the knee to the body. Nice hip positioning from Macfedries.
Yamamoto avoiding damage as Macfedries throws knees to the body.
Macfedries wants to break free but Yamamoto has control.
An uppercut to the body lands inside from Macfedries.
Macfedries tries to circle away but Yamamoto has him pinned against the ropes.
Macfedries wants to break free but Yamamoto has control.
Ratto Macfedries has stepped it up - he knows he needs a finish here!
Shunsuke Yamamoto is fighting for a decision here - he's started to take the cautious approach.
That's two minutes gone in the round.
The crowd are starting to boo a lack of action.
A battle for position here, against the ropes.
Macfedries is trying to slow the pace down but that's a couple of times in a row that he's tried to get underhooks and Yamamoto has denied him.
An uppercut on the inside fails to land for Macfedries.
A body shot lands from Yamamoto.
Macfedries working hard to break the clinch.
Macfedries is trying to break the clinch but Yamamoto has him pressed against the ropes.
Macfedries is looking to score with knees to the body. Maybe he'll change it up and go body then head. Yamamoto is defending well for now.
Macfedries misses with a knee strike.
Macfedries misses with a knee strike.
Yamamoto lands with a light punch inside.
Macfedries throws a knee to the head but misses.
Yamamoto lands a shoulder strike that jolts his opponent's head backwards.
That's three minutes gone in the round.
Macfedries misses the knee to the body. Nice hip positioning from Yamamoto.
Yamamoto lands a right hand that snaps the head of Macfedries backwards.
Macfedries with the Thai clinch. He's looking to land a big knee but he's not managed it this time.
Yamamoto lands on the inside with an uppercut.
Macfedries trying to control the position but instead, Yamamoto has worked for underhooks and has pushed Macfedries into the ropes.
A short right from Yamamoto.
Macfedries with an attempt at a knee that misses.
Yamamoto lands with a short punch from the clinch.
Macfedries tries to circle away but Yamamoto has him pinned against the ropes.
Yamamoto lands a hook to the body. It's hard to tell if that hurt Macfedries or not.
Macfedries tries a knee to the head but Yamamoto blocks it.
A short body shot lands from Yamamoto as the two fighters clinch.
Yamamoto scores with a shoulder strike.
That's four minutes gone in the round.
A few boos can be heard. I'm sure they will multiply if the fighters don't pick up the pace.
A nice right hand lands inside from Yamamoto.
Macfedries using the Thai plumb to throw knees but Yamamoto has his back arched nicely, preventing the strike.
Both guys are working to get underhooks.
Macfedries on the defensive, avoiding the knees to the body.
Yamamoto lands with a right to the head.
Yamamoto is working for takedown but Macfedries is calmly controlling the position for now.
That's three failed takedown attempts in the round for Shunsuke Yamamoto. That's going to take a lot out of him.
Both fighters working to control the clinch.
Yamamoto prevents Macfedries from breaking the clinch.
Yamamoto on the defensive, avoiding the knees to the body.
Yamamoto tries to land a knee to the head but Macfedries blocks with his arms.
Macfedries looks like he'd prefer to be striking at range right now.
Boooooooooooooooooooo!!! God, this has been a terrible round. Come on you two, sort yourselves out!
Yamamoto pushes off and fires off an elbow that misses, before clinching up again, against the ropes.
Shunsuke Yamamoto has scored more points in the clinch so far.
Macfedries can't break the clinch.
A short body shot lands from Yamamoto as the two fighters clinch.
Macfedries with the Thai clinch. He's looking to land a big knee but he's not managed it this time.
And that's the end of the fight!
Ratto Macfedries comfortably won the final round on my scorecard.
I think Yamamoto has won this one but let's see what the judges have to say. Over to the ring announcer for the scorecards.
Ladies and gentlemen, after 3 rounds of action, we go to the scorecards for a decision.
Judge Yukihiro Shimada scores the fight 29:28
Judge Hirohito Nitta scores the fight 29:28
Judge Taro Takaoka scores the fight 29:28
In favor of your winner, by unanimous decision... Shunsuke Yamamoto!
|
|
|
|
|
|
|
|
|
|
|
|
|
|
|
|
|
|
|
|
|
|
|
| S |
C
A |
G |
S |
C
B |
G |
|
S |
C |
G |
|
energy
A | B |
|
hype
A | B |
|
pop
A | B |
|
mgr
A | B |
|
FIGHT
RATING
30% |
|
|
|
|
|
|

