|
|
PBP Commentary |
Coming up we have a welterweight MMA rules bout between Shane Miyagi (ranked 0 p4p, 0 weight class) and Jeremih Budden (ranked 0 p4p, 0 weight class). Miyagi kept the crowd waiting but all that was forgotten when his ring entrance music started. The incomparable musical genius that is Ready for war. Over to our ring announcer for the fighter introductions!
 |
|
 |
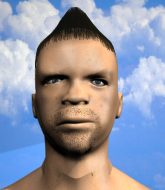
| 184 cm
25
170 lbs
7 - 6 - 0 |
|
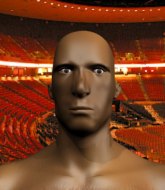
179 cm
20
169 lbs
0 - 1 - 0 |
BJJ Purple Belt
Basic striking
Granite chin |
|
BJJ Blue Belt
Brawler
Determined |
|
| |
|
Ladies and gentlemen. This fight is 3 rounds, in the welterweight division.
Introducing the fighter to my left, fighting out of the red corner.
With a record of
7 - 6 - 0, fighting out of Los Angeles, Shane Miyagi!
And introducing the fighter to my right, fighting out of the blue corner.
With a record of
0 - 1 - 0, fighting out of Los Angeles, Jeremih Budden!
The judges for this bout are , Timothy Bukovac and .

The bell rings for round one and we are underway!
A telegraphed takedown attempt from Budden is defended easily by Miyagi.

Miyagi closes the distance and looks for a trip takedown... aaaand he's got it - Miyagi lands in his opponent's guard.
Budden looking to hit a scissor sweep but Miyagi is one step ahead there.
Miyagi is pushing down on Budden's leg trying to pass to half guard. Budden is fighting to maintain full guard but Miyagi has managed to sneak the leg through.
Miyagi perhaps working for something from half guard, or maybe not. It looks like he's just sitting there.
Miyagi prevents Budden from improving his position.
Miyagi is thwarting Budden's attempts to control the position.
Budden wants to get back to full guard.
The ref warns both fighters not to hold the cage as they work up against the meshing.
Miyagi trying to advance position but Budden counters by regaining guard.
Miyagi postures up to throw the ground and pound strikes but they don't connect.

That's one minute gone in the round.
Budden working a defensive guard here.
Miyagi stops Budden from standing up.

The referee has ruled that neither fighter is active enough on the ground and has stood them back up.
Miyagi is moving around nicely and scores here with a single head shot.
Miyagi misses with a wild combination.
Budden has his takedown stuffed
and Miyagi counters with a lovely straight right hand!
Budden with a lazy takedown attempt
and Miyagi counters with a straight punch to the midsection.
Shane Miyagi has stuffed three takedown attempts in the round now. That's going to take a lot out of Jeremih Budden.
Miyagi scores to the head and body with a nice combination!
Budden gets cracked there but stands up to it.

Miyagi rushes Budden and pushes him back against the cage in a clinch.
Miyagi trying to land knees to the body.
Miyagi has picked Budden up - he's going for a ride! Miyagi dumps his opponent to the mat with a thud and settles into half guard.
Budden keeping his head moving to avoid the ground and pound.
Budden is looking to escape.
Budden is refusing to be controlled, as Miyagi sits in half guard.
Nice strikes from Miyagi there.

That's two minutes gone in the round.
Ground and pound from Miyagi.
The crowd cheering loudly, showing their appreciation for the quality fight we're seeing here.
Miyagi lands with a punch from half guard.
Budden taking some punishment here, with Miyagi in his half guard.
Budden holds on for dear life, maintaining half guard for now.
Miyagi passes to full mount!
A nice elbow there by Miyagi.
BOOM! Miyagi connects with a massive shot to the dome!
A nice elbow there by Miyagi.
Miyagi looking to control and managing it successfully.
Miyagi with good strikes from the mount here!

That's three minutes gone in the round.
Budden is writhing around trying to get back to his feet.
Budden is in a horrible position here. Miyagi smacks him with another shot as he tries to escape the position.
Budden is desperately trying to get back to half guard.
Miyagi cracks Budden with a nasty head shot there - the crowd let out an audible gasp there, as the noise reverberated around the arena.
Budden is writhing around trying to get back to his feet.
Miyagi has been looking to land a fair amount of strikes on the ground. He might be looking to soften his opponent up in order to work for a submission.
Miyagi dominating with strikes here.
Miyagi avoids the attempt from Budden to control.

That's four minutes gone in the round.
Miyagi lands a big elbow.
Miyagi raining down shots from the mount!
A nice elbow there by Miyagi.
Miyagi breaks from Budden's wrist control and lands an elbow.
Miyagi working the ground and pound effectively.

Budden is rocked!
Miyagi working the ground and pound effectively.
Budden is still in real trouble! Can Miyagi finish him?
The fighters are pressed up against the cage, both looking to find a bit of space to work.
We've seen a great period of action over the last minute or so - credit to both fighters for going all out!
Miyagi lands a shot to the body, followed up by a shot to the exposed head of his trapped opponent.
As the round comes to an end the crowd are showing their appreciation for a great round of action.
Budden tries to lock up and control but Miyagi gives him a forearm to the face and pushes him away.
Budden seems to have recovered his senses.
Budden is desperately trying to get back to half guard.

Miyagi is looking to secure an arm. He's managed it! He's pivoting for an armbar - that looks tight! But Budden has managed to get out of it and now he's in a dominant position. Nice work from Budden!
And thats the end of the round the fighters go back to their corners.
Shane Miyagi dominated that round.
The referee calls time. The cornermen exit stage left and we're back to business.

Nice body kick there by Miyagi.
Shane Miyagi seems to be the more aggressive standup fighter in this bout.
Miyagi lands a jab.
Budden takes a jab on the nose. He smiles like he loves it and keeps coming.
Miyagi lands a lovely overhand right.
A left and a right from Miyagi both land. Nice combination.
Budden fails with the takedown
and Budden takes a counter punch right on the button for his troubles.
Jeremih Budden is looking to throw some combinations by the looks of things.
Miyagi tries to land with a swinging hook to the body but Budden was well out of range. Poor timing from Miyagi.
Budden showing good head movement there, avoiding the strikes from Miyagi.
Budden walks into a stiff left hand from Miyagi.
Budden has his takedown stuffed
and Miyagi counters with a shoot takedown. Budden fights it but they end up in guard.
Budden controls Miyagi momentarily but Miyagi frees himself.
That's one minute gone in the round.
Budden has momentary wrist control but Miyagi slips an elbow through the middle.
Miyagi is looking to work some ground and pound but Budden has wrist control.
Miyagi cracks Budden with a solid left hand.
Budden really doesn't want to stay on the ground with Miyagi. If he can't get it back to his feet, it's only a matter of time before he'll be tapping out.
A big thud reverberates around the arena there as Miyagi accidentally thumps the mat. Hopefully he's not broken his hand.
Miyagi trying to land body shots but he keeps hitting the mat.
Miyagi working some strikes from top position.
Miyagi is looking to work some ground and pound but Budden has wrist control.
Both fighters are absolutely exhausted here.
Miyagi tries to free his leg and advance position but Budden is retaining full guard.
Budden looks to be working for a triangle here. Oh, it looks like he might have it! Miyagi has picked Budden up and slammed him! Budden can't keep hold of the triangle and Miyagi manages to pass to side control!
Budden manages to work his way to half guard, despite Miyagi's best efforts.
Miyagi winds up and cracks Budden with a swinging punch to the side of the head.
Miyagi working over Budden with some ground and pound. Budden looks like he wants out of this position, which is understandable.
Miyagi throws a strike but Budden avoids it easily and moves to full guard.
That's two minutes gone in the round.

Budden pushes Miyagi off for just long enough to get back to his feet. Very athletic spring there.
Budden is looking to take this fight into the clinch.
Budden tries to clinch
and Miyagi counters with a stiff right hand.
Miyagi pushes Budden up against the cage in a clinch.
Budden is looking for a takedown up against the cage. Miyagi gets underhooks though and prevents the takedown attempt.
Shane Miyagi has stuffed three takedown attempts in the round now. That's going to take a lot out of Jeremih Budden.
Knees to the body from Miyagi.
Miyagi lands a shot to the body.
Miyagi turns his back and goes for a hip toss. It's a bit messy but it gets the job done and Miyagi manages to end up in side control.
Miyagi is looking for a kimura. He might have it! No, Budden has escaped the position, nice work there.
Budden avoids any damage from the ground and pound of Miyagi.
Budden explodes and escapes back to his feet! Nice escape there!
That's three minutes gone in the round.
Miyagi is looking to clinch.
Budden on the wrong end of a vicious looking body shot.
Budden tries to clinch but Miyagi moves out of range.
Budden misses with a low kick.
Budden steps to the side to avoid the strikes from Miyagi.
Miyagi shoots in looking for a single leg takedown. Budden is trying to defend but Miyagi finishes it well and ends up in half guard. Let's see if he can advance position further.
Budden trying to hold on to Miyagi's head to control him but Miyagi postures up.
Budden pushes Miyagi off looking to stand but Miyagi dives back in and keeps control.
Miyagi sitting in half guard, looking to land shots. Budden defending well though.
Budden works his way to full guard. Good work.
Miyagi is really dominating this fight. Is there anything that Budden can do to turn this around?
Miyagi with a flurry of punches that miss.
That's four minutes gone in the round.
Budden is looking to get back to his feet but can't, whilst Miyagi is controlling him.
Miyagi passes Budden's right leg, so he's now in half guard.
Miyagi tries to pass to full mount but Budden defends it.
Budden trying to control from the bottom.
Miyagi sitting in half guard, looking to land shots. Budden defending well though.
Budden trying to control from the bottom.
Budden wants to get back to his feet.
The crowd applaud the fighters efforts here as the round comes to an end.
It looks like we're going to have a standup here. Neither fighter is doing enough on the ground.
Miyagi comes forward and lands a shot to the body, then darts back out of range.
Miyagi thows a body shot but no joy.
Budden tries to clinch but Miyagi is having none of it.
And thats the end of the round the fighters go back to their corners.
Shane Miyagi dominated that second round.
Well, the break between rounds is over. Let's get back to the scrappin! This is the final round!

Miyagi scores with a straight right hand, right through his opponent's guard.
Nice shot lands for Miyagi.
Budden with a lazy takedown attempt
and Miyagi counters nicely by changing levels and landing a hook to the body.
Budden wants to clinch.
No luck for Budden with that takedown attempt.
Budden forces Miyagi back against the cage and clinches.

Miyagi breaks from the clinch.
Miyagi bobbing and weaving, closes the distance and lands a hook to the side of Budden's head.
Miyagi scores with a jab to the head.
Budden takes a big intake of breath there - he's definitely tired.
Budden takes one to the chin there.
Budden tries to close the distance and clinch up but Miyagi swats him away and circles back towards the center.
Nice body punch from Miyagi.
Budden walks into a left hand.
Miyagi takes the fight into the clinch.
That's one minute gone in the round.
Miyagi lands a left hand.
A hook to the body from Miyagi.
Budden tries to pull guard but Miyagi won't allow it.
Shane Miyagi has stuffed three takedown attempts in the round now. That's going to take a lot out of Jeremih Budden.
Budden takes a knee right on the jaw!
Budden trying to land knees to the body.
Miyagi has picked Budden up - he's going for a ride! Miyagi dumps his opponent to the mat with a thud and settles into half guard.
Miyagi looking for a kimura but he'll have to free his other leg if he wants to finish that. Perhaps he's just using it as a distraction technique.
Miyagi stops Budden from getting back to his feet.
Miyagi slips a nice elbow through Budden's hands, connecting with Budden's forehead.
Budden looks like he's trying to stand up.
That's two minutes gone in the round.
Nice strikes from Miyagi there.
Miyagi scores with a couple of good hammerfists.
Miyagi is looking for a kimura. It's going to be difficult to finish that from half guard though and Budden defends it well.
Budden keeps control of the position for the meantime.
Budden works his way to full guard. Good work.
Budden wants to sweep but no luck.
Miyagi postures up in Budden's guard and throws a big left but Budden blocks it.
Shane Miyagi overall seems to be getting the better of the ground position in the fight so far.
That's three minutes gone in the round.
Miyagi throwing strikes from guard but Budden blocks nicely.
Budden utilising some decent striking defenses from the guard, preventing the ground and pound.
Budden is looking for a guillotine. You can't force these things though and Miyagi defends well.
Miyagi works over Budden with some ground and pound from guard.
Miyagi postures up to throw the ground and pound strikes but they don't connect.
It looks like we're going to have a standup here. Neither fighter is doing enough on the ground.
Miyagi misses with a wild body shot.
The fight moves into the clinch position.
Budden misses with a knee to the head.
Miyagi scores with an uppercut up the middle.
Miyagi working on landing some head shots here - that one got through nicely.
That's four minutes gone in the round.
Well. There's a bit of a lull in the action here and the crowd are starting to get restless.
Miyagi connects with a nasty looking knee right to Budden's face.
Miyagi wants to break free but Budden has control.
Budden looking to throw knees to the head but Miyagi is blocking nicely.
Miyagi avoiding damage as Budden throws knees to the body.
A frustrated look appears on Miyagi's face as he tries to break the clinch.
Miyagi blocks an elbow strike from Budden.
Budden misses with an elbow strike.
Budden is trying desperately to land a takedown but Miyagi is having absolutely none of it. This is turning into a bit of a nightmare for Budden.
The two fighters are working to gain dominance in the clinch.
Budden with the Thai clinch. He's looking to land a big knee but he's not managed it this time.
Budden throws a nice elbow but it doesn't land.
An uppercut on the inside fails to land for Miyagi.
Budden misses with a knee to the head.
Nice body punch from Miyagi.
A shot in the inside from Miyagi.
Miyagi blocks the elbow strike.
Budden gets the body lock takedown. After a quick scramble, Miyagi regains guard.
Miyagi keeping moving, preventing Budden from controlling successfully.
Miyagi bucks up whilst keeping hold of a body lock, managing to reverse the position. Now he's in top in Budden's guard.
Jeremih Budden has stepped it up - he knows he needs a finish here!
Miyagi drops back for a leg! It's a sloppy attempt though and Miyagi jumps back into guard quickly, to retain the dominant position.
And that's the end of the fight!
Shane Miyagi showed his dominance in that final round.
Well Miyagi has outscored his opponent in every aspect of the fight today. Only a scarily incompetent judge or two will keep him from a well deserved win... Over to the ring announcer for the scorecards.
Ladies and gentlemen, after 3 rounds of action, we go to the scorecards for a decision.
Judge Percy O'Donnell scores the fight for Shane Miyagi!
Judge Timothy Bukovac scores the fight for Shane Miyagi!
Judge Suge Night scores the fight for Shane Miyagi!
Shane Miyagi wins by unanimous decision!
|
|
|
|
|
|
|
|
|
|
|
|
|
|
|
|
|
|
|
|
|
|
|
| S |
C
A |
G |
S |
C
B |
G |
|
S |
C |
G |
|
energy
A | B |
|
hype
A | B |
|
pop
A | B |
|
mgr
A | B |
|
FIGHT
RATING
58% |
|
|
|
|
|
|
