|
|
PBP Commentary |
Coming up we have a heavyweight MMA rules bout between Dylan James (ranked 0 p4p, 0 weight class) and ashton bulges (ranked 0 p4p, 0 weight class). bulges has chosen dont stop beleving as his entrance music. Dylan James has the edge in experience - let's see if he can make that count tonight.
 |
|
 |
| 165 cm
18
225 lbs
0 - 0 - 0 |
|
185 cm
22
250 lbs
0 - 1 - 0 |
BJJ Purple Belt
Counter striker
Good chin |
|
BJJ White Belt
Counter striker
Very confident |
|
| |
|
Ladies and gentlemen. This fight is 3 rounds, in the heavyweight division.
Introducing the fighter to my left, fighting out of the red corner.
With a record of
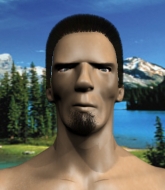
0 - 0 - 0, fighting out of Tokyo, Dylan James!
And introducing the fighter to my right, fighting out of the blue corner.
With a record of
0 - 1 - 0, fighting out of Tokyo, ashton bulges!
The judges for this bout are Sosuke Kotani, Shirou Masuda and Taro Takaoka.

The bell rings for round one and we are underway!
James shoots in but no luck this time.
James misses with a series of wild punches.
bulges scores with a sloppy punch to the body. Not much technique there but it did the business.
James is breathing heavily.

bulges darts in and clinches James up against the cage.
James jumps guard but his hands slip and he falls flat on his back. Well, he's made himself look a right mug there, as bulges walks away with a smile on his face. James gets slowly back to his feet and shakes his head.
James throws a head kick but bulges moves out of range.

bulges closes the distance and looks for a trip takedown... aaaand he's got it - bulges lands in his opponent's guard.
Fantastic stuff here - a very entertaining period of action, which has drawn cheers from the crowd.
bulges is in close to James's body, working some short punches and elbows.
bulges landing some decent shots from guard.
bulges postures up to throw the ground and pound strikes but they don't connect.
James might be looking to lock onto one of his opponent's long limbs for a submission, whilst we're on the ground.
bulges throwing elbows and punches but not connecting, as James works some decent striking defense from the bottom.
bulges in full guard, throwing the ground and pound. No damage this time.

That's one minute gone in the round.
James preventing the ground and pound from doing any damage.
bulges loading up with the ground and pound but he's missing more than he's landing in this flurry.
bulges works over James with some ground and pound from guard.
bulges missing there with some ground and pound from the guard.
bulges postures up in James's guard and throws a big left but James blocks it.
bulges throwing elbows and punches but not connecting, as James works some decent striking defense from the bottom.
bulges would like to get this fight back to the feet but can't get free from the closed guard.
bulges postures up to throw the ground and pound strikes but they don't connect.
bulges lands a nice shot whilst sitting in his opponent's guard.
bulges is sitting in guard, working some ground and pound.
bulges lands a couple of digs.
bulges with a flurry of punches that miss.

That's two minutes gone in the round.
bulges makes a bit of distance and scores with some ground and pound, still in guard.

bulges gets to his feet. James looking to butt scoot but the ref puts an end to that. On your feet son!
James feints and then dives in with a takedown. That was a long way out but the feint bought him enough time to close the distance and complete the takedown. Now we'll play guard for a bit and see who can get the better of that position.
bulges looking to hit a scissor sweep but James is one step ahead there.
bulges striking off his back but it's not causing James any problems.
James wants to pass the guard but bulges is keeping the position.
bulges will have to put a bit more behind his punches if he's going to do any damage from this position.
James stopping the sweep attempt from bulges.
bulges wants to get back to his feet but James is in a dominant position and won't allow it.

That's three minutes gone in the round.
bulges wants to sweep but no luck.
bulges throws a couple of shots from the bottom but they don't land.

It looks like we're going to have a standup here. Neither fighter is doing enough on the ground.
bulges scores with a nice one two combo and darts back out of range to avoid anything coming in the opposite direction.
bulges with a poor takedown
and James counters with a nice double leg into side control. bulges won't be happy with that.
The ref warns both fighters not to hold the cage as they work up against the meshing.
James is maintaining the dominant position - no doubt bulges will start to get frustrated soon if he's not already.
James is looking to take a break and control but bulges is keeping him honest, looking to work from the bottom.
bulges tries to strike but it doesn't land.

That's four minutes gone in the round.
bulges is looking to regain half guard here but James keeps moving and retains side control.
James trying to control the position but bulges is working away.
A lull in the action here.
James trying to control the action but bulges is working from the bottom.
As the round comes to an end the crowd are showing their appreciation for a great round of action.
James scoring with punches from side control.
And thats the end of the round the fighters go back to their corners.
ashton bulges dominated that round.
The fighters get back to their feet, the hooter sounds and we're back to the action!

bulges rushes James and pushes him back against the cage in a clinch.
bulges drops down for a takedown but doesn't get it.
James's head jolts backwards as he takes an uppercut right on the button!
bulges has double underhooks and is working for a body lock takedown. He's got it. The fighters land in half guard but James regains guard immediately.
The fighters are pressed up against the cage, both looking to find a bit of space to work.
James tries to land a sweep but no joy.
bulges postures up to throw the ground and pound strikes but they don't connect.
James bucks up whilst keeping hold of a body lock, managing to reverse the position. Now he's in top in bulges's guard.
bulges is looking to stand up but James isn't so interested in that idea.
James trying to control but bulges is working from the bottom.
James sneaks a leg through and gets to half guard. That was like a knife through butter how easily he passed bulges's guard.
Both fighters are absolutely exhausted here.
That's one minute gone in the round.
bulges wants to get back to full guard.
bulges throws a strike from the bottom that misses.
bulges wants to get back to full guard.
James blocks the strikes from bulges.
bulges manages to escape and get back to his feet!
bulges misses with a takedown
and James counters with a nice shoot takedown that brings the fighters to the ground.
James pressing down on his opponent's thigh, looking to pass guard. bulges is keeping the position for now.
bulges can't keep his opponent in guard - James advances to half guard, no doubt looking to mount.
bulges is trying to escape back to his feet but James uses the scramble to pass into side control.
That's two minutes gone in the round.
bulges wants to escape from the position here - easier said than done!
We get told so often about how wrestlers don't like to be on their backs. Let's see if bulges can do anything to dispel that myth.
James avoids the strikes from the bottom by bulges.
bulges tries to strike from the bottom but misses.
ashton bulges has got the better of the ground game so far.
James trying to control the action but bulges is working from the bottom.
James prevents bulges from escaping the position.
bulges throws an elbow to the body but it doesn't land.
bulges wants to get back to his feet.
It looks like we're going to have a standup here. Neither fighter is doing enough on the ground.
bulges throws a right high kick that is partially blocked by James.
That's three minutes gone in the round.
bulges scores with a nice takedown into half guard. Let's see what he's got on the ground.
bulges missing with the ground and pound from half guard.
bulges not throwing his punches with enough precision this time.
James regains full guard. Nicely done.
bulges postures up to throw the ground and pound strikes but they don't connect.
James throwing strikes off his back to little effect.
There's a bit of a scramble here and now James is on top in guard.
James wants to control from the top but bulges keeps moving.
bulges pushes James off for just long enough to get back to his feet. Very athletic spring there.
That's four minutes gone in the round.
bulges closes the distance and scores a nice trip takedown into half guard. James did well to prevent bulges getting side control.
James is working for an escape here. He's hooked one of bulges's legs and he's managed to sneak out and take bulges's back!
bulges prevents James from getting a body triangle.
You can see the frustration on bulges's face
He knows he is in trouble unless he improves his position sooner rather than later.
bulges has the hand control, trying to stop the rear naked choke.
James struggling to keep hold of the position.
bulges tries to break free.
bulges is persisting with the attempt to improve his position.
And thats the end of the round the fighters go back to their corners.
A close second round but ashton bulges will probably get the nod - 10:9.
The fighters get back to their feet, the hooter sounds and we're back to the action! This is the final round!

James shoots in for a takedown. He's persisting with it as bulges sprawls well. bulges wins this battle and keeps the fight standing. James gets slowly back to his feet.
A combination from bulges does no damage.
bulges with a poor takedown
and James counters with a shoot takedown. bulges fights it but they end up in guard.
bulges wants to get back to his feet but James is in a dominant position and won't allow it.
bulges is striking from the bottom but James uses the opportunity to pass into half guard.
James decides he's had enough of the ground and stands up.
Both fighters are breathing heavily.
James keeps the fight standing with a nice sprawl.
That's one minute gone in the round.
James shoots in for a takedown - he's clinched up with bulges but bulges pushes him off and we're back to square one.
bulges is trying hard to land a takedown here. James sprawls well and keeps this one on the feet.
Dylan James has stuffed three takedown attempts in the round now. That's going to take a lot out of ashton bulges.
James tries for a takedown but bulges circles away easily
and bulges counters with a nice double leg into half guard.
James wants to control but bulges is keeping busy.
bulges scores with a couple of good hammerfists.
That's two minutes gone in the round.
bulges throwing shots but they're hitting the canvas more than the man.
bulges not landing any meaningful shots this time.
bulges drops an elbow to the side of James's head.
James tries to get to full guard but bulges has control of the leg.
bulges thows a huge punch but James dodges it nicely.
James tries to get to full guard but bulges has control of the leg.
The referee decides to stand the fighters back up.
bulges has James up against the cage in a clinch.
bulges lands a shot to the body.
ashton bulges is fighting for a decision here - he's started to take the cautious approach.
That's three minutes gone in the round.
James pulls guard effortlessly.
bulges trying to control but James is working from the bottom.
bulges postures up.
bulges trying to control but James is working from the bottom.
James is controlling bulges's posture.
bulges looking to control the position here, rather than advance.
Dylan James has stepped it up - he knows he needs a finish here!
James is trying to control the position but bulges postures up.
That's four minutes gone in the round.
A lull in the action here being met with boos from the crowd.
James keeping moving, preventing bulges from controlling successfully.
The referee has ruled that neither fighter is active enough on the ground and has stood them back up.
bulges wants to clinch.
bulges shoots in and scores a nice double leg takedown into half guard.
bulges is trying to control the action in half guard but James is working away on the bottom, looking perhaps to get back to full guard.
And that's the end of the fight!
I would just about give that final round to ashton bulges.
Well bulges has outworked and out performed his opponent in all aspects of the game today. He was simply too good and the decision should be no more than a formality. Over to the ring announcer for the scorecards.
Ladies and gentlemen, after 3 rounds of action, we go to the scorecards for a decision.
Judge Sosuke Kotani scores the fight 27:30
Judge Shirou Masuda scores the fight 27:30
Judge Taro Takaoka scores the fight 27:30
In favor of your winner, by unanimous decision... ashton bulges!
|
|
|
|
|
|
|
|
|
|
|
|
|
|
|
|
|
|
|
|
|
|
|
| S |
C
A |
G |
S |
C
B |
G |
|
S |
C |
G |
|
energy
A | B |
|
hype
A | B |
|
pop
A | B |
|
mgr
A | B |
|
FIGHT
RATING
83% |
|
|
|
|
|
|

