|
|
PBP Commentary |
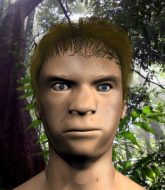
Coming up we have a bantamweight MMA rules bout between Doug Wallaby (ranked 0 p4p, 0 weight class) and Kanto Gruma (ranked 0 p4p, 0 weight class). Chooooooooon! I think Wallaby might be my favorite fighter, now he's come out to Europe - The Final Countdown. Doug Wallaby has the edge in experience - let's see if he can make that count tonight.
 |
|
 |
| 182 cm
20
135 lbs
1 - 1 - 0 |
|
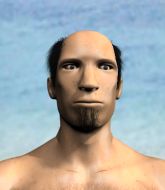
200 cm
20
140 lbs
0 - 1 - 0 |
BJJ White Belt
Excellent boxer
Granite chin |
|
BJJ Blue Belt
Brawler
Likes ground |
|
| |
|
Ladies and gentlemen. This fight is 3 rounds, in the bantamweight division.
Introducing the fighter to my left, fighting out of the red corner.
With a record of
1 - 1 - 0, fighting out of Tokyo, Doug Wallaby!
And introducing the fighter to my right, fighting out of the blue corner.
With a record of
0 - 1 - 0, fighting out of Tokyo, Kanto Gruma!
The judges for this bout are Yukihiro Yamamoto, Kenichi Hosakawa and Tatsuya Matsuyama.

The bell rings for round one and we are underway!
Wallaby connects with the punch.
A punch combination from Wallaby misses.
Wallaby misses with a wild combination.

Gruma instigates a clinch.
Wallaby tries to break the clinch but Gruma is controlling the position.

Gruma escapes the clinch and we're back to striking.
Wallaby throws an uppercut from half a mile away. Gruma sees it coming and avoids it easily.
Wallaby scores with a nice looking left hook and follows it up with an uppercut!
Gruma buckles his opponent's knee momentarily with a nice leg kick.
Gruma fails with the takedown.
Wallaby throws a nice looking combination but Gruma bobs and weaves to avoid any damage.
Wallaby misses with a double jab.
Gruma shoots in and drives through. Wallaby sprawls well.
Wallaby lands a jab followed by a vicious hook that sends Gruma sprawling to the canvas. Wallaby follows him down, looking for the kill. Can Gruma hang on?

Gruma is rocked!
Wallaby tries to stand but can't do so whilst Gruma controls his leg.
Gruma is still in real trouble! Can Wallaby finish him?

That's one minute gone in the round.
Gruma wants to get back to his feet.
Gruma seems to have recovered his senses.
Wallaby knows he needs to get back to his feet asap. He's simply no match for Gruma on the ground.
Gruma has no desire to be mounted, so is trying to control. Wallaby is working away from the top position though.
Wallaby tries to stand but can't do so whilst Gruma controls his leg.
Gruma punching from the bottom.
Gruma misses with some strikes from the bottom.
The fighters are pressed up against the cage, both looking to find a bit of space to work.
Wallaby is breathing heavily.
Wallaby tries to stand but his arm is trapped.

That's two minutes gone in the round.
A lull in the action here being met with boos from the crowd.
Gruma tries to roll over but Wallaby keeps him under control.

Well, the referee has seen enough. Neither fighter is active enough on the ground so he's stood them back up.
Gruma clinches up against the cage.
Wallaby really does look like a pencil wearing a pair of gloves. Let's hope he has a gameplan to suit that ridiculous body shape.
Wallaby wants to strike at distance but he can't break free of the clinch.

Gruma jumps into guard, dragging Wallaby to the mat.
Gruma controlling Wallaby's posture.
Wallaby has decided he wants to stand but the closed guard of Gruma is proving hard to escape from.

That's three minutes gone in the round.
Gruma is pulling down on Wallaby's head to control his posture.

Gruma looking for submissions off his back, moving his hips, looking for an opening.
Gruma working from the bottom, still in full guard. He's managed to get a loose triangle. Wallaby doesn't seem to be doing much to defend here, obviously he feels comfortable in the position. Wallaby manages to throw the legs off his shoulder and he's back into guard - no problem.
Wallaby trying to stand up but can't free himself from Gruma's guard.

That's four minutes gone in the round.
Well. There's a bit of a lull in the action here and the crowd are starting to get restless.
Gruma working a defensive guard but Wallaby manages to pass into side control anyway.
Wallaby wants to stand but Gruma has his arm trapped.
The fighters are starting to perspire pretty heavily.
And thats the end of the round the fighters go back to their corners.
Doug Wallaby dominated that round.
The minute break is over - no more time for sponges and pep talks - back to the action!

Gruma dodges the punch combination from Wallaby.
Wallaby throws a right and a left that Gruma avoids nicely.
The crowd cheers as Wallaby lands an impressive looking overhand right. Gruma doesn't seem phased though.
Gruma showing good head movement there, avoiding the strikes from Wallaby.
Wallaby lands a glancing blow to the side of Gruma's head.
Gruma showing good head movement there, avoiding the strikes from Wallaby.
Wallaby moves into range and throws a combination. A nice jab followed by a hook to the body.
Gruma looks for a takedown here. Will he get it? Wallaby is fending him off so far but Gruma persists. Nope, Wallaby circles away and we're back to standing.
Wallaby lands a jab-cross combination.
Gruma misses with a takedown attempt - Wallaby sprawls well and throws a nice strike on the way out which just misses.
A swing and a miss from Wallaby.
Both fighters are absolutely exhausted here.
Wallaby misses with the combination.
A right-left combo lands from Wallaby.
That's one minute gone in the round.
Gruma scores with a punch to the head.
Doug Wallaby seems to be the more aggressive standup fighter in this bout.
Gruma shoots in and drives through. Wallaby sprawls well.
Doug Wallaby has stuffed three takedown attempts in the round now. That's going to take a lot out of Kanto Gruma.
Gruma closes the distance, clinches up and gets a nice trip takedown into side control. Very smooth.
Wallaby tries to wriggle free to get back to his feet but he's given up his back! Oops.
Wallaby holding both Gruma 's hands and preventing any damage.
That's two minutes gone in the round.
That's three minutes gone in the round.
Gruma has his opponent trapped and is landing shots. Not a good position for Wallaby.
Wallaby holding both Gruma 's hands and preventing any damage.
Wallaby staying busy and making it hard for Gruma to control.
Wallaby might be looking to lock onto one of his opponent's long limbs for a submission, whilst we're on the ground.
That's four minutes gone in the round.
A few boos can be heard. I'm sure they will multiply if the fighters don't pick up the pace.
Gruma throwing lazy shots from the back mount that aren't doing any damage.
Gruma tries to get the hooks in deep but Wallaby pushed the leg off.
The ref warns both fighters not to hold the cage as they work up against the meshing.
Wallaby is displaying good submission defense - not really looking in danger of submitting to the rear naked choke at the moment. That could change in an instant of course if Gruma gets his way!
Wallaby trying to get back to his feet but Gruma is in full control for now.
The crowd thankful this round is nearly over.
And thats the end of the round the fighters go back to their corners.
That was a close second round but I would say that Doug Wallaby will probably get the nod.
The fighters get back to their feet, the hooter sounds and we're back to the action! Let's hear some noise people - this is the final round!

Wallaby throws a combination but it was largely blocked by Gruma.
Gruma walks into a jab.
Wallaby will need to tighten up his combinations if he doesn't want to gas himself out, swinging at thin air.
Wallaby throws a body kick that misses.
Gruma dodges the punch combination from Wallaby.
Wallaby is using his height advantage well here, landing a good percentage of his punches.
Gruma closes this distance looking for a takedown but Wallaby circles away.
Wallaby throws a series of punches but Gruma avoids them all with ease.
Gruma shoots in but Wallaby avoids the takedown attempt easily.
Wallaby scores with a punch to the head.
We've had a slow start to the round here - hopefully the action picks up.
Wallaby throws a nice looking combination but Gruma bobs and weaves to avoid any damage.
Wallaby swinging wilding here.
Gruma darts in and clinches Wallaby up against the cage.
Gruma manages to break the clinch.
Doug Wallaby is looking to throw some combinations by the looks of things.
Both fighters are breathing heavily.
Wallaby throws an ugly left hook that misses
and Gruma counters by clinching up.
That's one minute gone in the round.
Gruma content to slow the pace in the clinch.
Gruma wants a takedown.
Doug Wallaby has stuffed three takedown attempts in the round now. That's going to take a lot out of Kanto Gruma.
Gruma stalling.
Wallaby can't break the clinch.
Wallaby wants to break free. God knows he wants to breaaaak freeee.
Gruma has Wallaby pressed up against the cage and is working for takedown. Wallaby manages to improve position though and keeps the fight standing.
Gruma prevents Wallaby from breaking the clinch.
Wallaby wants to get back to striking at distance but Gruma won't allow it.
Wallaby is trying to break free.
Wallaby has had enough of the clinch but Gruma keeps him there for the moment.
Gruma prevents Wallaby from breaking the clinch.
Gruma breaks the clinch.
Wallaby takes a head kick and keeps coming.
Wallaby throws a big shot that misses.
Gruma looks shocked there as he takes a right hand to the temple.
Gruma looking to shoot here. He's gone for it and he's landed a takedown into mount! Oh, that's bad for Wallaby!
Wallaby really wants to buck Gruma off and get back to his feet.
That's two minutes gone in the round.
Wallaby defends a decent attempt at a guillotine from Gruma.
Gruma with good strikes from the mount here!
Gruma wants to control the pace but Wallaby is squirming around nicely.

Gruma is standing up, even though he is in mount.
Wallaby cracks Gruma with a good shot that sees him stumbling back into the cage.
Wallaby tries to keep at a distance but Gruma has taken the fight into the clinch.
Gruma breaks the clinch.
That's three minutes gone in the round.
Wallaby swings wildly with a couple of big hooks
and Gruma counters by moving into the clinch.
Wallaby wants to break free but Gruma has control.
Wallaby gets double underhooks to prevent a takedown attempt from Gruma.
Wallaby is trying to break free.
Gruma manages to break the clinch.
Gruma blocks a jab.
Gruma looks frusrated there after his takedown attempt is stuffed easily.
Gruma closes this distance looking for a takedown but Wallaby circles away.
Wallaby ducks down and throws a hook to the body.
Wallaby throws a one two combo.
Wallaby stuns Gruma with a nice body shot, before stepping back out of range.
A combination from Wallaby does no damage.
Wallaby lands with a big right hook that stumbles Gruma - he's out on his feet here! Wallaby follows up with another monster hook that separates Gruma from consciousness! Gruma falls, almost in slow motion to the canvas! Wallaby stands and admires his work as the crowd go wild.
Ladies and gentlemen, after 3:56 of round 3, we have a winner by way of KO (Punches). Doug Wallaby!
|
|
|
|
|
|
|
|
|
|
|
|
|
|
|
|
|
|
|
|
|
|
|
| S |
C
A |
G |
S |
C
B |
G |
|
S |
C |
G |
|
energy
A | B |
|
hype
A | B |
|
pop
A | B |
|
mgr
A | B |
|
FIGHT
RATING
45% |
|
|
|
|
|
|

