|
|
PBP Commentary |
Coming up we have a featherweight MMA rules bout between Crash Holly (ranked 0 p4p, 0 weight class) and Barry Obomba (ranked 0 p4p, 0 weight class). Holly's entrance music is Slow Death. A fine choice. These two fighters really are very evenly matched on the feet - it will be fascinating to see who can assert themselves in that aspect of the fight.
 |
|
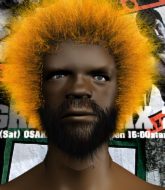 |
| 175 cm
19
148 lbs
7 - 1 - 0 |
|
175 cm
21
153 lbs
3 - 1 - 0 |
BJJ Purple Belt
Solid boxing
Cardio machine |
|
BJJ Purple Belt
Counter striker
Granite chin |
|
| |
|
Ladies and gentlemen. This fight is 5 rounds, for the featherweight championship of the world!
Introducing the champion to my left, fighting out of the red corner.
With a record of
7 - 1 - 0, fighting out of Rio de Janeiro, Crash Holly!
And introducing the challenger to my right, fighting out of the blue corner.
With a record of
3 - 1 - 0, fighting out of Rio de Janeiro, Barry Obomba!
The judges for this bout are Edson Gomes, Luis Engracia and Daniel Cesar.

The bell rings for round one and we are underway!
Holly punishes Obomba's body with a nice straight punch.
Obomba shoots in for a double leg but Holly sprawls well. That's going to sap some energy.
Obomba shakes his hands off, looking to compose himself, but takes a jab to the jaw whilst he does it.
Obomba shoots in but no luck this time.
Obomba moves out of range as Holly strikes.
Obomba fails with an attempt to clinch.
Holly scores with a body shot.
Obomba wants to clinch up but Holly keeps it at a distance.
Holly misses with a body shot.
Obomba doesn't react quick enough there as he takes a shot to the body.
Obomba throws a series of punches but Holly avoids them all with ease.
Holly connects with a lovely jab that went straight through the gap between Obomba's hands.
Holly throws a body punch but Obomba moves out of range.

That's one minute gone in the round.
Obomba wants to clinch up but Holly keeps it at a distance.
Obomba tries to clinch but Holly moves out of range.
Holly throws a hook to the body but it doesn't connect.
Obomba misses with a takedown attempt - Holly sprawls well and throws a nice strike on the way out which just misses.
Crash Holly has stuffed three takedown attempts in the round now. That's going to take a lot out of Barry Obomba.
Obomba fails with a rather predictable takedown attempt.
Obomba tries to clinch there but Holly circles away.
Holly fails to land with the punch combination there - jab, cross, hook, miss, miss, miss.
Holly fakes high and swings low for a body shot but Obomba manages to avoid it.
Holly throws a shot from downtown. Obomba moves away and avoids it.
Holly lands a really nice looking cross but Obomba seems unphased.

That's two minutes gone in the round.
The crowd are hurling abuse towards the fighters... You can hardly blame them though because there isn't a lot going on in the fight.
Obomba takes one to the chin there.
Holly slips under a jab from Obomba.
Holly looks to land a combination but Obomba avoids it well.
Holly avoids the clinch attempt nicely.
Holly lands with an overhand left.
Obomba slips under a jab.
Obomba is looking to clinch but Holly is avoiding it.

Obomba shoots in looking for a single leg takedown. Holly is trying to defend but Obomba finishes it well and ends up in half guard. Let's see if he can advance position further.
Holly regains full guard, whilst avoiding punches from Obomba.

That's three minutes gone in the round.
Holly is avoiding any damage by keeping wrist control.

Obomba postures up as if he's going to throw some strikes but drops back for an ankle! Holly is in big trouble! He looks ready to tap! But no, he's escaped and dives on top of Obomba, into his guard.
Holly is intent on slowing down the pace of the fight, simply looking to control.

That's four minutes gone in the round.
The crowd are hurling abuse towards the fighters... You can hardly blame them though because there isn't a lot going on in the fight.
Obomba controls Holly momentarily but Holly frees himself.
Holly stays in close to Obomba's body and controls the position.
Holly trying to pass the guard but can't manage it just yet.
Obomba is throwing his legs up, looking for submissions. Holly is aware though and is defending well.
And thats the end of the round the fighters go back to their corners.
Crash Holly dominated that round.
That's the end of the interval. I'm sure that seemed a lot quicker than a minute for our two fighters! Back to the action.

Holly connects with a hook to the side of his opponent's head.
Obomba is looking to clinch.
Barry Obomba is looking to throw some combinations by the looks of things.
Holly throws an overhand right that lands on Obomba's shoulder, as Obomba tries to avoid the shot.
Holly jabs Obomba right on the nose. Obomba blinks but takes it well.
A really sloppy takedown attempt there from Obomba.
Obomba slips a straight right by Holly.
Holly avoids the clinch attempt nicely.
Obomba is looking to take this fight into the clinch.
Holly misses with a wild body shot.
Holly throws an uppercut from half a mile away. Obomba sees it coming and avoids it easily.
That's one minute gone in the round.
Obomba tries to clinch up but Holly circles away and keeps his distance.
Obomba keeping a good distance there, avoiding the body shot.
Obomba fails with a takedown attempt.
Holly throws a nice looking combination but Obomba bobs and weaves to avoid any damage.
Obomba shoots for a takedown but Holly saw that one coming a mile off and avoided it easily.
Crash Holly has stuffed three takedown attempts in the round now. That's going to take a lot out of Barry Obomba.
Holly lands a jab to the head.
Holly misses with a body shot. Nice footwork from Obomba.
Obomba bobs and weaves into range and then changes levels and scores with a nice takedown into side control.
Obomba is working Holly over with some ground and pound from side control.
That's two minutes gone in the round.
You can see the frustration on Holly's face, being in this tough position on the bottom.
The ref warns both fighters not to hold the cage as they work up against the meshing.
Obomba goes for an armbar! This could be all over! Wait, no, Holly rolls with the submission and now he's on top in Obomba's guard! Nice work there by Holly!
Obomba is breathing heavily.
Obomba working for submissions but it's allowed Holly to get to half guard.
The fighters are starting to get a bit slippery now, which will make submissions a bit more difficult.
Holly sitting and controlling from the half guard.
That's three minutes gone in the round.
Holly trying to pass the guard but Obomba defending well.
That's four minutes gone in the round.
A lull in the action here being met with boos from the crowd.
Holly looks over to his corner - he wants some instructions but his corner are not responding.
The crowd thankful this round is nearly over.
Holly looking to pass the half guard. Not this time.
And thats the end of the round the fighters go back to their corners.
Crash Holly dominated that second round.
Well, the break between rounds is over. Let's get back to the scrappin!

Obomba on the wrong end of a vicious looking body shot.
Holly pushing out the jab but it's not landing.

Obomba rushes Holly and presses him up against the cage.

Holly breaks from the clinch.
Obomba shoots in looking for a takedown. Holly tries to sprawl out of it but Obomba keeps driving through. The fighters are pinned against the cage. Holly manages to get underhooks and after a bit of a struggle, circles away and we're back to standing.
Obomba steps to the side to avoid the strikes from Holly.
Holly misses with a body shot. Nice footwork from Obomba.
Obomba misses with a few strikes there.
Obomba misses the body punch
and Holly counters with a quick right hand to the jaw.
That's one minute gone in the round.
Obomba takes a jab on the nose there. A little bit of blood seems to be coming out. Hopefully that won't affect his breathing.
Obomba tries to clinch up
and Holly counters with a nice body shot.
Holly misses with a body shot.
Obomba tries to score a power double leg takedown but Holly sees that one coming and sprawls well. That will dishearten Obomba somewhat.
Crash Holly seems to be the more aggressive standup fighter in this bout.
Obomba keeping a good distance there, avoiding the body shot.
Obomba fakes high and shoots in for a takedown but Holly avoids it really well and circles away.
Crash Holly has stuffed three takedown attempts in the round now. That's going to take a lot out of Barry Obomba.
That's two minutes gone in the round.
Obomba swings for the body but Holly moves out of range.
Holly lands with a right hand.
Obomba tries to clinch up
and Holly counters with a quick right hand to the jaw.
Holly throws a hard body shot but it just misses.
Obomba misses with a double jab.
Obomba fails miserably with a takedown attempt.
Obomba takes a big intake of breath there - he's definitely tired.
Holly lands with a shot to the body.
That's three minutes gone in the round.
Holly throws a sloppy body shot
and Obomba counters with a nice double leg into guard.
Holly is adopting a defensive guard.
Obomba working some ground and pound from guard but it's not doing any damage.
Obomba lands a couple of digs.
That's four minutes gone in the round.
Obomba throwing strikes from guard but Holly blocks nicely.
Holly wants to sweep but no luck.
Holly lands a beautiful switch and he's in full mount! That could spell trouble for Obomba!
Obomba tries to get back to half guard but can't.
The crowd applaud the fighters efforts here as the round comes to an end.
Obomba is persisting with the attempt to improve his position.
And thats the end of the round the fighters go back to their corners.
Crash Holly clearly takes that round.
That's time! Back to the action!

Holly throws a body punch but Obomba moves out of range.
Holly pushing out the jab but it's not landing.
Holly fakes a head shot and lands one to the body.
A jab from Holly misses.
Obomba changes levels and looks for a double leg takedown. Holly tries to avoid it but Obomba manages to keep hold of a leg and drag Holly to the ground. Holly escapes though and pops straight back up to his feet.
Holly uses good footwork to get in and out and land a nice right hand before Obomba has time to react.
Obomba looks shocked there as he takes a right hand to the temple.
Crash Holly is winning the standup battle so far.
Obomba stalks Holly and leaps in with a furious combination of punches. Uppercuts and crosses smash into Holly's face. Holly staggers backwards, shaken.
Holly throws a monster uppercut resembling something out of street fighter but it doesn't land.
Obomba ducks right into an uppercut from Holly.
That's one minute gone in the round.
Holly throws an uppercut from half a mile away. Obomba sees it coming and avoids it easily.
Holly misses with a looping right.
Holly fakes low and throws an overhand right that catches Obomba on the side of the head.
Obomba closes the distance but Holly moves to the side
and Holly counters with a right hand to the body.
Crash Holly is looking to keep the fight on the feet at all costs.
Obomba is absolutely dripping with sweat - he looks exhausted.
Holly jabbing away but nothing is landing.
Holly scores with a decent looking hook.
Obomba slips a jab from Holly.
Obomba has his takedown stuffed
and Holly counters with a stiff right hand.
That's two minutes gone in the round.
Nice shot lands for Holly.
Obomba misses with a kick to the body.
Obomba fails with the takedown
and Holly counters with a lovely shot to the body.
Crash Holly has stuffed three takedown attempts in the round now. That's going to take a lot out of Barry Obomba.
Holly bobs and weaves and unloads with a good uppercut.
A telegraphed takedown attempt from Obomba is defended easily by Holly.
Holly ducks down and throws a hook to the body but Obomba moves away.
That's three minutes gone in the round.
Holly connects with a single shot there.
Holly dips down and scores with a jab to the body.
A big right from Holly misses.
Holly ducks down and throws a hook to the body but Obomba moves away.
Holly punishes Obomba's body with a nice straight punch.
Obomba takes a solid shot to the body. That one hurt him but he's trying not to show it.
Holly lands a straight punch to the body, keeping Obomba at a distance.
Obomba takes a shot to the nose. Hopefully that hasn't broken it.
Holly clobbers Obomba with an overhand right that has the crowd gasping. That made a horrendous noise.
Fantastic stuff here - a very entertaining period of action, which has drawn cheers from the crowd.
Obomba displays some good footwork, moving neatly out of range as Holly throws out the jab.
That's four minutes gone in the round.
Holly uses good footwork to get in and out, landing a nice hook.
Holly lands with a nice body punch.
Holly throws a jab to the body, straight down the pipe. Boom. That sent Obomba stumbling backwards but he manages to regain his composure quickly.
Obomba walks into a left hand.
Holly thuds a left hand into Obomba's body.
Holly scores with a body shot.
Holly tests Obomba's chin there with a solid looking shot.
As the round comes to an end the crowd are showing their appreciation for a great round of action.
Holly lands a right hook to the body.
Holly scores with a punch to the gut of his opponent.
And thats the end of the round the fighters go back to their corners.
Crash Holly had his way with Barry Obomba in that round.
That's the end of the round. The referee orders the cornermen out of the cage so we can get back down to business. This is the final round!

Holly lands a jab to the nose.
Obomba wants to clinch but Holly slips to the side
and Holly counters with a straight punch to the midsection.
Holly throws a shot to the body.
Holly throws a left and a right that both miss
so Obomba counters with a double leg into guard. Good agility.
Holly wants to control here, rather than go for any submissions from the bottom. At least for now.
Obomba drops back for a leg but he's not going to get it - he lets go and Holly dives on top into guard.
Holly passes into half guard under a barage of strikes.
We could do with one of the fighters taking the initiative a bit more on the ground - they're both waiting to capitalize on a mistake.
Obomba is wobbling all over the place through exhaustion. Will he make it to the final bell?
That's one minute gone in the round.
Obomba throws a strike from the bottom that misses.
Holly seems content to maintain position for now, rather than mounting any offense.
Obomba is looking to regain full guard. Not this time though.
That's two minutes gone in the round.
The crowd are getting on the fighters' backs, as the pace has dropped off in the last minute or so.
Holly performing his best blanket impression for a moment.
Obomba is trying to control but Holly manages to pass to mount!
Crash Holly is fighting for a decision here - he's started to take the cautious approach.
That's three minutes gone in the round.
Obomba tries to control the position but Holly now has his back.
Holly has the hooks in. Obomba is trying to push off one leg but he has to do so cautiously to avoid being submitted.
Barry Obomba has stepped it up - he knows he needs a finish here!
That's four minutes gone in the round.
The crowd are getting on the fighters' backs, as the pace has dropped off in the last minute or so.
Holly has the hooks sunk in and you can see the will to fight slowly draining out of Obomba's body.
Holly has controlled the position for a good 20 seconds, which will no doubt be starting to frustrate his opponent.
And that's the end of the fight!
That was a close round. You could make an argument for either fighter but I would give it to Crash Holly.
Well I reckon that's a shut out for Holly, winning every round. Will the judges agree? They are the ones who matter, even if they are often depressingly incompetent. Over to the ring announcer for the scorecards.
Ladies and gentlemen, after 5 rounds of action, we go to the scorecards for a decision.
Judge Edson Gomes scores the fight 50:44
Judge Luis Engracia scores the fight 50:44
Judge Daniel Cesar scores the fight 50:44
In favor of your winner, by unanimous decision... Crash Holly!
Crash Holly retains his featherweight title!
|
|
|
|
|
|
|
|
|
|
|
|
|
|
|
|
|
|
|
|
|
|
|
| S |
C
A |
G |
S |
C
B |
G |
|
S |
C |
G |
|
energy
A | B |
|
hype
A | B |
|
pop
A | B |
|
mgr
A | B |
|
FIGHT
RATING
60% |
|
|
|
|
|
|
