|
|
PBP Commentary |
Coming up we have a featherweight MMA rules bout between JIM Hatter (ranked 0 p4p, 0 weight class) and Steve Buscemi (ranked 0 p4p, 0 weight class). Over to our ring announcer for the fighter introductions!
 |
|
 |
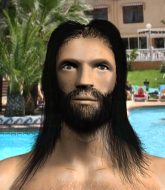
| 180 cm
20
153 lbs
1 - 0 - 0 |
|
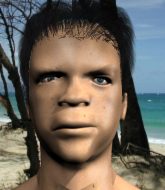
173 cm
24
152 lbs
7 - 5 - 0 |
BJJ White Belt
Excellent boxer
Big right hand |
|
BJJ Blue Belt
Brawler
Knockout power |
|
| |
|
Ladies and gentlemen. This fight is 3 rounds, in the featherweight division.
Introducing the fighter to my left, fighting out of the red corner.
With a record of
1 - 0 - 0, fighting out of Hilo, JIM Hatter!
And introducing the fighter to my right, fighting out of the blue corner.
With a record of
7 - 5 - 0, fighting out of Rio de Janeiro, Steve Buscemi!
The judges for this bout are , and .

The bell rings for round one and we are underway!
Buscemi fakes high and shoots in for a takedown but Hatter avoids it really well and circles away.
Buscemi lands a nice shot to the body.
Hatter tries to work over Buscemi's front leg with a kick but Buscemi checks it.
Buscemi shoots for a takedown but Hatter saw that one coming a mile off and avoided it easily.
Buscemi has a takedown stuffed.
JIM Hatter has stuffed three takedown attempts in the round now. That's going to take a lot out of Steve Buscemi.
Hatter jabs at Buscemi's body.
Jab, cross, leg kick. Nice combination by Hatter!
Buscemi shoots in but Hatter avoids the takedown attempt easily.
Buscemi misses with a takedown attempt - Hatter sprawls well and throws a nice strike on the way out which just misses.
Hatter throws a combination but comes up with nothing but fresh air.

That's one minute gone in the round.
Buscemi looks frustrated there after his takedown attempt is stuffed easily.
Buscemi moves his head to the side to avoid a jab but walks straight into a cross.
Hatter's corner calls for a 1,2 combination and Hatter duly obliges.

It looks like Steve Buscemi has been cut.
Buscemi moves out of range of the body kick from Hatter.
A telegraphed takedown attempt from Buscemi is defended easily by Hatter.
Hatter throws a right and a left that Buscemi avoids nicely.
Hatter stuffs a takedown. It's all about dictating where the fight takes place and Hatter wants it to stay on the feet.
Hatter misses with a jab, cross combination.

That's two minutes gone in the round.

Hatter gets caught on his heels momentarily as he allows Buscemi to score an easy takedown into full guard.
Buscemi looks gassed!

Buscemi drops back looking for a heel hook - he quickly realises he's not going to get it but Hatter manages to dive on top of him before he can escape and now Buscemi has Hatter in his guard.
Hatter avoids a guillotine attempt easily.
Buscemi escapes his hips to the side and looks to be working for an armbar. Hatter gives him a little smile and shakes his head. No chance.
Hatter postures up to throw the ground and pound strikes but they don't connect.
Hatter knows he needs to get back to his feet asap. He's simply no match for Buscemi on the ground.

That's three minutes gone in the round.
Hatter trying to stand up but can't free himself from Buscemi's guard.
The ref warns both fighters not to hold the cage as they work up against the meshing.
Hatter wants to control from the top but Buscemi keeps moving.
Buscemi working for a triangle but Hatter defends it easily.
Buscemi had isolated an arm as going for an omaplata. Hatter is defending the submission well but is in a very vulnerable position. Buscemi Is leaning forward trying to finish the omaplata but decides to abandon it, and take Hatter's back instead.
Hatter trying to control the hands but Buscemi won't let him.

That's four minutes gone in the round.
The crowd are getting on the fighters' backs, as the pace has dropped off in the last minute or so.
Buscemi is working really hard to secure the rear naked choke. Hatter defends successfully for a significant amount of time. Both fighters are looking very determined.
The fighters are starting to get a bit slippery now, which will make submissions a bit more difficult.
Buscemi gets his hands free as Hatter looks to control.
Buscemi patiently working for the choke. Which fighter will keep their nerve here?
Hatter trying to control but he's just got himself in more trouble.
Hatter breaks Buscemi's hooks off and manages to turn into his guard.
Buscemi is working from a closed guard but he's struggling to control his opponent.
And thats the end of the round the fighters go back to their corners.
JIM Hatter dominated that round.
The cut man is working on Steve Buscemi's cut.
OK. That's time! The bell goes and we're back to the action.

Hatter stuffs a takedown. It's all about dictating where the fight takes place and Hatter wants it to stay on the feet.
Buscemi looks to score with a jab to the body but Hatter is just out of range.
Good work by Hatter as he checks the leg kick.
Hatter paws at his opponent with the jab and then lunges in with a straight, right on the button.
Hatter misses with the combination.
Hatter throws a series of punches but Buscemi avoids them all with ease.
We've had a slow start to the round here - hopefully the action picks up.
Buscemi shoots in but no luck this time.
Buscemi has a takedown stuffed.
JIM Hatter has stuffed three takedown attempts in the round now. That's going to take a lot out of Steve Buscemi.
Buscemi is breathing heavily.
Buscemi drops his hands and takes a jab to the jaw for his troubles.
That's one minute gone in the round.
Hatter blocks a leg kick.
Hatter jabs at Buscemi's body.
Hatter will need to tighten up his combinations if he doesn't want to gas himself out, swinging at thin air.
Hatter scores with a hook to the body. Buscemi takes a step back and tries to catch his breath.
No luck with that takedown attempt from Buscemi.
JIM Hatter is looking to keep the fight on the feet at all costs.
Hatter misses with a two punch combination.
Hatter lands with a right hand.
Hatter throws a nice looking combination but Buscemi bobs and weaves to avoid any damage.
Buscemi has a takedown stuffed.
That's two minutes gone in the round.
Buscemi shoots in for a takedown but doesn't get it.
Buscemi slips a jab and a cross from Hatter.
Hatter will need to tighten up his combinations if he doesn't want to gas himself out, swinging at thin air.
Nice sprawl there from Hatter as Buscemi shoots in.
Hatter closes the distance and lands a one-two.
Buscemi has a takedown stuffed.
Hatter swinging wilding here.
Buscemi showing good head movement there, avoiding the strikes from Hatter.
That's three minutes gone in the round.
Hatter looks to land a combination but Buscemi avoids it well.
Hatter displays good takedown defense there as he swats away a double leg from Buscemi.
Buscemi shoots in but no luck this time.
A left and a right from Hatter both land. Nice combination.
Buscemi fails to land the takedown.
Hatter paws at his opponent with the jab and then lunges in with a straight, right on the button.

Buscemi is rocked!
That's four minutes gone in the round.
Buscemi shoots in for a takedown. He's persisting with it as Hatter sprawls well. Hatter wins this battle and keeps the fight standing. Buscemi gets slowly back to his feet.
Buscemi is still on wobbly legs! Can Hatter finish him?
Hatter connects with a superb combination that knocks Buscemi out cold! The referee charges across the mat and tackles Hatter before he can land any more shots to the unconscious Buscemi!
Ladies and gentlemen, after 4:13 of round 2, we have a winner by way of KO (Punches). JIM Hatter!
|
|
|
|
|
|
|
|
|
|
|
|
|
|
|
|
|
|
|
|
|
|
|
| S |
C
A |
G |
S |
C
B |
G |
|
S |
C |
G |
|
energy
A | B |
|
hype
A | B |
|
pop
A | B |
|
mgr
A | B |
|
FIGHT
RATING
42% |
|
|
|
|
|
|
