|
|
PBP Commentary |
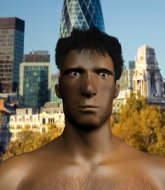
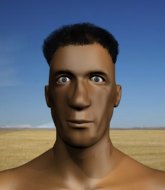
Coming up we have a light heavyweight MMA rules bout between JJ Sutton (ranked 0 p4p, 0 weight class) and Rodger Lapedis (ranked 0 p4p, 0 weight class). Rodger Lapedis has the better chin. Will he look to stand and bang today?
 |
|
 |
| 184 cm
22
212 lbs
4 - 3 - 0 |
|
190 cm
22
220 lbs
5 - 1 - 0 |
Good takedowns
Counter striker
Experienced |
|
BJJ Brown Belt
Brawler
Solid chin |
|
| |
|
Ladies and gentlemen. This fight is 3 rounds, in the light heavyweight division.
Introducing the fighter to my left, fighting out of the red corner.
With a record of
4 - 3 - 0, fighting out of Sydney, JJ Sutton!
And introducing the fighter to my right, fighting out of the blue corner.
With a record of
5 - 1 - 0, fighting out of Sydney, Rodger Lapedis!
The judges for this bout are Eliza Hachem, Skip Squint and Summer Carpenter.

The bell rings for round one and we are underway!
Sutton wants to clinch.
Lapedis shoots in for a takedown. "I don't think so" says Sutton as he avoids it easily.
Lapedis looks frustrated there after his takedown attempt is stuffed easily.

Sutton shoots in for a takedown! He's got it and he's managed to land in full mount! That's better than Sutton was expecting from the takedown attempt, I'm sure!
Lapedis is wriggling around trying to escape.

Sutton working for a submission but Lapedis is keeping him at bay.
Sutton working for a guillotine from mount but Lapedis is in no mood to give up.
Lapedis is wriggling around trying to escape.
Sutton trying to control but he's not successful this time.
Sutton prevents Lapedis from getting the reversal.
Sutton tries to control but Lapedis wriggling away.

That's one minute gone in the round.
Sutton is working for a guillotine from mount but Lapedis frees his head quite easily.
Sutton is in full mount, looking to secure a guillotine but Lapedis is surviving well by controlling Sutton's body position as best he can.
Lapedis working to try and regain half guard.
Lapedis sneaks a leg under to get to half guard.
Lapedis is looking for a sweep. Sutton is wise to his cunning plan and keeps the top position.
Lapedis regains full guard. Nicely done.
Sutton controlling from the top position.
Lapedis has his foot on Sutton's thigh. He's trying to push off and get in position for a triangle, I think. Sutton works his way back into a safe position though.
The fighters are pressed up against the cage, both looking to find a bit of space to work.

That's two minutes gone in the round.
The fighters are starting to perspire pretty heavily.
Lapedis isolates an arm and boxes in a triangle. Sutton stacks Lapedis on his neck as he steps over and passes to the side. He's now in a much more dominant position where he can look to do some serious damage. Nice move by Sutton!
Lapedis looks gassed!
Lapedis gets one leg under and gets the fight to half guard.
Sutton is looking for a kimura but he's never going to get it from there.
Sutton is trying to work for a kimura but Lapedis is defending well.
Lapedis looking for a kimura from the bottom but Sutton passes into side control!
Sutton trying to control the action but Lapedis is working from the bottom.
Lapedis tries to buck Sutton off but Sutton is having none of it.
Both fighters really going for it on the ground here!
Sutton advances nicely into full mount.

That's three minutes gone in the round.
Lapedis defends a decent attempt at a guillotine from Sutton.
Sutton jumps to side control looking for an arm triangle but Lapedis manages to avoid the submission attempt.
Lapedis manages to work his way to half guard, despite Sutton's best efforts.
Lapedis looking for submissions from an awkward position here.
Sutton thumps the canvas. Not on purpose obviously - he just missed Lapedis's head.
Lapedis looking to work for a kimura from the bottom.
Sutton working over Lapedis with some ground and pound. Lapedis looks like he wants out of this position, which is understandable.
Sutton stalling.
Sutton is looking for an arm triangle, whilst trying to pass to side control. Lapedis doesn't seem that keen to cooperate though. No luck this time Sutton.

That's four minutes gone in the round.
Sutton trying to control the action but Lapedis is working from the bottom.
Sutton missing with the ground and pound from half guard.
Lapedis looking for submissions from an awkward position here.
Sutton seems to be looking for submissions.
The fighters are battling for position here. Lapedis manages to regain full guard. Nice work.
Lapedis tries to land a sweep but no joy.
Lapedis is looking for a triangle but Sutton pushes his legs off easily.
Sutton pushes down on Lapedis's leg and manages to get into half guard.
And thats the end of the round the fighters go back to their corners.
JJ Sutton dominated that round.
That's the end of the interval. I'm sure that seemed a lot quicker than a minute for our two fighters! Back to the action.


Sutton drives through and clinches with Lapedis against the cage.
Sutton tries to pull guard but Lapedis won't allow it.
Lapedis successfully pulls guard.
Sutton forces his way into half guard.
Lapedis gets full guard.
Sutton trying to control the position from guard on top but Lapedis is wriggling around, looking for whatever he can.
Sutton pushing down on Lapedis's thigh, trying to pass to half guard. He's managed it... Nice work.
Lapedis wants to get back to full guard.
Lapedis looking to work for a kimura from the bottom.
Lapedis is breathing heavily.
Sutton seems to be looking for submissions.
Sutton content to control rather than advance.
That's one minute gone in the round.
Lapedis actively working from the bottom here.
Sutton moves into full mount! Lapedis won't be happy about that!
The ref warns both fighters not to hold the cage as they work up against the meshing.
Sutton lands a shot to the body, followed up by a shot to the exposed head of his trapped opponent.
Sutton is going olschool here, as he tries to force Lapedis to tap using a forearm choke. This isn't 1993 though, so Lapedis shrugs it off.
Lapedis is working to get back to half guard.
Sutton lands with some strikes.
Sutton looking to ground and pound his opponent to a finish here.
Sutton looking for a guillotine from mount but Lapedis is having none of it.
Lapedis sneaks a leg back under and regains half guard and is working straight away to try and get back to guard. He hasn't managed just yet though.
JJ Sutton overall seems to be getting the better of the ground position in the fight so far.
That's two minutes gone in the round.
Sutton trying to control the action but Lapedis is working from the bottom.
Lapedis looking for submissions from an awkward position here.
Lapedis is looking to regain full guard. Not this time though.
Sutton passes to full mount!
Sutton lands a shot to the body, followed up by a shot to the exposed head of his trapped opponent.
Sutton working Lapedis over with strikes here.
Lapedis is wriggling around trying to escape.
Lapedis regains half guard.
That's three minutes gone in the round.
Lapedis taking some punishment here, with Sutton in his half guard.
Lapedis actively working from the bottom here.
Sutton frees up his trapped foot and advances to mount.
Lapedis is looking to improve his position but Sutton isn't that keen on the idea.
Sutton wants to control the pace but Lapedis is squirming around nicely.
Lapedis manages to regain half guard. Good work.
Lapedis looking for submissions off his back.
Lapedis is refusing to be controlled, as Sutton sits in half guard.
That's four minutes gone in the round.
The crowd are starting to boo a lack of action.
Sutton is going to have to think about doing something other than just controlling because Lapedis is managing to avoid having the position dictated to him.
Lapedis is looking to improve his position.
Lapedis is refusing to be controlled, as Sutton sits in half guard.
Lapedis wants to get back to full guard.
Lapedis looking for submissions from an awkward position here.
Lapedis is looking to regain full guard. Not this time though.

The referee decides to stand the fighters back up.
Excellent takedown into side control there by Sutton.
Lapedis takes an elbow right on the bridge of the nose and winces in pain.
Sutton tries for an arm triangle. That looks pretty tight to me. Is this one over!?! Possibly, maybe, no Sutton has let go of the choke. Obviously it wasn't as tight as we thought!
And thats the end of the round the fighters go back to their corners.
JJ Sutton dominated that second round.
Well, the break between rounds is over. Let's get back to the scrappin! Let's get this one finished - here comes the final round!

Lapedis misses with an uppercut. Sutton saw that one coming.
Lapedis doesn't succeed with the takedown
and Sutton counters with a shoot takedown into half guard.
Sutton is trying for a kimura here. Lapedis looks like he's in a lot of pain... and he's tapping out! Sutton wins by kimura!
Ladies and gentlemen, after 0:45 of round 3, we have a winner by way of Submission (Kimura). JJ Sutton!
|
|
|
|
|
|
|
|
|
|
|
|
|
|
|
|
|
|
|
|
|
|
|
| S |
C
A |
G |
S |
C
B |
G |
|
S |
C |
G |
|
energy
A | B |
|
hype
A | B |
|
pop
A | B |
|
mgr
A | B |
|
FIGHT
RATING
100% |
|
|
|
|
|
|
