|
|
PBP Commentary |
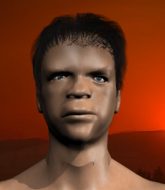
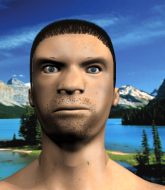
Coming up we have a light heavyweight MMA rules bout between Krayzie Bone (ranked 0 p4p, 0 weight class) and Jimmy Almerson (ranked 0 p4p, 0 weight class). Both fighters look fresh as a daisy as they make their way towards the cage.
 |
|
 |
| 190 cm
22
206 lbs
3 - 0 - 0 |
|
186 cm
19
225 lbs
2 - 2 - 0 |
BJJ Blue Belt
Brawler
KO power |
|
BJJ Blue Belt
Counter striker
Determined |
|
| |
|
Ladies and gentlemen. This fight is 3 rounds, for the light heavyweight championship of the world!
Introducing the champion to my left, fighting out of the red corner.
With a record of
3 - 0 - 0, fighting out of Tokyo, Krayzie Bone!
And introducing the challenger to my right, fighting out of the blue corner.
With a record of
2 - 2 - 0, fighting out of Tokyo, Jimmy Almerson!
The judges for this bout are Kenichi Hosakawa, Yuuki Gou and Taro Takaoka.

The bell rings for round one and we are underway!
Bone throws a low kick but it's checked well by Almerson.

Almerson closes the distance and presses his opponent up against the cage.
Almerson tries to pull guard but Bone won't allow it.
Bone keeps control of Almerson as he tries to wriggle out of the double underhooks.
Almerson wants a takedown but no success here.
Almerson tries for a takedown. No joy.
Krayzie Bone has stuffed three takedown attempts in the round now. That's going to take a lot out of Jimmy Almerson.
Almerson avoiding damage as Bone throws knees to the body.
Almerson is looking for a takedown up against the cage. Bone gets underhooks though and prevents the takedown attempt.
Bone blocking some punches.
Bone looking to throw knees to the head but Almerson is blocking nicely.
Almerson wants to get back to striking at distance but Bone won't allow it.
Almerson fails to pull guard.
Almerson on the defensive, avoiding the knees to the body.
Bone trying to land knees to the body.
Almerson doesn't land with the attempted body shot.
Bone holding his opponent close, against the cage.
Bone missing with knees to the body.
Bone managing to block the knees to the body from Almerson.
Almerson avoids a wild elbow strike from Bone.
We've had a slow start to the round here - hopefully the action picks up.
Bone misses the knee to the body. Nice hip positioning from Almerson.
Bone missing with knees to the body.
The referee is keeping an eye on Almerson - much more stalling and he will separate the fighters.
Knees in the clinch landing for Bone.
Almerson looks gassed!

Bone pushes off and circles away, back to the middle of the mat.
Bone tries to clinch up.
The fighters circling - Bone throws out the jab but it was never going to land.

That's one minute gone in the round.
Almerson uses good footwork to avoid the strikes from Bone.
Bone swinging wilding here.
Bone takes a step towards his opponent and connects with a left hand, before circling away.
Bone moves into the clinch.
Bone manages to break the clinch.
Bone looks to score with a jab to the body but Almerson is just out of range.
Almerson uses good footwork to avoid the strikes from Bone.

Almerson looking to shoot here. He's gone for it and he's landed a takedown into mount! Oh, that's bad for Bone!
Bone wants to hold on but Almerson pushes him away.
Bone swinging wildly from the bottom but he's not landing.
Bone is desperately trying to get back to half guard.
Almerson avoids the attempt from Bone to control.
Bone regains half guard.

That's two minutes gone in the round.
Almerson wants to free his trapped foot but Bone is holding on for dear life with his legs.
The fighters are pressed up against the cage, both looking to find a bit of space to work.
Bone tries to get to full guard but Almerson has control of the leg.
Bone wants to control but Almerson is keeping busy.
Bone wants to get back to full guard.
Almerson throwing punches and elbows but they're not doing any damage.
Bone tries to roll over but Almerson keeps him under control.
Bone is in trouble now - Almerson has advanced to mount!
Almerson lands a shot to the body, followed up by a shot to the exposed head of his trapped opponent.

That's three minutes gone in the round.
Almerson trying to control but Bone is having none of it.
Bone is writhing around trying to get back to his feet.
Bone is in a bad position, trying to hold on for dear life but he is really struggling to maintain any sort of control.
Bone is desperately trying to get back to half guard.

Almerson swings around for an armbar but it's a sloppy attempt and Bone is now in Almerson's guard. A big mistake from Almerson there, giving up the dominant position!
Bone works over Almerson with some ground and pound from guard.
Bone got a little sloppy there for a moment and Almerson has worked his way into a loose triangle - can he finish it?! No, Bone has managed to get both his arms back between Almerson's legs - danger averted.
Bone with a nice head shot there.

That's four minutes gone in the round.
Bone passes Almerson's left leg - he's now in half guard.
Bone missing with the ground and pound from half guard.
Bone throwing punches and elbows but they're not doing any damage.
Bone is figuring out what he wants to do next.
Bone thumps the canvas. Not on purpose obviously - he just missed Almerson's head.
Bone is trying for a guillotine from the top but the pressure isn't in the right place so Almerson is just riding it out for now. Bone eventually gives up the hold.
Bone trying to control the action but Almerson is working from the bottom.
The crowd applaud the fighters efforts here as the round comes to an end.
Bone working Almerson over with strikes.
And thats the end of the round the fighters go back to their corners.
Krayzie Bone dominated that round.
That's the end of the round. The referee orders the cornermen out of the cage so we can get back down to business.

Bone misses with an uppercut.
Almerson moves out of range as Bone strikes.
Bone swings and misses with a hook to the body.
A slow jab from Bone misses its intended target.
Bone pushing out the jab but it's not landing.
Almerson shoots in and bounces Bone off the cage to secure the takedown into guard.
Bone throws his legs up looking to secure a triangle. Oh, that looks pretty tight, I gotta say! Almerson escapes and throws Bone's legs to the side, diving into side control!
Almerson is looking for a kimura. He might have it! No, Bone has escaped the position, nice work there.
Bone is trying to control Almerson's posture but Almerson avoids it.
Bone takes a big shot right to the temple there but he's taken it well.
That's one minute gone in the round.
Almerson misses with the ground and pound.
Bone sneaks a leg under to get back to half guard.
Bone is looking to sinch up a guillotine here but Almerson pulls his head out easily.
Bone regains full guard. Nicely done.
The ref warns both fighters not to hold the cage as they work up against the meshing.
Almerson is breathing heavily.
Bone has a loose triangle. He'll be looking to tighten that up but Almerson can see exactly what he's planning and manages to posture up and free himself.
Almerson passes Bone's left leg - he's now in half guard.
Bone looking to work for a kimura from the bottom.
Almerson throwing shots but Bone is blocking nicely.
That's two minutes gone in the round.
Bone is not content to let Almerson control the position.
Almerson looking to pass the half guard. Not this time.
Bone looking for submissions from an awkward position here.
Bone is looking to improve his position.
Almerson missing with some ground and pound from the half guard.

The referee decides to stand the fighters back up.
Almerson displays good takedown defense there as he swats away a double leg from Bone.
Bone swings wildly with a right hand that was never going to find it's target.
Bone has a takedown stuffed.
That's three minutes gone in the round.
Bone throws out a token jab with nothing on it.
Bone is looking to clinch but Almerson is avoiding it.
Bone fakes high and swings low for a body shot but Almerson manages to avoid it.
Krayzie Bone seems to be the more aggressive standup fighter in this bout.
Bone misses with a straight left.
Bone shoots and misses
and Almerson decides to take the opportunity to score a takedown. He's landed in Bone's guard.
That's three failed takedown attempts in the round for Krayzie Bone. That's going to take a lot out of him.
Almerson drops back for a leg! It's a sloppy attempt though and Almerson jumps back into guard quickly, to retain the dominant position.
Bone keeping moving, preventing Almerson from controlling successfully.
Bone keeping full guard, as Almerson tries to pass.
Bone looking for submissions off his back, moving his hips, looking for an opening.
Almerson wants to control from the top but Bone keeps moving.
That's four minutes gone in the round.
Almerson throws a strike but Bone rolls with it and manages to sweep. Now he's in guard on top.
Bone throwing shots from guard but he's hitting more mat than opponent.
Bone has gone for a leg lock! Almerson slips out almost immediately though and dives into Bone's guard.
Almerson wants to control from the top but Bone keeps moving.
Almerson slips effortlessly into side control - very nice.
Bone manages to work his way to half guard, despite Almerson's best efforts.
And thats the end of the round the fighters go back to their corners.
Jimmy Almerson showed his class in that round. I'd imagine he'll take it on all the scorecards.
That's time! Back to the action! This is the final round!

Almerson steps to the side to avoid the strikes from Bone.
Almerson tries to close the distance and clinch up against the cage but Bone paws at him with a jab and circles away.
Bone tries for a takedown but Almerson circles away easily
and Almerson counters with a three punch combination, finished off with a leg kick. Nice work.
Bone throws a looping overhand right but Almerson ducks down to avoid it.
Bone throws a hook but Almerson avoids it easily.
A big right from Bone misses.
A punch combination from Bone misses.
Jab by Bone.
Almerson keeps the fight standing with a nice sprawl.
Bone tries to close the distance and clinch but Almerson swats him to one side with an open hand palm strike and circles away.
Bone throws an overhand right that lands on Almerson's shoulder, as Almerson tries to avoid the shot.
Almerson scores a trip takedown into side control. Nice.
Bone manages to land a sweep and he's now on top! Lovely Jiu Jitsu!
Almerson is looking for a sweep. Bone is wise to his cunning plan and keeps the top position.
Jimmy Almerson has got the better of the ground game so far.
That's one minute gone in the round.
Bone is looking for an arm triangle, whilst trying to pass to side control. Almerson doesn't seem that keen to cooperate though. No luck this time Bone.
Almerson moves into full guard.
Both fighters are breathing heavily.
Bone throws and elbow that misses. Almerson uses the momentum to reverse the position. He's now in Bone's guard. Nice move by Almerson!
Bone is looking for a triangle but Almerson pushes his legs off easily.
Bone utilising some decent striking defenses from the guard, preventing the ground and pound.
Bone is throwing his legs up, looking for submissions. Almerson is aware though and is defending well.
Bone looking for a guillotine here but Almerson defends easily.
That's two minutes gone in the round.
The crowd are starting to boo a lack of action.
Almerson is looking to stand up but Bone won't let him.
Almerson thinks about going for a leg but decides against it, in order to maintain the position.
Bone is trying to keep Almerson in close.
Almerson trying to control the position from guard on top but Bone is wriggling around, looking for whatever he can.
Well, the referee has seen enough. Neither fighter is active enough on the ground so he's stood them back up.
Bone misses with an uppercut.
Bone throws a hook to the side of Almerson's head but Almerson sees it coming and ducks under it beautifully.
Good exchange - Almerson coming out on top.
Bone scores with a nice right hand.
That's three minutes gone in the round.
Bone keeps the fight on the outside.
Almerson fakes high and shoots in for a takedown but Bone avoids it really well and circles away.
Bone digs a good body shot into Almerson's ribs.
Almerson tries to move into range but Bone moves to the side and lands with a nice right hand.
Bone is really head hunting here, hardly looking to strike to the body at all.
Bone throws out a loose jab but Almerson uses good head movement to avoid it.
Jimmy Almerson is looking to throw some combinations by the looks of things.
Almerson steps to his left, right into the path of a big body kick from Bone. That one must have hurt.
A big right from Bone misses.
Bone wants to clinch
and Almerson counters with a three punch combo that has Bone backing up. Bone nods at Almerson to acknowledge the strikes.
Bone tries to clinch there but Almerson circles away.
Almerson shoots in for a takedown but Bone shows good takedown defense.
Bone tries to land with a swinging hook to the body but Almerson was well out of range. Poor timing from Bone.
Bone misses the shot to the body.
That's four minutes gone in the round.
Bone throws a shot from downtown. Almerson moves away and avoids it.
Bone throws the left hand but Almerson avoids the punch easily.
Almerson moves in looking to clinch but Bone pushes him off.
Bone keeps the fight on the outside.
Bone looks to throw the jab but Almerson is out of range.
Almerson gets taken down but at least he's managed to land in guard.
Almerson looking for subs off his back but Bone has passed one foot through into half guard.
Almerson has hold of Bone's hands but Bone slips his arm to the side and lands an elbow.
Bone takes advantage of the dominant position to land a couple of big hammer fists.
The crowd cheering loudly, showing their appreciation for the quality fight we're seeing here.
Almerson taking some punishment here, with Bone in his half guard.
Almerson avoiding damage under a succession of punches from Bone.
And that's the end of the fight!
Krayzie Bone showed his dominance in that final round.
I think Bone has won this one but let's see what the judges have to say. Over to the ring announcer for the scorecards.
Ladies and gentlemen, after 3 rounds of action, we go to the scorecards for a decision.
Judge Kenichi Hosakawa scores the fight 29:28
Judge Yuuki Gou scores the fight 29:28
Judge Taro Takaoka scores the fight 29:28
In favor of your winner, by unanimous decision... Krayzie Bone!
Krayzie Bone retains his light heavyweight title!
|
|
|
|
|
|
|
|
|
|
|
|
|
|
|
|
|
|
|
|
|
|
|
| S |
C
A |
G |
S |
C
B |
G |
|
S |
C |
G |
|
energy
A | B |
|
hype
A | B |
|
pop
A | B |
|
mgr
A | B |
|
FIGHT
RATING
64% |
|
|
|
|
|
|
