|
|
PBP Commentary |
Coming up we have a light heavyweight MMA rules bout between Finnegan Brewzer (ranked 0 p4p, 0 weight class) and John Force (ranked 0 p4p, 0 weight class). Brewzer comes into the arena with The Way I Feel blaring out of the sound system. Finnegan Brewzer has the better chin. Will he look to stand and bang today?
 |
|
 |
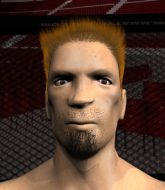
| 188 cm
19
210 lbs
2 - 2 - 0 |
|
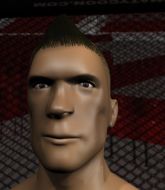
180 cm
24
210 lbs
3 - 2 - 0 |
BJJ Blue Belt
Basic striking
Very strong |
|
BJJ Brown Belt
Counter striker
Knockout power |
|
| |
|
Ladies and gentlemen. This fight is 3 rounds, in the light heavyweight division.
Introducing the fighter to my left, fighting out of the red corner.
With a record of
2 - 2 - 0, fighting out of Montreal, Finnegan Brewzer!
And introducing the fighter to my right, fighting out of the blue corner.
With a record of
3 - 2 - 0, fighting out of Montreal, John Force!
The judges for this bout are Elvis Blanc, Gregory Folan and Trevor Gratis.

The bell rings for round one and we are underway!
Force fakes with the hands and throws a leg kick but Brewzer is out of range.
Brewzer tries to clinch there but Force circles away.

Force looking for a takedown here - he's got it.
Force stops Brewzer from standing up.
The fighters are pressed up against the cage, both looking to find a bit of space to work.
Force is taking a break and basically stalling. The referee will not allow him to do that for long.
Force throwing elbows and punches but not connecting, as Brewzer works some decent striking defense from the bottom.
Brewzer is looking to get back to his feet but can't, whilst Force is controlling him.
Force pushing down on Brewzer's thigh, trying to pass to half guard. He's managed it... Nice work.
Force trying to control the action but Brewzer is working from the bottom.
The ref warns both fighters not to hold the cage as they work up against the meshing.
Brewzer is looking to escape.
Brewzer wants to stand back up but Force manages to pass into side control.
Force cracks Brewzer with an elbow. That is naaassty.

That's one minute gone in the round.
Brewzer tries to escape but Force is in control.
Brewzer trying to remain calm as Force controls from the top position.
Brewzer is trying to stand back up. He's worked his way up against the cage but Force has just dragged him back down to the mat.
Force lands a knee to the body and follows it up with some ground and pound to the head. That will wear Brewzer down.

Force is looking for a kimura. He might have it! No, Brewzer has escaped the position, nice work there.
Force scores with a couple of short elbows.
Brewzer is trying to buck Force off.
Force is looking to take a break and control but Brewzer is keeping him honest, looking to work from the bottom.
The fighters are starting to get a bit slippery now, which will make submissions a bit more difficult.
Force is trying to get an arm triangle but Brewzer is defending well.

That's two minutes gone in the round.
Force wants to control but Brewzer is keeping him busy.
Brewzer pushes Force away and creates a bit of space to escape. He's almost out here... but no, Force gets a good hold of his legs and remains firmly in side control.
Force working the ground and pound but Brewzer is defending the strikes.
Force cracks Brewzer with an elbow. That is naaassty.
Brewzer wants to get back to his feet.
Force misses with an attempted head punch from side control.
Force working hard here to secure a kimura but he's not really in the right position for it.
Brewzer pushes Force away and creates a bit of space to escape. He's almost out here... but no, Force gets a good hold of his legs and remains firmly in side control.

That's three minutes gone in the round.

Brewzer sneaks out the side door and pushes Force away - he's back to his feet. The crowd show their appreciation for the escape.
Force avoids the clinch attempt nicely.
Brewzer looks to score with a combo but nothing lands.
Brewzer tries to close the distance and clinch up but Force swats him away and circles back towards the center.
Force shoots in for a takedown but doesn't get it.
Brewzer tries to clinch but is not successful on this occasion.
Force misses with a jab, cross combination.
Brewzer fails with an attempt to clinch.
Brewzer lunges in with swinging rights and lefts but Force circles away quickly and effectively.
Brewzer with a poor takedown
and Force counters with a nice double leg into side control. Brewzer won't be happy with that.
Force swings around for an armbar but Brewzer sees it coming a mile off and turns beautifully into Force's guard.
Force looks gassed!
A big thud reverberates around the arena there as Brewzer accidentally thumps the mat. Hopefully he's not broken his hand.
Brewzer has decided he wants to stand but the closed guard of Force is proving hard to escape from.

That's four minutes gone in the round.
Force not looking particularly offensive just at the moment.
Brewzer stands up from Force's guard - Brewzer perhaps looking for a knockout.
Brewzer fails in his attempt to clinch.
Brewzer tries to clinch but Force is having none of it.
Brewzer looks to land a combination but Force avoids it well.

Brewzer clinches.
Brewzer presses Force against the cage and delivers a mid-strength body shot.
Brewzer comes over the top with an elbow. That landed flush.
Brewzer is struggling to control the position.
Brewzer throws an elbow but it misses.
Force is trying to work out of this bad position, with his back against the cage.
Brewzer tries to land a knee to the body but he is off balance and Force avoids it.
Brewzer using the Thai plumb to throw knees but Force has his back arched nicely, preventing the strike.
And thats the end of the round the fighters go back to their corners.
John Force dominated that round.
The fighters get back to their feet, the hooter sounds and we're back to the action!

Force circles away from the clinch attempt.
Force is pinned up against the cage taking some big shots here. The referee is looking closely deciding whether he should stop the fight.
Force shoots in and bounces Brewzer off the cage to secure the takedown into guard.
Force won't allow Brewzer to get back to his feet.
Force connects with a couple of short punches.
Brewzer keeping moving, preventing Force from controlling successfully.
Force landing with the ground and pound.
Force tries to free his leg and advance position but Brewzer is retaining full guard.
That's one minute gone in the round.
Force drops back looking for a leg! Brewzer is in trouble here! The fighters roll with the hold and Brewzer manages to kick Force off! Force jumps back into Brewzer's guard.
Brewzer is looking to get back to his feet but can't, whilst Force is controlling him.
Brewzer trying desperately to get back to his feet here but he's not having any joy at all. He's going to tire himself out if he's not careful.

The referee has ruled that neither fighter is active enough on the ground and has stood them back up.
Brewzer clinches up with Force and pushes him back against the cage.
Force fails to pull the fight into his guard.
Force wants to strike at distance but he can't break free of the clinch.
Brewzer landing knees to the body.
Force is breathing heavily.
Brewzer misses with an elbow over the top.
Brewzer changes levels and goes for a takedown here. Force fights it off and pushes away nicely.
That's two minutes gone in the round.
Force showing good head movement there, avoiding the strikes from Brewzer.
Brewzer tries to clinch up.
Force showing good head movement there, avoiding the strikes from Brewzer.
Brewzer clinches.
Brewzer wants a takedown but no success here.
Brewzer throws an elbow but it misses.

Brewzer escapes the clinch and we're back to striking.
Brewzer tries to grapple but his opponent circles
and Force counters with a nice single leg takedown and he's in Brewzer's guard now.
Force wants to pass the guard but Brewzer is keeping the position.
Force stands up over Brewzer, holding his feet. He dives back in and lands a decent shot to the head.
That's three minutes gone in the round.
Brewzer is looking to get back to his feet but can't, whilst Force is controlling him.
Brewzer is looking to stand back up but Force counters by passing into half guard. Oops... bit sloppy there by Brewzer.
Force wants to take a breather but Brewzer is having none of it.
Brewzer tries to kick Force off in order to stand up. Force Avoids the leg push though and dives into side control.
Force has the superior BJJ but he's also working some ground strikes into his gameplan.
Brewzer wants to get back to his feet.
Force is trying to land an Americana. He has the arm isolated but Brewzer is keeping cool and he's avoided the danger for now.
Brewzer tries to wriggle free to get back to his feet but he's given up his back! Oops.
Force has his hand under the chin of his opponent looking for the choke. He's nearly got it! This one could be all over! But no, Brewzer has freed his hand and lives to survive another
well, another couple of seconds at least!
That's four minutes gone in the round.
Force has the rear naked choke here! This is very bad for Brewzer! Can he survive? No! He's out! Force gets to his feet and celebrates with his cornermen. He looks absolutely delighted. In the post fight interviews he takes time to thank his parents and everyone who has believed in him from the start. How sweet.
Ladies and gentlemen, after 4:30 of round 2, we have a winner by way of Submission (RNC). John Force!
|
|
|
|
|
|
|
|
|
|
|
|
|
|
|
|
|
|
|
|
|
|
|
| S |
C
A |
G |
S |
C
B |
G |
|
S |
C |
G |
|
energy
A | B |
|
hype
A | B |
|
pop
A | B |
|
mgr
A | B |
|
FIGHT
RATING
43% |
|
|
|
|
|
|

