|
|
PBP Commentary |
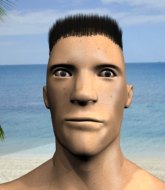
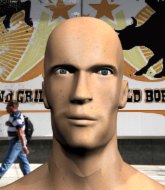
Coming up we have a light heavyweight MMA rules bout between Mark Coleman (ranked 0 p4p, 0 weight class) and brick wall (ranked 0 p4p, 0 weight class). Man, I cannot wait for this one!
 |
|
 |
| 185 cm
18
205 lbs
2 - 0 - 0 |
|
150 cm
19
205 lbs
7 - 5 - 0 |
BJJ White Belt
Brawler
Big heart |
|
BJJ Blue Belt
Brawler
Determined |
|
| |
|
Ladies and gentlemen. This fight is 3 rounds, in the light heavyweight division.
Introducing the fighter to my left, fighting out of the red corner.
With a record of
2 - 0 - 0, fighting out of New York, Mark Coleman!
And introducing the fighter to my right, fighting out of the blue corner.
With a record of
7 - 5 - 0, fighting out of New York, brick wall!
The judges for this bout are Reed Andrews, Eddie Farnsworth and David Schapiro.

The bell rings for round one and we are underway!

wall shoots in with a lovely double leg takedown. Coleman manages to land in full guard to minimise the damage.

wall gets to his feet. Coleman looking to butt scoot but the ref puts an end to that. On your feet son!
wall uses good head movement to avoid the hook from Coleman.
Coleman paws at his opponent with the jab and then lunges in with a straight, right on the button.
Coleman goes for a spinning back kick but it misses.
Coleman displays good takedown defense there as he swats away a double leg from wall.
Coleman is looking to clinch but wall is avoiding it.
wall moves away from the strike by Coleman.
wall uses good head movement to avoid the hook from Coleman.
Coleman with a nice cross.
wall keeping a good distance there, avoiding the body shot.
Coleman tries to close the distance and clinch up but wall swats him away and circles back towards the center.
wall shoots for a takedown but Coleman saw that one coming a mile off and avoided it easily.
Coleman throws a right and a left that wall avoids nicely.
Coleman waving his hands out in front of him, looking to distract wall.

That's one minute gone in the round.
wall scores with a nice takedown into half guard. Let's see what he's got on the ground.
Coleman is looking to regain full guard. Not this time though.
Coleman on his back here. We all know that wrestlers don't like being on their back so let's see if Coleman tries to get out of the position.
Coleman is breathing heavily.
wall wants to get back to his feet.
wall decides to stand up and try his luck on the feet.
A big right from Coleman misses.
wall defending well as Coleman loads up on a big left hand.
Coleman pivots as if he's going to throw a leg kick but stops half way.

That's two minutes gone in the round.
Coleman bobbing and weaving, closes the distance and lands a hook to the side of wall's head.
wall shoots in for a takedown but Coleman shows good takedown defense there and keeps this one on the feet.
Mark Coleman has stuffed three takedown attempts in the round now. That's going to take a lot out of brick wall.
wall shoots in for a takedown - he's clinched up with Coleman but Coleman pushes him off and we're back to square one.
Coleman is using his reach advantage well here, landing the more effective single shots from range.
Coleman keeps the fight standing with a nice sprawl.
Coleman looks to throw the jab but wall is out of range.
Coleman displays good takedown defense there as he swats away a double leg from wall.
wall shoots in looking for a takedown. Coleman tries to sprawl out of it but wall keeps driving through. The fighters are pinned against the ropes. Coleman manages to get underhooks and after a bit of a struggle, circles away and we're back to standing.
Coleman throws a big shot that misses.
wall fails with a takedown attempt from distance.
wall shoots in for a takedown. "Ole!" shouts Coleman as he jumps to the side.
Mark Coleman seems to be the more aggressive standup fighter in this bout.
Coleman tries to score with an inside leg kick but telegraphs it and wall is able to avoid easily.

That's three minutes gone in the round.
wall moves out of range of the body kick.
wall avoids a lazy jab quite easily.
wall blocks a jab.
Coleman fails in his attempt to clinch.
Coleman throws a head kick but wall moves out of range.
wall shoots in with a lovely double leg takedown. Coleman manages to land in full guard to minimise the damage.
wall has decided he wants to stand but the closed guard of Coleman is proving hard to escape from.
wall stands up from Coleman's guard - wall perhaps looking for a knockout.

That's four minutes gone in the round.
A big right from Coleman misses.
wall shoots in for a takedown from distance. He catches Coleman napping and manages to drive through into side control!
Coleman tries to work a leg under to get back to half guard but wall wriggles his own leg back out and remains in side control.
wall stands up and beckons Coleman to his feet.
Mark Coleman is looking to keep the fight on the feet at all costs.
wall looks for a takedown here. Will he get it? Coleman is fending him off so far but wall persists. Nope, Coleman circles away and we're back to standing.
Coleman stuffs the takedown attempt from wall. wall gets slowly back to his feet.
The crowd applaud the fighters efforts here as the round comes to an end.
Coleman looks to land a combination but wall avoids it well.
wall looks frustrated there after his takedown attempt is stuffed easily.
And thats the end of the round the fighters go back to their corners.
brick wall dominated that round.
That's time! Coleman's corner gives him a slap on the ass as he gets ready to fight.

Coleman misses the jab.
Coleman throws a wild body kick that wall sees coming a mile off.
Coleman stuffs a takedown. It's all about dictating where the fight takes place and Coleman wants it to stay on the feet.
Coleman ducks down and throws a hook to the body but wall moves away.
Coleman throws an uppercut from half a mile away. wall sees it coming and avoids it easily.
wall moves out of range of the body kick.
Nice sprawl there from Coleman as wall shoots in.
wall uses good head movement to avoid the hook from Coleman.
wall changes levels and looks for a double leg takedown. Coleman tries to avoid it but wall manages to keep hold of a leg and drag Coleman to the ground. Coleman escapes though and pops straight back up to his feet.
Mark Coleman has stuffed three takedown attempts in the round now. That's going to take a lot out of brick wall.
wall moves out of range as Coleman throws a body kick.
We've had a slow start to the round here - hopefully the action picks up.
wall drops down and drives through with a powerful takedown into guard.
The fighters are starting to perspire pretty heavily.
wall has decided he wants to stand but the closed guard of Coleman is proving hard to escape from.
Both fighters are absolutely exhausted here.
Coleman is avoiding any damage by keeping wrist control.
Coleman will need to keep those long limbs tucked in whilst he's on the ground, to prevent any submissions.
That's one minute gone in the round.
wall decides to stand up and beckons his opponent to follow.
wall closes the distance and clinches up with Coleman, looking for a takedown. wall pushes Coleman against the ropes but Coleman circles to the side and manages to break the clinch.
wall fails to land the takedown.
wall uses good footwork to avoid the strikes from Coleman.
wall looks frustrated there after his takedown attempt is stuffed easily.
Coleman lands with a shot to the body.
Mark Coleman is looking to throw some combinations by the looks of things.
That's two minutes gone in the round.

Coleman gets in close and instigates a clinch.
wall tries to jump guard but he falls flat on his backside. Coleman smiles and moves away.
wall uses decent footwork to sidestep a right hand from Coleman.
wall drives through with a takedown into guard.
wall gets to his feet - Coleman follows without any prompting.
Coleman lands an overhand right.
wall shoots in for a takedown. "Ole!" shouts Coleman as he jumps to the side.
Coleman lands a straight punch to the body, keeping wall at a distance.
A telegraphed takedown attempt from wall is defended easily by Coleman.
wall tries to shoot in for a takedown. He's got hold of a leg but Coleman swivels and escapes.
That's three minutes gone in the round.
Coleman connects with a slap. Keep your fist closed son.
wall has a takedown stuffed.
Coleman lunges in with swinging rights and lefts but wall circles away quickly and effectively.
A really sloppy takedown attempt there from wall.
wall takes one to the side of the head.
wall bobs and weaves well there to avoid the strikes.
A really sloppy takedown attempt there from wall.
wall shoots in for a takedown and gets it.
brick wall has got the better of the ground game so far.
wall seems to have lost interest with the ground game and is thinking about standing back up.
That's four minutes gone in the round.
Coleman gets back to full guard.
wall wanted to stand there but Coleman had control of the position.
And thats the end of the round the fighters go back to their corners.
brick wall showed his class in that round. I'd imagine he'll take it on all the scorecards.
That's the end of the interval. I'm sure that seemed a lot quicker than a minute for our two fighters! Back to the action. This is the final round!

wall fakes an overhand right and shoots for a takedown. Coleman sprawls well initially but wall persists and gets the takedown into half guard.
Coleman is doing well to avoid being mounted. He's controlling the position at the moment.
wall wants to stand up but Coleman has a hold of him and won't allow it.
Coleman is trying to stand.
Both fighters are breathing heavily.
That's one minute gone in the round.
wall decides to stand up.
wall shoots in for a takedown but doesn't get it.
wall dives in and grabs Coleman's left leg, looking for a takedown. Coleman pushes down on wall's head and hops out.
Coleman waving his hands out in front of him, looking to distract wall.
wall dives in and grabs Coleman's left leg, looking for a takedown. Coleman pushes down on wall's head and hops out.
Mark Coleman has stuffed three takedown attempts in the round now. That's going to take a lot out of brick wall.
wall drops his hands and takes a jab to the jaw for his troubles.
Coleman looks to land a left hand but wall moved out of range nicely.
wall shoots in for a double leg but Coleman sprawls well. That's going to sap some energy.
wall closes the distance, clinches up and gets a nice trip takedown into side control. Very smooth.
wall stands up and beckons Coleman to his feet.
That's two minutes gone in the round.
Coleman will need to tighten up his combinations if he doesn't want to gas himself out, swinging at thin air.
Coleman displays good takedown defense there as he swats away a double leg from wall.
Coleman throws a hook to the body but it doesn't connect.
wall is trying hard to land a takedown here. Coleman sprawls well and keeps this one on the feet.
Coleman is looking to clinch.
wall throws a looping left and ducks down for a takedown. He's got his arms around Coleman's waist but Coleman gets an underhook and avoids the takedown by throwing wall off to one side.
wall on the wrong end of a nice hook.
wall dives in and grabs Coleman's left leg, looking for a takedown. Coleman pushes down on wall's head and hops out.
wall fakes high and shoots in for a takedown but Coleman avoids it really well and circles away.
Coleman clinches up against the ropes.
That's three minutes gone in the round.
wall gets control of Coleman's arms and successfully pulls guard. wall will no doubt be looking for submissions off his back.
wall wants to stand but Coleman is controlling the position.
Coleman trying to stand up but can't free himself from wall's guard.
wall wants to stand up but Coleman is controlling him.
wall has a closed guard, preventing Coleman from standing up.
That's four minutes gone in the round.
The crowd are starting to boo a lack of action.
wall wants to get back to his feet but Coleman is in a dominant position and won't allow it.
Mark Coleman has stepped it up - he knows he needs a finish here!
Coleman tries to stand but wall is controlling from the bottom.

Neither fighter is doing enough for the referee's liking and he's decided to stand them back up.
Coleman keeps the fight standing with a nice sprawl.
wall avoids the body shot from Coleman.
Coleman throws a nice looking combination but wall bobs and weaves to avoid any damage.
wall shoots in looking for a double leg takedown. Coleman defends it nicely.
Coleman fails to land with a series of punches.
And that's the end of the fight!
brick wall comfortably won the final round on my scorecard.
I've got wall winning every round here. Surely the decision will go his way and he'll pick up a well deserved decision victory. Over to the ring announcer for the scorecards.
Ladies and gentlemen, after 3 rounds of action, we go to the scorecards for a decision.
Judge Reed Andrews scores the fight 27:30
Judge Eddie Farnsworth scores the fight 27:30
Judge David Schapiro scores the fight 27:30
In favor of your winner, by unanimous decision... brick wall!
|
|
|
|
|
|
|
|
|
|
|
|
|
|
|
|
|
|
|
|
|
|
|
| S |
C
A |
G |
S |
C
B |
G |
|
S |
C |
G |
|
energy
A | B |
|
hype
A | B |
|
pop
A | B |
|
mgr
A | B |
|
FIGHT
RATING
49% |
|
|
|
|
|
|
