|
|
PBP Commentary |
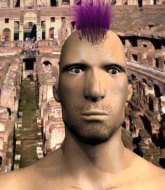
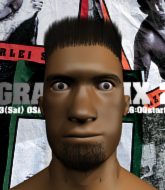
Coming up we have a bantamweight MMA rules bout between Kanye Yamamoto (ranked 0 p4p, 0 weight class) and George Mako (ranked 0 p4p, 0 weight class). Yamamoto comes to the cage accompanied by No Way Out by ZZ. Both fighters look fresh as a daisy as they make their way towards the cage.
 |
|
 |
| 169 cm
22
145 lbs
2 - 1 - 0 |
|
160 cm
18
140 lbs
3 - 1 - 0 |
BJJ Blue Belt
Counter striker
Prefers ground |
|
BJJ Blue Belt
Basic striking
Solid chin |
|
| |
|
Ladies and gentlemen. This fight is 3 rounds, in the bantamweight division.
Introducing the fighter to my left, fighting out of the red corner.
With a record of
2 - 1 - 0, fighting out of Montreal, Kanye Yamamoto!
And introducing the fighter to my right, fighting out of the blue corner.
With a record of
3 - 1 - 0, fighting out of Montreal, George Mako!
The judges for this bout are William Peck, Steve Smith and Gregory Folan.

The bell rings for round one and we are underway!
Yamamoto connects nicely with a jab. Noted by the judges no doubt.
Crunch! Yamamoto slams his shin into Mako's torso.

Yamamoto gets a takedown into half guard.

Yamamoto looking for a kimura but he'll have to free his other leg if he wants to finish that. Perhaps he's just using it as a distraction technique.
Mako slips a foot under and gets full guard. Nice work.
Mako tries to land a sweep but no joy.
Yamamoto trying to control but Mako is working from the bottom.
Mako lands a beautiful switch and he's in full mount! That could spell trouble for Yamamoto!
Mako has control of Yamamoto's right arm, working for a kimura. It's a bit of a token attempt though and Yamamoto regains control of the situation pretty easily.

That's one minute gone in the round.
Mako scores with a couple of good head shots there.
Mako controlling from the full mount.
Mako looking for a guillotine from mount but Yamamoto is having none of it.
Yamamoto is wriggling around trying to escape.
Mako has control of Yamamoto's right arm, working for a kimura. It's a bit of a token attempt though and Yamamoto regains control of the situation pretty easily.
Yamamoto can't escape the position.
Mako postures up and cracks his opponent a couple of times before moving back into close ground control. Yamamoto looks a forlorn figure.
Yamamoto is desperately trying to improve his position but Mako has a good base and remains in mount.

That's two minutes gone in the round.
A lull in the action here being met with boos from the crowd.
Yamamoto slips a leg in and gets back to half guard.
The fighters are battling for position here. Yamamoto manages to regain full guard. Nice work.
Yamamoto keeping moving, preventing Mako from controlling successfully.
Mako looks gassed!

Mako gets to his feet. Yamamoto looking to butt scoot but the ref puts an end to that. On your feet son!
Mako connects with a solid leg kick.
Yamamoto connects with a solid leg kick.
Mako misses with a left hand
and Yamamoto counters with a nice double leg into guard.
Yamamoto sneaks a leg through and gets to half guard. That was like a knife through butter how easily he passed Mako's guard.
Yamamoto is trying to work for a kimura but Mako is defending well.
Yamamoto is trying for a guillotine from the top but the pressure isn't in the right place so Mako is just riding it out for now. Yamamoto eventually gives up the hold.
Mako is pressing down on Yamamoto's left leg trying to get back to full guard. He's managed it.

That's three minutes gone in the round.
Yamamoto won't allow Mako to sweep him here.
Yamamoto is trying to work a guillotine from the top, or something like that? Don't know how he thinks he's going to get a finish from there.
Yamamoto wants to control from the top but Mako keeps moving.
Yamamoto advances to half guard.
Mako trying to control but Yamamoto postures up.
Yamamoto controlling the action here.
Yamamoto is trying to work for a kimura but Mako is defending well.
Yamamoto is working for a kimura but Mako is defending it quite comfortably.

That's four minutes gone in the round.
The crowd are getting on the fighters' backs, as the pace has dropped off in the last minute or so.
Mako works his way to full guard. Good work.
Mako has a closed guard, preventing Yamamoto from standing up.
Yamamoto looking to pass the guard.
The fighters are pressed up against the cage, both looking to find a bit of space to work.
A big thud reverberates around the arena there as Yamamoto accidentally thumps the mat. Hopefully he's not broken his hand.
Mako is working from a closed guard but he's struggling to control his opponent.
Mako punching from the bottom.

It looks like we're going to have a standup here. Neither fight is doing enough on the ground.
Mako throws a lazy head kick
and Yamamoto finishes the little exchange by landing a big kick to the body.
Mako swings and misses with a shot to the body
and Yamamoto counters with a two punch combo.
The crowd applaud the fighters efforts here as the round comes to an end.
Yamamoto drives through with a really nice takedown into side control.
And thats the end of the round the fighters go back to their corners.
Kanye Yamamoto dominated that round.
That's the end of the interval. I'm sure that seemed a lot quicker than a minute for our two fighters! Back to the action.

Mako avoids a low kick by using good footwork.
Mako throws an off balance right hand
and Yamamoto counters with a takedown into full mount! That could mean trouble for Mako!
Yamamoto won't let Mako get back to his feet... He wants to keep the fight where it is for now.
Kanye Yamamoto overall seems to be getting the better of the ground position in the fight so far.
Mako is writhing around trying to get back to his feet.
Mako is trying desperately to improve position.
Yamamoto landing strikes from the mount and Mako is in trouble!
Mako tries to hold on but Yamamoto pushes him away.
Mako slips a leg in and gets back to half guard.
Mako looking to work for a kimura from the bottom.
Yamamoto is nestled in close to Mako, controlling him well. He's worked in a nice elbow to the side of the head as well, for good measure.
Mako trying to control from the bottom.
Yamamoto seems very keen to just sit and control from half guard but Mako does not like that idea so much and is remaining active off his back.
Both fighters are absolutely exhausted here.
Yamamoto frees up his trapped foot and advances to mount.
Mako tries to reverse the position but Yamamoto maintains control.
That's one minute gone in the round.
Mako tries to lock up and control but Yamamoto gives him a forearm to the face and pushes him away.
Mako swinging wildly from the bottom but he's not landing.
Mako wants to control but Yamamoto is having none of it.
Mako is trying to escape the mount.
Mako's corner are shouting for him to stand up but that's bad cornering - how is he meant to stand up when he's mounted? He should be looking to improve his position on the ground before trying to stand back up.
Mako bucks up and manages to get a nice reversal! He's in guard on the top - nicely done!
Yamamoto is trying to keep Mako in close.
Mako trying to control but Yamamoto is working from the bottom.
Mako wants to pass the guard but Yamamoto is keeping the position.
Yamamoto keeping moving, preventing Mako from controlling successfully.
That's two minutes gone in the round.
My god... these two guys really need to pick up the pace or everyone will leave to go get a beer.
Mako sitting in guard here, content to control.
Yamamoto is looking for a triangle but Mako pushes his legs off easily.
Yamamoto working for a triangle but Mako defends it easily.
The referee has ruled that neither fighter is active enough on the ground and has stood them back up.
Mako fails with a rather predictable takedown attempt.
Mako throws a body kick, spinning off balance
and Yamamoto counters with a shoot takedown into half guard.
Yamamoto is trying to control the action in half guard but Mako is working away on the bottom, looking perhaps to get back to full guard.
Mako tries to kick Yamamoto off but Yamamoto keeps his base steady and stays in half guard.
Mako trying to hold on to Yamamoto's head to control him but Yamamoto postures up.
Yamamoto working the head and body with strikes.
That's three minutes gone in the round.
Mako is staying active underneath Yamamoto, who seems content to just control the action from this position.
Mako is pressing down on Yamamoto's left leg trying to get back to full guard. He's managed it.
Mako pulls Yamamoto in to control the position.
The ref warns both fighters not to hold the cage as they work up against the meshing.
Mako manages to sweep nicely, so he's now on top. Yamamoto manages to get himself to full guard.
Mako wants to pass the guard but Yamamoto is keeping the position.
Mako gets to his feet - Yamamoto follows without any prompting.
Mako throws a predictable looking body shot
and Yamamoto counters with a nice body kick.
Kanye Yamamoto is looking to throw some combinations by the looks of things.
Yamamoto gets the takedown into side control.
Mako manages to get one leg in to regain half guard.
Mako moves into full guard.
Mako has his feet on Yamamoto's hips. He pushes off and gets to his feet. Nice work.
Mako misses with a combination
and Yamamoto counters with a nice single leg takedown and he's in Mako's guard now.
That's four minutes gone in the round.
We've seen a great period of action over the last minute or so - credit to both fighters for leaving it all in the cage!
Mako lands a beautiful switch and he's in full mount! That could spell trouble for Yamamoto!
Yamamoto working to try and regain half guard.
Yamamoto wants to control but Mako is having none of it.
Mako trying to control but he's not successful this time.
Yamamoto is trying desperately to improve position.
Mako tries to control but Yamamoto wriggling away.
Yamamoto bucks up and manages to get a nice reversal! He's in guard on the top - nicely done!
As the round comes to an end the crowd are showing their appreciation for a great round of action.
Yamamoto drops back, looking for a kneebar! Mako looks panicked! The fighters roll across the mat, one looking to finish, one looking to escape. Mako looks to have wriggled free... Yes, he's got his leg free and he's dived into side control! Good work there from Mako!
Mako decides to take the fight back to the feet.
And thats the end of the round the fighters go back to their corners.
Kanye Yamamoto dominated that second round.
OK. That's time! The bell goes and we're back to the action. This is the final round!

Yamamoto throws a one two combo.
Mako lands a big right hand and follows it up with an uppercut. Oh and another big punch and a knee - Yamamoto can't take much more of this! Another big shot to the jaw from Mako and Yamamoto drops to the floor. Beaten and bloodied - he had enough there. A vicious beatdown by Mako.
Ladies and gentlemen, after 0:14 of round 3, we have a winner by way of TKO (Strikes). George Mako!
|
|
|
|
|
|
|
|
|
|
|
|
|
|
|
|
|
|
|
|
|
|
|
| S |
C
A |
G |
S |
C
B |
G |
|
S |
C |
G |
|
energy
A | B |
|
hype
A | B |
|
pop
A | B |
|
mgr
A | B |
|
FIGHT
RATING
100% |
|
|
|
|
|
|
