|
|
PBP Commentary |
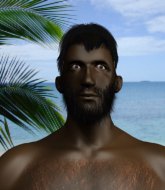
Coming up we have a heavyweight MMA rules bout between Tony Stark (ranked 0 p4p, 0 weight class) and Trapezius Milkington (ranked 0 p4p, 0 weight class). Stark kept the crowd waiting but all that was forgotten when his ring entrance music started. The incomparable musical genius that is Black Sabbath - Iron Man. Both fighters look fresh as a daisy as they make their way towards the cage.
 |
|
 |
| 195 cm
19
280 lbs
4 - 1 - 0 |
|
185 cm
18
220 lbs
2 - 1 - 0 |
BJJ Blue Belt
Counter striker
Intelligent |
|
Good wrestler
Counter striker
Powerful |
|
| |
|
Ladies and gentlemen. This fight is 3 rounds, in the heavyweight division.
Introducing the fighter to my left, fighting out of the red corner.
With a record of
4 - 1 - 0, fighting out of Montreal, Tony Stark!
And introducing the fighter to my right, fighting out of the blue corner.
With a record of
2 - 1 - 0, fighting out of Montreal, Trapezius Milkington!
The judges for this bout are Gregory Folan, Dillan Fox and Steve Smith.

The bell rings for round one and we are underway!
Milkington shoots in for a takedown. He's persisting with it as Stark sprawls well. Stark wins this battle and keeps the fight standing. Milkington gets slowly back to his feet.
Stark showing good head movement there, avoiding the strikes from Milkington.
Stark fakes high and swings low for a body shot but Milkington manages to avoid it.

Milkington shoots in for a takedown and gets it. Oh and he's advanced to full mount straight away.
Milkington fakes a shot to the body and cracks his opponent in the head. Nice ground and pound there!
Milkington scoring with some good ground and pound from mount here. Will he manage to finish Stark?
Stark tries to reverse the position but Milkington maintains control.
Milkington wants to control the pace but Stark is squirming around nicely.
Stark can't escape the position.
Stark could do with loosing a few pounds - he looks very soft around the mid section, to put it politely.
Stark tries to hold on but Milkington pushes him away.

That's one minute gone in the round.
Stark can't escape the position.
Milkington connects with a couple of good shots from mount.
Stark is looking to get to half guard.
Milkington scoring with some good ground and pound from mount here. Will he manage to finish Stark?
Milkington in mount throwing good strikes here, bouncing his opponent's head off the canvas.
Stark is looking to improve his position but Milkington isn't that keen on the idea.
Stark in a bad spot here, taking shots to the head.
We've seen a great period of action over the last minute or so - credit to both fighters for going all out!
Stark is desperately trying to get back to half guard.
Milkington working the ground and pound effectively.
Stark is looking to get to half guard.
The fighters are pressed up against the cage, both looking to find a bit of space to work.
Stark regains half guard.

That's two minutes gone in the round.
Stark tries to get to full guard but Milkington has control of the leg.
Milkington trying to control from half guard but Stark is working away.
Milkington works his foot free and advances to mount.
BOOM! Milkington connects with a massive shot to the dome!
Milkington is landing with some decent strikes but Stark is trying to advance his position so the referee is letting the fight continue.
The fighters are starting to get a bit slippery now, which will make submissions a bit more difficult.
The crowd growing excited in anticipation of a finish here! Right on cue, Milkington cracks his opponent with a massive right hand that draws loud cheers!
Stark manages to regain half guard. Good work.
Stark is breathing heavily.
Milkington slips a nice elbow through Stark's hands, connecting with Stark's forehead.
Milkington is trying to control. Stark wants to improve his position but can't escape this time.

That's three minutes gone in the round.
Stark has hold of Milkington's hands but Milkington slips his arm to the side and lands an elbow.
Stark is trying to defend against the ground and pound but Milkington scores with a couple of nice shots.
Milkington is keen to just control but Stark is a slippery customer.
Milkington wants to free his trapped foot but Stark is holding on for dear life with his legs.
Milkington moves nicely into side control.
Milkington tries to cartwheel into mount but he doesn't manage it.
Milkington trying to control the position but Stark is working away.
Milkington tries to move into full mount but can't pass Stark's legs.

That's four minutes gone in the round.
Stark manages to work his way to half guard, despite Milkington's best efforts.
Stark is trying to control but can't.

Stark is looking to sinch up a guillotine here but Milkington pulls his head out easily.
Milkington sitting and controlling from the half guard.
Milkington working some ground and pound from close in. He's looking to maintain this position and strike for a while by the looks of things... although he'll probably advance to full mount in a minute now I've said that.
Milkington lands strikes from half guard.
Milkington working over Stark with some ground and pound. Stark looks like he wants out of this position, which is understandable.
As the round comes to an end the crowd are showing their appreciation for a great round of action.
Stark looking to work for a kimura from the bottom.
Milkington lands strikes from half guard.
And thats the end of the round the fighters go back to their corners.
Trapezius Milkington dominated that round.
That's the end of the round. The referee orders the cornermen out of the cage so we can get back down to business.

Stark gets caught on his heels momentarily as he allows Milkington to score an easy takedown into full guard.
Milkington slips effortlessly into side control - very nice.
Stark gets one leg under and gets the fight to half guard.
Milkington wants to pass to mount but Stark is defending the position.
Stark has no desire to be mounted, so is trying to control. Milkington is working away from the top position though.
Milkington looks to score some points with some ground and pound.
Milkington lands with a punch from half guard.
Stark looking for submissions off his back.
Stark has hold of Milkington's hands but Milkington slips his arm to the side and lands an elbow.
Both fighters are absolutely exhausted here.
That's one minute gone in the round.
Stark is staying active underneath Milkington, who seems content to just control the action from this position.
The ref warns both fighters not to hold the cage as they work up against the meshing.
Milkington scores with a couple of good hammerfists.
The referee walks around the fighters to get a better view of the action. Milkington lands a nice short elbow.
Stark won't allow Milkington to pass to mount.
Stark throws a strike from the bottom that misses.
Stark has no desire to be mounted, so is trying to control. Milkington is working away from the top position though.
Milkington trying to control the action but Stark is working from the bottom.
Milkington prevents Stark from improving his position.
The step up in weight doesn't seem to be a problem for Milkington. He's performing admirably here against the bigger man.
Milkington performing his best blanket impression for a moment.
That's two minutes gone in the round.
Well. There's a bit of a lull in the action here and the crowd are starting to get restless.
Milkington moves nicely into side control.
Milkington moves into full mount!
Stark keeping his composure momentarily, calmly looking to get back to half guard.
Milkington tries to control but Stark wriggling away.
Milkington breaks from Stark's wrist control and lands an elbow.
Stark is looking to improve his position but Milkington isn't that keen on the idea.
Stark is bucking up trying to escape but Milkington cracks him with another couple of good strikes.
That's three minutes gone in the round.
Milkington fakes a shot to the body and cracks his opponent in the head. Nice ground and pound there!
Milkington lands a heavy elbow.
Milkington dominating with strikes here.
Milkington has his opponent pinned against the cage, landing some nasty ground and pound that is really making a bit of a mess out of Stark's face.
Milkington putting on the heat here with some good ground and pound!
Milkington with the ground and pound from mount.
Trapezius Milkington has got the better of the ground game so far.
Milkington scoring with some good ground and pound from mount here. Will he manage to finish Stark?
The crowd are loving this. Great action here.
Milkington landing punches.

Stark is rocked!
Milkington postures up and lands a whopping elbow - oh that's hurt Stark bigstyle! Two more strikes land for Milkington and the fight is over!
Ladies and gentlemen, after 3:53 of round 2, we have a winner by way of TKO (Strikes). Trapezius Milkington!
|
|
|
|
|
|
|
|
|
|
|
|
|
|
|
|
|
|
|
|
|
|
|
| S |
C
A |
G |
S |
C
B |
G |
|
S |
C |
G |
|
energy
A | B |
|
hype
A | B |
|
pop
A | B |
|
mgr
A | B |
|
FIGHT
RATING
86% |
|
|
|
|
|
|
