|
|
PBP Commentary |
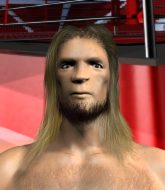
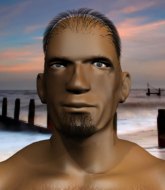
Coming up we have a super heavyweight MMA rules bout between Keith Jayme (ranked 0 p4p, 0 weight class) and Phil High (ranked 0 p4p, 0 weight class). Rumors backstage are that the fighters have been paid to keep it standing but we know that would never happen in MMA!
 |
|
 |
| 200 cm
18
280 lbs
1 - 0 - 0 |
|
205 cm
22
295 lbs
0 - 0 - 0 |
BJJ White Belt
Solid boxing
Big heart |
|
BJJ White Belt
Excellent boxer
Heavy handed |
|
| |
|
Ladies and gentlemen. This fight is 3 rounds, in the super heavyweight division.
Introducing the fighter to my left, fighting out of the red corner.
With a record of
1 - 0 - 0, fighting out of Amsterdam, Keith Jayme!
And introducing the fighter to my right, fighting out of the blue corner.
With a record of
0 - 0 - 0, fighting out of Amsterdam, Phil High!
The judges for this bout are Albert Achterberg, Paulsen Ambrosius and Daniel Blasius.

The bell rings for round one and we are underway!
Jayme scores with a sloppy punch to the body. Not much technique there but it did the business.
Keith Jayme seems to be the more aggressive standup fighter in this bout.
High misses with a takedown attempt - Jayme sprawls well and throws a nice strike on the way out which just misses.
Jayme will need to tighten up his combinations if he doesn't want to gas himself out, swinging at thin air.
Nice takedown defense from Jayme. No joy for High on that attempt.
Jayme throws a wild combination but nothing lands.
Jayme tries to land with a swinging hook to the body but High was well out of range. Poor timing from Jayme.
Jayme slips a jab and a cross from High.
Jayme slaps away a takedown attempt from High, before circling back to the center of the mat.
Keith Jayme has stuffed three takedown attempts in the round now. That's going to take a lot out of Phil High.
Jayme looks to throw the jab but High is out of range.
Jayme lands with an overhand left.
High is trying hard to land a takedown here. Jayme sprawls well and keeps this one on the feet.
Jayme throws a wild combination but nothing lands.
High fails in his attempt to clinch.
A shot to de liver by Jayme. Beautiful body shot.
Jayme throws a hook to the body but it doesn't connect.
Jayme lands a two punch combo.

That's one minute gone in the round.
High shoots for a takedown but Jayme saw that one coming a mile off and avoided it easily.
Jayme displays good takedown defense there as he swats away a double leg from High.
Jayme falls off balance throwing a combination

and High counters with a nice single leg takedown and he's in Jayme's guard now.

Jayme is edging up against the cage. He's using the cage to get back to his feet. Nice work there - the fighters are clinched.
Jayme is trying to break the clinch but High is controlling him.

Jayme breaks the clinch and we're back to striking at distance.
Jayme scores with a nice right hand.
High uses decent footwork to sidestep a right hand from Jayme.
Jayme lands with a hook. High tried to avoid it but it clipped the top of his head.
High misses with a low kick.
Jayme looks to throw the jab but High is out of range.
High fails with a takedown attempt.
Jayme misses with the combination.

That's two minutes gone in the round.
Jayme misses with a wild body shot.
High swings away but doesn't land with a series of punches.
Jayme's corner calls for a 1,2 combination and Jayme duly obliges.
The fans in attendance giving it up for the two fighters, who have really let it all hang out in the last minute or so!
High tries for a takedown but Jayme sees it coming a mile off and avoids it easily.
Jayme throws a hook but High blocks it.
Jayme swings for the body but High moves out of range.
Jayme misses with a hook to the body
and High counters with a nice double leg into side control. Jayme won't be happy with that.
The fighters are pressed up against the cage, both looking to find a bit of space to work.
Jayme pushes High away and creates a bit of space to escape. He's almost out here... but no, High gets a good hold of his legs and remains firmly in side control.
High stands up and beckons Jayme to his feet.
High tries to clinch up but Jayme circles away and keeps his distance.

That's three minutes gone in the round.
High slips a jab from Jayme.
High tries to shoot in for a takedown. He's got hold of a leg but Jayme swivels and escapes.
Keith Jayme is looking to keep the fight on the feet at all costs.
High has his head snapped back a nice jab. A little nod from High there as he acknowledges the shot.
High changes levels and looks for a double leg takedown. Jayme tries to avoid it but High manages to keep hold of a leg and drag Jayme to the ground. Jayme escapes though and pops straight back up to his feet.
High looks gassed!
Jayme rushes forward with a series of wild hooks but High moves out of range and avoids them all easily.
Jayme misses with a straight left.
High throws a sloppy head kick and Jayme moves out of range easily.
High will have to do better than that with his takedown attempts.
High throws a wild combination but nothing lands.
High avoids the body shot from Jayme.
High throws a looping left and ducks down for a takedown. He's got his arms around Jayme's waist but Jayme gets an underhook and avoids the takedown by throwing High off to one side.
Jayme looks to score with a combo but nothing lands.
High fails with a takedown attempt.
High throws a combination but it was largely blocked by Jayme.

That's four minutes gone in the round.
My god... these two guys really need to pick up the pace or everyone will leave to go get a beer.
Jayme tries to land with a swinging hook to the body but High was well out of range. Poor timing from Jayme.
Jayme lands a jab to the head.
High will have to do better than that with his takedown attempts.
Jayme scores with a sloppy right hand. High should have avoided that one.
Jayme stuns High with a nice body shot, before stepping back out of range.
Jayme throws a lazy right hand but High sees it coming a mile off and sidesteps it easily.
Jayme cracks High with a good jab.
Jayme misses with a hook. High ducked under it nicely.
Nice cross by Jayme.
High gets his head snapped back by a nice shot there.
As the round comes to an end the crowd are showing their appreciation for a great round of action.
High shoots in for a double leg but Jayme sprawls well. That's going to sap some energy.
Jayme scores with a nice head shot.
Jayme scores with a jab to the body.
And thats the end of the round the fighters go back to their corners.
Keith Jayme dominated that round.
Well, the break between rounds is over. Let's get back to the scrappin!

Jayme misses with a looping left.
Jayme connects with a body shot.
Jayme moves into range and connects with a jab.
Jayme stuns High with a nice body shot, before stepping back out of range.

High gets a clinch.
Jayme breaks from the clinch.
Jayme digs a good body shot into High's ribs.
High showing good head movement there, avoiding the strikes from Jayme.
High tries to clinch up.
High misses with a shot to the body
and Jayme counters with a two punch combo.
Jayme throws a monster uppercut resembling something out of street fighter but it doesn't land.
High is breathing heavily.
High throws a right and a left that both miss.
Jayme throws a monster uppercut resembling something out of street fighter but it doesn't land.
Jayme throws a hard body shot but it just misses.
Jayme falls off balance throwing a combination
and High counters with a single leg into guard. Jayme didn't expect that.
That's one minute gone in the round.
Jayme uses the cage to get back to his feet.
Jayme throws out a loose jab but High uses good head movement to avoid it.
Jayme keeps the fight standing with a nice sprawl.
Jayme throws a hook but High avoids it easily.
Jayme fakes a head shot and lands one to the body.
Jayme tries to bum rush High with a series of wild strikes but High uses good footwork to avoid the assault.
Jayme loads up on a big right hand but High slips the punch.
Jayme throws a jab but it's blocked by High.
Jayme is moving around nicely and scores here with a single head shot.
A head kick misses from High.
High misses with a double jab.
That's two minutes gone in the round.
A telegraphed takedown attempt from High is defended easily by Jayme.
The crowd cheers as Jayme lands an impressive looking overhand right. High doesn't seem phased though.
High throws a low kick but it's checked well by Jayme.
High slips a jab from Jayme.
Jayme misses with a straight right.
High fails with the takedown.
Keith Jayme has stuffed three takedown attempts in the round now. That's going to take a lot out of Phil High.
High misses with a half-hearted attempt at a head kick.
High misses with a wild body shot.
Jayme looks to score with a jab to the body but High is just out of range.
Jayme throws an overhand right that lands on High's shoulder, as High tries to avoid the shot.
The fighters are going at a pretty good pace and they're both starting to sweat now.
Jayme lands a two punch combo.
That's three minutes gone in the round.
High slips a jab from Jayme.
Jayme throws a nice looking combination but High bobs and weaves to avoid any damage.
Jayme misses with a double jab.
High changes levels and looks for a double leg takedown. Jayme tries to avoid it but High manages to keep hold of a leg and drag Jayme to the ground. Jayme escapes though and pops straight back up to his feet.
High clinches but Jayme breaks the clinch
and Jayme counters with a nice body shot.
Jayme misses with the combination.
High tries to clinch but is not successful on this occasion.
Jayme avoids the head kick by High.
Jayme swings away but doesn't land with a series of punches.
Keith Jayme is winning the standup battle so far.
Jayme connects with a hook to the side of his opponent's head.
Jayme cracks High with a good shot that sees him stumbling back into the cage.
Jayme defends well against a solid takedown attempt from High.
Jayme misses with a wild body shot.
That's four minutes gone in the round.
A lull in the action here being met with boos from the crowd.
Jayme lands with an uppercut that bounces High off the cage and back into rage.
Jayme keeps his opponent at a distance with a nice jab.
A combination from Jayme does no damage.
High slips a jab from Jayme.
High shoots in for a takedown - he's clinched up with Jayme but Jayme pushes him off and we're back to square one.
High closes the distance and looks for a trip takedown... aaaand he's got it - High lands in his opponent's guard.
High looking to pass the guard.
The crowd applaud the fighters efforts here as the round comes to an end.
High is looking to advance position but Jayme has hit a scissor sweep - now he's on top in mount!
And thats the end of the round the fighters go back to their corners.
Keith Jayme dominated that second round.
Well, the break between rounds is over. Let's get back to the scrappin! Ladies and gentlemen, this is the final round!

High tries to land a front kick but Jayme steps back. That was a bit too telegraphed.
High shoots in for a double leg but Jayme sprawls well. That's going to sap some energy.
High tries to clinch but Jayme moves out of range.
Jayme throws a combination that misses
and High counters with a takedown into side control.
Phil High has got the better of the ground game so far.
Jayme pushes High away and creates a bit of space to escape. He's almost out here... but no, High gets a good hold of his legs and remains firmly in side control.
High wants to lay and pray for a moment but Jayme keeps working.
Jayme is putting a lot of effort into getting back to his feet here.
Both fighters are breathing heavily.
That's one minute gone in the round.
High remains in side control and seems content to stay there. It's a versatile position from which he can work both strikes and submissions, whilst maintaining that control, so maybe he'll sit here for a while.
High working the ground and pound but Jayme is defending the strikes.
High in side control, throwing shots but Jayme defends.
Jayme is pushing High's head away, looking to escape. High manages to hold on to the position though.

The referee decides to stand the fighters back up.
High misses with a double jab.
That's two minutes gone in the round.
The crowd are showing their displeasure at the lack of action as loud boos ring out around the arena.
Jayme stuffs the takedown.
Jayme throws an uppercut from half a mile away. High sees it coming and avoids it easily.
High has his takedown stuffed
enabling Jayme to counter with a crisp jab.
Keith Jayme has stuffed three takedown attempts in the round now. That's going to take a lot out of Phil High.
High looking for a takedown here - he's got it.
High passes into half guard.
High stands, ready to strike. The ref makes him back up and allows Jayme to get to his feet.
Jayme misses the shot to the body.
That's three minutes gone in the round.
Jayme swings and misses with a hook to the body.
Jayme misses with a few strikes there.
Keith Jayme is looking to throw some combinations by the looks of things.
Jayme just misses with a punch to the body.
High has a takedown stuffed.
High shoots in with a takedown attempt and he has Jayme pinned against the cage. Jayme gets the underhooks and manages to circle away.
High staying out of range there.
Jayme swings and misses with a hook to the body.
Jayme throws a jab when High was well out of range.
A punch combination from High misses.
Jayme misses with a double jab
and High counters into the clinch. Nicely done.
That's four minutes gone in the round.
A lull in the action here being met with boos from the crowd.
Jayme escapes the clinch and we're back to striking.
High tries to grapple but his opponent circles
and Jayme counters with a shot to the ribs. That looked like it hurt.
Jayme looks to score with a jab to the body but High is just out of range.
Jayme avoids the head kick by High.
High shoots in looking for a double leg takedown. Jayme defends it nicely.
High has a pretty nasty looking mouse under his right eye.
High bobs and weaves well there to avoid the strikes.
High changes levels and looks for a double leg takedown. Jayme tries to avoid it but High manages to keep hold of a leg and drag Jayme to the ground. Jayme escapes though and pops straight back up to his feet.
Jayme scores with a nice strike.
Phil High has stepped it up - he knows he needs a finish here!
Keith Jayme is fighting for a decision here - he's started to take the cautious approach.
Jayme throws a monster uppercut resembling something out of street fighter but it doesn't land.
Jayme loads up on a big right hand but High slips the punch.
And that's the end of the fight!
Phil High comfortably won the final round on my scorecard.
I think Jayme has won this one but let's see what the judges have to say. Over to the ring announcer for the scorecards.
Ladies and gentlemen, after 3 rounds of action, we go to the scorecards for a decision.
Judge Albert Achterberg scores the fight 29:28
Judge Paulsen Ambrosius scores the fight 29:28
Judge Daniel Blasius scores the fight 29:28
In favor of your winner, by unanimous decision... Keith Jayme!
|
|
|
|
|
|
|
|
|
|
|
|
|
|
|
|
|
|
|
|
|
|
|
| S |
C
A |
G |
S |
C
B |
G |
|
S |
C |
G |
|
energy
A | B |
|
hype
A | B |
|
pop
A | B |
|
mgr
A | B |
|
FIGHT
RATING
68% |
|
|
|
|
|
|
