|
|
PBP Commentary |
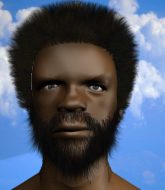
Coming up we have a welterweight MMA rules bout between Obi Uzoma (ranked 0 p4p, 0 weight class) and Mac Avelli (ranked 0 p4p, 0 weight class). Obi Uzoma had a look across the cage there at his opponent. He definitely means business
 |
|
 |
| 185 cm
25
181 lbs
6 - 2 - 0 |
|
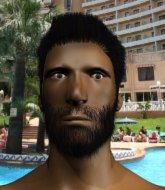
180 cm
20
184 lbs
3 - 1 - 0 |
BJJ Purple Belt
Solid boxing
KO power |
|
BJJ Blue Belt
Solid Muay Thai
Good gas tank |
|
| |
|
Ladies and gentlemen. This fight is 3 rounds, in the welterweight division.
Introducing the fighter to my left, fighting out of the red corner.
With a record of
6 - 2 - 0, fighting out of Los Angeles, Obi Uzoma!
And introducing the fighter to my right, fighting out of the blue corner.
With a record of
3 - 1 - 0, fighting out of Los Angeles, Mac Avelli!
The judges for this bout are Timothy Bukovac, and .

The bell rings for round one and we are underway!
Uzoma avoids the head kick by Avelli.
Uzoma lands with a hook. Avelli tried to avoid it but it clipped the top of his head.
Uzoma moves out of range of the body kick.
Left hook, right uppercut from Avelli.

It looks like Obi Uzoma has been cut.
Uzoma works his jab well there, keeping his opponent at a distance.
The crowd are loving this. Great action here.
Uzoma shoots in but Avelli avoids the takedown attempt easily.
Uzoma swings wildly with a right hand that was never going to find it's target.
Uzoma throws a series of punches but Avelli moves out of range.
Obi Uzoma seems to be the more aggressive standup fighter in this bout.
Avelli moves into range and lands a nice leg kick.
Uzoma looks to land a combination but Avelli avoids it well.
Uzoma shoots in for a takedown. He's persisting with it as Avelli sprawls well. Avelli wins this battle and keeps the fight standing. Uzoma gets slowly back to his feet.
Uzoma misses with a jab, cross combination.
Uzoma throws a right and a left that Avelli avoids nicely.
Avelli tries a head kick but it misses.

That's one minute gone in the round.
Uzoma fails with a takedown attempt.
That's three failed takedown attempts in the round for Obi Uzoma. That's going to take a lot out of him.
Avelli swings and misses with a hook to the body.
Avelli throws a right hand that Uzoma ducks under and follows up with a left that Uzoma also avoids with ease.

Avelli moves into the clinch successfully.
Avelli pushes off and fires off an elbow that misses, before clinching up again, against the cage.
Avelli stops a takedown attempt from Uzoma.

Avelli manages to break the clinch.
Avelli misses with a double jab

and Uzoma counters with a nice shoot takedown that brings the fighters to the ground.
Avelli tries to land a sweep but no joy.
Uzoma slips effortlessly into side control - very nice.
Uzoma taking a breather here.

That's two minutes gone in the round.

Uzoma looking for an arm triangle but it's way too loose to do anything.
Uzoma is breathing heavily.
Uzoma in side control, trying to ground and pound but not landing this time.
Avelli is trying to get back to half guard.
You can see the frustration on Avelli's face, being in this tough position on the bottom.
Uzoma goes for an armbar here - this could be all over! But no, Avelli has escaped beautifully and is now on top in side control! Oh, that's unlucky for Uzoma but great work by Avelli.

That's three minutes gone in the round.

Avelli decides to take the fight back to the feet.
Uzoma fails miserably with a takedown attempt.
Uzoma shoots in with a takedown attempt and he has Avelli pinned against the cage. Avelli gets the underhooks and manages to circle away.
Avelli throws a combination. Uzoma tries to block but a couple of punches get through.
Avelli clinches with his opponent.
Uzoma looking for a takedown.
Avelli breaks from the clinch.
The fighters circling - Avelli throws out the jab but it was never going to land.
Avelli throws an uppercut from half a mile away. Uzoma sees it coming and avoids it easily.
Uzoma fails with a takedown attempt from distance.

That's four minutes gone in the round.
Avelli throws a quick inside leg kick.
Avelli bobs and weaves and then throws a good body kick.
We've seen a great period of action over the last minute or so - credit to both fighters for going all out!
Uzoma misses with a body shot. Nice footwork from Avelli.
Avelli throws a right high kick that is partially blocked by Uzoma.
Avelli throws a hard body shot but it just misses.
Avelli lands a jab-cross combination.

Uzoma is rocked!
Obi Uzoma's cut is getting worse.
Avelli lands a leg kick. The shin dug right into the meat of the thigh.
Uzoma moves out of range of the body kick from Avelli.
A combination from Avelli does no damage.
Uzoma looks for a takedown but Avelli sprawls well.
The crowd are going absolutely nuts as the round comes to an end - what a fantastic round of action!
Avelli lands with a kick to the ribs.
Uzoma moves his head to the side to avoid a jab but walks straight into a cross.
Avelli bobs and weaves and then throws a good body kick.
And thats the end of the round the fighters go back to their corners.
Mac Avelli dominated that round.
The cut man is working on Obi Uzoma's cut.
The corners get their ten second warning. Both fighters stand from their stools and stare eachother down, ready to get back to the action.

Avelli throws a head kick that misses and slips in the process. He scrambles back to his feet and the fighters circle.
Avelli throws a half hearted mid kick.
Uzoma shoots in and scores a nice double leg takedown into half guard.
Avelli is trying to stand.
Avelli won't allow Uzoma to pass to mount.
Avelli looks like he's trying to stand up.
Avelli is trying is best to control the position here.
Uzoma is pressing down on Avelli's thigh, looking to free his foot. Avelli is holding on for now.
Both fighters are absolutely exhausted here.
Avelli wants to control but Uzoma is keeping busy and won't allow it.
That's one minute gone in the round.
Uzoma sitting and controlling from the half guard.

Neither fighter is doing enough for the referee's liking and he's decided to stand them back up.
Uzoma fakes an overhand right and shoots for a takedown. Avelli sprawls well initially but Uzoma persists and gets the takedown into half guard.
Uzoma is trying to control. Avelli wants to improve his position but can't escape this time.
The fighters are pressed up against the cage, both looking to find a bit of space to work.
Avelli looks like he's trying to stand up.
Avelli avoiding damage under a succession of punches from Uzoma.
Uzoma content to control rather than advance.
Avelli is looking to improve his position.
That's two minutes gone in the round.
Avelli is persisting with the attempt to improve his position.
Uzoma is trying to control. Avelli wants to improve his position but can't escape this time.
The referee has ruled that neither fighter is active enough on the ground and has stood them back up.
Uzoma shoots in with a takedown attempt and he has Avelli pinned against the cage. Avelli gets the underhooks and manages to circle away.
Avelli pulls out of a head kick attempt.
Mac Avelli seems to be getting the better of the standup.
Avelli will need to tighten up his combinations if he doesn't want to gas himself out, swinging at thin air.
That's three minutes gone in the round.
Avelli walks into a straight right hand from Uzoma.
Uzoma swings wildly with a couple of big hooks
and Avelli counters with a leg kick.
Avelli swings away but doesn't land with a series of punches.
Uzoma misses with a double jab
and Avelli counters with a lovely shot to the body.
Avelli throws a right and a left that Uzoma avoids nicely.
Obi Uzoma is looking to throw some combinations by the looks of things.
Uzoma throws a combination but comes up with nothing but fresh air.
Avelli misses with a double jab
and Uzoma counters with a nice double leg into half guard.
Avelli trying to control from the bottom.
Uzoma is working for submissions here but there's nothing on.
Uzoma is looking for an arm triangle, whilst trying to pass to side control. Avelli doesn't seem that keen to cooperate though. No luck this time Uzoma.
That's four minutes gone in the round.
Avelli wants to control but Uzoma is keeping busy.
The ref warns both fighters not to hold the cage as they work up against the meshing.
Avelli taking some punishment here, with Uzoma in his half guard.
Avelli tries to roll over but Uzoma keeps him under control.
The referee decides to stand the fighters back up.
Uzoma staying out of range there.
And thats the end of the round the fighters go back to their corners.
Obi Uzoma dominated that second round.
The cut man is working on Obi Uzoma's cut.
That's time! Uzoma's corner gives him a slap on the ass as he gets ready to fight. This is the final round!

Avelli throws a jab when Uzoma was well out of range.
Avelli throws a sloppy head kick and Uzoma moves out of range easily.
Avelli walks straight into an uppercut. Luckily it didn't land flush.
Uzoma lands a jab.
Uzoma moves out of range as Avelli throws a body kick.
Uzoma avoids a kick to the body.
Uzoma shoots in for a takedown but doesn't get it.
Avelli throws a head kick that connects with a bit of head and a bit of hand.
Uzoma scores with a crisp jab that stopped Avelli in his tracks.
Avelli cracks Uzoma with a good shot that sees him stumbling back into the cage.
Avelli fakes high and swings low for a body shot but Uzoma manages to avoid it.
Avelli throws a head kick that misses.
Avelli rushes forward with a series of wild hooks but Uzoma moves out of range and avoids them all easily.
That's one minute gone in the round.
Avelli works over Uzoma's head and body with a nice combination.
Avelli takes a big intake of breath there - he's definitely tired.
No luck for Uzoma with that takedown attempt.
Good leg kick by Avelli there. It's the ones that make that thud noise that hurt and that was an almighty thud.
Uzoma throws a combination that misses
and he gets countered with a snapping leg kick.
Avelli dips down and scores with a jab to the body.
Uzoma shoots in but doesn't get the takedown
and Avelli counters with a nice jab to the body that keeps Uzoma thinking.
That's three failed takedown attempts in the round for Obi Uzoma. That's going to take a lot out of him.
Avelli throws a nice inside leg kick.
Avelli lands the left hand.
Avelli tries a switch kick but it misses it's target.
Avelli lands with a kick to the temple. Uzoma shrugs as if to say "is that all you've got?"
Uzoma with a lazy takedown attempt
and Avelli counters with a head kick.
That's two minutes gone in the round.
Avelli lands a jab-cross combination.
Avelli throws a head kick but Uzoma moves out of range.
Avelli swings wildly with a hook that is half blocked by Uzoma.
Fantastic stuff here - a very entertaining period of action, which has drawn cheers from the crowd.
Uzoma misses with a jab and misses with a cross straight after too.
Uzoma blocks a head kick by Avelli.
Avelli lands with a shot to the body.
Avelli misses with a jab, cross combination.
Avelli throws a body kick but he wasn't in range.
Avelli pulls out of a head kick attempt.
Uzoma gets his takedown attempt stuffed easily
and Avelli counters with a nice low kick that buckles Uzoma's knee momentarily.
Obi Uzoma has stepped it up - he knows he needs a finish here!
Uzoma stumbles momentarily as he takes a strong leg kick from Avelli.
That's three minutes gone in the round.
Uzoma on the wrong end of a decent looking cross there.
Avelli ducks down and throws a hook to the body but Uzoma moves away.
Uzoma throws a right and a left that both miss.
Uzoma fails miserably with a takedown attempt.
Avelli looks to throw the jab but Uzoma is out of range.
Avelli plants his feet and lands a nice head kick!
Avelli is moving around nicely and scores here with a single head shot.
Avelli throws a head kick but Uzoma moves out of range.
Uzoma will need to tighten up his combinations if he doesn't want to gas himself out, swinging at thin air.
Uzoma shoots in looking for a double leg takedown. Avelli defends it nicely.
Avelli fakes high and swings low for a body shot but Uzoma manages to avoid it.
That's four minutes gone in the round.
My god... these two guys really need to pick up the pace or everyone will leave to go get a beer.
Avelli slips under a jab from Uzoma.
Uzoma shoots in for a takedown. "I don't think so" says Avelli as he avoids it easily.
Avelli looks to score with a jab to the body but Uzoma is just out of range.
Mac Avelli is looking to keep the fight on the feet at all costs.
Avelli throws a left and a right that both miss
and Uzoma counters with a nice jab to the body that keeps Avelli thinking.
Avelli is the aggressor but that punch slipped nicely by Uzoma.
Avelli scores with a kick to the body.
Uzoma takes a shot right to the liver - Bas would have been proud of that punch.
The crowd applaud the fighters efforts here as the round comes to an end.
Avelli scores with a nice body kick.
Avelli ducks down and throws a hook to the body but Uzoma moves away.
Avelli throws a body kick that digs right into the meat.
And that's the end of the fight!
Mac Avelli comfortably won the final round on my scorecard.
I think Avelli has won this one but let's see whether the judges agree with me. Over to the ring announcer for the scorecards.
Ladies and gentlemen, after 3 rounds of action, we go to the scorecards for a decision.
Judge Timothy Bukovac scores the fight for Mac Avelli!
Judge Suge Night scores the fight for Mac Avelli!
Judge Percy O'Donnell scores the fight for Mac Avelli!
Mac Avelli wins by unanimous decision!
|
|
|
|
|
|
|
|
|
|
|
|
|
|
|
|
|
|
|
|
|
|
|
| S |
C
A |
G |
S |
C
B |
G |
|
S |
C |
G |
|
energy
A | B |
|
hype
A | B |
|
pop
A | B |
|
mgr
A | B |
|
FIGHT
RATING
100% |
|
|
|
|
|
|
