|
|
PBP Commentary |
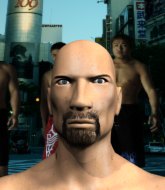
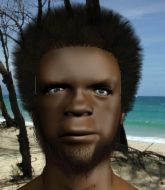
Coming up we have a featherweight MMA rules bout between Remote Control (ranked 0 p4p, 0 weight class) and Spliffington Bongsworth (ranked 0 p4p, 0 weight class). Remote Control has the edge in experience - let's see if he can make that count tonight.
 |
|
 |
| 170 cm
23
150 lbs
4 - 4 - 0 |
|
170 cm
18
145 lbs
0 - 0 - 0 |
BJJ Blue Belt
Counter striker
Experienced |
|
BJJ Blue Belt
Brawler
Enjoys gardening |
|
| |
|
Ladies and gentlemen. This fight is 3 rounds, in the featherweight division.
Introducing the fighter to my left, fighting out of the red corner.
With a record of
4 - 4 - 0, fighting out of London, Remote Control!
And introducing the fighter to my right, fighting out of the blue corner.
With a record of
0 - 0 - 0, fighting out of London, Spliffington Bongsworth!
The judges for this bout are William Gold, Richard Clark and Colin Fotheringham.

The bell rings for round one and we are underway!

Bongsworth scores a trip takedown into side control. Nice.
Bongsworth prevents Control from escaping the position.
Control is looking to reverse the position.
Control is working hard here to advance position.
Bongsworth fails to land a wild elbow strike.
Bongsworth scores with punches from side control.
Control manages to work his way to half guard, despite Bongsworth's best efforts.
Bongsworth working Control over with strikes.
Bongsworth trying to control the action but Control is working from the bottom.
Bongsworth working over Control with some ground and pound. Control looks like he wants out of this position, which is understandable.
Control manages to get to full guard.
Bongsworth trying to control but Control is working from the bottom.
Control wants to sweep but no luck.

That's one minute gone in the round.
Bongsworth throwing strikes from guard but Control blocks nicely.
Control is striking off his back. Bongsworth thinks nothing of it though and passes easily into half guard.
Bongsworth thumps the canvas. Not on purpose obviously - he just missed Control's head.
Bongsworth not throwing his punches with enough precision this time.
Control wants to get back to full guard.

Bongsworth is trying a forearm choke
I don't think that's going to do much at this level of the game.

It looks like we're going to have a standup here. Neither fighter is doing enough on the ground.
Bongsworth throws a body kick that misses.
Control stuffs the takedown.
Bongsworth moves into range and lands a nice body kick.
Control is breathing heavily.

That's two minutes gone in the round.
There's not a lot going on here and the crowd are letting the fighters know they're not willing to tolerate a lack of action.
Bongsworth throws a series of punches but Control avoids them all with ease.
Bongsworth swinging wilding here.
Bongsworth throws a head kick that looked like it stung.
No luck with that takedown attempt from Control.
Bongsworth shoots in but doesn't get the takedown
and Control cracks him with a counter punch right on the button.
A punch combination from Bongsworth misses.
Bongsworth looks to land a combination but Control avoids it well.
Spliffington Bongsworth seems to be the more aggressive standup fighter in this bout.
Control takes a head kick and shrugs it off.
Bongsworth gets caught on his heels momentarily as he allows Control to score an easy takedown into full guard.

That's three minutes gone in the round.
Control seems content to control from guard here. He's going to have to remain active though if he doesn't want to get stood back up.
Control trying to control the position from guard on top but Bongsworth is wriggling around, looking for whatever he can.

Bongsworth has his feet on Control's hips. He pushes off and gets to his feet. Nice work.
Bongsworth has his head snapped back a nice jab. A little nod from Bongsworth there as he acknowledges the shot.
Control bobbing and weaving, closes the distance and lands a hook to the side of Bongsworth's head.
Bongsworth closes the distance and looks for a trip takedown... aaaand he's got it - Bongsworth lands in his opponent's guard.
The ref warns both fighters not to hold the cage as they work up against the meshing.
The fighters are starting to get a bit slippery now, which will make submissions a bit more difficult.
Control trying to control the position here.

That's four minutes gone in the round.
Control throwing some rather feeble looking strikes off his back.
Bongsworth trying to control the position from guard on top but Control is wriggling around, looking for whatever he can.
Control controls Bongsworth momentarily but Bongsworth frees himself.
Control working from the bottom, still in full guard. He's managed to get a loose triangle. Bongsworth doesn't seem to be doing much to defend here, obviously he feels comfortable in the position. Bongsworth manages to throw the legs off his shoulder and he's back into guard - no problem.
Bongsworth must be cautious of submissions here, given that his opponent has the superior Jiu Jitsu.
Bongsworth passes into half guard.
Control wants to get back to full guard but Bongsworth has mounted him!
And thats the end of the round the fighters go back to their corners.
Spliffington Bongsworth dominated that round.
The corners get their ten second warning. Both fighters stand from their stools and stare eachother down, ready to get back to the action.

Bongsworth looks to score with a combo but nothing lands.
Bongsworth throws a right and a left that Control avoids nicely.
Bongsworth pulls out of a head kick attempt.
Control circles away from the clinch attempt.
A jab from Bongsworth misses.
Control clobbers Bongsworth with an overhand right that has the crowd gasping. That made a horrendous noise.
Spliffington Bongsworth is looking to throw some combinations by the looks of things.
Control lands with an uppercut that bounces Bongsworth off the cage and back into rage.
Bongsworth displays good takedown defense there as he swats away a double leg from Control.
We've had a slow start to the round here - hopefully the action picks up.
Bongsworth swings wildly with a right hand that was never going to find it's target.
Bongsworth throws a head kick but Control moves out of range.
Both fighters are absolutely exhausted here.
That's one minute gone in the round.
Bongsworth throws a jab, cross combination which is slipped
enabling Control to counter with a crisp jab.
Bongsworth misses with a body shot.
Control drops down and drives through with a powerful takedown into guard.
Control trying to control but Bongsworth is working from the bottom.
Bongsworth controls Control momentarily but Control frees himself.
Bongsworth wants to stand but Control is controlling the position.
Control throwing elbows and punches but not connecting, as Bongsworth works some decent striking defense from the bottom.
Control landing with the ground and pound.
Bongsworth manages to land a sweep and now he's in mount on top!
Bongsworth breaks from Control's wrist control and lands an elbow.
That's two minutes gone in the round.
Control wants to control but Bongsworth is having none of it.
Control working to try and regain half guard.
Bongsworth with good strikes from the mount here!
Control is really trying hard to get back to his feet.
Control tries to hold on but Bongsworth pushes him away.
Control squirming around on the bottom, looking to escape.
Bongsworth landing strikes from the mount.
That's three minutes gone in the round.
Control working to try and regain half guard.
Bongsworth working Control over with strikes here.
Control really trying hard to get back to half guard here.
Bongsworth lands an elbow that was bordering on illegal but the referee lets it go with a warning.
Bongsworth scoring with some good ground and pound from mount here. Will he manage to finish Control?
Bongsworth with a couple of short strikes.
Bongsworth lands a nice shot to the head.
Bongsworth trying to control but Control is having none of it.
Control trying desperately to get to his feet.
Control bucks up and manages to get a nice reversal! He's in guard on the top - nicely done!
Control is looking to work some ground and pound but Bongsworth has wrist control.
That's four minutes gone in the round.
Control with a nice head shot there.
Control missing there with some ground and pound from the guard.
Control working from the guard for now, landing some ground and pound.
Bongsworth keeping moving, preventing Control from controlling successfully.
Control wants to get up but he can't break Bongsworth's closed guard. He needs to be careful trying to break the legs open, as he's open to submissions here.
Control postures up as if he's going to throw some strikes but drops back for an ankle! Bongsworth is in big trouble! He looks ready to tap! But no, he's escaped and dives on top of Control, into his guard.
The crowd thankful this round is nearly over.
Control looking to sweep here. No luck so far.
And thats the end of the round the fighters go back to their corners.
That was a close second round but I would say that Remote Control will probably get the nod.
The corners get their ten second warning. Both fighters stand from their stools and stare eachother down, ready to get back to the action. So, we enter the final round. Let's see if either fighter can bring us a finish, or whether we're going to the judges scorecards.

Bongsworth fails to land with a series of punches.
Bongsworth misses with a few strikes there.
Bongsworth fails with a takedown attempt.
Bongsworth has his hands up protecting his head but a hook from Control finds it's way round the side to connect with Bongsworth's head.
Control fails with a takedown attempt from distance.
Bongsworth misses with a wild combination.
Both fighters are breathing heavily.
We've had a slow start to the round here - hopefully the action picks up.
Bongsworth tries to close the distance and clinch up against the cage but Control paws at him with a jab and circles away.
Bongsworth misses with a double jab
and Bongsworth takes a counter punch right on the button for his troubles.
That's one minute gone in the round.
Control misses with a takedown attempt - Bongsworth sprawls well and throws a nice strike on the way out which just misses.
Bongsworth lunges in with an uppercut that skims his opponent's chin.
A head kick misses from Bongsworth.
Bongsworth fakes an overhand right and shoots for a takedown. Control sprawls well initially but Bongsworth persists and gets the takedown into half guard.
Control keeping hold of Bongsworth's head, controlling as best he can.
Bongsworth slows the pace down in half guard.
Control is looking to sinch up a guillotine here but Bongsworth pulls his head out easily.
That's two minutes gone in the round.
Control is looking for a sweep. Bongsworth is wise to his cunning plan and keeps the top position.
Control is trying to maintain the position but Bongsworth is very close to passing his half guard.
Control is looking to sinch up a guillotine here but Bongsworth pulls his head out easily.
Control missing with punches from the bottom.
Well, the referee has seen enough. Neither fighter is active enough on the ground so he's stood them back up.
Bongsworth fails with the takedown
enabling Control to counter with a crisp jab.
Control looks shocked there as he takes a right hand to the temple.
Bongsworth throws a wild combination but nothing lands.
That's three minutes gone in the round.
Control misses with a takedown
and Bongsworth counters with a driving takedown into guard. Nice work there by Bongsworth.
That's three failed takedown attempts in the round for Remote Control. That's going to take a lot out of him.
Control wriggles free and stands up.
Control circles away from the clinch attempt.
Bongsworth misses with the combination.
Bongsworth throws a combination that misses
so Control counters with a double leg into guard. Good agility.
The crowd are loving this. Great action here.
Bongsworth preventing the ground and pound from doing any damage.
Control makes a bit of distance and scores with some ground and pound, still in guard.
Hammerfist, elbow! yells Control's corner. There ya go! There ya go!
Control has been looking to land a fair amount of strikes on the ground. He might be looking to soften his opponent up in order to work for a submission.
Control drops back looking for a leg! Bongsworth is in trouble here! The fighters roll with the hold and Bongsworth manages to kick Control off! Control jumps back into Bongsworth's guard.
Control loading up with the ground and pound but he's missing more than he's landing in this flurry.
That's four minutes gone in the round.
Control throwing strikes but missing.
Control working from the guard for now, landing some ground and pound.
Control has decided he wants to stand but the closed guard of Bongsworth is proving hard to escape from.
It looks like we're going to have a standup here. Neither fighter is doing enough on the ground.
Bongsworth throws a jab, cross combination which is slipped
and Control decides to take the opportunity to score a takedown. He's landed in Bongsworth's guard.
Control working some strikes from top position.
Bongsworth wants to control here, rather than go for any submissions from the bottom. At least for now.
The crowd applaud the fighters efforts here as the round comes to an end.
Control lands a couple of decent looking shots.
Control with a couple of shots to the head there. Not particularly brutal.
Control throwing elbows and punches but not connecting, as Bongsworth works some decent striking defense from the bottom.
And that's the end of the fight!
Remote Control showed his dominance in that final round.
I think Control has won this one but let's see what the judges have to say. Over to the ring announcer for the scorecards.
Ladies and gentlemen, after 3 rounds of action, we go to the scorecards for a decision.
Judge William Gold scores the fight 29:29
Judge Richard Clark scores the fight 29:28
Judge Colin Fotheringham scores the fight 29:28
In favor of your winner, by majority decision... Remote Control!
|
|
|
|
|
|
|
|
|
|
|
|
|
|
|
|
|
|
|
|
|
|
|
| S |
C
A |
G |
S |
C
B |
G |
|
S |
C |
G |
|
energy
A | B |
|
hype
A | B |
|
pop
A | B |
|
mgr
A | B |
|
FIGHT
RATING
52% |
|
|
|
|
|
|
