|
|
PBP Commentary |
Coming up we have a featherweight MMA rules bout between Keiji Hashimoto (ranked 0 p4p, 0 weight class) and Buck Wild (ranked 0 p4p, 0 weight class). Hashimoto comes to the cage accompanied by Chopin's Funeral March in B flat minor. Both these guys have really solid chins. Will we see a standup war or will they both decide that a knockout is unlikely and try to win the fight elsewhere?
 |
|
 |
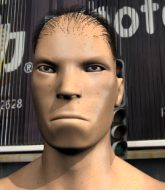
| 172 cm
23
151 lbs
10 - 5 - 1 |
|
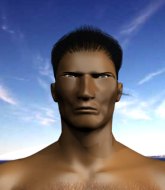
177 cm
24
153 lbs
7 - 3 - 0 |
BJJ Brown Belt
Solid boxing
KO power |
|
BJJ Blue Belt
Excellent boxer
Granite chin |
|
| |
|
Ladies and gentlemen. This fight is 3 rounds, in the featherweight division.
Introducing the fighter to my left, fighting out of the red corner.
With a record of
10 - 5 - 1, fighting out of Rio de Janeiro, Keiji Hashimoto!
And introducing the fighter to my right, fighting out of the blue corner.
With a record of
7 - 3 - 0, fighting out of Rio de Janeiro, Buck Wild!
The judges for this bout are Luis Engracia, Matheus Silva and Paulo Santos.

The bell rings for round one and we are underway!
Nice jab there from Hashimoto.

Hashimoto bobs and weaves into range and then changes levels and scores with a nice takedown into side control.
Hashimoto taking a break here but Wild is having none of it and regains half guard.
Hashimoto is keen to just control but Wild is a slippery customer.

Hashimoto seems to be looking for submissions.
Wild really doesn't want to stay on the ground with Hashimoto. If he can't get it back to his feet, it's only a matter of time before he'll be tapping out.
Hashimoto throwing shots but Wild is blocking nicely.
Hashimoto is looking to take a break and control but Wild is keeping him honest, looking to work from the bottom.
Hashimoto sitting and controlling from the half guard.
Hashimoto trying to control from half guard but Wild is working away.

That's one minute gone in the round.
Hashimoto wants to work for an arm triangle but Wild is really keeping half guard well and defending the submission attempt.
Hashimoto is trying to control. Wild wants to improve his position but can't escape this time.

Neither fighter is doing enough for the referee's liking and he's decided to stand them back up.
Hashimoto misses with a wild body shot.
A looping hook to the body misses from Hashimoto. Wild does a little dance to reset his feet.
Hashimoto tries to close the distance and clinch up against the cage but Wild paws at him with a jab and circles away.
Wild throws a right and a left that Hashimoto avoids nicely.
Hashimoto just misses with a punch to the body.
Hashimoto ducks down and throws a hook to the body but Wild moves away.
Hashimoto tries to close the distance and clinch up against the cage but Wild paws at him with a jab and circles away.
Wild slips a straight right by Hashimoto.

That's two minutes gone in the round.
There's not a lot going on here and the crowd are letting the fighters know they're not willing to tolerate a lack of action.
A swing and a miss from Wild.
Hashimoto displays some good footwork, moving neatly out of range as Wild throws out the jab.
Hashimoto takes a body punch but keeps moving.
Wild ducks under a wild hook from Hashimoto.
Wild throws a looping left and ducks down for a takedown. He's got his arms around Hashimoto's waist but Hashimoto gets an underhook and avoids the takedown by throwing Wild off to one side.
Wild uses good head movement to avoid the hook from Hashimoto.
Hashimoto lands with an overhand left.
Hashimoto throws out a token jab with nothing on it.
Wild throws a hook but Hashimoto blocks it.
Hashimoto uses decent footwork to sidestep a right hand from Wild.
Hashimoto is looking to clinch.
Wild moves out of range of the strikes.
Hashimoto connects with the punch.

That's three minutes gone in the round.

Hashimoto clinches.
Hashimoto has Wild pressed against the cage, preventing Wild from circling away and getting back to striking at range.
Wild wants to break the clinch but can't.
Wild is trying to break the clinch but Hashimoto is controlling him.
Hashimoto is working Wild over against the cage.
Wild is looking to break free of the clinch but Hashimoto has double underhooks.
Wild wants to get back to striking at distance but Hashimoto won't allow it.
Wild looks like he'd prefer to be striking at range right now.
Wild wants to push off and get back to the center of the mat but Hashimoto has him pressed against the cage.
Wild prevents a takedown attempt there.
Wild wants to break free but Hashimoto has control.
Hashimoto has Wild pressed up against the cage and is working for takedown. Wild manages to improve position though and keeps the fight standing.
Wild tries to circle away but Hashimoto has him pinned against the cage.
Hashimoto prevents Wild from breaking the clinch.
Hashimoto throws a hook to the body. More of an arm punch but it's all scoring with the judges.
Hashimoto lands with a short punch from the clinch.
Wild wants to push off and get back to the center of the mat but Hashimoto has him pressed against the cage.
A nice left hand lands by Hashimoto.
Hashimoto presses Wild against the cage and delivers a mid-strength body shot.
Hashimoto has managed to pull guard. Let's see whether he can work an aggressive guard. It will also be interesting to see what tactics Wild uses from the top position.
Hashimoto has an omoplata and is looking to use it perhaps as a submission or perhaps to transition. Wild is in a bit of discomfort here, but he's managed to free himself and has dived into side control! That didn't work out too well for Hashimoto.

That's four minutes gone in the round.
Wild trying to control the action but Hashimoto is working from the bottom.
Hashimoto manages to land a sweep and he's now on top! Lovely Jiu Jitsu!
Hashimoto wants to lay and pray for a moment but Wild keeps working.
Hashimoto is trying a forearm choke
I don't think that's going to do much at this level of the game.
Wild pushes Hashimoto off looking to stand but Hashimoto dives back in and keeps control.
And thats the end of the round the fighters go back to their corners.
Keiji Hashimoto dominated that round.
That's time! Back to the action!

Hashimoto swings for the body but Wild moves out of range.
Hashimoto wants to clinch up but Wild keeps it at a distance.
Wild displays good takedown defense there as he swats away a double leg from Hashimoto.
Wild defending well as Hashimoto loads up on a big left hand.
Hashimoto dips down and scores with a jab to the body.
A telegraphed right hand from Wild misses the target.
Hashimoto lands a really nice looking cross but Wild seems unphased.
Wild walks straight into a jab right on the nose. That one stung - he's blinking and trying to clear his head.
Wild throws a hook but Hashimoto blocks it.
Wild misses with a jab and misses with a cross straight after too.
Wild will need to tighten up his combinations if he doesn't want to gas himself out, swinging at thin air.
Hashimoto fails with an attempt to clinch.
That's one minute gone in the round.
Hashimoto displays some good footwork, moving neatly out of range as Wild throws out the jab.
Hashimoto is looking to take this fight into the clinch.
Hashimoto thuds a left hand into Wild's body.
Hashimoto throws a left and a right that both miss
and Wild counters with a series of strikes. Hashimoto will be more careful next time no doubt.
Wild uses decent footwork to sidestep a right hand from Hashimoto.
Hashimoto tries to close the distance and clinch but Wild swats him to one side with an open hand palm strike and circles away.
Hashimoto looks to land a right hand but Wild moved out of range.
Wild thows a left - swing and a miss!
Hashimoto gets a takedown into half guard.
Hashimoto trying to control the action but Wild is working from the bottom.
That's two minutes gone in the round.
Wild wants to control but Hashimoto is keeping busy and won't allow it.
Hashimoto seems to be looking for submissions.
Wild blocking the ground and pound attempt from Hashimoto.
Hashimoto trying to pass the guard but Wild defending well.
Wild moves his hips nicely and gets into full guard.
Hashimoto looking to pass the guard.
That's three minutes gone in the round.
Hashimoto postures up as if he's going to throw some strikes but drops back for an ankle! Wild is in big trouble! He looks ready to tap! But no, he's escaped and dives on top of Hashimoto, into his guard.
Wild would like to get this fight back to the feet but can't get free from the closed guard.
Hashimoto is trying to control the position from the bottom.
Hashimoto tries to land a sweep but no joy.
Hashimoto manages to land a sweep and now he's in mount on top!
That's four minutes gone in the round.
Neither fighter has done anything of merit for a good minute or two here and the crowd are not happy about it.
Hashimoto can't quite control the action as he would like just now, as Wild is looking to escape.
Hashimoto looking to finish with strikes here!
Hashimoto pushing the pace here, looking to move to his opponents back and work for a finish.
Hashimoto thowing shots but they're missing.
And thats the end of the round the fighters go back to their corners.
Keiji Hashimoto dominated that second round.
That's the end of the round. The referee orders the cornermen out of the cage so we can get back down to business. This is the final round!

Wild takes one on the button.
Hashimoto tries to clinch there but Wild circles away.
Hashimoto misses with a double jab.
Wild displays some good footwork, moving neatly out of range as Hashimoto throws out the jab.
Wild moves out of range of the strikes.
A looping hook to the body misses from Hashimoto. Wild does a little dance to reset his feet.
Wild looks to land a right hand but Hashimoto moved out of range.
Nice shot lands for Wild.
Wild swings wildly with a couple of big hooks
and Hashimoto counters with a nice uppercut.
Wild bobs and weaves well there to avoid the strikes.
Hashimoto just misses with a punch to the body.
Hashimoto clinches with his opponent.
That's one minute gone in the round.
Wild working hard to break the clinch.
A right hand to the body from Hashimoto.
Knees to the body from Hashimoto.
Hashimoto lands with a right to the head.
Wild wants to break free but Hashimoto has control.
Wild wants to strike at distance but he can't break free of the clinch.
Wild tries to break the clinch but Hashimoto is controlling the position.
Hashimoto tries a knee to the head but Wild blocks it.
Hashimoto has a body lock and is looking for a takedown. Wild is bouncing around trying to prevent the takedown and somehow he has indeed managed to stay on his feet.
Hashimoto has Wild pressed against the cage, preventing Wild from circling away and getting back to striking at range.
A right hook to the body lands for Hashimoto.
Wild takes a big intake of breath there - he's definitely tired.
Wild wants to push off and get back to the center of the mat but Hashimoto has him pressed against the cage.
A short body shot lands from Hashimoto as the two fighters clinch.
Wild is trying to break the clinch but Hashimoto is controlling him.
Hashimoto lands a short shot on the inside that snaps the head of Wild backwards.
Hashimoto manages to pull guard.
Wild won't allow Hashimoto to sweep him here.
The fighters are pressed up against the cage, both looking to find a bit of space to work.
Hashimoto bucks up whilst keeping hold of a body lock, managing to reverse the position. Now he's in top in Wild's guard.
Hashimoto advances position into side control!
That's two minutes gone in the round.
Wild is trying to control Hashimoto's posture but Hashimoto avoids it.
Check out the look on Hashimoto's face as he threw that strike - that's one determined fighter!
Hashimoto throws a knee to the body but it doesn't do much damage.
Hashimoto advances nicely into full mount.
This is a great period of action - very entertaining stuff!
Hashimoto goes for an armbar but he's fallen flat on his backside there and now Wild is on top in guard.
Hashimoto has a closed guard, preventing Wild from standing up.
That's three minutes gone in the round.
Wild trying to control but Hashimoto is working from the bottom.
Hashimoto throwing his legs up looking for a triangle.
Hashimoto is trying to keep Wild in close.
Hashimoto looking for a sweep. Not yet Hashimoto, not yet.
Keiji Hashimoto is fighting for a decision here - he's started to take the cautious approach.
There's a bit of a scramble here and now Hashimoto is on top in guard.
That's four minutes gone in the round.
The crowd are starting to boo a lack of action.
Hashimoto wants to control from the top but Wild keeps moving.
Hashimoto slows down the pace of the fight for a moment. He'll need to remain active if he doesn't want to see the fight stood back up.
And that's the end of the fight!
Keiji Hashimoto showed his dominance in that final round.
Well Hashimoto has outscored his opponent in every aspect of the fight today. Only a scarily incompetent judge or two will keep him from a well deserved win... Over to the ring announcer for the scorecards.
Ladies and gentlemen, after 3 rounds of action, we go to the scorecards for a decision.
Judge Luis Engracia scores the fight 30:27
Judge Matheus Silva scores the fight 30:27
Judge Paulo Santos scores the fight 30:27
In favor of your winner, by unanimous decision... Keiji Hashimoto!
|
|
|
|
|
|
|
|
|
|
|
|
|
|
|
|
|
|
|
|
|
|
|
| S |
C
A |
G |
S |
C
B |
G |
|
S |
C |
G |
|
energy
A | B |
|
hype
A | B |
|
pop
A | B |
|
mgr
A | B |
|
FIGHT
RATING
36% |
|
|
|
|
|
|

