|
|
PBP Commentary |
Coming up we have a welterweight MMA rules bout between Shingo Takeda (ranked 0 p4p, 0 weight class) and Asaki Hioko (ranked 0 p4p, 0 weight class). We have two fighters making their debuts here, so let's see who comes out of this one with their first professional victory.
 |
|
 |
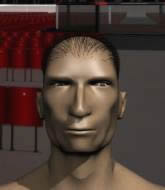
| 170 cm
19
175 lbs
0 - 0 - 0 |
|
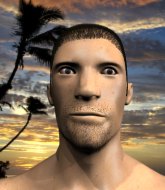
178 cm
22
178 lbs
0 - 0 - 0 |
BJJ White Belt
Counter striker
Intelligent |
|
BJJ White Belt
Excellent boxer
Heavy handed |
|
| |
|
Ladies and gentlemen. This fight is 3 rounds, in the welterweight division.
Introducing the fighter to my left, fighting out of the red corner.
With a record of
0 - 0 - 0, fighting out of Tokyo, Shingo Takeda!
And introducing the fighter to my right, fighting out of the blue corner.
With a record of
0 - 0 - 0, fighting out of Tokyo, Asaki Hioko!
The judges for this bout are Yukihiro Shimada, Ren Mimura and Taro Takaoka.

The bell rings for round one and we are underway!
Takeda slips a jab and a cross from Hioko.
Hioko thows a body shot but no joy.
Takeda showing good head movement there, avoiding the strikes from Hioko.

Takeda moves into the clinch successfully.
Takeda landing some nice looking knees to the body.
The pace slowing considerably in the clinch, as Takeda takes a break from that fighting nonsense to think about the finer things in life.
Hioko is trying to break free.
Hioko wants to break the clinch but can't.
Hioko wants to strike at distance but he can't break free of the clinch.
Hioko wants to push off and get back to the center of the mat but Takeda has him pressed against the cage.
Hioko is trying to slow down the pace in the clinch, to catch his breath.
Takeda prevents Hioko from breaking the clinch.
We've had a slow start to the round here - hopefully the action picks up.
Takeda lands a nice shot to the body.
Hioko can't break the clinch.
Hioko wants to strike at distance but he can't break free of the clinch.
Takeda keeps control of Hioko as he tries to wriggle out of the double underhooks.
Takeda can't find room to land a body shot as Hioko controls the action.
Hioko can't break the clinch.

That's one minute gone in the round.
Takeda blocking some punches.
Hioko can't break the clinch.
Takeda lands a body shot.
Hioko is clearly stalling here... Pick up the pace son.
Hioko looks gassed!
The is referee keeping an eye on Takeda - much more stalling and he will separate the fighters.
Takeda scores with a shoulder strike.
Takeda lands a hook to the body. It's hard to tell if that hurt Hioko or not.
A head punch blocked on the inside by Takeda.
Hioko is leaning against Takeda and scores with a nice uppercut to the body.
Hioko wants to get back to striking at distance but Takeda won't allow it.
Takeda pressing his opponent against the cage.
Hioko has had enough of the clinch but Takeda keeps him there for the moment.
Hioko wants to break free but Takeda has control.
A short right from Takeda on the inside.
Nice body punch from Takeda.
Takeda lands a body punch.

That's two minutes gone in the round.
Well. There's a bit of a lull in the action here and the crowd are starting to get restless.
Takeda lands a shot to the body.
Takeda prevents Hioko from breaking the clinch.
Hioko wants to break the clinch but can't.
Takeda unloads a knee to the mid-section. Hioko lets out a prehistoric sounding urrrrgh.
Takeda lands a body shot in the clinch.
Takeda cracks Hioko with a nice body shot.
Takeda missing with knees to the body.
Takeda is leaning against Hioko and scores with a nice uppercut to the body.
Takeda works for underhooks and lands a body shot in the process.
Hioko wants to strike at distance but he can't break free of the clinch.
Hioko wants to get back to striking at distance but Takeda won't allow it.
Takeda with a knee to the head.
Takeda lands with a left to the head.
Takeda lands a body punch.
Nice body punch from Takeda.
Nice body punch from Takeda - that landed with a thud.
Takeda could do with loosing a few pounds - he looks very soft around the mid section, to put it politely.
Takeda changes levels and goes for a takedown here. Hioko fights it off and pushes away nicely.
Hioko avoids the head kick by Takeda.

That's three minutes gone in the round.
Hioko throws an overhand right that lands on Takeda's shoulder, as Takeda tries to avoid the shot.
Takeda has taken the fight to the clinch.
Takeda is working Hioko over against the cage.
Takeda controlling the action here for a moment.
Takeda lands with a short shot to the head.
Hioko wants to break free but Takeda has control.
Takeda is leaning against Hioko and scores with a nice uppercut to the body.
Takeda lands a body shot in the clinch.
A hook to the body from Takeda.
Takeda lands a body shot.
Takeda lands a body punch.
Hioko wants to push off and get back to the center of the mat but Takeda has him pressed against the cage.
Hioko can't break the clinch.
Hioko wants to push off and get back to the center of the mat but Takeda has him pressed against the cage.
Hioko wants to break free but Takeda has control.

Hioko escapes the clinch and we're back to striking.
Takeda takes the fight into the clinch.

That's four minutes gone in the round.
Takeda lands a hook to the side of the head.
Hioko looking to slow down the pace here.
Hioko lands with a short head shot on the inside.
Takeda tries to land a shot to the body but it's blocked.
Takeda stalling.
Hioko wants to push off and get back to the center of the mat but Takeda has him pressed against the cage.
Hioko lands an uppercut.
Hioko wants to break free. God knows he wants to breaaaak freeee.
Takeda prevents Hioko from breaking the clinch.
Hioko holding his opponent close, against the cage.
Takeda lands a body punch in the clinch.
A left hand lands to the body for Takeda.
The crowd thankful this round is nearly over.
Hioko can't break the clinch.
A short body shot lands from Takeda as the two fighters clinch.
Takeda unloads a knee to the mid-section. Hioko lets out a prehistoric sounding urrrrgh.
Hioko can't break the clinch.
Hioko wants to break the clinch but can't.
Takeda tries a body shot but Hioko blocks it.
And thats the end of the round the fighters go back to their corners.
Shingo Takeda dominated that round.
That's time! Takeda's corner gives him a slap on the ass as he gets ready to fight.

Takeda wants to clinch.
Takeda tries to clinch but is not successful on this occasion.
Hioko throws a body punch but Takeda moves out of range.
Takeda is looking to clinch.
Hioko throws a nice looking combination but Takeda bobs and weaves to avoid any damage.
Hioko misses with a wild body shot.
Takeda connects with a looping right hand.
Takeda doesn't manage to clinch there - Hioko circles away.
Hioko misses with an uppercut.
We've had a slow start to the round here - hopefully the action picks up.
Hioko throws a right hand that Takeda ducks under and follows up with a left that Takeda also avoids with ease.
Takeda fails with an attempt to clinch.
Hioko is breathing heavily.
Hioko looks to land a combination but Takeda avoids it well.
Hioko fails to land with a series of punches.
Hioko throws a low kick but it's checked well by Takeda.
That's one minute gone in the round.
Takeda tries to clinch but Hioko moves out of range.
Hioko lands a jab-cross combination.
Takeda tries to clinch there but Hioko circles away.
Takeda moves away from the strike by Hioko.
Takeda takes a punch right to his stomach. That took the wind out of him momentarily.
Hioko will need to tighten up his combinations if he doesn't want to gas himself out, swinging at thin air.
Hioko fakes a jab and throws a low kick but Takeda checks it well.
Takeda looks to land a combination but Hioko avoids it well.
Takeda swings wildly with a couple of big hooks
and Hioko counters with a nice uppercut.
A punch combination from Hioko misses.
Hioko looks to land a combination but Takeda avoids it well.
Hioko swings wildly with a couple of big hooks
and Takeda counters with a straight right hand.
Takeda punishes Hioko's body with a nice straight punch.
Hioko chopping away at his opponent's legs.
That's two minutes gone in the round.
Takeda has managed to clinch.
Takeda changes levels and goes for a takedown here. Hioko fights it off and pushes away nicely.
Takeda forces Hioko back against the cage and clinches.
Hioko wants to push off and get back to the center of the mat but Takeda has him pressed against the cage.
Takeda misses with a hook to the ribs.
Takeda blocks a couple of punches on the inside.
Hioko has had enough of the clinch but Takeda keeps him there for the moment.
Hioko wants to break free. God knows he wants to breaaaak freeee.
Takeda has not gone for a single takedown so far in this fight, which seems like a very strange tactic when you consider that he has the superior wrestling and BJJ.
Some stalling of biblical proportions here from Takeda.
Hioko prevents a body shot from Takeda.
Hioko can't break the clinch.
Takeda scores with a hook to the body.
Hioko wants to strike at distance but he can't break free of the clinch.
Takeda's corner are urging him to control the action in the clinch for a moment, rather than mount any serious offense. I'm sure the crowd appreciate those instructions... not.
Hioko tries to break the clinch but Takeda is controlling the position.
That's three minutes gone in the round.
Hioko wants to push off and get back to the center of the mat but Takeda has him pressed against the cage.
Hioko is trying to maintain a safe position but Takeda gets an underhook and turns Hioko into the cage.
Takeda looking for a takedown.
Hioko wants to strike at distance but he can't break free of the clinch.
A left hand lands to the body for Takeda.
Takeda lands with a light punch inside.
Hioko takes an elbow to the temple.
Takeda lands a body punch in the clinch.
A left hand lands to the body for Takeda.
Some stalling of biblical proportions here from Takeda.
Takeda is leaning against Hioko and scores with a nice uppercut to the body.
Takeda lands a body punch.
Takeda just leaning against Hioko, taking a breather.
A short body shot lands from Takeda as the two fighters clinch.
Takeda keeps control of Hioko as he tries to wriggle out of the double underhooks.
Takeda cracks Hioko with a nice body shot.
Takeda is leaning against Hioko and scores with a nice uppercut to the body.
Takeda lands a body shot.
That's four minutes gone in the round.
There's not a lot going on here and the crowd are letting the fighters know they're not willing to tolerate a lack of action.
Takeda lands a body shot in the clinch.
Nice body punch from Takeda.
Hioko is leaning against Takeda and scores with a nice uppercut to the body.
Hioko is trying to break free.
Hioko can't break the clinch.
Takeda prevents Hioko from breaking the clinch.
Hioko wants to push off and get back to the center of the mat but Takeda has him pressed against the cage.
Hioko tries to break the clinch but Takeda is controlling the position.
Hioko is trying to break free.
Takeda goes for a takedown attempt but Hioko pushes him away and we're back to fighting at a distance.
That's three failed takedown attempts in the round for Shingo Takeda. That's going to take a lot out of him.
Hioko throws a right and a left that Takeda avoids nicely.
Takeda scores with a nice one two combo and darts back out of range to avoid anything coming in the opposite direction.
Hioko throws a series of punches but Takeda avoids them all with ease.
An inside leg kick lands from Hioko.
Takeda closes the distance but Hioko moves to the side
and Hioko counters with a two punch combo.
And thats the end of the round the fighters go back to their corners.
Asaki Hioko showed his class in that round. I'd imagine he'll take it on all the scorecards.
The fighters get back to their feet, the hooter sounds and we're back to the action! Ladies and gentlemen, this is the final round!

Hioko tries to bum rush Takeda with a series of wild strikes but Takeda uses good footwork to avoid the assault.
Hioko misses with an uppercut
and Takeda counters by moving into the clinch. Good anticipation by Takeda.
Takeda lands a body punch - he's looking to wear down Hioko.
Takeda just leaning against Hioko, taking a breather.
Takeda is leaning against Hioko and scores with a nice uppercut to the body.
Takeda scores a nice knee to the body.
Takeda keeps control of Hioko as he tries to wriggle out of the double underhooks.
Hioko throws a punch but it's blocked by Takeda.
Takeda will no doubt start fighting again in a minute but for now he's just having a little rest, leaning Hioko up against the cage.
Hioko trying to stall but Takeda improves his position.
Hioko wants to break free. God knows he wants to breaaaak freeee.
Hioko tries to break the clinch but Takeda is controlling the position.
We've had a slow start to the round here - hopefully the action picks up.
Hioko wants to strike at distance but he can't break free of the clinch.
Hioko trying to stall but Takeda improves his position.
Hioko takes a big intake of breath there - he's definitely tired.
The referee calls for Takeda to work.
Takeda missing with knees to the body.
Takeda keeps control of Hioko as he tries to wriggle out of the double underhooks.
Hioko has had enough of the clinch but Takeda keeps him there for the moment.
That's one minute gone in the round.
Hioko lands a shoulder strike that jolts his opponent's head backwards.
Hioko tries to break the clinch but Takeda is controlling the position.
Hioko wants to get back to striking at distance but Takeda won't allow it.
Takeda keeps control of Hioko as he tries to wriggle out of the double underhooks.
Takeda keeps control of Hioko as he tries to wriggle out of the double underhooks.
Takeda misses with a body punch.
Takeda prevents Hioko from breaking the clinch.
Hioko throws a head punch that misses.
Takeda misses the knee to the body. Nice hip positioning from Hioko.
Hioko has had enough of the clinch but Takeda keeps him there for the moment.
Takeda lands a hook to the body. It's hard to tell if that hurt Hioko or not.
Takeda lands a nice looking hook to the body, against the cage.
Hioko prevents a body shot from Takeda.
Takeda with an attempt at a knee that misses.
Takeda lands a body punch.
Takeda prevents Hioko from breaking the clinch.
Stalling in the clinch from Takeda.
Hioko wants to strike at distance but he can't break free of the clinch.
Takeda works for underhooks and lands a body shot in the process.
Hioko can't break the clinch.
That's two minutes gone in the round.
There's not a lot going on here and the crowd are letting the fighters know they're not willing to tolerate a lack of action.
Nice body punch from Takeda - that landed with a thud.
Hioko trying to stall but Takeda improves his position.
Takeda lands a shot to the body.
Takeda lands a hook to the body. It's hard to tell if that hurt Hioko or not.
Nice body punch from Takeda.
Takeda unloads a knee to the mid-section. Hioko lets out a prehistoric sounding urrrrgh.
A right hook to the body lands for Takeda.
Takeda blocks a body shot from Hioko.
Takeda wants a takedown.
Hioko scores with a nice hook to the head.
Takeda tries to land knees in the clinch but Hioko avoids the damage to the body.
Hioko tries to break the clinch but Takeda is controlling the position.
Hioko tries to break the clinch but Takeda is controlling the position.
Hioko can't break the clinch.
Hioko wants to break free but Takeda has control.
Hioko breaks the clinch.
Shingo Takeda is looking to throw some combinations by the looks of things.
Takeda has taken the fight to the clinch.
Takeda goes for a body shot but it's blocked.
Takeda keeps control of Hioko as he tries to wriggle out of the double underhooks.
Hioko tries to break the clinch but Takeda is controlling the position.
Takeda lands a nice shot to the body.
That's three minutes gone in the round.
Hioko is trying to break free.
Hioko wants to push off and get back to the center of the mat but Takeda has him pressed against the cage.
A short body shot lands from Takeda as the two fighters clinch.
Hioko doesn't land with the attempted body shot.
Hioko wants to get back to striking at distance but Takeda won't allow it.
Hioko tries to break the clinch but Takeda is controlling the position.

Takeda pulls Hioko into guard.
Takeda is working the butterfly guard. He manages to land a nice scissor sweep and is now in half guard on the top. Nice move.
Takeda is figuring out what he wants to do next.
Hioko is trying to control but can't.
That's four minutes gone in the round.
A few boos can be heard. I'm sure they will multiply if the fighters don't pick up the pace.

Takeda stands, ready to strike. The ref makes him back up and allows Hioko to get to his feet.
Hioko avoids the clinch attempt nicely.
Asaki Hioko seems to be the more aggressive standup fighter in this bout.
Takeda stumbles momentarily as he takes a strong leg kick from Hioko.
Hioko throws a wild combination but nothing lands.
Hioko throws a combination that misses
and Takeda moves into the clinch.
Hioko is trying to maintain a safe position but Takeda gets an underhook and turns Hioko into the cage.
Hioko breaks from the clinch.
Takeda wants to clinch up but Hioko keeps it at a distance.
Hioko falls off balance throwing a combination
and Takeda counters with a three punch combo that has Hioko backing up. Hioko nods at Takeda to acknowledge the strikes.
Takeda swings wildly with a hook that is half blocked by Hioko.
Takeda is looking to clinch but Hioko is avoiding it.
Hioko swings wildly with a couple of big hooks
and Takeda moves into the clinch.
And that's the end of the fight!
Shingo Takeda showed his dominance in that final round.
I think Takeda has won this one but let's see what the judges have to say. Over to the ring announcer for the scorecards.
Ladies and gentlemen, after 3 rounds of action, we go to the scorecards for a decision.
Judge Yukihiro Shimada scores the fight 29:28
Judge Ren Mimura scores the fight 29:28
Judge Taro Takaoka scores the fight 29:28
In favor of your winner, by unanimous decision... Shingo Takeda!
|
|
|
|
|
|
|
|
|
|
|
|
|
|
|
|
|
|
|
|
|
|
|
| S |
C
A |
G |
S |
C
B |
G |
|
S |
C |
G |
|
energy
A | B |
|
hype
A | B |
|
pop
A | B |
|
mgr
A | B |
|
FIGHT
RATING
34% |
|
|
|
|
|
|
