|
|
PBP Commentary |
Coming up we have a heavyweight MMA rules bout between Jada Swizz (ranked 0 p4p, 0 weight class) and Easy II Burger (ranked 0 p4p, 0 weight class). Swizz comes to the ring accompanied by lil wayne pick the world up and drop it on your head. Burger has chosen Set it off as his entrance music. Over to our ring announcer for the fighter introductions!
 |
|
 |
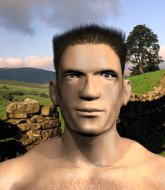
| 225 cm
23
220 lbs
0 - 5 - 0 |
|
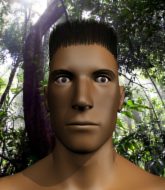
198 cm
19
265 lbs
2 - 3 - 0 |
Good wrestling
Counter striker
Very strong |
|
BJJ Blue Belt
Counter striker
Tends to cut |
|
| |
|
Ladies and gentlemen. This fight is 3 rounds, in the heavyweight division.
Introducing the fighter to my left, fighting out of the red corner.
With a record of
0 - 5 - 0, fighting out of Amsterdam, Jada Swizz!
And introducing the fighter to my right, fighting out of the blue corner.
With a record of
2 - 3 - 0, fighting out of Amsterdam, Easy II Burger!
The judges for this bout are Wagner Zegers, Radbod Blank and Paulsen Ambrosius.

The bell rings for round one and we are underway!

Swizz rushes Burger and pushes him back against the ropes in a clinch.

Burger gets a trip takedown into half guard.
Swizz is looking to regain full guard. Not this time though.

Burger decides to stand up.
Burger has closed the distance and engaged Swizz in a clinch.
A frustrated look appears on Burger's face as he tries to break the clinch.
Burger is working for takedown but Swizz is calmly controlling the position for now.
Swizz really does look like a pencil wearing a pair of gloves. Let's hope he has a gameplan to suit that ridiculous body shape.
Burger looks gassed!
Burger avoiding damage.
Burger goes for a takedown in the clinch but Swizz prevents it.
A battle for position here, against the ropes.
Burger jumps guard but Swizz stands there with Burger around his waist. Burger gives up and drops back to his feet. We remain in the clinch.
Jada Swizz has stuffed three takedown attempts in the round now. That's going to take a lot out of Easy II Burger.

That's one minute gone in the round.
Burger is trying to stall.
Burger tries to pull guard but can't drag his opponent to the mat. Swizz just stands there and leans against the ropes.
Burger keeps control of Swizz as he tries to wriggle out of the double underhooks.
Swizz is trying to break free.
Burger jumps guard but Swizz stands there with Burger around his waist. Burger gives up and drops back to his feet. We remain in the clinch.

Swizz breaks from the clinch.
Burger avoids the clinch attempt nicely.
Swizz clinches with his opponent.
Swizz breaks from the clinch.
Swizz tries to clinch up but Burger circles away and keeps his distance.
Swizz throws a shot to the body.
Swizz fails to land with the punch combination there - jab, cross, hook, miss, miss, miss.

That's two minutes gone in the round.
Burger tries to clinch up
and Swizz moves into the clinch.
Burger is trying to force a seperation but Swizz has the dominant position.
Swizz throws a vicious knee straight up the middle but Burger blocks it with crossed arms.
Burger tries to jump guard but he falls flat on his backside. Swizz smiles and moves away.
Burger blocks a low kick nicely.
Swizz fails with an attempt to clinch.
Swizz throws a low kick but it's checked well by Burger.
Swizz wants to clinch up but Burger keeps it at a distance.

That's three minutes gone in the round.
Swizz tries to close the distance and clinch up but Burger swats him away and circles back towards the center.
Swizz misses with a two punch combination.
Swizz is looking to clinch.
Crunch! Swizz slams his shin into Burger's torso.
Swizz lands a jab followed by a nice looking cross.
Swizz moves into the clinch successfully.
Swizz escapes the clinch and we're back to striking.
Burger wants to clinch.
Swizz moves into range and clinches up with Burger.

That's four minutes gone in the round.
Burger wants to break free but Swizz has control.
Swizz pushes off and circles away, back to the middle of the mat.
Burger tries for a takedown but Swizz circles away easily
and Swizz cracks him with a counter punch right on the button.
Burger has his takedown stuffed
and Swizz makes him pay by landing a nice hook to the body before moving out of range.
Swizz closes the distance and presses his opponent up against the ropes.
Burger goes for a takedown in the clinch but Swizz prevents it.
Swizz working hard to break the clinch.
Swizz can't break the clinch.
Burger keeps the fight in the clinch, despite Swizz's efforts to push away.
Burger tries to stall but Swizz uses the opportunity to gain a better position.
And thats the end of the round the fighters go back to their corners.
Jada Swizz dominated that round.
That's the end of the interval. I'm sure that seemed a lot quicker than a minute for our two fighters! Back to the action.

The fight stays on the outside here - Swizz looks like he's thinking about clinching though.
Swizz misses with a low kick as Burger jumps back.
Burger fails with the takedown
and Swizz counters with a stiff right hand.
Burger showing good head movement there, avoiding the strikes from Swizz.
Swizz tries to clinch but is not successful on this occasion.
Both fighters are absolutely exhausted here.
We've had a slow start to the round here - hopefully the action picks up.
Swizz tries to clinch up but Burger circles away and keeps his distance.
Swizz swats away the attempt to clinch by Burger.
Swizz tries a switch kick but it misses it's target.
That's one minute gone in the round.
Swizz throws a body punch but Burger moves out of range.
Burger fakes a jab and then connects with a hook.
Burger misses with a double jab
and Swizz counters with a good low kick that Burger was not able to check.
The fight stays on the outside here - Swizz looks like he's thinking about clinching though.
Burger with a poor takedown
and Swizz counters nicely by changing levels and landing a hook to the body.
Swizz's corner calls for a 1,2 combination and Swizz duly obliges.
Burger has his head snapped back a nice jab. A little nod from Burger there as he acknowledges the shot.
Burger doesn't succeed with the takedown
enabling Swizz to counter with a crisp jab.
Jada Swizz has stuffed three takedown attempts in the round now. That's going to take a lot out of Easy II Burger.
That's two minutes gone in the round.
Burger tries for a takedown but Swizz circles away easily
and Swizz counters by moving into the clinch. Good anticipation by Swizz.
Burger tries to pull guard but can't drag his opponent to the mat. Swizz just stands there and leans against the ropes.
Burger is trying to work for a single leg takedown but Swizz pulls him back up using the underhooks.
Burger wants the takedown. Swizz is fighting it off but Burger persists and manages to bring the fight to the ground, ending up in Swizz's guard against the ropes.

Swizz throws his legs up looking for a submission but Burger uses it to pass to side control.
Burger looking for an arm triangle but it's way too loose to do anything.
Burger looking for an arm triangle but it's way too loose to do anything.
The fighters are trapped in the ropes so we're going to have a reposition here. The ref calls for a break and repositions the fighters in the center of the ring.
That's three minutes gone in the round.
Burger decides to stand back up.
Swizz scores with a hook to the body. Burger takes a step back and tries to catch his breath.
Swizz fails with an attempt to clinch.
Burger shoots in but doesn't get the takedown
and Swizz counters with a two punch combo.
A head kick misses from Swizz.
Jada Swizz is looking to throw some combinations by the looks of things.
That's four minutes gone in the round.
A lull in the action here being met with boos from the crowd.
Swizz gets taken down but at least he's managed to land in guard.
Burger is holding a leg here, probably looking for an ankle lock - he drops back and goes for it! Swizz is in trouble! Is it all over??? No! Swizz has escaped and now he's on top!
Burger wants to sweep here but Swizz controlling him for the moment.
Burger throwing his legs up looking for a triangle.
And thats the end of the round the fighters go back to their corners.
Easy II Burger showed his class in that round. I'd imagine he'll take it on all the scorecards.
OK. That's time! The bell goes and we're back to the action. This is the final round!

Burger throws a head kick that misses.
Swizz is using his reach advantage well here, landing the more effective single shots from range.
Swizz closes the distance looking to clinch
and Burger counters with a nice double leg into guard.
Swizz has a loose triangle. He'll be looking to tighten that up but Burger can see exactly what he's planning and manages to posture up and free himself.
Burger pushing down on Swizz's thigh, trying to pass to half guard. He's managed it... Nice work.
Both fighters are breathing heavily.
That's one minute gone in the round.
Swizz wants to get back to his feet.
Burger is trying to work for a kimura. This could be trouble! No, Swizz has managed to free his arm - good work.
Burger is trying a forearm choke
I don't think that's going to do much at this level of the game.
Swizz looking to work for a kimura from the bottom.
That's two minutes gone in the round.
Burger is sneakily working for an arm triangle but Swizz sees it coming and defends easily.
The fighters are tangled up in the ropes here. We might need a restart if the fighters can't break free themselves.
It looks like Burger is going to stand back up.
Burger is looking for an arm triangle, whilst trying to pass to side control. Swizz doesn't seem that keen to cooperate though. No luck this time Burger.
That's three minutes gone in the round.
Burger is working for a submission of some sort.
Swizz is trying to stand.
That's four minutes gone in the round.
A few boos can be heard. I'm sure they will multiply if the fighters don't pick up the pace.
Swizz is looking for a sweep. Burger is wise to his cunning plan and keeps the top position.
Burger is working for a submission of some sort.
Burger is working for submissions here but there's nothing on.
Burger maintaining the dominant position here and is working for a kimura. He's locked it up! Swizz could be in real trouble here! He's trying to wriggle out but Burger has cracked it and Swizz is screaming in pain - he's tapped out! Great finish by Burger!
Ladies and gentlemen, after 4:57 of round 3, we have a winner by way of Submission (Kimura). Easy II Burger!
|
|
|
|
|
|
|
|
|
|
|
|
|
|
|
|
|
|
|
|
|
|
|
| S |
C
A |
G |
S |
C
B |
G |
|
S |
C |
G |
|
energy
A | B |
|
hype
A | B |
|
pop
A | B |
|
mgr
A | B |
|
FIGHT
RATING
51% |
|
|
|
|
|
|

