|
|
PBP Commentary |
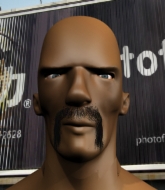
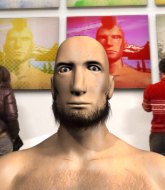
Coming up we have a featherweight MMA rules bout between Hideki Yokohama (ranked 0 p4p, 0 weight class) and Kenji Yakimoto (ranked 0 p4p, 0 weight class). Kenji Yakimoto has the power to score a knockout today if he connects clean with Hideki Yokohama's chin.
 |
|
 |
| 180 cm
18
155 lbs
0 - 0 - 0 |
|
170 cm
18
150 lbs
0 - 7 - 0 |
BJJ Blue Belt
Brawler
Good chin |
|
BJJ Blue Belt
Basic striking
Determined |
|
| |
|
Ladies and gentlemen. This fight is 3 rounds, in the featherweight division.
Introducing the fighter to my left, fighting out of the red corner.
With a record of
0 - 0 - 0, fighting out of Tokyo, Hideki Yokohama!
And introducing the fighter to my right, fighting out of the blue corner.
With a record of
0 - 7 - 0, fighting out of Tokyo, Kenji Yakimoto!
The judges for this bout are Yuuki Gou, Ren Mimura and Taro Takaoka.

The bell rings for round one and we are underway!

Yokohama scores a takedown into full mount!
Yakimoto is desperately trying to improve his position but Yokohama has a good base and remains in mount.
Yakimoto is persisting with the attempt to improve his position.

Yokohama is standing up, even though he is in mount.
Yakimoto tries to clinch but is not successful on this occasion.
Yokohama closes this distance looking for a takedown but Yakimoto circles away.

Yokohama has taken the fight to the clinch.
Yakimoto is trying to work for a single leg takedown but Yokohama pulls him back up using the underhooks.
Yokohama fails to pull guard.
Yakimoto is trying to drag Yokohama to the mat but Yokohama just about manages to keep his footing. He used the cage to his advantage there.
Yokohama gets the body lock takedown. After a quick scramble, Yakimoto regains guard.

That's one minute gone in the round.
Yokohama tries to free his leg and advance position but Yakimoto is retaining full guard.
Yokohama trying to stand up but can't free himself from Yakimoto's guard.
Yokohama looking to control the position here, rather than advance.
Yokohama is breathing heavily.
Yakimoto is working from a closed guard but he's struggling to control his opponent.
Yokohama stops Yakimoto from standing up.

That's two minutes gone in the round.
Well. There's a bit of a lull in the action here and the crowd are starting to get restless.
Yokohama tries to stand but Yakimoto is controlling from the bottom.
Yokohama trying to pass the guard but can't manage it just yet.
Yokohama wants to control from the top but Yakimoto keeps moving.

Well, the referee has seen enough. Neither fighter is active enough on the ground so he's stood them back up.
Yakimoto closes the distance and clinches.
Yokohama tries to land knees in the clinch but Yakimoto avoids the damage to the body.
Yokohama fails to pull guard.
That's three failed takedown attempts in the round for Hideki Yokohama. That's going to take a lot out of him.
Yakimoto is trying to work for a single leg takedown but Yokohama pulls him back up using the underhooks.
A battle for position here, against the cage.
Yakimoto looking for a takedown.
Yakimoto looks like he'd prefer to be striking at range right now.
Yakimoto is trying to drag Yokohama to the mat but Yokohama just about manages to keep his footing. He used the cage to his advantage there.

That's three minutes gone in the round.
Yakimoto is trying to work for a single leg takedown but Yokohama pulls him back up using the underhooks.
Yakimoto tried to land a shot to the body but connects with Yokohama's elbow.
Yokohama prevents a takedown attempt there.
Yakimoto tries to land a knee to the body but he is off balance and Yokohama avoids it.
Yokohama prevents Yakimoto from breaking the clinch.
Yokohama gets the body lock takedown. After a quick scramble, Yakimoto regains guard.
Yokohama showing good wrestling skills to control the position.
Yokohama is looking to stand up but Yakimoto won't let him.

That's four minutes gone in the round.
Yokohama passes Yakimoto's left leg - he's now in half guard.
Yakimoto is looking to regain full guard. Not this time though.
Yokohama stands up from half guard... He's had enough of that ground malarky for the time being.
Yokohama clinches with his opponent.

Yokohama pushes off and circles away, back to the middle of the mat.
Yokohama wants to clinch up but Yakimoto keeps it at a distance.
Yakimoto plants his feet and lands a nice head kick!
And thats the end of the round the fighters go back to their corners.
Hideki Yokohama dominated that round.
That's time! Back to the action!

Yakimoto fakes with an overhand right and moves in to clinch with Yokohama, pushing him back against the cage.
Yokohama gets control of Yakimoto's arms and successfully pulls guard. Yokohama will no doubt be looking for submissions off his back.
Yokohama keeping moving, preventing Yakimoto from controlling successfully.
Yakimoto missing there with some ground and pound from the guard.
Yokohama controlling the position.
Yokohama kicks Yakimoto off and gets to his feet.
Yokohama gets taken down but at least he's managed to land in guard.

Yakimoto drops back, looking for a kneebar! Yokohama looks panicked! The fighters roll across the mat, one looking to finish, one looking to escape. Yokohama looks to have wriggled free... Yes, he's got his leg free and he's dived into side control! Good work there from Yokohama!
Both fighters are absolutely exhausted here.
Yokohama decides to stand back up. Yokohama steps back and let's Yakimoto get back to his feet.
That's one minute gone in the round.
Yokohama tries for a takedown but Yakimoto sees it coming a mile off and avoids it easily.
Yokohama throws a series of punches but Yakimoto avoids them all with ease.
Yakimoto gets his takedown attempt stuffed easily
and Yokohama counters with a three punch combination, finished off with a leg kick. Nice work.
Yokohama throws a right and a left that both miss.
Yokohama shoots in for a takedown but doesn't get it.
Yakimoto tries for a takedown but Yokohama sees it coming a mile off and avoids it easily.
Yokohama fails to land the takedown.
That's three failed takedown attempts in the round for Hideki Yokohama. That's going to take a lot out of him.
Yakimoto shoots in for a takedown but doesn't get it.
A head kick by Yokohama misses
and Yakimoto connects with a straight left hand counter down the middle.
A head kick from Yokohama lands but Yakimoto takes it in his stride.
Yokohama throws a head kick that misses.
That's two minutes gone in the round.
My god... these two guys really need to pick up the pace or everyone will leave to go get a beer.
Yakimoto is looking to clinch but Yokohama is avoiding it.
Yakimoto moves into the clinch successfully.
Yakimoto wants a takedown but no success here.
Yakimoto changes levels and goes for a takedown here. Yokohama fights it off and pushes away nicely.
Yokohama shoots in and scores a nice double leg takedown into half guard.
Yokohama tries to stand but his arm is trapped.
Yokohama is trying to work for a kimura but Yakimoto is defending well.
That's three minutes gone in the round.
Yakimoto is trying to control but can't.
Yokohama seems to have lost interest with the ground game and is thinking about standing back up.
The fighters are pressed up against the cage, both looking to find a bit of space to work.
Yakimoto is looking to escape.
Yokohama content to sit in half guard and control for a moment.
Yokohama is looking for a kimura here.
That's four minutes gone in the round.
Neither fighter has done anything of merit for a good minute or two here and the crowd are not happy about it.
Yokohama is just sitting in half guard, waiting for something to happen.
It looks like we're going to have a standup here. Neither fighter is doing enough on the ground.
Yokohama tries to close the distance and clinch but Yakimoto swats him to one side with an open hand palm strike and circles away.
Hideki Yokohama is looking to throw some combinations by the looks of things.
Yakimoto shoots in and drives through. Yokohama sprawls well.
Yokohama throws a head kick that half lands.
Yokohama stuffs a takedown. It's all about dictating where the fight takes place and Yokohama wants it to stay on the feet.
Yakimoto stuffs the takedown attempt from Yokohama. Yokohama gets slowly back to his feet.
Yokohama tries to close the distance and clinch but Yakimoto swats him to one side with an open hand palm strike and circles away.
And thats the end of the round the fighters go back to their corners.
Hideki Yokohama dominated that second round.
The referee calls time. The cornermen exit stage left and we're back to business. This is the final round!

Yakimoto tries to clinch there but Yokohama circles away.
Yakimoto circles away from the clinch attempt.
Yakimoto tries to score a power double leg takedown but Yokohama sees that one coming and sprawls well. That will dishearten Yakimoto somewhat.
Yokohama swings away but doesn't land with a series of punches.
Yakimoto avoids the head kick by Yokohama.
Yokohama tries to clinch but Yakimoto is having none of it.
Yakimoto shoots in looking for a takedown. Yokohama tries to sprawl out of it but Yakimoto keeps driving through. The fighters are pinned against the cage. Yokohama manages to get underhooks and after a bit of a struggle, circles away and we're back to standing.
Yokohama moves into the clinch successfully.
We've had a slow start to the round here - hopefully the action picks up.
Yakimoto can't get the takedown.
Hideki Yokohama has stuffed three takedown attempts in the round now. That's going to take a lot out of Kenji Yakimoto.
Yakimoto changes levels and goes for a takedown here. Yokohama fights it off and pushes away nicely.
Both fighters are breathing heavily.
Yokohama fakes with an overhand right and moves in to clinch with Yakimoto, pushing him back against the cage.
That's one minute gone in the round.
Yokohama lands with a good tight uppercut to the head.
Yakimoto is working for a takedown up against the cage. He can't get it on this occasion though.
Yokohama stalling here - the referee won't stand for too much of that.
Yokohama ties up his opponent against the cage and manages to drag the fight down to the ground. Yokohama no doubt will be looking to work submissions from his guard.
Hideki Yokohama overall seems to be getting the better of the ground position in the fight so far.
Yokohama keeping moving, preventing Yakimoto from controlling successfully.
Yokohama is pulling down on Yakimoto's head. It's preventing any offense from Yakimoto, at least for the moment.
Yakimoto wants to stand but Yokohama has a closed guard, so he can't escape.
That's two minutes gone in the round.
The crowd are showing their displeasure at the lack of action as loud boos ring out around the arena.
Yakimoto wants to control from the top but Yokohama keeps moving.
Yakimoto is holding a leg here, probably looking for an ankle lock - he drops back and goes for it! Yokohama is in trouble! Is it all over??? No! Yokohama has escaped and now he's on top!
Yokohama stopping the sweep attempt from Yakimoto.
Yakimoto wants to stand up but Yokohama is controlling him.
The ref warns both fighters not to hold the cage as they work up against the meshing.
That's three minutes gone in the round.
Yokohama stands up from guard. Let's bang!
Yokohama doesn't manage to clinch there - Yakimoto circles away.
Yakimoto shoots in for a takedown but Yokohama shows good takedown defense there and keeps this one on the feet.
Yokohama misses with a combination
and Yakimoto counters with a nice double leg into guard.
Yokohama is looking for a triangle but Yakimoto pushes his legs off easily.
Yokohama looking for submissions off his back, moving his hips, looking for an opening.
That's four minutes gone in the round.
Yakimoto wanted to stand there but Yokohama had control of the position.
Yakimoto passes Yokohama's left leg - he's now in half guard.
Yakimoto looks to land a strike but Yokohama avoids it nicely and regains full guard.
Yokohama wants to stand but Yakimoto is controlling the position.
And that's the end of the fight!
That was a close round. You could make an argument for either fighter but I would give it to Hideki Yokohama.
Well Yokohama has outscored his opponent in every aspect of the fight today. Only a scarily incompetent judge or two will keep him from a well deserved win... Over to the ring announcer for the scorecards.
Ladies and gentlemen, after 3 rounds of action, we go to the scorecards for a decision.
Judge Yuuki Gou scores the fight 30:27
Judge Ren Mimura scores the fight 30:27
Judge Taro Takaoka scores the fight 30:27
In favor of your winner, by unanimous decision... Hideki Yokohama!
|
|
|
|
|
|
|
|
|
|
|
|
|
|
|
|
|
|
|
|
|
|
|
| S |
C
A |
G |
S |
C
B |
G |
|
S |
C |
G |
|
energy
A | B |
|
hype
A | B |
|
pop
A | B |
|
mgr
A | B |
|
FIGHT
RATING
39% |
|
|
|
|
|
|

