|
|
PBP Commentary |
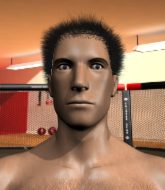
Coming up we have a featherweight MMA rules bout between Akira Kambei (ranked 0 p4p, 0 weight class) and Nichiren Daishonin (ranked 0 p4p, 0 weight class). Chooooooooon! I think Kambei might be my favorite fighter, now he's come out to Tori Amos - Crucify. The key to victory for Akira Kambei has got to be keeping the fight on the feet.
 |
|
 |
| 164 cm
22
145 lbs
2 - 2 - 0 |
|
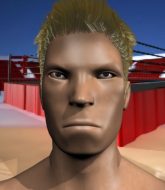
170 cm
22
153 lbs
4 - 1 - 0 |
BJJ Blue Belt
Basic striking
Cuts easily |
|
Good takedowns
Basic striking
Granite chin |
|
| |
|
Ladies and gentlemen. This fight is 3 rounds, in the featherweight division.
Introducing the fighter to my left, fighting out of the red corner.
With a record of
2 - 2 - 0, fighting out of Tokyo, Akira Kambei!
And introducing the fighter to my right, fighting out of the blue corner.
With a record of
4 - 1 - 0, fighting out of Tokyo, Nichiren Daishonin!
The judges for this bout are Yukihiro Shimada, Shigeki Fujiwara and Shigeki Sano.

The bell rings for round one and we are underway!
Daishonin shoots in for a takedown but Kambei shows good takedown defense there and keeps this one on the feet.
No luck with that takedown attempt from Daishonin.
Kambei throws a series of punches but Daishonin avoids them all with ease.
Daishonin keeping a good distance there, avoiding the body shot.
Left hook, right uppercut from Kambei.
Kambei throws a hook but Daishonin avoids it easily.
Daishonin takes a shot right to the bread basket.
Kambei misses with a body shot. Nice footwork from Daishonin.

Daishonin shoots in and bounces Kambei off the ropes to secure the takedown into guard.
Daishonin looking to pass the guard.
Kambei wants to sweep here but Daishonin controlling him for the moment.
Kambei is working hard here to advance position.

Daishonin drops back for a leg! It's a sloppy attempt though and Daishonin jumps back into guard quickly, to retain the dominant position.
A real slowdown in the pace of the fight for a moment, as Kambei holds on and takes a little breather.
Kambei looking for a sweep. Not yet Kambei, not yet.
Kambei is trying to keep Daishonin in close.

That's one minute gone in the round.

The referee has ruled that neither fighter is active enough on the ground and has stood them back up.
Daishonin fails with a takedown attempt.
Akira Kambei has stuffed three takedown attempts in the round now. That's going to take a lot out of Nichiren Daishonin.
Daishonin takes a shot right to the liver - Bas would have been proud of that punch.
Daishonin closes the distance and looks for a trip takedown... aaaand he's got it - Daishonin lands in his opponent's guard.
Kambei wants to sweep here but Daishonin controlling him for the moment.
Daishonin looking to pass the guard.
Kambei is trying to stand up but he's not managed so far.
Daishonin wants to pass the guard but Kambei is keeping the position.
Kambei trying to control the position.
Daishonin pressing down on his opponent's thigh, looking to pass guard. Kambei is keeping the position for now.

That's two minutes gone in the round.
The fighters are trapped in the ropes so we're going to have a reposition here. The ref calls for a break and repositions the fighters in the center of the ring.
Daishonin drops back looking for a leg! Kambei is in trouble here! The fighters roll with the hold and Kambei manages to kick Daishonin off! Daishonin jumps back into Kambei's guard.
The referee decides to stand the fighters back up.
Kambei misses with a wild body shot.
Good shot there by Kambei.
Left hook, right uppercut from Kambei.
Kambei throws an overhand right that lands on Daishonin's shoulder, as Daishonin tries to avoid the shot.
Horrible takedown by Daishonin or perhaps it was just good defense by Kambei which made him look bad.
Kambei lands with a nice body punch.
Kambei lands a with a good body shot.
Kambei digs a good hook to Daishonin's body.
A looping hook to the body misses from Kambei. Daishonin does a little dance to reset his feet.
Kambei is looking to wear down Daishonin with body shots, infact he's throwing more body shots than head shots at the moment.
Kambei misses the shot to the body.
Daishonin looks for a takedown but Kambei sprawls well.
Kambei dips down and scores with a jab to the body.

That's three minutes gone in the round.
Daishonin fails with the takedown.
Daishonin looks gassed!
Daishonin is trying hard to land a takedown here. Kambei sprawls well and keeps this one on the feet.
Kambei lands a nice looking body shot.
Kambei stuffs a takedown. It's all about dictating where the fight takes place and Kambei wants it to stay on the feet.
Kambei takes a swing at Daishonin's ribcage but misses.
Kambei stuffs the takedown attempt from Daishonin. Daishonin gets slowly back to his feet.
Kambei waving his hands out in front of him, looking to distract Daishonin.
Daishonin scores a trip takedown into side control. Nice.
Kambei manages to work his way to half guard, despite Daishonin's best efforts.
Kambei wants to improve his position but Daishonin is controlling well.
Both fighters really going for it on the ground here!
Daishonin is thinking about going for an arm triangle but he can't free his leg.
Daishonin is thwarting Kambei's attempts to control the position.

That's four minutes gone in the round.
Daishonin is looking to advance position but Kambei won't allow it.
The referee decides to stand the fighters back up.
Daishonin shoots in looking for a double leg takedown. Kambei defends it nicely.
Kambei throws a jab but it's blocked by Daishonin.
No luck for Daishonin with that takedown attempt.
Kambei fakes high and swings low for a body shot but Daishonin manages to avoid it.
Kambei stooping low to avoid any incoming strikes and then lunges in with an uppercut come cross that lands flush.
Kambei thows a body shot but no joy.
Daishonin tries for a takedown but Kambei sees it coming a mile off and avoids it easily.
A looping hook to the body misses from Kambei. Daishonin does a little dance to reset his feet.
And thats the end of the round the fighters go back to their corners.
Akira Kambei dominated that round.
The corners get their ten second warning. Both fighters stand from their stools and stare eachother down, ready to get back to the action.

Kambei works Daishonin's body with a nice hook.
A lazy left from Kambei finds it's target.
A shot to de liver by Kambei. Beautiful body shot.
Daishonin shoots in for a takedown but Kambei shows good takedown defense there and keeps this one on the feet.
Nichiren Daishonin is looking to throw some combinations by the looks of things.
Kambei looks to score with a jab to the body but Daishonin is just out of range.
Nice shot lands for Kambei.
Kambei swings for the body but Daishonin moves out of range.
Nice cross by Kambei.
Left hook, right uppercut from Kambei.
Daishonin fails with a takedown attempt from distance.
No luck with that takedown attempt from Daishonin.
Akira Kambei has stuffed three takedown attempts in the round now. That's going to take a lot out of Nichiren Daishonin.
Daishonin keeping a good distance there, avoiding the body shot.
Daishonin shoots in for a takedown but Kambei shows good takedown defense there and keeps this one on the feet.
The crowd cheers as Kambei lands an impressive looking overhand right. Daishonin doesn't seem phased though.
Daishonin is breathing heavily.
Kambei keeps the fight standing with a nice sprawl.
Daishonin ducks under a wild hook from Kambei.
Kambei misses with a body shot. Nice footwork from Daishonin.
Wow, both these guys are really going for it!
That's one minute gone in the round.
Kambei stuffs the takedown.
Kambei throws a big shot that misses.
Kambei ducks down and throws a hook to the body.
Kambei misses with a body shot. Nice footwork from Daishonin.
Daishonin uses some good footwork to avoid the body shot by Kambei.
Kambei throws a hook to the body but it doesn't connect.
Daishonin gets cracked with a nice right hand there by Kambei.
Daishonin shoots in and drives through. Kambei sprawls well.
Kambei connects with a jab.
Kambei jabs at Daishonin's body.
Kambei dips to his left and cracks Daishonin with an uppercut!
Daishonin moves out of range as Kambei strikes.
Kambei looks to score with a jab to the body but Daishonin is just out of range.
Kambei throws a jab but it's blocked by Daishonin.
Daishonin avoids the body shot from Kambei.
A looping hook to the body misses from Kambei. Daishonin does a little dance to reset his feet.
Daishonin fails to land the takedown.
Kambei lands a body shot.
That's two minutes gone in the round.
Kambei throws a shot from downtown. Daishonin moves away and avoids it.
Kambei misses with a wild body shot.
Kambei throws a body punch but Daishonin moves out of range.
Kambei just misses with a punch to the body.
Daishonin shoots in for a takedown but Kambei shows good takedown defense there and keeps this one on the feet.
Kambei misses with a body shot. Nice footwork from Daishonin.
Kambei misses with a body shot.
Daishonin shoots in looking for a takedown. Kambei tries to sprawl out of it but Daishonin keeps driving through. The fighters are pinned against the ropes. Kambei manages to get underhooks and after a bit of a struggle, circles away and we're back to standing.
Kambei bobs and weaves and unloads with a good uppercut.
Kambei throws a hook to the body but it doesn't connect.
Kambei throws a series of punches but Daishonin moves out of range.
Kambei scores with a punch to the gut of his opponent.
Kambei misses with a jab, cross combination.
A telegraphed takedown attempt from Daishonin is defended easily by Kambei.
Kambei throws a hard body shot but it just misses.
That's three minutes gone in the round.
Daishonin fakes high and shoots in for a takedown but Kambei avoids it really well and circles away.
Kambei takes a swing at Daishonin's ribcage but misses.
Kambei comes forward and lands a shot to the body, then darts back out of range.
Daishonin changes levels and looks for a double leg takedown. Kambei tries to avoid it but Daishonin manages to keep hold of a leg and drag Kambei to the ground. Kambei escapes though and pops straight back up to his feet.
No joy there for Kambei, who threw a few shots but didn't land.
Kambei throws a body punch but Daishonin moves out of range.
Kambei fakes high and swings low for a body shot but Daishonin manages to avoid it.
Kambei misses with a wild body shot.
Kambei tries to land with a swinging hook to the body but Daishonin was well out of range. Poor timing from Kambei.
Kambei stuffs the takedown.
Akira Kambei is winning the standup battle so far.
Daishonin tries for a takedown but Kambei sees it coming a mile off and avoids it easily.
Kambei swings and misses with a hook to the body.
Daishonin shoots in for a takedown but Kambei shows good takedown defense there and keeps this one on the feet.
Kambei tries to land with a swinging hook to the body but Daishonin was well out of range. Poor timing from Kambei.
Kambei fails to land with a series of punches.
Kambei with a jab.
That's four minutes gone in the round.
There's not a lot going on here and the crowd are letting the fighters know they're not willing to tolerate a lack of action.
Daishonin shoots in for a takedown. He's persisting with it as Kambei sprawls well. Kambei wins this battle and keeps the fight standing. Daishonin gets slowly back to his feet.
Daishonin uses good head movement to avoid the hook from Kambei.
A shot to de liver by Kambei. Beautiful body shot.
A big left from Kambei misses.
Daishonin fails with a takedown attempt.
Kambei with a jab.
Kambei thows a body shot but no joy.
Kambei takes a swing at Daishonin's ribcage but misses.
Kambei throws a looping overhand right but Daishonin ducks down to avoid it.
Daishonin dives in and grabs Kambei's left leg, looking for a takedown. Kambei pushes down on Daishonin's head and hops out.
Kambei stooping low to avoid any incoming strikes and then lunges in with an uppercut come cross that lands flush.
Kambei lands a jab.
Kambei takes a swing at Daishonin's ribcage but misses.
And thats the end of the round the fighters go back to their corners.
Akira Kambei dominated that second round.
The minute break is over - no more time for sponges and pep talks - back to the action! This is the final round!

Kambei misses with a straight right.
Daishonin tries to score a power double leg takedown but Kambei sees that one coming and sprawls well. That will dishearten Daishonin somewhat.
Kambei takes a swing at Daishonin's ribcage but misses.
Daishonin avoids the body shot from Kambei.
Kambei looks to land a left hand but Daishonin moved out of range nicely.
Kambei throws a hard body shot but it just misses.
Kambei looks to score with a jab to the body but Daishonin is just out of range.
Kambei jabbing away but nothing is landing.
Kambei misses with a hook.
Kambei tries to land with a swinging hook to the body but Daishonin was well out of range. Poor timing from Kambei.
Kambei ducks down and throws a hook to the body but Daishonin moves away.
We've had a slow start to the round here - hopefully the action picks up.
A looping hook to the body misses from Kambei. Daishonin does a little dance to reset his feet.
Daishonin shoots in and bounces Kambei off the ropes to secure the takedown into guard.
Kambei had isolated an arm as going for a kimura. Daishonin defends it easily.
Kambei is looking for a triangle but Daishonin pushes his legs off easily.
Both fighters are breathing heavily.
That's one minute gone in the round.
Kambei had isolated an arm as going for a kimura. Daishonin defends it easily.
Daishonin stays in close to Kambei's body and controls the position.
Daishonin passes Kambei's left leg - he's now in half guard.
Daishonin is looking for a kimura but Kambei is holding onto that half guard position, so it's hard for Daishonin to get the leverage.
Daishonin wants to free his trapped foot but Kambei is holding on for dear life with his legs.
Kambei has no desire to be mounted, so is trying to control. Daishonin is working away from the top position though.
Kambei is in trouble now - Daishonin has advanced to mount!
That's two minutes gone in the round.
Daishonin wants to finish this one by submission but Kambei is holding onto his waist, trying to prevent any attacks from Daishonin.
Kambei is desperately trying to get back to half guard.
Daishonin controlling his opponent.
Kambei defends a decent attempt at a guillotine from Daishonin.
Kambei tries to reverse the position but Daishonin maintains control.
Daishonin looking for an armbar but decides to keep the dominant position instead.
Daishonin is going oldschool here, as he tries to force Kambei to tap using a forearm choke. This isn't 1993 though, so Kambei shrugs it off.
That's three minutes gone in the round.
Kambei is wriggling around trying to escape.
Daishonin working to secure an arm triangle but it's not happening for him just yet.
Kambei tries to reverse the position but Daishonin maintains control.
Daishonin is working on an americana here. Ooh, that looks pretty nasty! Nope, Kambei has managed to escape the submission attempt.
Daishonin working to secure an arm triangle but it's not happening for him just yet.
Kambei is looking to improve his position but Daishonin isn't that keen on the idea.
Daishonin is working close to his opponent, looking to work a submission by the looks of things. Oh, he's managed to get a guillotine from mount as his opponent reached up! That looks tiiiiight! Will he tap? YES, he's tapped! Impressive submission by Daishonin!
Ladies and gentlemen, after 4:04 of round 3, we have a winner by way of Submission (Guillotine). Nichiren Daishonin!
|
|
|
|
|
|
|
|
|
|
|
|
|
|
|
|
|
|
|
|
|
|
|
| S |
C
A |
G |
S |
C
B |
G |
|
S |
C |
G |
|
energy
A | B |
|
hype
A | B |
|
pop
A | B |
|
mgr
A | B |
|
FIGHT
RATING
68% |
|
|
|
|
|
|
