|
|
PBP Commentary |
Coming up we have a lightweight MMA rules bout between Sorata Muon (ranked 0 p4p, 0 weight class) and Kenta Sazuki (ranked 0 p4p, 0 weight class). Muon's ring entrance music is that housewives' favourite, Mind.in.a.box - What used to be (short storm). The atmosphere really building for this one as we go over to our ring announcer for the fighter introductions!
 |
|
 |
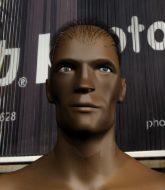
| 205 cm
22
150 lbs
0 - 1 - 0 |
|
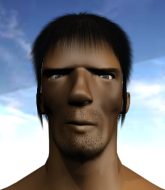
178 cm
21
149 lbs
4 - 6 - 0 |
BJJ Blue Belt
Solid Muay Thai
Granite chin |
|
BJJ Blue Belt
Good kicks
Knockout power |
|
| |
|
Ladies and gentlemen. This fight is 3 rounds, in the lightweight division.
Introducing the fighter to my left, fighting out of the red corner.
With a record of
0 - 1 - 0, fighting out of Tokyo, Sorata Muon!
And introducing the fighter to my right, fighting out of the blue corner.
With a record of
4 - 6 - 0, fighting out of Tokyo, Kenta Sazuki!
The judges for this bout are Shigeki Fujiwara, Kenichi Hosakawa and Sosuke Kotani.

The bell rings for round one and we are underway!
Sazuki is looking to chop away at Muon's legs.
Sazuki throws a head kick that misses.
Sazuki leaves Muon with his face pressed against the mat as he sprawls beautifully, defending against a solid takedown attempt.
Ouch! a nice leg kick from Sazuki, right into the meat.
Sazuki swings and misses with a hook to the body.
No luck with that takedown attempt from Muon.
Muon shoots for a takedown but Sazuki saw that one coming a mile off and avoided it easily.
That's three failed takedown attempts in the round for Sorata Muon. That's going to take a lot out of him.
Sazuki looks to throw the jab but Muon is out of range.

Sazuki closes the distance and presses his opponent up against the cage.
Sazuki lands a nice elbow from the clinch.
Sazuki tries a knee to the head but he's missed.
Sazuki tries a knee to the head but Muon blocks it.
Muon avoiding damage as Sazuki throws knees to the body.
Muon is trying to break the clinch but Sazuki has him pressed against the cage.
Sazuki throws a vicious knee straight up the middle but Muon blocks it with crossed arms.
Muon can't break the clinch.
Muon blocks an elbow strike.
Sazuki connects with a nasty looking knee right to Muon's face.
Muon has had enough of the clinch but Sazuki keeps him there for the moment.
A frustrated look appears on Muon's face as he tries to break the clinch.
Sazuki tries to land a knee to the body but he is off balance and Muon avoids it.
Muon really does look like a pencil wearing a pair of gloves. Let's hope he has a gameplan to suit that ridiculous body shape.
Muon wants to break free but Sazuki has control.

That's one minute gone in the round.

Muon breaks from the clinch.
Sazuki rushes forward with a series of wild hooks but Muon moves out of range and avoids them all easily.
Muon with a nice looking leg kick. You could hear that one land in a back row.
Sazuki displays good takedown defense there as he swats away a double leg from Muon.
Sazuki will need to tighten up his combinations if he doesn't want to gas himself out, swinging at thin air.
Sazuki is looking to take this fight into the clinch.
Muon fakes high and shoots in for a takedown but Sazuki avoids it really well and circles away.
Muon shoots for a double leg takedown but Sazuki sprawls well. He's pushed Muon's face into the mat and manages to get back to his feet relatively easily.
Sazuki rushes forward with a series of wild hooks but Muon moves out of range and avoids them all easily.
Muon avoids the body shot from Sazuki.
Muon has a takedown stuffed.
Muon is breathing heavily.
Sazuki defends well against a solid takedown attempt from Muon.

That's two minutes gone in the round.
A lull in the action here being met with boos from the crowd.
Sazuki looks to land a right hand but Muon moved out of range.
Sazuki changes levels and scores with a jab to the body.
Sazuki tries to close the distance and clinch but Muon swats him to one side with an open hand palm strike and circles away.
Sazuki defends well against a solid takedown attempt from Muon.
Sazuki chopping away at his opponent's legs.
Sazuki lands with a kick to the ribs.
Sazuki throws a sloppy head kick and Muon moves out of range easily.
Sazuki throws a series of punches but Muon moves out of range.
Muon keeps the fight on the outside.
Sazuki misses with a few strikes there.
Sazuki tries to bum rush Muon with a series of wild strikes but Muon uses good footwork to avoid the assault.
Muon has a nice red mark on his side after a thudding body kick by Sazuki.
Sazuki misses with a double jab.
Sazuki throws a sloppy head kick and Muon moves out of range easily.
Muon lands with a thumping leg kick.
Sazuki takes a kick to the side of the head.
Sazuki throws a head kick that misses
and Muon counters with a good low kick that Sazuki was not able to check.
Muon lands a high kick!

That's three minutes gone in the round.
Muon has a takedown stuffed.
Muon keeping a good distance there, avoiding the body shot.
Muon takes a step back and watches a body kick go sailing past his mid section.
Muon misses with a head kick.
Muon takes a nice looking leg kick right on the meat of his thigh there.
An inside leg kick lands from Muon.
Sazuki looks for the body kick but Muon saw that one coming.
A solid leg kick lands there for Muon.
Sazuki showing good head movement there, avoiding the strikes from Muon.
Muon throws a head kick that misses
and Sazuki counters with an outside leg kick.
Sazuki takes a push kick to the midsection and stumbles backwards.
The fighters circling - Sazuki throws out the jab but it was never going to land.
Sorata Muon seems to be the more aggressive standup fighter in this bout.
Muon fails with a takedown attempt.
Sazuki is looking to clinch but Muon is avoiding it.

That's four minutes gone in the round.
Neither fighter has done anything of merit for a good minute or two here and the crowd are not happy about it.
Muon looking to take his opponent's legs away with the low kicks.
Muon with a poor takedown
and Sazuki counters with a good right hand that lands right on the jaw.
Muon will have to do better than that with his takedown attempts.
Sazuki has closed the distance and engaged Muon in a clinch.
Sazuki landing some nice looking knees to the body.
Sazuki using the Thai plumb to throw knees but Muon has his back arched nicely, preventing the strike.
Sazuki tries to land a knee to the body but he is off balance and Muon avoids it.
Muon breaks from the clinch.
Both fighters circling a little - Sazuki finishes the exchange with a kick to the body.
Sazuki thows a leg kick but Muon checks it

and Muon counters with a nice double leg into half guard.
Muon with the ground and pound but Sazuki uses the opportunity to regain guard.
Muon lands a nice shot whilst sitting in his opponent's guard.
The crowd applaud the fighters efforts here as the round comes to an end.
Sazuki is trying to control the position but Muon postures up.
Muon has to be careful here, sitting in the guard of a superior BJJ player.
Sazuki utilising some decent striking defenses from the guard, preventing the ground and pound.
And thats the end of the round the fighters go back to their corners.
Kenta Sazuki dominated that round.
The fighters' corners scream their final instructions, as the referee calls time. Here we go, back to the action!

Sazuki misses with a double jab.
Sazuki is looking to land body kicks.
Sorata Muon is looking to throw some combinations by the looks of things.
The fight stays on the outside here - Sazuki looks like he's thinking about clinching though.
Muon shoots in and drives through. Sazuki sprawls well.
Sazuki tries to close the distance and clinch up against the cage but Muon paws at him with a jab and circles away.
Muon misses with a double jab
and Sazuki counters with an inside leg kick.
Sazuki checks the leg kick nicely there.
Sazuki throws a solid leg kick but Muon takes the impact on his shin and smiles at Sazuki.
Sazuki doesn't manage to clinch there - Muon circles away.
Sazuki plants his feet and lands a nice head kick!
Muon scores with a push kick.
Muon shoots in for a takedown but doesn't get it.
Sazuki finds nothing but air with that leg kick attempt.
A nice inside leg kick there by Muon. That's going to slow Sazuki down.
A solid body kick from Muon.
Both fighters are absolutely exhausted here.
Sazuki throws a sloppy head kick
and Muon counters with a low kick, right behind Sazuki 's knee.
That's one minute gone in the round.
Muon changes levels and looks for a double leg takedown. Sazuki tries to avoid it but Muon manages to keep hold of a leg and drag Sazuki to the ground. Sazuki escapes though and pops straight back up to his feet.
That's three failed takedown attempts in the round for Sorata Muon. That's going to take a lot out of him.
Muon avoids the head kick by Sazuki.
Sazuki lands with a nice low kick. That'll leave a bruise.
Sazuki digs a good body shot into Muon's ribs.
Sazuki throws a head kick that misses.
Muon has his takedown stuffed
and Sazuki holds on and brings the fighters into a clinch.
Muon wants to strike at distance but he can't break free of the clinch.
Sazuki creates a bit of space for himself and sneaks an elbow through Muon's defenses.
Sazuki with a knee to the head.
Muon avoiding damage as Sazuki throws knees to the body.
Sazuki has Muon pressed against the cage, preventing Muon from circling away and getting back to striking at range.
Sazuki is looking to score with knees to the body. Maybe he'll change it up and go body then head. Muon is defending well for now.
Kneeeeees! The crowd are calling for knees to the body. Sazuki obliges.
Muon's corner calls for him to break the clinch, which he does.
Sazuki throws a nice looking combination but Muon bobs and weaves to avoid any damage.
Muon shoots in but doesn't get the takedown
and Sazuki counters with a one-two to the body.
That's two minutes gone in the round.
Sazuki takes a push kick to the midsection and stumbles backwards.
Muon shoots in for a takedown and gets it. Oh and he's advanced to full mount straight away.
Muon throws some wild stikes that Sazuki manages to avoid easily.
Sazuki is desperately trying to improve his position but Muon has a good base and remains in mount.
Muon trying to control but Sazuki is having none of it.
Sazuki is wriggling around trying to escape.
Muon wants to control but instead Sazuki manages to regain half guard.
That's three minutes gone in the round.
Muon with the ground and pound but Sazuki uses the opportunity to regain guard.
Sazuki trying to control the position here.
Muon throws and elbow that misses. Sazuki uses the momentum to reverse the position. He's now in Muon's guard. Nice move by Sazuki!
Sazuki looking to sit in guard and control but Muon gets the butterfly guard and sweeps. He's now in the guard on the top.

Muon postures up as if he's going to throw some strikes but drops back for an ankle! Sazuki is in big trouble! He looks ready to tap! But no, he's escaped and dives on top of Muon, into his guard.
That's four minutes gone in the round.
Sazuki trying to control but Muon is working from the bottom.
Muon is looking to stand up but Sazuki isn't so interested in that idea.
Muon will need to keep those long limbs tucked in whilst he's on the ground, to prevent any submissions.
Sazuki is trying to work a guillotine from the top, or something like that? Don't know how he thinks he's going to get a finish from there.
And thats the end of the round the fighters go back to their corners.
Kenta Sazuki showed his class in that round. I'd imagine he'll take it on all the scorecards.
That's the end of the round. The referee orders the cornermen out of the cage so we can get back down to business. This is the final round!

Muon tries for a takedown but Sazuki circles away easily
and Sazuki counters with a nice low kick that buckles Muon's knee momentarily.
Muon has his takedown stuffed
and Sazuki counters with a series of strikes. Muon will be more careful next time no doubt.
Muon closes the distance and clinches up with Sazuki, looking for a takedown. Muon pushes Sazuki against the cage but Sazuki circles to the side and manages to break the clinch.
That's three failed takedown attempts in the round for Sorata Muon. That's going to take a lot out of him.
Sazuki throws a body kick, spinning off balance
and Muon counters with a series of strikes. Sazuki will be more careful next time no doubt.
Sazuki throws a right and a left that Muon avoids nicely.
Sazuki pulls out of a head kick attempt.
Sazuki dances in quickly and lands a nice inside leg kick on Muon. That did some damage!
Sazuki scores with a nice body kick.
Muon with a lazy takedown attempt
and Sazuki counters with a stiff right hand.
Muon circles away from the clinch attempt.
Sazuki misses with a body kick.
Muon shoots in and drives through. Sazuki sprawls well.
Both fighters are breathing heavily.
Muon throws a leg kick which misses Sazuki's front leg but catches the back leg as Sazuki tries to avoid it.
Sazuki throws a head kick that Muon semi-blocks.
Muon chopping away at his opponent's legs.
That's one minute gone in the round.
Muon moves out of range of the body kick.
Muon looking to take his opponent's legs away with the low kicks.
Sazuki fakes a head punch and goes low to the body. Nicely done.
Kenta Sazuki seems to be getting the better of the standup.
Sazuki tries a switch kick but it misses it's target.
Sazuki chopped to the floor by a nice leg kick but he springs right back up before Muon can pounce on him.
Muon misses with a takedown
and Sazuki counters with a two punch combo.
Sazuki tries to land a leg kick but Muon saw it coming and moves away.
Muon misses with a takedown attempt - Sazuki sprawls well and throws a nice strike on the way out which just misses.
Muon pivots as if he's going to throw a leg kick but stops half way.
Muon misses with a body kick.
Muon wants to land a leg kick but Sazuki is out of range.
Muon blocks a head kick by Sazuki.
A telegraphed takedown attempt from Muon is defended easily by Sazuki.
A low kick from Muon misses
and he gets countered with a snapping leg kick.
That's two minutes gone in the round.
The crowd are hurling abuse towards the fighters... You can hardly blame them though because there isn't a lot going on in the fight.
Muon tries to score with a leg kick but it misses it's target.
Sazuki scoring well with a low kick there.
Muon misses with a takedown attempt
and Sazuki counters with a slapping leg kick.
Sazuki looking to land some kicks to the body here.
Sazuki throws a looping overhand right but Muon ducks down to avoid it.
Muon misses with a takedown
and Sazuki counters with a slapping leg kick.
Muon shoots in but doesn't get the takedown
and Sazuki counters with a leg kick that reverborates around the arena.
Like a baseball bat into the meat of his leg there - nice leg kick by Sazuki.
Muon scoring well with a low kick there.
Sazuki on the wrong end of a vicious looking body shot.
Sazuki tries to close the distance and clinch up but Muon swats him away and circles back towards the center.
Sazuki keeping a good distance there, avoiding the body shot.
Muon checks a low kick. Bone on bone - not my idea of a good time.
Sazuki throws a sloppy head kick and Muon moves out of range easily.
Muon shoots in for a takedown. He's persisting with it as Sazuki sprawls well. Sazuki wins this battle and keeps the fight standing. Muon gets slowly back to his feet.
That's three minutes gone in the round.
Sazuki's corner calls for a 1,2 combination and Sazuki duly obliges.
Muon fails with the takedown
and Sazuki counters with a straight right hand.
A chopping leg kick lands by Sazuki.
Muon slips a jab and a cross from Sazuki.
Sazuki's leg has a nasty welt from taking a succession of leg kicks. That must be slowing him down.
Muon lands a nice leg kick that just misses Sazuki's sensitive parts.
Sazuki throws a leg kick that is checked
and Muon counters with a two punch combo.
Muon throws a nice outside leg kick.
Muon shoots in but doesn't get the takedown
and Sazuki counters with an outside leg kick.
Muon throws a combination but comes up with nothing but fresh air.
Sazuki throws a half hearted mid kick.
A cross from Sazuki lands.
Muon has his takedown stuffed
and Sazuki counters with a good low kick that Muon was not able to check.
That's four minutes gone in the round.
There's not a lot going on here and the crowd are letting the fighters know they're not willing to tolerate a lack of action.
Muon looks for a takedown. He's got it. We're now in half guard.
Muon is looking for a kimura. It's going to be difficult to finish that from half guard though and Sazuki defends it well.
Sazuki is looking to escape.
Sorata Muon has stepped it up - he knows he needs a finish here!
Muon throwing punches and elbows but they're not doing any damage.
Sazuki blocking the ground and pound attempt from Muon.
Muon missing with the ground and pound from half guard.
And that's the end of the fight!
Kenta Sazuki comfortably won the final round on my scorecard.
I've got Sazuki winning every round here. Surely the decision will go his way and he'll pick up a well deserved decision victory. Over to the ring announcer for the scorecards.
Ladies and gentlemen, after 3 rounds of action, we go to the scorecards for a decision.
Judge Shigeki Fujiwara scores the fight 27:30
Judge Kenichi Hosakawa scores the fight 27:30
Judge Sosuke Kotani scores the fight 27:30
In favor of your winner, by unanimous decision... Kenta Sazuki!
|
|
|
|
|
|
|
|
|
|
|
|
|
|
|
|
|
|
|
|
|
|
|
| S |
C
A |
G |
S |
C
B |
G |
|
S |
C |
G |
|
energy
A | B |
|
hype
A | B |
|
pop
A | B |
|
mgr
A | B |
|
FIGHT
RATING
50% |
|
|
|
|
|
|
