|
|
PBP Commentary |
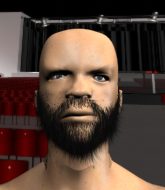
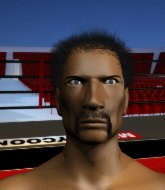
Coming up we have a super heavyweight MMA rules bout between Barry Hill (ranked 0 p4p, 0 weight class) and Jack Black (ranked 0 p4p, 0 weight class). I don't know about you partner, but I'm pumped for this one!
 |
|
 |
| 225 cm
19
290 lbs
2 - 3 - 0 |
|
202 cm
21
300 lbs
1 - 0 - 0 |
BJJ Blue Belt
Basic striking
Good chin |
|
BJJ Blue Belt
Solid Muay Thai
Tends to cut |
|
| |
|
Ladies and gentlemen. This fight is 3 rounds, in the super heavyweight division.
Introducing the fighter to my left, fighting out of the red corner.
With a record of
2 - 3 - 0, fighting out of London, Barry Hill!
And introducing the fighter to my right, fighting out of the blue corner.
With a record of
1 - 0 - 0, fighting out of London, Jack Black!
The judges for this bout are Andrew Berry, Donald Grub and Chris Edwards.

The bell rings for round one and we are underway!
Hill scores with a leg kick.
Good work by Black as he checks the leg kick.
Black wants to clinch up but Hill keeps it at a distance.
Black fails with an attempt to clinch.
Black is looking to clinch but Hill is avoiding it.

Black drops down and drives through with a powerful takedown into guard.
Hill looking to sweep here. No luck so far.
Hill is working the butterfly guard. He manages to land a nice scissor sweep and is now in half guard on the top. Nice move.
Black is trying to stand.
Black wants to control but Hill is keeping busy and won't allow it.
Still in half guard, Hill seems content to control.
Black trying to control from the bottom.
Neither fighter is being very active at the moment, with Hill in particular looking to stall.
Black is looking to regain full guard. Not this time though.

Hill seems to be looking for submissions.
Hill controlling the action here.

That's one minute gone in the round.
Black holds on for dear life, maintaining half guard for now.
Hill controlling the action here.
Black wants to get back to his feet.
Black trying to control here.
Hill trying to control the pace.

That's two minutes gone in the round.
The crowd are starting to boo a lack of action.
Black is looking to control Hill's leg but it's slowly edging free. Can Black avoid being mounted?
Hill is looking for a kimura but he's never going to get it from there.

The referee has ruled that neither fighter is active enough on the ground and has stood them back up.
Black tries a head kick but it misses.
Hill swats away the attempt to clinch by Black.
Hill throws a wild combination but nothing lands.
Hill misses with a takedown attempt

and Black moves into the clinch.
Black throws a vicious knee straight up the middle but Hill blocks it with crossed arms.
Hill can't get the takedown.

Black pushes off and circles away, back to the middle of the mat.

That's three minutes gone in the round.
Black fails to land with a series of punches.
Black looks gassed!
Hill tries to keep at a distance but Black has taken the fight into the clinch.
Hill tries for a takedown but Black manages to get underhooks.
That's three failed takedown attempts in the round for Barry Hill. That's going to take a lot out of him.
Hill tries to score a body lock takedown but Black shows good agility there to stay on his feet.
Hill wants a takedown.
Hill changes levels and goes for a takedown here. Black fights it off and pushes away nicely.
Black tries to clinch up.
Black tries to clinch there but Hill circles away.
Black is looking to clinch.
Black moves in looking to clinch but Hill pushes him off.
Hill takes a jab right on the kisser.
The fighters are starting to get sweaty, which will make takedowns a bit more tricky.
Hill clobbers Black with an overhand right that has the crowd gasping. That made a horrendous noise.

It looks like Jack Black has been cut.
Hill is trying hard to land a takedown here. Black sprawls well and keeps this one on the feet.
Hill looking for a takedown here - he's got it.
Black wants to stand but Hill is controlling the position.

That's four minutes gone in the round.
Hill controlling from the top position.
Hill's ground tactics aren't going to win him many fans. Let's hope he's got fireworks for us if he gets back to his feet because he's not doing much on the ground.
Hill prevents Black from getting back to his feet.
Black is working from a closed guard but he's struggling to control his opponent.
Hill is intent on slowing down the pace of the fight, simply looking to control.
Black should think about turning a few of those tyres round his middle into muscle if he wants people to take him seriously as an athlete.
Hill wants to control from the top but Black keeps moving.
Black wants to control but Hill passes easily into half guard.
And thats the end of the round the fighters go back to their corners.
Barry Hill dominated that round.
The cut man is working on Jack Black's cut.
The corners get their ten second warning. Both fighters stand from their stools and stare eachother down, ready to get back to the action.

Hill gets the takedown into side control.
Both fighters take a look at the clock.
Hill remains in side control and seems content to stay there. It's a versatile position from which he can work both strikes and submissions, whilst maintaining that control, so maybe he'll sit here for a while.
Black wants to escape from the position here - easier said than done!
Hill wants to lay and pray for a moment but Black keeps working.
Black tries to strike but it doesn't land.
Hill controls the position.
Hill wants to lay and pray for a moment but Black keeps working.
The fighters are pressed up against the cage, both looking to find a bit of space to work.
You can see the frustration on Black's face, being in this tough position on the bottom.
That's one minute gone in the round.
Hill in side control, just content to control the action for now.
Hill trying to control the action but Black is working from the bottom.
The referee has ruled that neither fighter is active enough on the ground and has stood them back up.
Black shoots and misses
and Hill counters by moving into the clinch. Good anticipation by Hill.
Hill tries to score a body lock takedown but Black shows good agility there to stay on his feet.
Black is trying to maintain a safe position but Hill gets an underhook and turns Black into the cage.
Hill wants a takedown but no success here.
Black is clearly stalling here... Pick up the pace son.
Black is breathing heavily.
Hill decides to pull guard.
Black won't allow Hill to sweep him here.
Hill is working the butterfly guard. He manages to land a nice scissor sweep and is now in half guard on the top. Nice move.
That's two minutes gone in the round.
Hill prevents Black from standing back up.
Black is looking for a sweep. Hill is wise to his cunning plan and keeps the top position.
Hill controlling the pace.
Black looks like he's trying to stand up.
Hill with a momentary lay and pray from half guard.
Hill is looking to advance position but Black won't allow it.
Hill is controlling the pace.
That's three minutes gone in the round.
Hill is trying to control the action in half guard but Black is working away on the bottom, looking perhaps to get back to full guard.
Black looks like he's trying to stand up.
Well, if Hill is going to just lie there, perhaps we should talk about what we're having for dinner tonight
I'm having a ham and pineapple pizza
Yum. Can't wait.
Black looks like he's trying to stand up.
Hill slows the pace down in half guard.
Both fighters really going for it on the ground here!
That's four minutes gone in the round.
The crowd are starting to boo a lack of action.
The referee stands the fighters back up. Barry Hill just wasn't active enough from the dominant position.
Hill lunges in with swinging rights and lefts but Black circles away quickly and effectively.
Hill closes the distance and lands a one-two.
Hill looks for a takedown. He's got it. We're now in half guard.
Black manages to get to full guard.
Hill postures up.
Hill throwing strikes but missing.
Hill stops Black from standing up.
Hill is trying to work a guillotine from the top, or something like that? Don't know how he thinks he's going to get a finish from there.
And thats the end of the round the fighters go back to their corners.
Barry Hill dominated that second round.
The cut man is working on Jack Black's cut.
That's the end of the round. The referee orders the cornermen out of the cage so we can get back down to business. This is the final round!

Black moves in looking to clinch but Hill pushes him off.
A really sloppy takedown attempt there from Black.
Black throws a head kick but Hill moves out of range.
Black tries to close the distance and clinch up against the cage but Hill paws at him with a jab and circles away.
A nice combination there by Hill.
A head kick from Hill lands but Black takes it in his stride.
Wooooo! Give it up for these two warriors! They are putting on a show!
Hill has closed the distance and engaged Black in a clinch.
Hill is working for a takedown up against the cage. He can't get it on this occasion though.
Hill works for the underhooks and manages to get a trip takedown into guard.
Hill passes Black's left leg - he's now in half guard.
The ref warns both fighters not to hold the cage as they work up against the meshing.
Both fighters are breathing heavily.
Hill is working for a submission here. He's got hold of the far side arm and he's looking for a kimura. He's cranking on the arm and he's got it! Black is tapping out! Ouch, that looked like it hurt!
Ladies and gentlemen, after 1:02 of round 3, we have a winner by way of Submission (Kimura). Barry Hill!
|
|
|
|
|
|
|
|
|
|
|
|
|
|
|
|
|
|
|
|
|
|
|
| S |
C
A |
G |
S |
C
B |
G |
|
S |
C |
G |
|
energy
A | B |
|
hype
A | B |
|
pop
A | B |
|
mgr
A | B |
|
FIGHT
RATING
100% |
|
|
|
|
|
|
