|
|
PBP Commentary |
Coming up we have a welterweight MMA rules bout between David Byrne (ranked 0 p4p, 0 weight class) and Hatt Mughes (ranked 0 p4p, 0 weight class). Hatt Mughes struggled to make weight for this fight. He only made it down to 171.5lbs at the first attempt and had to take the additional two hours to make the official bout weight. Let's see how much it's taken out of him. This should be a great matchup!
 |
|
 |
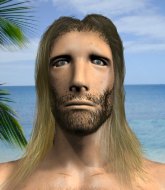
| 163 cm
22
174 lbs
3 - 1 - 0 |
|
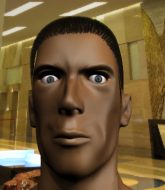
173 cm
21
180 lbs
7 - 6 - 0 |
BJJ Purple Belt
Solid Muay Thai
Cuts easily |
|
BJJ Purple Belt
Decent boxing
Powerful |
|
| |
|
Ladies and gentlemen. This fight is 3 rounds, in the welterweight division.
Introducing the fighter to my left, fighting out of the red corner.
With a record of
3 - 1 - 0, fighting out of Rio de Janeiro, David Byrne!
And introducing the fighter to my right, fighting out of the blue corner.
With a record of
7 - 6 - 0, fighting out of Rio de Janeiro, Hatt Mughes!
The judges for this bout are Emerson Jorge, Alexandre Firmino and Mauricio Rocha.

The bell rings for round one and we are underway!

The fight moves into the clinch position.
Byrne misses with a knee strike.
Byrne comes over the top with an elbow. That landed flush.
Byrne stalling.
Byrne misses the knee to the body. Nice hip positioning from Mughes.
Byrne tries a knee to the head but he's missed.
Byrne looking to stall.
Mughes is working for a takedown up against the ropes. He can't get it on this occasion though.
Byrne misses with a knee to the head.
Byrne lands a knee to the head.
Byrne tries to land a knee to the head but misses.
The referee is keeping an eye on Byrne - much more stalling and he will separate the fighters.
Byrne landing some nice looking knees to the body.
Mughes tries to score a body lock takedown but Byrne shows good agility there to stay on his feet.
Mughes looks gassed!
Byrne creates a bit of space for himself and sneaks an elbow through Mughes's defenses.
Byrne gets underhooks to prevent Mughes's takedown attempt.
David Byrne has stuffed three takedown attempts in the round now. That's going to take a lot out of Hatt Mughes.
Byrne throws a knee to the head but misses.
Byrne connects with a nasty looking knee right to Mughes's face.
Byrne throws a knee to the head but misses.

That's one minute gone in the round.
Byrne with a knee to the head.
Byrne stalling in the clinch.
Mughes takes an elbow to the temple.
Mughes blocks an elbow strike from Byrne.
Byrne lands a nice elbow.
Byrne with an attempt at a knee that misses.
Byrne gets an overhook and lands an elbow to the side of the head.
Byrne is stalling here. The referee will be looking to step in if he doesn't pick up the pace.
A knee to the head by Byrne.
Byrne has Mughes pushed against the ropes.
Byrne taking a breather.
Byrne tries a knee to the head but he's missed.
Byrne leaning his opponent against the ropes.
Byrne putting his Muay Thai to good use. He has Mughes in a tight clinch and is doing some damage with knees to the body.
Knees to the body from Byrne.
Byrne throws a vicious knee straight up the middle but Mughes blocks it with crossed arms.

That's two minutes gone in the round.
Mughes takes an elbow to the temple.
Byrne trying to control the position but instead, Mughes has worked for underhooks and has pushed Byrne into the ropes.
Byrne tries to land a knee to the body but he is off balance and Mughes avoids it.
Mughes looking for a takedown.
Byrne connects with a nasty looking knee right to Mughes's face.
Byrne using the Thai plumb to throw knees but Mughes has his back arched nicely, preventing the strike.
Byrne has Mughes pressed against the ropes.
Byrne tries a knee to the head but Mughes blocks it.
Byrne looking to throw knees to the head but Mughes is blocking nicely.
Byrne tries a knee to the head but Mughes blocks it.
Byrne missing with knees to the body.
Byrne tries to land a knee to the head but Mughes blocks with his arms.
Byrne lands a good knee to the midsection. Mughes won't want to take too many of those.
Both guys are working to get underhooks.
Byrne stalling in the clinch.

That's three minutes gone in the round.
Byrne looking to throw knees to the head but Mughes is blocking nicely.
The referee calls for Byrne to work.
Byrne missing with knees to the body.
Mughes looks like he'd prefer to be striking at range right now.
Byrne prevents the takedown attempt.
Byrne tries a knee to the head but Mughes blocks it.
Byrne will no doubt start fighting again in a minute but for now he's just having a little rest, leaning Mughes up against the ropes.
Mughes has Byrne pressed up against the ropes and is working for takedown. Byrne manages to improve position though and keeps the fight standing.
Byrne gets underhooks to prevent Mughes's takedown attempt.
Byrne with an attempt at a knee that misses.
Byrne tries a knee to the head but Mughes blocks it.
Byrne content to slow the pace in the clinch.
Byrne is trying to wear down his opponent with knees to the body.

That's four minutes gone in the round.
A lull in the action here being met with boos from the crowd.
Byrne's corner are urging him to control the action in the clinch for a moment, rather than mount any serious offense. I'm sure the crowd appreciate those instructions... not.
The ref breaks the fighters up, due to lack of action by David Byrne.
Mughes shoots in and drives through. Byrne sprawls well.
Byrne moves into the clinch.
Byrne lands a knee to the head.
Byrne connects with a knee to the head.
Byrne lands a nice knee to the body.
Byrne tries to land a knee to the head but misses.
Byrne is trying to wear down his opponent with knees to the body.
Byrne leaning his opponent against the ropes.
Byrne scores a nice knee to the body.
Byrne crunches a lovely knee into Mughes's ribcage.
Byrne with the Thai clinch. He's looking to land a big knee but he's not managed it this time.
Mughes wants to get back to striking at distance but Byrne won't allow it.
Byrne stalling here - the referee won't stand for too much of that.
And thats the end of the round the fighters go back to their corners.
David Byrne dominated that round.
The corners get their ten second warning. Both fighters stand from their stools and stare eachother down, ready to get back to the action.

Mughes fails with a takedown attempt from distance.
Byrne moves into the clinch.
Byrne looking to stall.
Mughes has hold of a leg and is looking for a trip takedown. Byrne avoids it nicely though and we remain in the clinch.
Byrne using the Thai clinch to land knees to the body.
Byrne with a knee to the head.
Byrne landing knees to the body. They look like they could hurt.
Byrne working Mughes over with knees to the body.
A bit of stalling here from Byrne.
Byrne landing knees to the head.
Byrne with the Thai clinch, lands a knee to the head.
Byrne scores with a knee to the head.
Byrne with the Thai clinch, lands a knee to the head.
Both fighters are absolutely exhausted here.
Byrne connects with a knee to the head.
A knee to the head by Byrne.
Byrne with the Thai clinch, lands a knee to the head.
Byrne comes over the top with an elbow. That landed flush.
That's one minute gone in the round.
Knees in the clinch landing for Byrne.
A battle for position here, against the ropes.
Byrne throws a knee to the head but misses.
Mughes blocks an elbow strike.
Byrne is trying to maintain a safe position but Mughes gets an underhook and turns Byrne into the ropes.
Come on Byrne - let's have some action - none of this stalling nonsense.
Both fighters working to control the clinch.
The ref breaks the fighters up, due to lack of action by David Byrne.
Mughes shoots in for a takedown but doesn't get it.
David Byrne has stuffed three takedown attempts in the round now. That's going to take a lot out of Hatt Mughes.
Byrne thumps Mughes with a low kick.
A solid body kick from Byrne.
Byrne pushes Mughes up against the ropes in a clinch.
Byrne with the Thai clinch, lands a knee to the head.
Mughes being controlled against the ropes.
Byrne with an attempt at a knee that misses.
That's two minutes gone in the round.
The crowd are getting on the fighters' backs, as the pace has dropped off in the last minute or so.
Byrne throws a vicious knee straight up the middle but Mughes blocks it with crossed arms.
Mughes on the defensive, avoiding the knees to the body.
Byrne throws a knee to the head but misses.

Mughes breaks from the clinch.
Mughes fails with a takedown attempt from distance.
Mughes fails with a takedown attempt from distance.
Wow, both these guys are really going for it!
Mughes takes a shot to the body in his stride.
A nice inside leg kick there by Byrne. That's going to slow Mughes down.
Byrne rushes Mughes and pushes him back against the ropes in a clinch.
A bit of stalling here from Byrne.
Byrne crunches a lovely knee into Mughes's ribcage.
Byrne unloads a knee to the mid-section. Mughes lets out a prehistoric sounding urrrrgh.
Byrne working Mughes over with knees to the body.
Mughes takes an elbow to the temple.
Byrne with an attempt at a knee that misses.
Byrne lands a knee to the body.
Byrne connects with a knee to the head.
That's three minutes gone in the round.
Mughes can't get the takedown.
Byrne content to slow the pace in the clinch.
Mughes is trying to drag Byrne to the mat but Byrne just about manages to keep his footing. He used the ropes to his advantage there.
Byrne landing knees to the head.
Byrne connects with a nasty looking knee right to Mughes's face.
Mughes has had enough of the clinch but Byrne keeps him there for the moment.
Byrne landing knees to the head.
Byrne lands a nice knee to the body.
Mughes managing to block the knees to the body from Byrne.
Byrne misses with a knee to the head.
Byrne connects with a knee to the head.
Byrne tries to land a knee to the head but misses.
Mughes breaks from the clinch.
Byrne closes the distance and clinches.
Byrne throws a vicious knee straight up the middle but Mughes blocks it with crossed arms.
Byrne misses the knee to the body. Nice hip positioning from Mughes.
That's four minutes gone in the round.
The crowd are getting on the fighters' backs, as the pace has dropped off in the last minute or so.
Mughes working hard to break the clinch.
Both fighters working to control the clinch.
Byrne comes over the top with an elbow. That landed flush.
Byrne tries a knee to the head but Mughes blocks it.
Mughes tries to score a body lock takedown but Byrne shows good agility there to stay on his feet.
Byrne looking to throw knees to the head but Mughes is blocking nicely.
David Byrne has scored more points in the clinch so far.
Byrne throws a knee to the head but misses.
Byrne using the Thai plumb to throw knees but Mughes has his back arched nicely, preventing the strike.
Byrne looking to slow down the pace here.
Mughes blocks a knee to the body. He'll have a nicely bruised forearm in the morning.

Mughes works for the underhooks and manages to get a trip takedown into guard.
Mughes wants to pass the guard but Byrne is keeping the position.
Byrne manages to sweep nicely, so he's now on top. Mughes manages to get himself to full guard.
Byrne trying to control the position from guard on top but Mughes is wriggling around, looking for whatever he can.
And thats the end of the round the fighters go back to their corners.
David Byrne dominated that second round.
The minute break is over - no more time for sponges and pep talks - back to the action! Let's get this one finished - here comes the final round!

Byrne has Mughes up against the ropes in a clinch.
Knees in the clinch landing for Byrne.
Mughes takes a knee right on the jaw!
Byrne using the Thai plumb to throw knees but Mughes has his back arched nicely, preventing the strike.
Byrne looking to throw knees to the head but Mughes is blocking nicely.
Mughes takes a knee right on the jaw!
Mughes being controlled against the ropes.
Byrne lands a knee to the head there! That was nasty!
Byrne landing knees to the head.
Byrne using the Thai plumb to throw knees but Mughes has his back arched nicely, preventing the strike.
Byrne landing knees to the body. They look like they could hurt.
Both fighters are breathing heavily.
Byrne landing knees to the body.
Byrne misses with a knee strike.
Byrne lands an elbow just above Mughes 's eye.
Both fighters working to control the clinch.
That's one minute gone in the round.
Byrne misses the knee to the body. Nice hip positioning from Mughes.
Mughes changes levels and goes for a takedown here. Byrne fights it off and pushes away nicely.
Byrne digs a good hook to Mughes's body.
Mughes takes one on the button.
A slapping leg kick lands for Byrne.
Byrne fails in his attempt to clinch.
Byrne darts in and clinches Mughes up against the ropes.
Byrne utilising his Muay Thai to score with a knee to the body.
Byrne throws a knee to the head but misses.
Mughes looking for a takedown.
Byrne lands a knee to the head there! That was nasty!
Mughes is looking for a takedown up against the ropes. Byrne gets underhooks though and prevents the takedown attempt.
David Byrne has stuffed three takedown attempts in the round now. That's going to take a lot out of Hatt Mughes.
Byrne lands an elbow just above Mughes 's eye.
Byrne working Mughes over with knees to the body.
Byrne looking to throw knees to the head but Mughes is blocking nicely.
That's two minutes gone in the round.
Byrne tries a knee to the head but Mughes blocks it.
Mughes wants a takedown.
Byrne tries a knee to the head but he's missed.
Mughes wants a takedown but no success here.
Knees to the body from Byrne.
Byrne is trying to maintain a safe position but Mughes gets an underhook and turns Byrne into the ropes.
Mughes being controlled against the ropes.
Mughes has clasped his hands together around Byrne's back... aaand, he's got a takedown into side control. Nicely done.
Byrne is moving his hips around well on the bottom and has managed to get back to half guard.
Mughes looking to pass the half guard. Not this time.

Mughes is sneakily working for an arm triangle but Byrne sees it coming and defends easily.
That's three minutes gone in the round.
Byrne has no desire to be mounted, so is trying to control. Mughes is working away from the top position though.
Byrne gets back to full guard.
Hatt Mughes has stepped it up - he knows he needs a finish here!
Byrne tries to land a sweep but no joy.
Byrne wants to get back to his feet but Mughes is in a dominant position and won't allow it.
Byrne lands a beautiful switch and he's in full mount! That could spell trouble for Mughes!
Byrne content just to control the position here.
Byrne lands with some strikes.
David Byrne is fighting for a decision here - he's started to take the cautious approach.
That's four minutes gone in the round.
Well. There's a bit of a lull in the action here and the crowd are starting to get restless.
Mughes is squirming around, avoiding Byrne's attempts to control the action.
Byrne working the ground and pound effectively.
Byrne sitting in mount, just looking to control for the moment.
And that's the end of the fight!
David Byrne showed his dominance in that final round.
Well I reckon that's a shut out for Byrne, winning every round. Will the judges agree? They are the ones who matter, even if they are often depressingly incompetent. Over to the ring announcer for the scorecards.
Ladies and gentlemen, after 3 rounds of action, we go to the scorecards for a decision.
Judge Emerson Jorge scores the fight 30:27
Judge Alexandre Firmino scores the fight 30:27
Judge Mauricio Rocha scores the fight 30:27
In favor of your winner, by unanimous decision... David Byrne!
|
|
|
|
|
|
|
|
|
|
|
|
|
|
|
|
|
|
|
|
|
|
|
| S |
C
A |
G |
S |
C
B |
G |
|
S |
C |
G |
|
energy
A | B |
|
hype
A | B |
|
pop
A | B |
|
mgr
A | B |
|
FIGHT
RATING
38% |
|
|
|
|
|
|

