|
|
PBP Commentary |
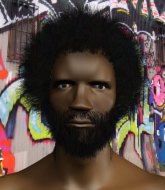
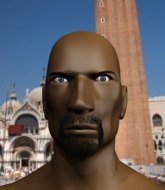
Coming up we have a middleweight MMA rules bout between World B Free (ranked 0 p4p, 0 weight class) and Roc Blitzer (ranked 0 p4p, 0 weight class). Free comes to the cage accompanied by Redemption Song -Bob Marley. Blitzer is bobbing his head along to his entrance song: Slipknot - Wait and Bleed. Well, I have no idea who's going to take this one!
 |
|
 |
| 187 cm
22
195 lbs
2 - 1 - 0 |
|
182 cm
19
188 lbs
2 - 2 - 0 |
BJJ Purple Belt
Improved boxing
Cuts easily |
|
BJJ Blue Belt
Brawler
Solid chin |
|
| |
|
Ladies and gentlemen. This fight is 3 rounds, in the middleweight division.
Introducing the fighter to my left, fighting out of the red corner.
With a record of
2 - 1 - 0, fighting out of Los Angeles, World B Free!
And introducing the fighter to my right, fighting out of the blue corner.
With a record of
2 - 2 - 0, fighting out of Los Angeles, Roc Blitzer!
The judges for this bout are Timothy Bukovac, and .

The bell rings for round one and we are underway!
Free digs a good body shot into Blitzer's ribs.
Free scores with a sloppy right hand. Blitzer should have avoided that one.
Blitzer tries to clinch but Free moves out of range.
Blitzer with poor footwork there. He got himself in a bit of a tangle, enabling Free to score with a decent uppercut.

Blitzer pushes Free up against the cage in a clinch.

Blitzer lands a nice trip takedown into half guard.
Blitzer is just content to waste time from the top position. Free takes advantage of the situation and regains full guard.
Blitzer thows a big elbow that misses.
The ref warns both fighters not to hold the cage as they work up against the meshing.
Blitzer in full guard, throwing the ground and pound. No damage this time.
Free tries to land a sweep but no joy.
Free looking to control.
Blitzer won't allow Free to sweep him here.
Blitzer has decided he wants to stand but the closed guard of Free is proving hard to escape from.
Blitzer must be cautious of submissions here, given that his opponent has the superior Jiu Jitsu.

Well, the referee has seen enough. Neither fighter is active enough on the ground so he's stood them back up.
Free thuds a left hand into Blitzer's body.

That's one minute gone in the round.
Blitzer takes one to the side of the head.
Free swinging wilding here.
Blitzer plants his feet and lands a nice head kick!

It looks like World B Free has been cut.
Free cracks Blitzer with a good jab.
Free fails with a takedown attempt.
Roc Blitzer seems to be the more aggressive standup fighter in this bout.
Free lands with a nice combination. Blitzer backs away looking to recover.
Free scores with a sloppy punch to the body. Not much technique there but it did the business.
Blitzer looks gassed!
Blitzer misses with a takedown attempt. He shot from a bit too far out.
Free lands a jab to Blitzer's midsection.
This is a great period of action - very entertaining stuff!
Blitzer is on the wrong end of a nice combination from Free.
Free misses with a series of wild punches.
Free cracks Blitzer with a right hand to the side of the head.
Free gets a takedown into half guard.
The fighters are pressed up against the cage, both looking to find a bit of space to work.

That's two minutes gone in the round.
Free is pressing down on Blitzer's thigh, looking to free his foot. Blitzer is holding on for now.
Blitzer trying to control here.
Blitzer is trying to get back to full guard.
Free is thwarting Blitzer's attempts to control the position.
Blitzer is trying to stand.
Blitzer wants to control but Free is keeping busy and won't allow it.
Blitzer wants to get back to full guard.
Blitzer is trying to control but can't.
It looks like we're going to have a standup here. Neither fight is doing enough on the ground.
Free misses with a double jab.
Free closes the distance and clinches up with Blitzer, looking for a takedown. Free pushes Blitzer against the cage but Blitzer circles to the side and manages to break the clinch.
Free lands a really nice looking cross but Blitzer seems unphased.

That's three minutes gone in the round.
Blitzer gets to the clinch - let's see what his plan is here.
Blitzer has Free pressed up against the cage. He's trying to work for a single leg takedown. Blitzer pulls back from the cage and twists to the side, sending Free tumbling to the mat - Blitzer dives into Free's guard.
Free keeping moving, preventing Blitzer from controlling successfully.
Blitzer wants to pass the guard but Free is keeping the position.
Blitzer thows a big elbow that misses.
Free is trying to keep Blitzer in close.
Free utilising some decent striking defenses from the guard, preventing the ground and pound.

Free is active off his back here, looking for submissions.
Blitzer trying to pass the guard but can't manage it just yet.
Free throwing his legs up looking for a triangle.
Free keeping moving, preventing Blitzer from controlling successfully.

That's four minutes gone in the round.
Blitzer drops back for a leg! It's a sloppy attempt though and Blitzer jumps back into guard quickly, to retain the dominant position.
Free working a defensive guard here.
Free looking for submissions from the bottom here. Moving his hips around, possibly looking for an armbar.
Blitzer stopping the sweep attempt from Free.
Free keeping moving, preventing Blitzer from controlling successfully.
Blitzer postures up in Free's guard and throws a big left but Free blocks it.
As the round comes to an end the crowd are showing their appreciation for a great round of action.
Free lands a beautiful switch and he's in full mount! That could spell trouble for Blitzer!
Blitzer swinging wildly from the bottom but he's not landing.
And thats the end of the round the fighters go back to their corners.
World B Free dominated that round.
The cut man is working on World B Free's cut.
OK. That's time! The bell goes and we're back to the action.

Free moves into range and connects with a jab.
Free shoots in and drives through. Blitzer sprawls well.
Blitzer dodges the punch combination from Free.
Free scores with a body shot.
Free shoots in looking for a takedown. Blitzer tries to sprawl out of it but Free keeps driving through. The fighters are pinned against the cage. Blitzer manages to get underhooks and after a bit of a struggle, circles away and we're back to standing.
Blitzer tries to close the distance and clinch up against the cage but Free paws at him with a jab and circles away.
Free cracks Blitzer with a hook to the jaw. Both fighters smile at eachother and high-five before getting back down to business.
Free scores with a jab to the body.
Blitzer takes a jab on the nose there. A little bit of blood seems to be coming out. Hopefully that won't affect his breathing.
Free fails to land with a series of punches.
Both fighters are absolutely exhausted here.
Blitzer doesn't react quick enough there as he takes a shot to the body.
Free circles away from the clinch attempt.
Free circles away from the clinch attempt.
Free scores with a big left there. The judges will like that one.
Blitzer pulls out of a head kick attempt.
That's one minute gone in the round.
Free with a jab.
Blitzer doesn't manage to clinch there - Free circles away.
Free lands a two punch combo.
Free thuds a left hand into Blitzer's body.
Free shoots in for a takedown but Blitzer shows good takedown defense.
That's three failed takedown attempts in the round for World B Free. That's going to take a lot out of him.
Blitzer on the wrong end of a decent looking cross there.
Free lands a lovely overhand right.
Blitzer is looking to clinch.
Free shoots in for a takedown - he's clinched up with Blitzer but Blitzer pushes him off and we're back to square one.
Blitzer avoids a punch combination nicely.
Free shoots in looking for a takedown. Blitzer tries to sprawl out of it but Free keeps driving through. The fighters are pinned against the cage. Blitzer manages to get underhooks and after a bit of a struggle, circles away and we're back to standing.
Blitzer gets to the clinch - let's see what his plan is here.
Blitzer drops to a knee looking for a takedown but Free gets the underhooks and prevents it.
That's two minutes gone in the round.
Free lands with a quick shot inside that doesn't really do much damage.
Free tries to break the clinch but Blitzer is controlling the position.
Free is looking to break free of the clinch but Blitzer has double underhooks.
Free gets underhooks to prevent Blitzer's takedown attempt.
Free looking for a takedown.
Free is looking to control Blitzer's arms but Blitzer gets an underhook and turns him. Now Free has his back to the cage.
Blitzer has clasped his hands together around Free's back... aaand, he's got a takedown into side control. Nicely done.
Free regains half guard.
Free is pressing down on Blitzer's left leg trying to get back to full guard. He's managed it.
Blitzer with a flurry of punches that miss.
Free looking to control.
Blitzer lands a nice shot whilst sitting in his opponent's guard.
The fans in attendance giving it up for the two fighters, who have really let it all hang out in the last minute or so!
Blitzer trying to control but Free is working from the bottom.
Blitzer advances to half guard.
Free is trying to maintain the position but Blitzer is very close to passing his half guard.
Free is not content to let Blitzer control the position.
That's three minutes gone in the round.
Free wants to improve his position but Blitzer is controlling well.
The fighters are battling for position here. Free manages to regain full guard. Nice work.
Blitzer showing good wrestling skills to control the position.
Free keeping full guard, as Blitzer tries to pass.
Free trying to keep a closed guard but Blitzer is proving a slippery customer.
Free keeping moving, preventing Blitzer from controlling successfully.
Free working the defensive guard well to avoid strikes from Blitzer.
Blitzer avoids a guillotine attempt easily.
Blitzer really doesn't want to stay on the ground with Free. If he can't get it back to his feet, it's only a matter of time before he'll be tapping out.
Free looking for a sweep. Not yet Free, not yet.
That's four minutes gone in the round.
Blitzer trying to land body shots but he keeps hitting the mat.
Free working a defensive guard here.
Blitzer won't allow Free to sweep him here.
Free preventing the ground and pound from doing any damage.
Free is active off his back here, looking for submissions.
Free wants to sweep here but Blitzer controlling him for the moment.
Blitzer controlling from the top position.
Free controls Blitzer momentarily but Blitzer frees himself.
Free keeping moving, preventing Blitzer from controlling successfully.
Blitzer works a leg free and moves into half guard.
And thats the end of the round the fighters go back to their corners.
World B Free dominated that second round.
The cut man is working on World B Free's cut.
The corners get their ten second warning. Both fighters stand from their stools and stare eachother down, ready to get back to the action. This is the final round!

Free stuns Blitzer with a nice body shot, before stepping back out of range.
Free cracks a nice hook into Blitzer's ribs.
Free looks for a takedown. He's got it. We're now in half guard.
Free missing with some ground and pound from the half guard.
Free is looking to pass the guard... He's managed it - he's now in full mount!
Free scoring with some good ground and pound from mount here. Will he manage to finish Blitzer?
Free looking for a guillotine from mount but Blitzer is having none of it.
Free is in full mount, looking to secure a guillotine but Blitzer is surviving well by controlling Free's body position as best he can.
Fantastic stuff here - a very entertaining period of action, which has drawn cheers from the crowd.
Free controlling his opponent.
Both fighters are breathing heavily.
Free jumps to side control looking for an arm triangle but Blitzer manages to avoid the submission attempt.
That's one minute gone in the round.
Free is looking to finish here, going for an Americana. Blitzer knows the correct defense though, so he's OK.
Free working away.
Free wants to lay and pray for a moment but Blitzer keeps working.
Free tries for an arm triangle. That looks pretty tight to me. Is this one over!?! Possibly, maybe, no Free has let go of the choke. Obviously it wasn't as tight as we thought!
Free is trying to land an Americana. He has the arm isolated but Blitzer is keeping cool and he's avoided the danger for now.
The ground and pound from Free seems to be hitting the mat more than his opponent.
Free thinks about going for a far side armbar but bails out and retains the dominant position instead.
That's two minutes gone in the round.
Free has hold of Blitzer's arm here. He's working for an Americana. It looks like he might have it! Blitzer tries to escape but he's just digging himself in deeper - Free cranks the arm and Blitzer screams in pain! The ref makes a decision and ends the fight before the tap - no complains from Blitzer, who is just happy to have his arm attached to his body.
Ladies and gentlemen, after 2:21 of round 3, we have a winner by way of Submission (Americana). World B Free!
|
|
|
|
|
|
|
|
|
|
|
|
|
|
|
|
|
|
|
|
|
|
|
| S |
C
A |
G |
S |
C
B |
G |
|
S |
C |
G |
|
energy
A | B |
|
hype
A | B |
|
pop
A | B |
|
mgr
A | B |
|
FIGHT
RATING
100% |
|
|
|
|
|
|
