|
|
PBP Commentary |
Coming up we have a welterweight MMA rules bout between Abe Patterson (ranked 0 p4p, 0 weight class) and Stevie Why (ranked 0 p4p, 0 weight class). Abe Patterson has the better chin. Will he look to stand and bang today?
 |
|
 |
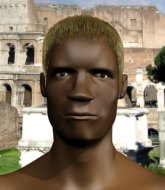
| 186 cm
22
179 lbs
7 - 0 - 0 |
|
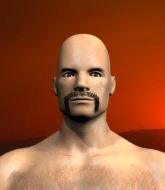
180 cm
25
180 lbs
10 - 8 - 0 |
BJJ Brown Belt
Solid boxing
Experienced |
|
BJJ Brown Belt
Excellent boxer
Powerful |
|
| |
|
Ladies and gentlemen. This fight is 3 rounds, in the welterweight division.
Introducing the fighter to my left, fighting out of the red corner.
With a record of
7 - 0 - 0, fighting out of Las Vegas, Abe Patterson!
And introducing the fighter to my right, fighting out of the blue corner.
With a record of
10 - 8 - 0, fighting out of Las Vegas, Stevie Why!
The judges for this bout are Chris Downing, Tiny Johnson and Gwen Towbar.

The bell rings for round one and we are underway!
Patterson moves in looking to clinch but Why pushes him off.

Patterson feints and as Why raises his hands in defense, Patterson changes levels and drives through with a takedown into guard.
Patterson trying to control the position from guard on top but Why is wriggling around, looking for whatever he can.
Patterson has decided he wants to stand but the closed guard of Why is proving hard to escape from.
Patterson wants to pass the guard but Why is keeping the position.
Pattersonis looking to pass into half guard but Why pushes him away with his feet and jumps on top - now Why is in guard.

Why gets to his feet. Patterson looking to butt scoot but the ref puts an end to that. On your feet son!
No luck for Patterson with that takedown attempt.
Patterson fails with a takedown attempt from distance.
Why closes the distance and scores a nice trip takedown into half guard. Patterson did well to prevent Why getting side control.
Patterson won't allow Why to pass to mount.

Patterson looking for submissions off his back.

That's one minute gone in the round.
Why scores with a couple of good hammerfists.
Patterson wants to control but Why is keeping busy.
Why wants to take a breather but Patterson is having none of it.
Patterson is looking to improve his position.
Patterson moves his hips nicely and gets into full guard.
Patterson looking to hit a scissor sweep but Why is one step ahead there.
Why wants to control from the top but Patterson keeps moving.
Why advances to half guard.

That's two minutes gone in the round.
A lull in the action here being met with boos from the crowd.
Why is working for submissions here but there's nothing on.
Patterson avoiding damage under a succession of punches from Why.
Why looking for a kimura but he'll have to free his other leg if he wants to finish that. Perhaps he's just using it as a distraction technique.
The fighters are going at a pretty good pace and they're both starting to sweat now.
Patterson tries to roll over but Why keeps him under control.
Why looks over to his corner - he wants some instructions but his corner are not responding.

That's three minutes gone in the round.
Patterson wants to control but Why is keeping busy and won't allow it.
Patterson is trying to get back to full guard.

It looks like we're going to have a standup here. Neither fighter is doing enough on the ground.
Patterson with a poor takedown
and Why counters with a driving takedown into guard. Nice work there by Why.
That's three failed takedown attempts in the round for Abe Patterson. That's going to take a lot out of him.
Why pressing down on his opponent's thigh, looking to pass guard. Patterson is keeping the position for now.
Patterson wants to control but Why passes easily into half guard.
Patterson wants to improve his position but Why is controlling well.
Patterson tries to kick Why off but Why keeps his base steady and stays in half guard.
Why seems very keen to just sit and control from half guard but Patterson does not like that idea so much and is remaining active off his back.
Patterson is trying to control but Why manages to pass to mount!
Patterson tries to lock up and control but Why gives him a forearm to the face and pushes him away.
The ref warns both fighters not to hold the cage as they work up against the meshing.

That's four minutes gone in the round.
Why gets to his feet and calls his opponent to stand. Here come the fireworks!
Why uses good footwork to get in and out and land a nice right hand before Patterson has time to react.

It looks like Abe Patterson has been cut.
Why loads up on a big right hand but Patterson slips the punch.
Patterson tries to grapple but his opponent circles
and Why counters with a nice shoot takedown that brings the fighters to the ground.
We've seen a great period of action over the last minute or so - credit to both fighters for going all out!
Patterson looking for a guillotine here but Why defends easily.
Why looking to sit in guard and control but Patterson gets the butterfly guard and sweeps. He's now in the guard on the top.
The crowd applaud the fighters efforts here as the round comes to an end.
Patterson trying to control but Why is working from the bottom.
And thats the end of the round the fighters go back to their corners.
Stevie Why dominated that round.
The cut man is working on Abe Patterson's cut.
Well, the break between rounds is over. Let's get back to the scrappin!

Why throws a big shot that misses.
Patterson with a lazy takedown attempt
and Why cracks him with a counter punch right on the button.
Why circles away from the clinch attempt
enabling Why to counter with a crisp jab.
Patterson bobs and weaves into range and then changes levels and scores with a nice takedown into side control.
Check out the look on Patterson's face as he threw that strike - that's one determined fighter!
Why struggling a bit here.
Why is moving his hips around well on the bottom and has managed to get back to half guard.
Why is looking to improve his position.
Patterson trying to control from half guard but Why is working away.
That's one minute gone in the round.
Patterson postures up and decides to stand up, from the half guard. The ref calls for Why to stand up.
Patterson gets his takedown attempt stuffed easily
and Why counters with a lovely straight right hand!
Patterson needs to keep his hands up - Why had a free shot at his head there.
Patterson tries to clinch but fails miserably
and Why counters with a shoot takedown into half guard.
Patterson trying to control from the bottom.
Why wants to work for an arm triangle but Patterson is really keeping half guard well and defending the submission attempt.
Why is breathing heavily.
Why stalling.
The fighters are pressed up against the cage, both looking to find a bit of space to work.
Patterson is trying to maintain the position but Why is very close to passing his half guard.
That's two minutes gone in the round.
Patterson is looking to sinch up a guillotine here but Why pulls his head out easily.
Patterson wants to get back to full guard.
Why wants to control but Patterson is keeping him busy.
Why maintaining the dominant position here and is working for a kimura. He's locked it up! Patterson could be in real trouble here! He's trying to wriggle out but Why has cracked it and Patterson is screaming in pain - he's tapped out! Great finish by Why!
Ladies and gentlemen, after 2:49 of round 2, we have a winner by way of Submission (Kimura). Stevie Why!
|
|
|
|
|
|
|
|
|
|
|
|
|
|
|
|
|
|
|
|
|
|
|
| S |
C
A |
G |
S |
C
B |
G |
|
S |
C |
G |
|
energy
A | B |
|
hype
A | B |
|
pop
A | B |
|
mgr
A | B |
|
FIGHT
RATING
68% |
|
|
|
|
|
|

