|
|
PBP Commentary |
Coming up we have a featherweight MMA rules bout between Frodo Baggins (ranked 0 p4p, 0 weight class) and Emilio Stark (ranked 0 p4p, 0 weight class). Over to our ring announcer for the fighter introductions!
 |
|
 |
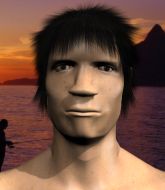
| 168 cm
22
150 lbs
0 - 1 - 0 |
|
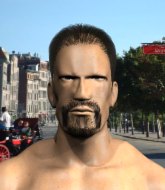
179 cm
19
155 lbs
1 - 0 - 0 |
BJJ White Belt
Good knees
Cuts easily |
|
BJJ Brown Belt
Counter striker
Good gas tank |
|
| |
|
Ladies and gentlemen. This fight is 3 rounds, in the featherweight division.
Introducing the fighter to my left, fighting out of the red corner.
With a record of
0 - 1 - 0, fighting out of Los Angeles, Frodo Baggins!
And introducing the fighter to my right, fighting out of the blue corner.
With a record of
1 - 0 - 0, fighting out of Los Angeles, Emilio Stark!
The judges for this bout are Jack Bonds, and Frank Antenori.

The bell rings for round one and we are underway!
Baggins tries to clinch up but Stark circles away and keeps his distance.
No luck for Stark with that takedown attempt.
Stark shoots for a takedown but Baggins saw that one coming a mile off and avoided it easily.
Baggins fails with an attempt to clinch.
Frodo Baggins seems to be the more aggressive standup fighter in this bout.

Baggins moves into the clinch.
Baggins gets underhooks to prevent Stark's takedown attempt.
Frodo Baggins has stuffed three takedown attempts in the round now. That's going to take a lot out of Emilio Stark.
Baggins working Stark over with knees to the body.
Baggins unloads a knee to the mid-section. Stark lets out a prehistoric sounding urrrrgh.
Baggins lands a body punch.
Stark tries to jump guard but he falls flat on his backside. Baggins smiles and moves away.
Baggins is looking to clinch but Stark is avoiding it.
Baggins is looking to take this fight into the clinch.
Baggins is looking to clinch.
Baggins gets a clinch.
Baggins works on Stark's body with a couple of short punches.
Stark takes a knee right on the jaw!

That's one minute gone in the round.
Baggins with the Thai clinch, lands a knee to the head.
Baggins unloads a knee to the mid-section. Stark lets out a prehistoric sounding urrrrgh.
Stark looks gassed!
A knee to the head by Baggins.
A knee to the head by Baggins.
Knees to the body from Baggins.
Baggins landing knees to the head.
Baggins landing some nice looking knees to the body.
Baggins lands a good knee to the midsection. Stark won't want to take too many of those.
Baggins lands a right hand that snaps the head of Stark backwards.
Baggins with a knee to the head.
Kneeeeees! The crowd are calling for knees to the body. Baggins obliges.
Baggins lands an uppercut.
Baggins lands a knee to the body.
Baggins lands a body shot.
This is a great period of action - very entertaining stuff!
Baggins working Stark over with knees to the body.
A body shot lands from Baggins.
Stark takes a knee to the side of the body.
Baggins unloads a knee to the mid-section. Stark lets out a prehistoric sounding urrrrgh.
Baggins connects with a knee to the head.
A knee to the head by Baggins.
Baggins landing knees to the body.
Baggins swings wildly with an uppercut but Stark uses good head movement to avoid it.

That's two minutes gone in the round.
Baggins throws a vicious knee straight up the middle but Stark blocks it with crossed arms.
Baggins tries to land a knee to the head but Stark blocks with his arms.
Stark on the defensive, avoiding the knees to the body.
Stark jumps guard but Baggins stands there with Stark around his waist. Stark gives up and drops back to his feet. We remain in the clinch.
Stark tries to take the fight to the ground by pulling guard but can't manage it.
Baggins looking to throw knees to the head but Stark is blocking nicely.
Baggins is pressed up against the cage. Stark has hold of a leg and is looking to drag Baggins down to the mat. Baggins avoids the attempt though and has circled away. We're back to striking at a distance.
Baggins stuffs the takedown attempt from Stark. Stark gets slowly back to his feet.
Baggins tries to clinch there but Stark circles away.
Baggins is looking to clinch.
Baggins will need to tighten up his combinations if he doesn't want to gas himself out, swinging at thin air.
Stark shoots for a takedown but Baggins saw that one coming a mile off and avoided it easily.

That's three minutes gone in the round.
An inside leg kick from Baggins misses.
Baggins tries to clinch but Stark is having none of it.
Baggins tries to close the distance and clinch up against the cage but Stark paws at him with a jab and circles away.
Baggins tries to close the distance and clinch but Stark swats him to one side with an open hand palm strike and circles away.
Stark closes this distance looking for a takedown but Baggins circles away.
Baggins fails in his attempt to clinch.
Baggins tries to clinch up.
Baggins doesn't manage to clinch there - Stark circles away.
Stark closes this distance looking for a takedown but Baggins circles away.
Stark avoids the clinch attempt nicely.
Baggins swings and misses with a hook to the body.
Stark circles away from the clinch attempt.
Baggins misses with a low kick.
Baggins scores with a shot to the body.

That's four minutes gone in the round.
The crowd are showing their displeasure at the lack of action as loud boos ring out around the arena.
Baggins is looking to clinch.
Baggins wants to clinch.
Stark keeps the fight on the outside.
Baggins wants to clinch up but Stark keeps it at a distance.
A big right from Stark misses.
Baggins wants to clinch up but Stark keeps it at a distance.
Baggins tries to clinch up.
Baggins looks to land a combination but Stark avoids it well.
The crowd applaud the fighters efforts here as the round comes to an end.
Baggins wants to clinch.
Baggins swings for the body but Stark moves out of range.
And thats the end of the round the fighters go back to their corners.
Frodo Baggins dominated that round.
That's time! Back to the action!


Stark closes the distance and gets a double leg, slamming Baggins to the mat! Baggins manages to get full guard.
Stark trying to control the position from guard on top but Baggins is wriggling around, looking for whatever he can.

Baggins working from the bottom, still in full guard. He's managed to get a loose triangle. Stark doesn't seem to be doing much to defend here, obviously he feels comfortable in the position. Stark manages to throw the legs off his shoulder and he's back into guard - no problem.
Stark preventing the sweep.
Baggins keeping moving, preventing Stark from controlling successfully.
The fighters are pressed up against the cage, both looking to find a bit of space to work.
Baggins utilising some decent striking defenses from the guard, preventing the ground and pound.
Stark has the superior BJJ but he's also working some ground strikes into his gameplan.
Stark trying to control but Baggins is working from the bottom.
Stark won't allow Baggins to sweep him here.
Stark trying to control but Baggins is working from the bottom.
Baggins on his back here. We all know that wrestlers don't like being on their back so let's see if Baggins tries to get out of the position.
That's one minute gone in the round.

Well, the referee has seen enough. Neither fighter is active enough on the ground so he's stood them back up.
Baggins fakes a jab and throws a low kick but Stark checks it well.
Stark avoids the clinch attempt nicely.
Baggins tries to clinch but Stark moves out of range.
Baggins tries to clinch there but Stark circles away.
A big right from Baggins misses.
Stark is trying hard to land a takedown here. Baggins sprawls well and keeps this one on the feet.
Stark fails with a rather predictable takedown attempt.
Baggins lands a right hook to the body.
Stark is breathing heavily.
Baggins throws a low kick, looking for Stark's leg but Stark calmly moves out of range.
Baggins darts in and clinches Stark up against the cage.
Baggins lands a knee to the head there! That was nasty!
Knees in the clinch landing for Baggins.
Baggins lands a shot to the body.
That's two minutes gone in the round.
Baggins misses with a knee to the head.
Stark takes a knee to the side of the body.
Baggins utilising his Muay Thai to score with a knee to the body.
Baggins lands a knee to the head.
Baggins connects with a knee to the head.
Stark is trying to force a seperation but Baggins has the dominant position.
Baggins tries a knee to the head but he's missed.
Baggins lands a nice shot to the body.
Stark avoiding damage as Baggins throws knees to the body.
Both fighters working to control the clinch.
Stark is trying to break the clinch but Baggins has him pressed against the cage.
Baggins presses Stark against the cage and delivers a mid-strength body shot.
Stark fails to pull guard.
Frodo Baggins has stuffed three takedown attempts in the round now. That's going to take a lot out of Emilio Stark.
Baggins misses the knee to the body. Nice hip positioning from Stark.
Stark fails to pull the fight into his guard.
Baggins is trying to wear down his opponent with knees to the body.
Stark is trying to work out of this bad position, with his back against the cage.
Stark tries to score a body lock takedown but Baggins shows good agility there to stay on his feet.
Stark jumps guard but Baggins stands there with Stark around his waist. Stark gives up and drops back to his feet. We remain in the clinch.
That's three minutes gone in the round.
Baggins misses with a knee strike.
Baggins tries to land knees in the clinch but Stark avoids the damage to the body.
Stark tries to pull guard but can't drag his opponent to the mat. Baggins just stands there and leans against the cage.
Baggins with the Thai clinch. He's looking to land a big knee but he's not managed it this time.
Stark tries to pull guard but Baggins won't allow it.
Stark managing to block the knees to the body from Baggins.
Stark jumps guard but Baggins stands there with Stark around his waist. Stark gives up and drops back to his feet. We remain in the clinch.
Stark tries to pull guard but Baggins holds him up against the cage and eventually Stark drops back down to his feet.
Stark is working for a takedown up against the cage. He can't get it on this occasion though.
Stark takes a knee to the side of the body.
Stark tries to pull guard but Baggins won't allow it.
Baggins trying to land knees to the body.
Baggins is looking to score with knees to the body. Maybe he'll change it up and go body then head. Stark is defending well for now.
Baggins tries a knee to the head but Stark blocks it.
Stark tries to pull guard but Baggins won't allow it.
Baggins tries a knee to the head but Stark blocks it.
An uppercut on the inside fails to land for Baggins.
Stark has Baggins pressed up against the cage and is working for takedown. Baggins manages to improve position though and keeps the fight standing.
That's four minutes gone in the round.
Stark avoiding damage as Baggins throws knees to the body.
Frodo Baggins has scored more points in the clinch so far.
Stark jumps guard but Baggins stands there with Stark around his waist. Stark gives up and drops back to his feet. We remain in the clinch.
Stark tries to take the fight to the ground by pulling guard but can't manage it.
Baggins lands a knee to the body.
Stark tries a knee to the head but he's missed.
Stark blocks a knee to the body. He'll have a nicely bruised forearm in the morning.
Stark tries to take the fight to the ground by pulling guard but can't manage it.
Stark has had enough of the clinch and is looking to separate.
Baggins crunches a lovely knee into Stark's ribcage.
Stark jumps guard but his hands slip and he falls flat on his back. Well, he's made himself look a right mug there, as Baggins walks away with a smile on his face. Stark gets slowly back to his feet and shakes his head.
Stark tries to score a power double leg takedown but Baggins sees that one coming and sprawls well. That will dishearten Stark somewhat.
The fight stays on the outside here - Baggins looks like he's thinking about clinching though.
Stark shoots in for a takedown. "I don't think so" says Baggins as he avoids it easily.
And thats the end of the round the fighters go back to their corners.
Frodo Baggins dominated that second round.
The corners get their ten second warning. Both fighters stand from their stools and stare eachother down, ready to get back to the action. Let's get this one finished - here comes the final round!

Baggins throws a series of punches but Stark moves out of range.
Stark swats away the attempt to clinch by Baggins.
Stark shoots in but Baggins avoids the takedown attempt easily.
Baggins keeps the fight standing with a nice sprawl.
Baggins is looking to chop away at Stark's legs.
Baggins fails with an attempt to clinch.
We've had a slow start to the round here - hopefully the action picks up.
Baggins is looking to clinch but Stark is avoiding it.
Baggins is looking to take this fight into the clinch.
Frodo Baggins is looking to throw some combinations by the looks of things.
Baggins throws a series of punches but Stark moves out of range.
Both fighters are breathing heavily.
Baggins tries to clinch but is not successful on this occasion.
That's one minute gone in the round.
A really sloppy takedown attempt there from Stark.
Frodo Baggins has stuffed three takedown attempts in the round now. That's going to take a lot out of Emilio Stark.
Baggins tries to clinch but Stark moves out of range.
Baggins tries to clinch but is not successful on this occasion.
Baggins tries to clinch but is not successful on this occasion.
Baggins tries to clinch but Stark moves out of range.
Frodo Baggins is looking to keep the fight on the feet at all costs.
Baggins is looking to take this fight into the clinch.
Baggins tries to clinch but is not successful on this occasion.
Baggins tries to clinch up.
A really sloppy takedown attempt there from Stark.
Stark throws a looping left and ducks down for a takedown. He's got his arms around Baggins's waist but Baggins gets an underhook and avoids the takedown by throwing Stark off to one side.
Frodo Baggins is fighting for a decision here - he's started to take the cautious approach.
That's two minutes gone in the round.
A lull in the action here being met with boos from the crowd.
Stark wants to clinch up but Baggins keeps it at a distance.
Baggins rushes Stark and presses him up against the cage.
Baggins connects with a knee to the head.
Baggins utilising his Muay Thai to score with a knee to the body.
Stark tries to jump guard but he falls flat on his backside. Baggins smiles and moves away.
Baggins tries to close the distance and clinch up but Stark swats him away and circles back towards the center.
Baggins tries to clinch up but Stark circles away and keeps his distance.
That's three minutes gone in the round.
Baggins is looking to clinch.
Baggins moves into the clinch.
Stark tries to take the fight to the ground by pulling guard but can't manage it.
Baggins missing with knees to the body.
Stark fails to pull the fight into his guard.
Stark tries to pull guard but can't drag his opponent to the mat. Baggins just stands there and leans against the cage.
Stark tries for a takedown but Baggins manages to get underhooks.
Stark fails to pull guard.
Stark fails to pull guard.
That's four minutes gone in the round.
Baggins gets double underhooks to prevent a takedown attempt from Stark.
A hook to the body from Baggins.
Stark can't break the clinch.
Stark tries to pull guard but Baggins won't allow it.
Boooooooooooooooooooo!!! God, this has been a terrible round. Come on you two, sort yourselves out!
Baggins landing some nice looking knees to the body.
Emilio Stark has stepped it up - he knows he needs a finish here!
Baggins with a knee to the head.
And that's the end of the fight!
Frodo Baggins showed his dominance in that final round.
Well I reckon that's a shut out for Baggins, winning every round. Will the judges agree? They are the ones who matter, even if they are often depressingly incompetent. Over to the ring announcer for the scorecards.
Ladies and gentlemen, after 3 rounds of action, we go to the scorecards for a decision.
Judge Jack Bonds scores the fight 30:26
Judge Percy O'Donnell scores the fight 30:26
Judge Frank Antenori scores the fight 30:26
In favor of your winner, by unanimous decision... Frodo Baggins!
|
|
|
|
|
|
|
|
|
|
|
|
|
|
|
|
|
|
|
|
|
|
|
| S |
C
A |
G |
S |
C
B |
G |
|
S |
C |
G |
|
energy
A | B |
|
hype
A | B |
|
pop
A | B |
|
mgr
A | B |
|
FIGHT
RATING
36% |
|
|
|
|
|
|
