|
|
PBP Commentary |
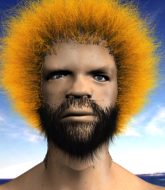
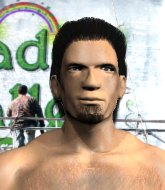
Coming up we have a welterweight MMA rules bout between Matt Burns (ranked 0 p4p, 0 weight class) and Rozhan Mallender (ranked 0 p4p, 0 weight class). We have two fighters making their debuts here, so let's see who comes out of this one with their first professional victory.
 |
|
 |
| 184 cm
19
185 lbs
0 - 0 - 0 |
|
170 cm
18
170 lbs
0 - 0 - 0 |
BJJ Purple Belt
Brawler
Very strong |
|
BJJ Blue Belt
Brawler
Determined |
|
| |
|
Ladies and gentlemen. This fight is 3 rounds, in the welterweight division.
Introducing the fighter to my left, fighting out of the red corner.
With a record of
0 - 0 - 0, fighting out of London, Matt Burns!
And introducing the fighter to my right, fighting out of the blue corner.
With a record of
0 - 0 - 0, fighting out of London, Rozhan Mallender!
The judges for this bout are James Atkins, Paul Tew and Sam Margolis.

The bell rings for round one and we are underway!

Burns rushes Mallender and pushes him back against the cage in a clinch.
Burns wants to break free. God knows he wants to breaaaak freeee.

Burns escapes the clinch and we're back to striking.
Mallender clinches up with Burns and pushes him back against the cage.

Mallender jumps guard and drags Burns to the mat. He's obviously going to be looking for submissions off his back.
Burns wants to pass the guard but Mallender is keeping the position.
Mallender looking to hit a scissor sweep but Burns is one step ahead there.
The fighters are pressed up against the cage, both looking to find a bit of space to work.
Burns missing there with some ground and pound from the guard.
Burns stands up and looks to throw the legs aside to pass to side control. Mallender swivels though and keeps the full guard.
Burns won't allow Mallender to sweep him here.

That's one minute gone in the round.
Burns stays in close to Mallender's body and controls the position.
Mallender looking to hit a scissor sweep but Burns is one step ahead there.

The referee decides to stand the fighters back up.
Mallender dives in and grabs Burns's left leg, looking for a takedown. Burns pushes down on Mallender's head and hops out.
Burns misses with a takedown attempt
and Mallender counters with a takedown into full mount! That could mean trouble for Burns!
Mallender wants to control the pace but Burns is squirming around nicely.
Burns is wriggling around trying to escape.
Mallender controlling from the full mount.

That's two minutes gone in the round.
Mallender can't quite control the action as he would like just now, as Burns is looking to escape.
Mallender is in a good position here but he's just trying to control... And he's not even managing to do that successfully.

Mallender wants to finish this one by submission but Burns is holding onto his waist, trying to prevent any attacks from Mallender.

That's three minutes gone in the round.
Burns is looking to improve his position but Mallender isn't that keen on the idea.
The fighters are starting to perspire pretty heavily.
Mallender looking to finish with strikes here!
Mallender moves into side control, trying to work for a kimura. That looks painful! Will he finish!!?? No, Burns has worked his arm free - good work by Burns!
Burns is trying to escape and get back to his feet.

That's four minutes gone in the round.
A few boos can be heard. I'm sure they will multiply if the fighters don't pick up the pace.
Mallender is looking to take a break and control but Burns is keeping him honest, looking to work from the bottom.
Mallender looks gassed!
Burns is trying to get back to his feet.
The crowd thankful this round is nearly over.
Burns is sneaking out the side here. He's bucked Mallender off and has taken his back!
Mallender is in bad spot here.
And thats the end of the round the fighters go back to their corners.
Rozhan Mallender dominated that round.
The fighters get back to their feet, the hooter sounds and we're back to the action!

Mallender fails with an attempt to clinch.
Mallender shoots in looking for a takedown. Burns tries to sprawl out of it but Mallender keeps driving through. The fighters are pinned against the cage. Burns manages to get underhooks and after a bit of a struggle, circles away and we're back to standing.
Burns shoots in and gets a takedown into half guard. Burns showed some decent athleticism there.
Mallender tries to strike from the bottom but it doesn't land.
Mallender is staying active underneath Burns, who seems content to just control the action from this position.
Burns is really struggling to control Mallender but he's trying to hold on to the position.
That's one minute gone in the round.
Mallender manages to get to full guard.

Burns gets to his feet and steps away from his opponent.
Mallender is breathing heavily.
Burns shoots and misses
and Mallender counters by clinching up.
Burns prevents the takedown attempt.
Burns tries to pull guard but Mallender holds him up against the cage and eventually Burns drops back down to his feet.
Mallender fails to pull guard.
Matt Burns has stuffed three takedown attempts in the round now. That's going to take a lot out of Rozhan Mallender.
Mallender drops to a knee looking for a takedown but Burns gets the underhooks and prevents it.
Mallender is looking to break free of the clinch but Burns has double underhooks.
Mallender is working for a takedown up against the cage. He can't get it on this occasion though.
That's two minutes gone in the round.
Burns breaks the clinch and we're back to striking at distance.
Burns stuffs the takedown.
Burns shoots in with a takedown attempt and he has Mallender pinned against the cage. Mallender gets the underhooks and manages to circle away.
Burns scores with a nice takedown into half guard. Let's see what he's got on the ground.
Burns uses his free foot to push down on Mallender's thigh. Eventually he works his other foot free and he's advanced to mount - this is trouble for Mallender.
Burns throws an elbow from mount that misses. Lucky escape for Mallender because Burns loaded up on that one.
Mallender working to try and regain half guard.
Burns will need to keep those long limbs tucked in whilst he's on the ground, to prevent any submissions.
Burns throwing sloppy strikes, which aren't doing any damage.
That's three minutes gone in the round.
Burns working the ground and pound effectively.
Burns working to secure an arm triangle but it's not happening for him just yet.
Mallender tries to lock up and control but Burns gives him a forearm to the face and pushes him away.
Mallender really trying hard to get back to half guard here.
Mallender wants to control but Burns is having none of it.
That's four minutes gone in the round.
A few boos can be heard. I'm sure they will multiply if the fighters don't pick up the pace.
Burns controlling his opponent.
Burns looking to finish Mallender with some ground and pound. This is bad for Mallender!
Mallender really trying hard to get back to half guard here.
Burns is still in mount, landing shots to his trapped opponent. Mallender can't stay in a position like this for much longer.
Mallender is writhing around trying to get back to his feet.
Burns working for a submission but Mallender is keeping him at bay.
And thats the end of the round the fighters go back to their corners.
Matt Burns dominated that second round.
OK. That's time! The bell goes and we're back to the action. This is the final round!

Burns fails to land the takedown.
Mallender is looking to clinch but Burns is avoiding it.
Burns scores with a takedown into Mallender's guard.
Matt Burns overall seems to be getting the better of the ground position in the fight so far.
Burns wants to control from the top but Mallender keeps moving.
Mallender utilising some decent striking defenses from the guard, preventing the ground and pound.
Both fighters are breathing heavily.
Burns avoids a guillotine attempt easily.
Burns stays in close to Mallender's body and controls the position.
That's one minute gone in the round.
Burns trying to land body shots but he keeps hitting the mat.
Mallender trying to control the position.
Burns drops back for a leg! It's a sloppy attempt though and Burns jumps back into guard quickly, to retain the dominant position.
Mallender trying to keep a closed guard but Burns is proving a slippery customer.
That's two minutes gone in the round.
A lull in the action here being met with boos from the crowd.
Neither fighter is doing enough for the referee's liking and he's decided to stand them back up.
Burns decides to change it up a bit and drives through with a nice takedown into half guard.
Burns thows a big elbow that misses, also allowing Mallender to regain full guard.
Burns trying to control the position from guard on top but Mallender is wriggling around, looking for whatever he can.
Burns stands up from Mallender's guard - Burns perhaps looking for a knockout.
Mallender keeps the fight standing with a nice sprawl.
Mallender tries to clinch up.
That's three minutes gone in the round.
Burns fails to land the takedown.
That's three failed takedown attempts in the round for Matt Burns. That's going to take a lot out of him.
Mallender clinches up against the cage.
Burns keeps control of Mallender as he tries to wriggle out of the double underhooks.
Mallender tightens his grip and picks Burns up, before dumping him to the ground. Burns manages to land in guard.
Mallender trying to control the position from guard on top but Burns is wriggling around, looking for whatever he can.
The ref warns both fighters not to hold the cage as they work up against the meshing.
Mallender wants to stand but Burns has a closed guard, so he can't escape.
Mallender trying to land body shots but he keeps hitting the mat.
That's four minutes gone in the round.
Burns is working the butterfly guard. He manages to land a nice scissor sweep and is now in half guard on the top. Nice move.
Burns wants to lay and pray for a moment but Mallender keeps working.
Burns passes to full mount!
Mallender wants to control but Burns is having none of it.
Burns landing strikes from the mount.
And that's the end of the fight!
Matt Burns showed his dominance in that final round.
I think Burns has won this one but let's see what the judges have to say. Over to the ring announcer for the scorecards.
Ladies and gentlemen, after 3 rounds of action, we go to the scorecards for a decision.
Judge James Atkins scores the fight 29:28
Judge Paul Tew scores the fight 29:28
Judge Sam Margolis scores the fight 29:28
In favor of your winner, by unanimous decision... Matt Burns!
|
|
|
|
|
|
|
|
|
|
|
|
|
|
|
|
|
|
|
|
|
|
|
| S |
C
A |
G |
S |
C
B |
G |
|
S |
C |
G |
|
energy
A | B |
|
hype
A | B |
|
pop
A | B |
|
mgr
A | B |
|
FIGHT
RATING
32% |
|
|
|
|
|
|
