|
|
PBP Commentary |
Coming up we have a light heavyweight MMA rules bout between Shanzo Miganzo (ranked 0 p4p, 0 weight class) and Happy Gilmore (ranked 0 p4p, 0 weight class). Miganzo kept the crowd waiting but all that was forgotten when his ring entrance music started. The incomparable musical genius that is Kenyan National Anthem. The fight MMA fans around the world have waited their entire lives for!
 |
|
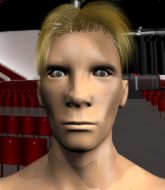 |
| 188 cm
18
215 lbs
0 - 0 - 0 |
|
180 cm
24
205 lbs
6 - 2 - 0 |
BJJ Blue Belt
Excellent boxer
Big heart |
|
Good takedowns
Basic striking
Granite chin |
|
| |
|
Ladies and gentlemen. This fight is 3 rounds, in the light heavyweight division.
Introducing the fighter to my left, fighting out of the red corner.
With a record of
0 - 0 - 0, fighting out of Hilo, Shanzo Miganzo!
And introducing the fighter to my right, fighting out of the blue corner.
With a record of
6 - 2 - 0, fighting out of Hilo, Happy Gilmore!
The judges for this bout are , and .

The bell rings for round one and we are underway!
Miganzo ducks down and throws a hook to the body.
Gilmore slips a straight right by Miganzo.
Gilmore avoids a punch combination nicely.
Nice sprawl there from Miganzo as Gilmore shoots in.
Gilmore lands a nice hook to Miganzo's body. Miganzo takes it in his stride and looks to land his own strikes.
Miganzo throws a hook to the body but it doesn't connect.
Miganzo throws a good cross that connects.
Gilmore walks into a stiff left hand from Miganzo.
Gilmore slips a jab from Miganzo.
Gilmore on the wrong end of a nice hook.
Miganzo misses with a jab and misses with a cross straight after too.
Miganzo on the wrong end of a nice jab.
Gilmore misses with a looping right.
Miganzo moves out of range as Gilmore strikes.
Miganzo lands a jab-cross combination.
Miganzo thows a left - swing and a miss!

Gilmore gets a takedown into half guard.

Gilmore seems to be working for a kimura but Miganzo defends the submission attempt.

That's one minute gone in the round.
Gilmore is trying for a guillotine from the top but the pressure isn't in the right place so Miganzo is just riding it out for now. Gilmore eventually gives up the hold.
Gilmore is sneakily working for an arm triangle but Miganzo sees it coming and defends easily.
Miganzo is trying to stand back up but Gilmore is controlling him
Gilmore is pressing down on Miganzo's thigh, looking to free his foot. Miganzo is holding on for now.

That's two minutes gone in the round.
The crowd are getting on the fighters' backs, as the pace has dropped off in the last minute or so.
Gilmore seems to be looking for submissions.
Miganzo is trying to stand up here but Gilmore is controlling him well.
Gilmore has freed up his trapped foot and advances to mount.
Miganzo wants to try and get back to his feet.
Gilmore wants to finish this one by submission but Miganzo is holding onto his waist, trying to prevent any attacks from Gilmore.
Gilmore is going oldschool here, as he tries to force Miganzo to tap using a forearm choke. This isn't 1993 though, so Miganzo shrugs it off.

That's three minutes gone in the round.
Gilmore is in full mount, looking to secure a guillotine but Miganzo is surviving well by controlling Gilmore's body position as best he can.
Gilmore is thinking about an arm triangle here, looking to tighten it up before moving to side control. Miganzo can see it coming though and defends well with a couple of strikes to the head and some good arm positioning.
Gilmore looking to secure an arm triangle but Miganzo defends it well.
The ref warns both fighters not to hold the cage as they work up against the meshing.
Gilmore looks gassed!
Gilmore looking to secure an arm triangle but Miganzo defends it well.

That's four minutes gone in the round.
Well. There's a bit of a lull in the action here and the crowd are starting to get restless.
Miganzo wants to use the cage to get back to his feet here.
Miganzo is trying to escape the mount but Gilmore keeps good control and instead manages to take Miganzo's back.
Gilmore looking for the choke from the back.
Miganzo looking to stop the rear naked choke attempt by controlling the hands.
Miganzo defends a rear naked choke attempt by controlling one of Gilmore's arms.
And thats the end of the round the fighters go back to their corners.
Happy Gilmore dominated that round.
The fighters get back to their feet, the hooter sounds and we're back to the action!

Gilmore shoots in looking for a double leg takedown. Miganzo defends it nicely.
Miganzo is the aggressor but that punch slipped nicely by Gilmore.
Miganzo missing with a left hand there. Gilmore was out of range so wasted energy throwing that one.
Miganzo lands a jab.
Gilmore throws a monster uppercut resembling something out of street fighter but it doesn't land.
Gilmore misses with a telegraphed body shot
and Miganzo counters with a quick right hand to the jaw.
Gilmore slips a jab and a cross from Miganzo.
Gilmore throws a hook to the side of Miganzo's head but Miganzo sees it coming and ducks under it beautifully.
Gilmore takes a jab right on the kisser.
Miganzo is really head hunting here, hardly looking to strike to the body at all.
We've had a slow start to the round here - hopefully the action picks up.
Gilmore with poor footwork there. He got himself in a bit of a tangle, enabling Miganzo to score with a decent uppercut.
Gilmore jabbing away but nothing is landing.
Miganzo throws an uppercut from half a mile away. Gilmore sees it coming and avoids it easily.
Gilmore has his head slapped from side to side by a 3 punch combination. That must have hurt him.
Gilmore is really struggling to land any decent head shots against his taller opponent.
A big left from Gilmore misses.
Miganzo is using his height advantage well here, landing a good percentage of his punches.
Gilmore swings for the body but Miganzo moves out of range.
That's one minute gone in the round.
Gilmore throws an uppercut from half a mile away. Miganzo sees it coming and avoids it easily.
Gilmore swings and misses with a hook to the body.
Gilmore takes a body punch but keeps moving.
Miganzo throws a lazy right hand but Gilmore sees it coming a mile off and sidesteps it easily.
Gilmore uses decent footwork to sidestep a right hand from Miganzo.
Gilmore shoots in for a takedown and gets it. Let's see what he's got on the mat.
Gilmore pressing down on his opponent's thigh, looking to pass guard. Miganzo is keeping the position for now.
Gilmore slips nicely into half guard.

Miganzo kicks off Gilmore and gets to his feet.
Shanzo Miganzo is looking to keep the fight on the feet at all costs.
Gilmore takes a shot to the body in his stride.
Gilmore shoots in for a takedown and gets it.
Miganzo looks like he's trying to stand up.
That's two minutes gone in the round.
Miganzo won't allow Gilmore to pass to mount.
Gilmore is trying to work for a kimura but Miganzo is defending well.
Miganzo knows he needs to get back to his feet asap. He's simply no match for Gilmore on the ground.
Miganzo keeping his head moving to avoid the ground and pound.
Gilmore in half guard on the top. He's looking for a kimura... He's got it locked and he's managed to free his trapped foot. Miganzo tries to escape but it's on too tight and he has to tap! Great BJJ skills there from Gilmore!
Ladies and gentlemen, after 3:02 of round 2, we have a winner by way of Submission (Kimura). Happy Gilmore!
|
|
|
|
|
|
|
|
|
|
|
|
|
|
|
|
|
|
|
|
|
|
|
| S |
C
A |
G |
S |
C
B |
G |
|
S |
C |
G |
|
energy
A | B |
|
hype
A | B |
|
pop
A | B |
|
mgr
A | B |
|
FIGHT
RATING
38% |
|
|
|
|
|
|

