|
|
PBP Commentary |
Coming up we have a featherweight MMA rules bout between Sirius Bidness (ranked 0 p4p, 0 weight class) and Peter Compton (ranked 0 p4p, 0 weight class). Bidness's entrance music is GRRRRR!!. A fine choice. Sirius Bidness has the better chin. Will he look to stand and bang today?
 |
|
 |
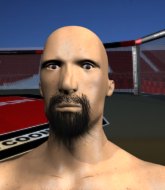
| 177 cm
24
155 lbs
9 - 6 - 1 |
|
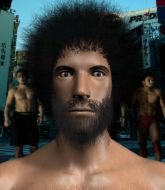
168 cm
23
152 lbs
11 - 11 - 1 |
Good wrestling
Excellent boxer
Granite chin |
|
BJJ Blue Belt
Decent boxing
Powerful |
|
| |
|
Ladies and gentlemen. This fight is 3 rounds, in the featherweight division.
Introducing the fighter to my left, fighting out of the red corner.
With a record of
9 - 6 - 1, fighting out of Tokyo, Sirius Bidness!
And introducing the fighter to my right, fighting out of the blue corner.
With a record of
11 - 11 - 1, fighting out of Tokyo, Peter Compton!
The judges for this bout are Hirohito Nitta, Shigeki Fujiwara and Yuuki Gou.

The bell rings for round one and we are underway!
Compton doesn't react quick enough there as he takes a shot to the body.
Compton pushing out the jab but it's not landing.
The fighters circling - Compton throws out the jab but it was never going to land.
Compton swings for the body but Bidness moves out of range.
Compton connects with a body shot.
Bidness with a hook.
Bidness slips under a jab.
Compton is looking to clinch.
Compton throws a right and a left that Bidness avoids nicely.
Bidness steps to the side to avoid the strikes from Compton.
A looping hook to the body misses from Compton. Bidness does a little dance to reset his feet.
A telegraphed right hand from Compton misses the target.
Bidness tries to bum rush Compton with a series of wild strikes but Compton uses good footwork to avoid the assault.
Bidness shoots in looking for a takedown. Compton tries to sprawl out of it but Bidness keeps driving through. The fighters are pinned against the cage. Compton manages to get underhooks and after a bit of a struggle, circles away and we're back to standing.

Compton gets caught flat footed, as Bidness shoots in with a quick takedown into guard.
Bidness trying to control the position from guard on top but Compton is wriggling around, looking for whatever he can.
Bidness scoring with some ground and pound.

That's one minute gone in the round.
Bidness throwing strikes but missing.
The fighters are pressed up against the cage, both looking to find a bit of space to work.
Bidness trying to control but Compton is working from the bottom.
Compton looking to control.
Compton is looking to get back to his feet but can't, whilst Bidness is controlling him.

Bidness is holding a leg here, probably looking for an ankle lock - he drops back and goes for it! Compton is in trouble! Is it all over??? No! Compton has escaped and now he's on top!
Bidness is breathing heavily.
Compton wants to get up but he can't break Bidness's closed guard. He needs to be careful trying to break the legs open, as he's open to submissions here.

That's two minutes gone in the round.
The crowd are getting on the fighters' backs, as the pace has dropped off in the last minute or so.

That's three minutes gone in the round.

Compton stands and steps away. Bidness gets to his feet too and we're back to the striking game.
Compton throws a push kick but Bidness slaps the foot to one side.
A head kick misses from Compton.
Compton dips down and scores with a jab to the body.
Bidness fails to land with the punch combination there - jab, cross, hook, miss, miss, miss.
Compton lands a jab.
Compton pushes Bidness away with a front kick.
Compton tries to close the distance and clinch up against the cage but Bidness paws at him with a jab and circles away.

That's four minutes gone in the round.
Bidness avoids the body shot from Compton.
Bidness scores with a nice head shot.
Compton is really struggling to land any decent head shots against his taller opponent.
Bidness just misses with a punch to the body.
Bidness darts in trying to clinch
and Compton counters with a left and a right that stings Bidness.
Compton throws a series of punches but Bidness moves out of range.
Compton swings wildly with a couple of big hooks
and Compton takes a counter punch right on the button for his troubles.
Compton misses with a hook.
Bidness swings for the body but Compton moves out of range.
Compton scores with a nice right hand.
A punch combination from Compton misses.
Bidness slips a jab from Compton.
Bidness tries to clinch up.
Compton wants to clinch.
Compton showing good head movement there, avoiding the strikes from Bidness.
And thats the end of the round the fighters go back to their corners.
Peter Compton dominated that round.
Well, the break between rounds is over. Let's get back to the scrappin!

Bidness scores with a reasonable looking shot to the body. Compton doesn't seem bothered though.
Sirius Bidness is looking to throw some combinations by the looks of things.
Compton closes the distance and takes a jab right on the nose as he does so.
Bidness uses good head movement to avoid the hook from Compton.
Bidness rushes forward with a series of wild hooks but Compton moves out of range and avoids them all easily.
Bidness ducks under an overhand right and circles away with a smile on his face.
A jab from Compton misses.
Sirius Bidness seems to be the more aggressive standup fighter in this bout.
A big right from Compton misses.
A shot to the body from Compton misses
and Bidness counters with a series of strikes. Compton will be more careful next time no doubt.
Bidness ducks under a wild hook from Compton.
Bidness fakes high and swings low for a body shot but Compton manages to avoid it.
Compton displays good takedown defense there as he swats away a double leg from Bidness.
Compton connects with a looping right hand.
Both fighters are absolutely exhausted here.
Compton throws a hook to the side of Bidness's head but Bidness sees it coming and ducks under it beautifully.
Some wild striking there from Bidness.
Bidness moves out of range as Compton strikes.
Peter Compton is looking to keep the fight on the feet at all costs.
That's one minute gone in the round.
Compton is looking to take this fight into the clinch.
Nice sprawl there from Compton as Bidness shoots in.
Compton throws a hook to the body but it doesn't connect.
Bidness moves out of range of the body kick.
Bidness closes this distance looking for a takedown but Compton circles away.
That's three failed takedown attempts in the round for Sirius Bidness. That's going to take a lot out of him.
Compton misses with a looping right.
Compton misses with a straight right.
Compton throws out a token jab with nothing on it.
Compton dances in quickly and lands a nice inside leg kick on Bidness. That did some damage!
Bidness takes one on the button.

Compton closes the distance and pushes Bidness back into the cage.
Compton connects with a knee to the head.
Compton tries to land a knee to the head but Bidness blocks with his arms.
An uppercut on the inside fails to land for Compton.
Compton stays in close to his opponent and throws a right hand to the body.
Compton tries to land a knee to the head but misses.
Compton lands punches inside but they're not really causing much damage.
Compton working Bidness over with knees to the body.
That's two minutes gone in the round.
Bidness on the defensive, avoiding the knees to the body.
Compton tries to land a shot to the body but it's blocked.
Compton swings away with an uppercut that misses.
Bidness is working for a takedown up against the cage. He can't get it on this occasion though.
Compton doesn't land with the attempted body shot.
Compton tried to land a shot to the body but connects with Bidness's elbow.
Compton working aggressively here.
Bidness is looking for a takedown up against the cage. Compton gets underhooks though and prevents the takedown attempt.
Compton lands a shoulder strike.
Compton throws a blind hook that connects with the side of Bidnesss head.
Compton misses with a shot to the kidneys.
Compton throws an elbow but it misses.
Bidness on the defensive, avoiding the knees to the body.
Bidness blocks a knee to the body. He'll have a nicely bruised forearm in the morning.
Good body shot from Bidness.
Compton has Bidness pressed against the cage, preventing Bidness from circling away and getting back to striking at range.
Compton misses with an elbow over the top.
A head punch blocked on the inside by Bidness.
Compton crunches a lovely knee into Bidness's ribcage.
An uppercut to the body lands inside from Compton.
Compton misses with a knee to the head.
Compton misses with a knee to the head.
Bidness managing to block the knees to the body from Compton.
Compton with the Thai clinch. He's looking to land a big knee but he's not managed it this time.
Bidness avoiding damage as Compton throws knees to the body.
That's three minutes gone in the round.
Compton scores with a shot to the side of Bidness's head.
Compton struggles to land a body shot inside as Bidness controls his hands.
Compton misses with a punch to the body.
Compton working aggressively here.
A right handed body shot lands from Compton.
Compton lands a left hand that snaps the head of Bidness backwards.
Bidness avoiding damage as Compton throws knees to the body.
Bidness works on Compton's body with a couple of short punches.
Bidness has hold of one of Compton's legs. Compton is fighting the takedown attempt but Bidness gets the trip and lands the takedown into guard.
Bidness throws a strike but Compton rolls with it and manages to sweep. Now he's in guard on top.
Bidness looking to control but Compton passes into half guard.
That's four minutes gone in the round.
Compton is thwarting Bidness's attempts to control the position.
Compton tries to stand but his arm is trapped.
And thats the end of the round the fighters go back to their corners.
Peter Compton showed his class in that round. I'd imagine he'll take it on all the scorecards.
That's time! Bidness's corner gives him a slap on the ass as he gets ready to fight. This is the final round!

Bidness swings and misses with a hook to the body.
Compton throws out a token jab with nothing on it.
Compton fails with an attempt to clinch.
Compton misses with a body shot. Nice footwork from Bidness.
Compton tries to clinch up but Bidness circles away and keeps his distance.
Compton stuns Bidness with a nice body shot, before stepping back out of range.
Compton tries to work over Bidness's front leg with a kick but Bidness checks it.
A left lands for Compton.
The fight stays on the outside here - Compton looks like he's thinking about clinching though.
Compton digs a good body shot into Bidness's ribs.
Compton fails with an attempt to clinch.
Compton misses with a jab and misses with a cross straight after too.
Bidness uses some good footwork to avoid the body shot by Compton.
Compton throws the left hand but Bidness avoids the punch easily.
Both fighters are breathing heavily.
Compton throws a head kick that connects with a bit of head and a bit of hand.
That's one minute gone in the round.
No luck for Bidness with that takedown attempt.
Compton scores with a nice body kick.
Compton throws a series of punches but Bidness avoids them all with ease.
Compton has Bidness up against the cage in a clinch.
Compton throws a knee to the head but misses.
Compton swings away with an uppercut that misses.
Bidness looking for a takedown.
Compton gets through Bidness's defenses to land a nice punch to the side of the head.
Compton tries to throw a body punch but Bidness avoids it by throwing Compton back against the cage.
Bidness blocking some punches.
Compton misses with a punch to the body.
A right hook to the body lands for Compton.
Compton working aggressively here.
An uppercut on the inside fails to land for Compton.
Compton lands a right hand that snaps the head of Bidness backwards.
Bidness tries to throw a body punch but Compton avoids it by throwing Bidness back against the cage.
Compton misses with the head strike.
Compton lands a nice uppercut.
Compton lands a body punch.
Compton landing knees to the body. They look like they could hurt.
That's two minutes gone in the round.
Bidness misses with a body punch.
With the fighters up against the cage, Compton throws an elbow but misses.
A short right from Compton.
Compton with the Thai clinch. He's looking to land a big knee but he's not managed it this time.
Compton missing with knees to the body.
Compton tries to land a knee to the head but misses.
Compton works on Bidness's body with a couple of short punches.
Compton tries to land a shot to the body but it's blocked.
Bidness blocks an uppercut.
Compton lands with a short punch from the clinch.
Compton tries a body shot but Bidness blocks it.
A right hook to the body lands for Compton.
Compton just leaning against Bidness, taking a breather.
Bidness has a body lock and is looking for a takedown. Compton is bouncing around trying to prevent the takedown and somehow he has indeed managed to stay on his feet.
That's three failed takedown attempts in the round for Sirius Bidness. That's going to take a lot out of him.
Compton with an attempt at a knee that misses.
An uppercut on the inside fails to land for Compton.
Bidness blocking some punches.
Compton swings away with an uppercut that misses.
Bidness prevents a body shot from Compton.
Compton utilising his Muay Thai to score with a knee to the body.
Compton doesn't land with the attempted body shot.
Compton makes some space for himself and lands an uppercut.
Compton struggles to land a body shot inside as Bidness controls his hands.
That's three minutes gone in the round.
Bidness looking for a takedown.
Compton trying to land knees to the body.
Bidness blocks an elbow strike.
Compton lands a body punch in the clinch.
Bidness blocks a punch to the side of the head.
Bidness can't get the takedown.
Compton missing with knees to the body.
Bidness tries for a takedown but Compton manages to get underhooks.
Bidness has Compton pressed up against the cage and is working for takedown. Compton manages to improve position though and keeps the fight standing.
Bidness prevents a body shot from Compton.
Compton lands a knee to the head.
Compton misses with a body punch.
Compton lands a body shot.
Compton swings away with an uppercut that misses.
Bidness managing to block the knees to the body from Compton.
Bidness avoiding damage as Compton throws knees to the body.
Bidness has dropped down and is working for a takedown. Compton is trying to keep an underhook but Bidness manages to get the takedown into half guard.
Compton is not content to let Bidness control the position.
Bidness thumps the canvas. Not on purpose obviously - he just missed Compton's head.
That's four minutes gone in the round.
Compton wants to control but Bidness is keeping busy.
Bidness stops Compton from getting back to his feet.
Sirius Bidness has stepped it up - he knows he needs a finish here!
Bidness slips a nice elbow through Compton's hands, connecting with Compton's forehead.
Bidness takes advantage of the dominant position to land a couple of big hammer fists.
Bidness wants to advance to full mount but Compton doesn't think that's going to happen and regains full guard instead.
Compton wants to control here, rather than go for any submissions from the bottom. At least for now.
The ref warns both fighters not to hold the cage as they work up against the meshing.
Compton utilising some decent striking defenses from the guard, preventing the ground and pound.
Peter Compton is fighting for a decision here - he's started to take the cautious approach.
Bidness postures up to throw the ground and pound strikes but they don't connect.
And that's the end of the fight!
Peter Compton comfortably won the final round on my scorecard.
I've got Compton winning every round here. Surely the decision will go his way and he'll pick up a well deserved decision victory. Over to the ring announcer for the scorecards.
Ladies and gentlemen, after 3 rounds of action, we go to the scorecards for a decision.
Judge Hirohito Nitta scores the fight 27:30
Judge Shigeki Fujiwara scores the fight 27:30
Judge Yuuki Gou scores the fight 27:30
In favor of your winner, by unanimous decision... Peter Compton!
|
|
|
|
|
|
|
|
|
|
|
|
|
|
|
|
|
|
|
|
|
|
|
| S |
C
A |
G |
S |
C
B |
G |
|
S |
C |
G |
|
energy
A | B |
|
hype
A | B |
|
pop
A | B |
|
mgr
A | B |
|
FIGHT
RATING
60% |
|
|
|
|
|
|
