|
|
PBP Commentary |
Coming up we have a welterweight MMA rules bout between Utah Jones (ranked 0 p4p, 0 weight class) and Dye Tryin (ranked 0 p4p, 0 weight class). Tryin has chosen On the way home as his entrance music. Both fighters will be looking to make this an exciting fight for the fans, I'm sure!
 |
|
 |
| 181 cm
18
184 lbs
1 - 2 - 0 |
|
175 cm
22
179 lbs
3 - 5 - 1 |
BJJ Blue Belt
Brawler
KO power |
|
BJJ Blue Belt
Basic striking
Knockout power |
|
| |
|
Ladies and gentlemen. This fight is 3 rounds, in the welterweight division.
Introducing the fighter to my left, fighting out of the red corner.
With a record of
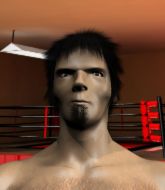
1 - 2 - 0, fighting out of Sydney, Utah Jones!
And introducing the fighter to my right, fighting out of the blue corner.
With a record of
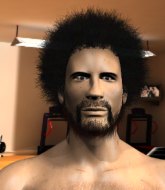
3 - 5 - 1, fighting out of Sydney, Dye Tryin!
The judges for this bout are John Mangel, Eliza Hachem and Damien Edna.

The bell rings for round one and we are underway!
Jones tries to close the distance and clinch up against the cage but Tryin paws at him with a jab and circles away.
Jones misses with a takedown attempt - Tryin sprawls well and throws a nice strike on the way out which just misses.
Tryin lands a lovely overhand right.
Tryin throws a nice outside leg kick.
Tryin lands with an overhand left.
Tryin scores with a nice right hand.
Jones takes an uppercut right on the jaw but it doesn't phase him.
Tryin fakes with a right hand and throws a good leg kick, right into the thigh. That had to hurt Jones.
Tryin throws a right and a left that Jones avoids nicely.
Tryin swats away the attempt to clinch by Jones.
Jones throws a combination but it was largely blocked by Tryin.
Tryin lands a leg kick. The shin dug right into the meat of the thigh.
Tryin connects with a crisp jab.
Tryin throws a head kick but Jones moves out of range.
Tryin buckles his opponent's knee momentarily with a nice leg kick.
Tryin tries to clinch up but Jones circles away and keeps his distance.

Jones scores a takedown into full mount!
The crowd cheering loudly, showing their appreciation for the quality fight we're seeing here.
Tryin tries to reverse the position but Jones maintains control.

That's one minute gone in the round.
Tryin wants to control but Jones is having none of it.
Tryin holding onto his opponent's waist for dear life, as Jones tries to land some strikes to get him to release his grip.
Jones has been looking to land a fair amount of strikes on the ground. He might be looking to soften his opponent up in order to work for a submission.
Tryin is trying desperately to improve position.
The ref warns both fighters not to hold the cage as they work up against the meshing.
Jones sitting in mount, just looking to control for the moment.
Jones throwing sloppy strikes here. Perhaps if he tightened up his striking from such a dominant position, he'd be able to finish easier.

Jones goes for an armbar but he's fallen flat on his backside there and now Tryin is on top in guard.
Tryin tries to free his leg and advance position but Jones is retaining full guard.

That's two minutes gone in the round.
The crowd are showing their displeasure at the lack of action as loud boos ring out around the arena.
Tryin is frustrating his opponent with some stalling tactics from top position.
Jones throwing strikes off his back to little effect.
Tryin passes easily into side control. Nice work.
The fighters are pressed up against the cage, both looking to find a bit of space to work.
Jones is looking for a sweep.
Tryin content to control the pace. The referee will try and keep them active though.

That's three minutes gone in the round.
Jones is looking for a sweep.
Jones struggling a bit here.
Jones taking a bit of punishment here - Tryin scoring with strikes.

Tryin has had enough of the ground for now and decides to stand.
Jones throws a combination that misses
and Tryin counters with a lovely shot to the body.
Jones takes one on the button.

That's four minutes gone in the round.
Jones throws a lazy body kick
and Tryin counters with a nice low kick that buckles Jones's knee momentarily.
Jones is breathing heavily.
Jones takes a jab on the nose there. A little bit of blood seems to be coming out. Hopefully that won't affect his breathing.
Tryin tries to clinch up.

Jones tries to keep at a distance but Tryin has taken the fight into the clinch.
A knee to the head by Tryin.
Tryin lands a knee to the body.
Jones avoids the elbow strike from Tryin, against the cage.
Tryin trying to land knees to the body.
Tryin missing with knees to the body.
Jones avoiding damage as Tryin throws knees to the body.
Jones can't break the clinch.
Jones scores with an uppercut up the middle.
Tryin tries to land knees in the clinch but Jones avoids the damage to the body.
Tryin unloads a knee to the mid-section.
Tryin lands an elbow that stopped Jones in his tracks for a moment.
The crowd applaud the fighters efforts here as the round comes to an end.
Jones blocks a knee to the body. He'll have a nicely bruised forearm in the morning.
Jones takes a knee to the side of the body.
Tryin lands a glancing elbow in the clinch.
Tryin putting his Muay Thai to good use. He has Jones in a tight clinch and is doing some damage with knees to the body.
Tryin throws a nice elbow but it doesn't land.
And thats the end of the round the fighters go back to their corners.
Dye Tryin dominated that round.
The minute break is over - no more time for sponges and pep talks - back to the action!

Tryin fails with an attempt to clinch.
Jones shoots in but doesn't get the takedown
and Tryin counters by clinching up.
Tryin pushes off an throws an elbow but Jones leans to the side and avoids it. We're back to clinching against the cage.
Jones avoids a wild elbow strike from Tryin.
Jones on the defensive, avoiding the knees to the body.
Tryin misses with an elbow over the top.
Tryin gets double underhooks to prevent a takedown attempt from Jones.
Tryin tries to land a knee to the body but he is off balance and Jones avoids it.
Knees in the clinch landing for Tryin.
Tryin utilising his Muay Thai to score with a knee to the body.
Tryin landing some nice looking knees to the body.
Tryin putting his Muay Thai to good use. He has Jones in a tight clinch and is doing some damage with knees to the body.
Jones on the defensive, avoiding the knees to the body.
Jones avoiding damage as Tryin throws knees to the body.
Jones fails to pull guard.
That's three failed takedown attempts in the round for Utah Jones. That's going to take a lot out of him.
Both fighters are absolutely exhausted here.
Jones on the defensive, avoiding the knees to the body.
Jones tries to pull guard but can't drag his opponent to the mat. Tryin just stands there and leans against the cage.
That's one minute gone in the round.
Jones avoiding damage as Tryin throws knees to the body.
Jones takes an elbow to the temple.
Jones avoids a wild elbow strike from Tryin.
Jones blocks a knee to the body. He'll have a nicely bruised forearm in the morning.
Tryin tries to land knees in the clinch but Jones avoids the damage to the body.
Tryin trying to land knees to the body.
Tryin missing with knees to the body.
Jones can't break the clinch.
Jones lands on the inside with an uppercut.
Tryin throws a nice elbow but it doesn't land.
Jones throws a knee to the head but misses.
A head punch blocked on the inside by Tryin.
Tryin is fighting off a takedown attempt but Jones is just too persistent for him and manages to trip Tryin to the mat. Tryin regains guard as soon as the fighters hit the mat.
Jones stands up and waves to Tryin to follow him.
The fight stays on the outside here - Tryin looks like he's thinking about clinching though.
Jones ducks right into an uppercut from Tryin.
That's two minutes gone in the round.
Jones shoots and misses
and Tryin counters with a lovely straight right hand!
This fight brought to you by 5M nutrition - it's mmmmm tasty. Nice jab by Tryin.
Tryin throws a series of strikes that have Jones backpedaling.
Tryin closes the distance and lands a one-two.
Tryin scores with a hook.
Jones keeps the fight on the outside.
Jones on the wrong end of a kick to the body.
Tryin clinches up against the cage.
Kneeeeees! The crowd are calling for knees to the body. Tryin obliges.
Jones on the defensive, avoiding the knees to the body.
Knees to the body from Tryin.
Tryin tries to land knees in the clinch but Jones avoids the damage to the body.
Tryin is looking to score with knees to the body. Maybe he'll change it up and go body then head. Jones is defending well for now.
Tryin lands a glancing elbow in the clinch.
Jones is leaning against Tryin and scores with a nice uppercut to the body.
Tryin throws a nice elbow but it doesn't land.
Jones blocks a knee to the body. He'll have a nicely bruised forearm in the morning.
Jones blocks a knee to the body. He'll have a nicely bruised forearm in the morning.
That's three minutes gone in the round.
Jones gets double underhooks and manages to take the fight to the ground.
Tryin manages to sweep nicely, so he's now on top. Jones manages to get himself to full guard.
Jones throwing some rather feeble looking strikes off his back.
Jones keeping moving, preventing Tryin from controlling successfully.
Tryin sitting in guard, not really doing much.
Jones throwing some rather feeble looking strikes off his back.
Tryin won't allow Jones to sweep him here.
That's four minutes gone in the round.
Jones is working from a closed guard but he's struggling to control his opponent.
Tryin trying to control the position from guard on top but Jones is wriggling around, looking for whatever he can.
Jones is looking for a guillotine. You can't force these things though and Tryin defends well.

The referee has ruled that neither fighter is active enough on the ground and has stood them back up.
Tryin bobs and weaves and unloads with a good uppercut.
Jones on the wrong end of a vicious looking body shot.
Tryin scoring well with a low kick there.
Tryin scores with a jab to the body.
Jones keeps the fight on the outside.
Jones misses with a takedown
and Tryin counters with a three punch combo that has Jones backing up. Jones nods at Tryin to acknowledge the strikes.
And thats the end of the round the fighters go back to their corners.
Dye Tryin showed his class in that round. I'd imagine he'll take it on all the scorecards.
The referee calls time. The cornermen exit stage left and we're back to business. This is the final round!

Tryin lands a head shot.
Tryin moves into the clinch successfully.
Tryin tries to land a knee to the body but he is off balance and Jones avoids it.
Tryin landing some nice looking knees to the body.
Tryin tries to land a knee to the body but he is off balance and Jones avoids it.
Jones turns his back and goes for a hip toss. It's a bit messy but it gets the job done and Jones manages to end up in side control.
Tryin is sneaking out the side here. He's bucked Jones off and has taken his back!
Tryin has the hooks sunk in and you can see the will to fight slowly draining out of Jones's body.
Tryin not allowing Jones to control his hands.
Both fighters are breathing heavily.
Jones covers up after that shot from Tryin.
That's one minute gone in the round.
Jones is defending well here and trying to improve his position.
I would not like to be Jones right now.
Tryin wants to control the position but Jones frees himself and scrambles - Tryin manages to regain control in side control.
Jones gives up the full mount - oops, sloppy defensive grappling there!
Tryin controlling the pace for now.
Jones tries to reverse the position but Tryin maintains control.
That's two minutes gone in the round.
There's not a lot going on here and the crowd are letting the fighters know they're not willing to tolerate a lack of action.
Tryin controlling from mount.
Jones is in all sorts of trouble here.
Tryin content just to control the position here.
That's three minutes gone in the round.
Jones really trying hard to get back to half guard here.
Tryin lands a nice shot to the head.
Jones is trying desperately to improve position.
Tryin controlling from the full mount.
That's four minutes gone in the round.
Well. There's a bit of a lull in the action here and the crowd are starting to get restless.
Tryin tries to control but Jones wriggling away.
Tryin controlling from mount.
Jones is desperately trying to improve his position but Tryin has a good base and remains in mount.
The crowd thankful this round is nearly over.
Tryin sitting in mount, just looking to control for the moment.
Utah Jones has stepped it up - he knows he needs a finish here!
Despite being in the dominant position, Dye Tryin just isn't active enough and the referee decides to stand the fighters back up.
Jones misses with the body kick
and Tryin counters with a low kick, right behind Jones 's knee.
And that's the end of the fight!
Dye Tryin comfortably won the final round on my scorecard.
I've got Tryin winning every round here. Surely the decision will go his way and he'll pick up a well deserved decision victory. Over to the ring announcer for the scorecards.
Ladies and gentlemen, after 3 rounds of action, we go to the scorecards for a decision.
Judge John Mangel scores the fight 27:30
Judge Eliza Hachem scores the fight 27:30
Judge Damien Edna scores the fight 27:30
In favor of your winner, by unanimous decision... Dye Tryin!
|
|
|
|
|
|
|
|
|
|
|
|
|
|
|
|
|
|
|
|
|
|
|
| S |
C
A |
G |
S |
C
B |
G |
|
S |
C |
G |
|
energy
A | B |
|
hype
A | B |
|
pop
A | B |
|
mgr
A | B |
|
FIGHT
RATING
57% |
|
|
|
|
|
|
