|
|
PBP Commentary |
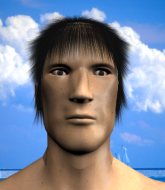
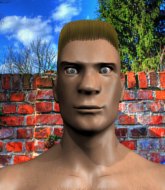
Coming up we have a welterweight MMA rules bout between Henry Downey (ranked 0 p4p, 0 weight class) and Alan Milkins (ranked 0 p4p, 0 weight class). Chooooooooon! I think Downey might be my favorite fighter, now he's come out to we didn't start the fire. Alan Milkins has the power to score a knockout today if he connects clean with Henry Downey's chin.
 |
|
 |
| 175 cm
25
177 lbs
7 - 5 - 0 |
|
179 cm
26
180 lbs
8 - 8 - 0 |
BJJ Blue Belt
Solid boxing
Experienced |
|
BJJ Purple Belt
Good kicks
Granite chin |
|
| |
|
Ladies and gentlemen. This fight is 3 rounds, in the welterweight division.
Introducing the fighter to my left, fighting out of the red corner.
With a record of
7 - 5 - 0, fighting out of Las Vegas, Henry Downey!
And introducing the fighter to my right, fighting out of the blue corner.
With a record of
8 - 8 - 0, fighting out of Las Vegas, Alan Milkins!
The judges for this bout are Cecil Peabody, Chris Downing and George Francis.

The bell rings for round one and we are underway!
Milkins tries to clinch up.
The crowd cheers as Downey lands an impressive looking overhand right. Milkins doesn't seem phased though.

It looks like Alan Milkins has been cut.
Downey throws a head kick that misses.
Downey misses with a looping left.
Milkins is looking to take this fight into the clinch.
Downey blocks a leg kick.
Downey tries to clinch up

and Milkins counters by moving into the clinch.
Milkins throws a nice elbow but it doesn't land.
Milkins tries to land a knee to the head but Downey blocks with his arms.
Milkins blocks an elbow strike.
Milkins throws a knee to the head but misses.
Downey has Milkins pressed up against the cage and is working for takedown. Milkins manages to improve position though and keeps the fight standing.
Milkins landing knees to the head.
It looks like Henry Downey has been cut.
Milkins crunches a lovely knee into Downey's ribcage.
Downey managing to block the knees to the body from Milkins.
The referee is keeping an eye on Milkins - much more stalling and he will separate the fighters.
Downey tries to break free but Milkins pushes him back against the cage.

That's one minute gone in the round.
Knees to the body from Milkins.
Downey lands a nice elbow.
Milkins stalling in the clinch but Downey improves position.
Milkins tries to land a knee to the head but Downey blocks with his arms.
Milkins holding his opponent close, against the cage.
Milkins landing knees to the body.
Downey tries to score a body lock takedown but Milkins shows good agility there to stay on his feet.
Downey on the defensive, avoiding the knees to the body.
Milkins tries to land a knee to the head but misses.
Milkins landing knees to the body. They look like they could hurt.
Milkins connects with a nasty looking knee right to Downey's face.
Milkins throws a nice elbow but it doesn't land.
Milkins throws a knee to the head but misses.
Milkins stalling in the clinch but Downey improves position.
Milkins with the Thai clinch. He's looking to land a big knee but he's not managed it this time.
Downey drops down for a takedown but doesn't get it.
That's three failed takedown attempts in the round for Henry Downey. That's going to take a lot out of him.
Downey tries for a takedown but Milkins manages to get underhooks.
Both fighters working to control the clinch.
Milkins creates a bit of distance and throws an elbow that only just misses.
Milkins tries to land a knee to the head but Downey blocks with his arms.

That's two minutes gone in the round.

Downey wants the takedown. Milkins is fighting it off but Downey persists and manages to bring the fight to the ground, ending up in Milkins's guard against the cage.
Downey won't allow Milkins to get back to his feet.
Milkins looks gassed!
Milkins working the defensive guard well to avoid strikes from Downey.
Milkins is working an open guard here, looking to improve his position. No doubt that will leave him open to counters but at least he's being more offensive.

Downey gets to his feet - Milkins follows without any prompting.
Downey takes a shot right to the bread basket.
Alan Milkins is looking to keep the fight on the feet at all costs.
Milkins is looking to take this fight into the clinch.
Milkins throws a decent looking leg kick but it doesn't land clean.
Ooooh, nice body kick lands from Milkins. Downey shrugs it off though.
Fantastic stuff here - a very entertaining period of action, which has drawn cheers from the crowd.
Milkins buckles his opponent's knee momentarily with a nice leg kick.
Downey circles away from the clinch attempt.
Downey is looking to take this fight into the clinch.

That's three minutes gone in the round.
Milkins closes the distance and clinches.
A nice glancing elbow lands by Milkins.
Milkins content to slow the pace in the clinch.
Milkins lands an elbow that stopped Downey in his tracks for a moment.
Milkins with an attempt at a knee that misses.
Milkins is pressed up against the cage. Downey has hold of a leg and is looking to drag Milkins down to the mat. Milkins avoids the attempt though and has circled away. We're back to striking at a distance.
A head kick misses from Milkins.
Milkins misses with a hook. Downey ducked under it nicely.
A chopping leg kick lands by Milkins.
Good leg kick by Milkins there. It's the ones that make that thud noise that hurt and that was an almighty thud.
Milkins tries a switch kick but it misses it's target.
Milkins misses with a body kick.
A thudding body kick lands there by Milkins!

That's four minutes gone in the round.
Downey swings away but doesn't land with a series of punches.
Milkins throws a nice inside leg kick.
Ouch! a nice leg kick from Milkins, right into the meat.
This has been an exciting period of action!
Downey walks into a left hand.
Milkins rushes Downey and presses him up against the cage.
Downey takes an elbow to the forehead.
Milkins avoids a wild elbow strike from Downey.
Milkins pushes off an throws an elbow but Downey leans to the side and avoids it. We're back to clinching against the cage.
Milkins comes over the top with an elbow. That landed flush.
A battle for position here, against the cage.
Downey avoiding damage as Milkins throws knees to the body.
As the round comes to an end the crowd are showing their appreciation for a great round of action.
Downey looks to throw an elbow but misses.
Milkins throws a vicious knee straight up the middle but Downey blocks it with crossed arms.
Downey lands punches inside but they're not really causing much damage.
Downey blocks a knee to the body. He'll have a nicely bruised forearm in the morning.
Downey looks like he'd prefer to be striking at range right now.
Milkins misses with a knee strike.
And thats the end of the round the fighters go back to their corners.
Alan Milkins dominated that round.
Both fighters have cut men working on them during the interval.
The fighters get back to their feet, the hooter sounds and we're back to the action!

Milkins lands with a nice low kick. That'll leave a bruise.
Downey avoids a low kick by using good footwork.
Downey throws a shot from downtown. Milkins moves away and avoids it.
Milkins gets a clinch.
Milkins using the Thai plumb to throw knees but Downey has his back arched nicely, preventing the strike.
Milkins looking to throw knees to the head but Downey is blocking nicely.
Milkins throws a vicious knee straight up the middle but Downey blocks it with crossed arms.
Downey misses with a short punch on the inside.
Milkins misses with a knee strike.
Downey tries for a takedown but Milkins manages to get underhooks.
Milkins prevents a takedown attempt there.
Milkins tries to land a knee to the head but misses.
We've had a slow start to the round here - hopefully the action picks up.
Milkins is pressed up against the cage. Downey has hold of a leg and is looking to drag Milkins down to the mat. Milkins avoids the attempt though and has circled away. We're back to striking at a distance.
That's three failed takedown attempts in the round for Henry Downey. That's going to take a lot out of him.
Milkins takes a body kick right on the floating rib. Ouchie.
A punch combination from Milkins misses.
No joy there for Milkins, who threw a few shots but didn't land.
That's one minute gone in the round.
Downey scores with a jab to the body.
Milkins is breathing heavily.
Downey throws a combination but comes up with nothing but fresh air.
Downey connects with a jab.
Milkins throws a lazy head kick
and Downey counters with a nice double leg into half guard.
Milkins punching from the bottom.
Milkins trying to hold on to Downey's head to control him but Downey postures up.
The fighters are starting to perspire pretty heavily.
Downey trying to control the action but Milkins is working from the bottom.
Milkins avoiding damage under a succession of punches from Downey.
Downey stands up from half guard.
Downey misses with a double jab.
That's two minutes gone in the round.
Milkins tries to clinch but is not successful on this occasion.
Downey misses with a hook. Milkins ducked under it nicely.
Milkins tries to clinch but fails miserably
and Downey counters with a lovely straight right hand!
Milkins tries a switch kick but it misses it's target.
Milkins with a nice looking leg kick. You could hear that one land in a back row.
Wooooo! Give it up for these two warriors! They are putting on a show!
Milkins tried to score with a low kick but Downey checks it.
Downey tries to check the leg kick but that clearly hurt him.
Milkins doesn't manage to clinch there - Downey circles away.
Downey uses good footwork to avoid the strikes from Milkins.
Milkins tries a switch kick but it misses it's target.
Alan Milkins seems to be getting the better of the standup.
Milkins tries to close the distance and clinch up but Downey swats him away and circles back towards the center.
Milkins wants to clinch but Downey slips to the side
and Downey counters with a nice shoot takedown that brings the fighters to the ground.
The ref warns both fighters not to hold the cage as they work up against the meshing.
That's three minutes gone in the round.
Downey trying to land body shots but he keeps hitting the mat.
Milkins controls Downey momentarily but Downey frees himself.
Milkins might have to switch it up a bit here because his efforts to control Downey kaven't been going to plan, at least at the current moment in time.
Downey working in close now, lands a nice elbow to the side of Milkins's head.
Downey trying to control but Milkins is working from the bottom.
Milkins trying to punch from his back but it's not doing any damage.

Downey got a little sloppy there for a moment and Milkins has worked his way into a loose triangle - can he finish it?! No, Downey has managed to get both his arms back between Milkins's legs - danger averted.
Downey lands a nice shot whilst sitting in his opponent's guard.
Downey wants to pass the guard but Milkins is keeping the position.
Downey throwing shots from guard but he's hitting more mat than opponent.
Downey working in close now, lands a nice elbow to the side of Milkins's head.
That's four minutes gone in the round.
There's not a lot going on here and the crowd are letting the fighters know they're not willing to tolerate a lack of action.
Milkins avoiding any damage from the ground and pound.
Milkins uses the cage to get back to his feet.
Alan Milkins seems to be the more aggressive standup fighter in this bout.
Downey checks a low kick from Milkins.
Milkins falls off balance throwing a combination
and Downey counters with a takedown into full mount! That could mean trouble for Milkins!
Milkins trying desperately to get to his feet.
Downey landing strikes from the mount.
Milkins wants to control but Downey is having none of it.
Downey is landing with some decent strikes but Milkins is trying to advance his position so the referee is letting the fight continue.
As the round comes to an end the crowd are showing their appreciation for a great round of action.
Downey breaks from Milkins's wrist control and lands an elbow.
Downey fakes a shot to the body and cracks his opponent in the head. Nice ground and pound there!
And thats the end of the round the fighters go back to their corners.
Henry Downey dominated that second round.
Both fighters have cut men working on them during the interval.
The fighters get back to their feet, the hooter sounds and we're back to the action! This is the final round!

Good exchange - Downey coming out on top.
Milkins tries a switch kick but it misses it's target.
Downey takes a thudding leg kick, right into the meat of the thigh.
Milkins wants to clinch.
Downey fakes and then throws a beautiful body shot. Milkins looks a bit winded and takes a step backwards to take a breath.
Milkins stuffs the takedown attempt from Downey. Downey gets slowly back to his feet.
Downey lands a jab to Milkins's midsection.
Milkins misses with a low kick.
Milkins misses with a body punch
and Downey counters with a quick right hand to the jaw.
Both fighters are breathing heavily.
Milkins clinches but Downey breaks the clinch
and Downey counters with a nice double leg into half guard.
That's one minute gone in the round.
Downey is thwarting Milkins's attempts to control the position.
Downey is working hard to pass the guard. He's done it - he's now in full mount! Trouble for Milkins!
Downey unloading with bombs!
Downey is still in mount, landing shots to his trapped opponent. Milkins can't stay in a position like this for much longer.
Downey lands a couple of nice shots there from mount.
Downey landing strikes from the mount.
Downey lands a couple of nice shots there from mount.
Milkins is trying desperately to improve position.
Downey working Milkins over with strikes here.
Downey is landing with some decent strikes but Milkins is trying to advance his position so the referee is letting the fight continue.
That's two minutes gone in the round.
Downey scores with a couple of good head shots there.
Downey in mount throwing good strikes here, bouncing his opponent's head off the canvas.
Downey with a couple of short strikes.
Downey looking to ground and pound but Milkins is blocking nicely.
Milkins sneaks a leg under to get to half guard.
Milkins slips a foot under and gets full guard. Nice work.
Downey stands up from guard. Let's bang!
Milkins throws a right and a left that Downey avoids nicely.
Downey rushes Milkins and pushes him back against the cage in a clinch.
Milkins throws a knee to the head but misses.
Downey is trying to work for a single leg takedown but Milkins pulls him back up using the underhooks.
Milkins tries to land a knee to the head but misses.
Milkins connects with a knee to the head.
That's three minutes gone in the round.
Milkins is pressed up against the cage. Downey has hold of a leg and is looking to drag Milkins down to the mat. Milkins avoids the attempt though and has circled away. We're back to striking at a distance.
That's three failed takedown attempts in the round for Henry Downey. That's going to take a lot out of him.
Milkins has Downey up against the cage in a clinch.
Milkins is looking to control Downey's arms but Downey gets an underhook and turns him. Now Milkins has his back to the cage.
Milkins stops a takedown attempt from Downey.
Milkins lands a nice elbow from the clinch.
Milkins gets underhooks to prevent Downey's takedown attempt.
Downey takes a knee right on the jaw!
The fighters are pressed against the cage, as the pace of the fight slows.
Downey drops to a knee looking for a takedown but Milkins gets the underhooks and prevents it.
Milkins is pressed up against the cage. Downey has hold of a leg and is looking to drag Milkins down to the mat. Milkins avoids the attempt though and has circled away. We're back to striking at a distance.
Ouch! a nice leg kick from Milkins, right into the meat.
Milkins closes the distance and presses his opponent up against the cage.
That's four minutes gone in the round.
Milkins misses the knee to the body. Nice hip positioning from Downey.
Milkins gets double underhooks to prevent a takedown attempt from Downey.
Milkins using the Thai plumb to throw knees but Downey has his back arched nicely, preventing the strike.
Milkins tries to land a knee to the body but he is off balance and Downey avoids it.
Milkins misses with an elbow strike.
Milkins landing some nice looking knees to the body.
Downey managing to block the knees to the body from Milkins.
Milkins lands a glancing elbow in the clinch.
Milkins tries to land a knee to the head but Downey blocks with his arms.

Downey escapes the clinch and we're back to striking.
Nice takedown defense from Milkins. No joy for Downey on that attempt.
Downey looks to throw the jab but Milkins is out of range.
The crowd applaud the fighters efforts here as the round comes to an end.
Downey avoids the clinch attempt nicely.
Henry Downey is looking to throw some combinations by the looks of things.
A head kick misses from Downey.
Milkins throws a sloppy head kick and Downey moves out of range easily.
And that's the end of the fight!
Henry Downey showed his dominance in that final round.
I think Downey has won this one but let's see what the judges have to say. Over to the ring announcer for the scorecards.
Ladies and gentlemen, after 3 rounds of action, we go to the scorecards for a decision.
Judge Cecil Peabody scores the fight 29:28
Judge Chris Downing scores the fight 29:28
Judge George Francis scores the fight 29:28
In favor of your winner, by unanimous decision... Henry Downey!
|
|
|
|
|
|
|
|
|
|
|
|
|
|
|
|
|
|
|
|
|
|
|
| S |
C
A |
G |
S |
C
B |
G |
|
S |
C |
G |
|
energy
A | B |
|
hype
A | B |
|
pop
A | B |
|
mgr
A | B |
|
FIGHT
RATING
100% |
|
|
|
|
|
|
