|
|
PBP Commentary |
Coming up we have a super heavyweight MMA rules bout between Cloudy Disposition (ranked 0 p4p, 0 weight class) and Moo Shoo (ranked 0 p4p, 0 weight class). Shoo has a niggling injury. He would have liked to come in 100% fit but that's not always possible. Man, I cannot wait for this one!
 |
|
 |
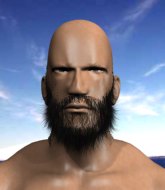
| 182 cm
22
300 lbs
2 - 0 - 0 |
|
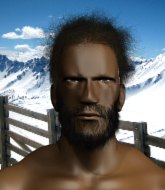
150 cm
22
300 lbs
0 - 2 - 0 |
Dangerous GnP
Excellent boxer
Good chin |
|
Good wrestler
Decent knees
Solid chin |
|
| |
|
Ladies and gentlemen. This fight is 3 rounds, in the super heavyweight division.
Introducing the fighter to my left, fighting out of the red corner.
With a record of
2 - 0 - 0, fighting out of Amsterdam, Cloudy Disposition!
And introducing the fighter to my right, fighting out of the blue corner.
With a record of
0 - 2 - 0, fighting out of Amsterdam, Moo Shoo!
The judges for this bout are Aafke Stam, Paul Aken and Paulsen Ambrosius.

The bell rings for round one and we are underway!
Shoo checks the leg kick.
Shoo tries to close the distance and clinch up against the cage but Disposition paws at him with a jab and circles away.
Shoo fails in his attempt to clinch.
Disposition shoots in but Shoo avoids the takedown attempt easily.
Disposition looks to clinch

and Shoo counters by moving into the clinch. Good anticipation by Shoo.
Disposition really is a fat lump.
Shoo tries to score a body lock takedown but Disposition shows good agility there to stay on his feet.
Disposition lands a right hand.
A left hand lands to the body for Disposition.
Shoo looks gassed!
Disposition creates a bit of space for himself and sneaks an elbow through Shoo's defenses.
Disposition pushes Shoo back against the cage and lands a hook to the side of the head.
Disposition lands an elbow just above Shoo 's eye.

It looks like Moo Shoo has been cut.
Disposition is leaning against Shoo and scores with a nice uppercut to the body.
Disposition landing knees to the body.
Disposition lands a knee to the head there! That was nasty!
A right hand to the body from Disposition.
This is a great period of action - very entertaining stuff!
Disposition misses with a knee strike.
Disposition crunches a lovely knee into Shoo's ribcage.
Disposition pushes Shoo back against the cage and unloads with a body punch.
Disposition lands with a light punch inside.
A short body shot lands from Disposition as the two fighters clinch.
Disposition scores a nice knee to the body.
Disposition lands a body shot in the clinch.

That's one minute gone in the round.
Disposition landing knees to the head.
Disposition throws a blind hook that connects with the side of Shoos head.
Disposition lands a nice looking hook to the body, against the cage.
Disposition is working for takedown but Shoo is calmly controlling the position for now.
Shoo is working for takedown but Disposition is calmly controlling the position for now.
Shoo drops down for a takedown but doesn't get it.
Cloudy Disposition has stuffed three takedown attempts in the round now. That's going to take a lot out of Moo Shoo.
Disposition lands a knee to the head there! That was nasty!
Disposition lands with a short shot to the head.
Shoo has Disposition pressed up against the cage and is working for takedown. Disposition manages to improve position though and keeps the fight standing.
Shoo drops down for a takedown but doesn't get it.
Shoo is working for takedown but Disposition is calmly controlling the position for now.
Shoo has hold of a leg and is looking for a trip takedown. Disposition avoids it nicely though and we remain in the clinch.
Disposition prevents a takedown attempt there.
Disposition comes over the top with an elbow. That landed flush.
Disposition tried to land a shot to the body but connects with Shoo's elbow.
Shoo has Disposition pressed up against the cage and is working for takedown. Disposition manages to improve position though and keeps the fight standing.
Shoo has hold of a leg and is looking for a trip takedown. Disposition avoids it nicely though and we remain in the clinch.

That's two minutes gone in the round.
Shoo wants a takedown but no success here.
Disposition gets double underhooks to prevent a takedown attempt from Shoo.
Disposition trying to land knees to the body.
Shoo is working for takedown but Disposition is calmly controlling the position for now.
Shoo has a body lock and is looking for a takedown. Disposition is bouncing around trying to prevent the takedown and somehow he has indeed managed to stay on his feet.
Shoo has hold of a leg and is looking for a trip takedown. Disposition avoids it nicely though and we remain in the clinch.
Disposition prevents the takedown attempt.
Shoo is working for a takedown up against the cage. He can't get it on this occasion though.
Disposition landing knees to the body. They look like they could hurt.
Knees to the body from Disposition.
Disposition prevents the takedown attempt.
Shoo goes for a takedown attempt but Disposition pushes him away and we're back to fighting at a distance.
Shoo circles away from the clinch attempt
and Shoo counters by clinching up.
Disposition prevents a takedown attempt there.
Disposition is looking to score with knees to the body. Maybe he'll change it up and go body then head. Shoo is defending well for now.

That's three minutes gone in the round.
Disposition connects with a nasty looking knee right to Shoo's face.
Shoo wants a takedown but no success here.
Disposition tries to land a shot to the body but it's blocked.
A head punch blocked on the inside by Shoo.
Shoo goes for a takedown in the clinch but Disposition prevents it.
Shoo drops down looking for an ankle pick but Disposition pulls his leg out and moves away.
Disposition wants to clinch
and Shoo counters by moving into the clinch.
Disposition scores a nice knee to the body.
Shoo has a body lock and is looking for a takedown. Disposition is bouncing around trying to prevent the takedown and somehow he has indeed managed to stay on his feet.
Shoo goes for a takedown in the clinch but Disposition prevents it.
Disposition looking for a takedown.
Shoo prevents a body shot from Disposition.
Shoo drops down for a takedown but doesn't get it.
Shoo goes for a takedown in the clinch but Disposition prevents it.
Shoo can't get the takedown.

That's four minutes gone in the round.
Shoo changes levels and goes for a takedown here. Disposition fights it off and pushes away nicely.
Disposition fails with a takedown attempt from distance.
Disposition tries to grapple but his opponent circles
and Shoo counters into the clinch. Nicely done.
Shoo tries to score a body lock takedown but Disposition shows good agility there to stay on his feet.
Shoo can't get the takedown.
Disposition is working Shoo over against the cage.
As the round comes to an end the crowd are showing their appreciation for a great round of action.
Disposition lands with a right to the head.
Shoo can't get the takedown.
Disposition prevents the takedown attempt.
Shoo has a body lock and is looking for a takedown. Disposition is bouncing around trying to prevent the takedown and somehow he has indeed managed to stay on his feet.
Shoo tries to stall but Disposition uses the opportunity to gain a better position.
And thats the end of the round the fighters go back to their corners.
Cloudy Disposition dominated that round.
The cut man is working on Moo Shoo's cut.
The referee calls time. The cornermen exit stage left and we're back to business.

Disposition tries to clinch up
and Shoo holds on and brings the fighters into a clinch.
Shoo wants a takedown but no success here.
Disposition digs a right hand into Shoo's ribs. Those have got to be taking their toll on Shoo's gas tank.
Disposition crunches a lovely knee into Shoo's ribcage.
Disposition lands a shot to the body.
Cloudy Disposition has scored more points in the clinch so far.
Disposition lands with a good tight uppercut to the head.
Shoo takes an elbow to the forehead.
Shoo tries for a takedown but Disposition manages to get underhooks.
Fantastic stuff here - a very entertaining period of action, which has drawn cheers from the crowd.
Shoo prevents a takedown attempt there.
Disposition stops a takedown attempt from Shoo.
Cloudy Disposition has stuffed three takedown attempts in the round now. That's going to take a lot out of Moo Shoo.
Shoo is working for a takedown up against the cage. He can't get it on this occasion though.
Shoo managing to block the knees to the body from Disposition.
Disposition lands a nice shot to the body.
Shoo has a body lock and is looking for a takedown. Disposition is bouncing around trying to prevent the takedown and somehow he has indeed managed to stay on his feet.
Shoo drops down for a takedown but doesn't get it.
Shoo is working for a takedown up against the cage. He can't get it on this occasion though.
Both fighters are absolutely exhausted here.
That's one minute gone in the round.
Shoo is looking for a takedown up against the cage. Disposition gets underhooks though and prevents the takedown attempt.
Shoo is looking for a takedown up against the cage. Disposition gets underhooks though and prevents the takedown attempt.
Disposition lands a nice shot to the body.
Shoo is looking for a takedown up against the cage. Disposition gets underhooks though and prevents the takedown attempt.
Shoo drops to a knee looking for a takedown but Disposition gets the underhooks and prevents it.
A quick uppercut on the inside from Disposition.
Shoo changes levels and goes for a takedown here. Disposition fights it off and pushes away nicely.
Shoo tries to clinch up but Disposition circles away and keeps his distance.
Shoo keeps the fight standing with a nice sprawl.
Shoo avoids the clinch attempt nicely.
Disposition closes this distance looking for a takedown but Shoo circles away.
That's two minutes gone in the round.
Neither fighter has done anything of merit for a good minute or two here and the crowd are not happy about it.
Disposition shoots in and drives through. Shoo sprawls well.
Disposition tries for a takedown but Shoo sees it coming a mile off and avoids it easily.
Moo Shoo is looking to keep the fight on the feet at all costs.
Disposition fails with a rather predictable takedown attempt.
We are yet to see a takedown attempt from Shoo in the fight. On paper you would think he is the more dominant ground fighter so let's see if these unusual tactics pay off.
Disposition misses with a takedown attempt - Shoo sprawls well and throws a nice strike on the way out which just misses.
Disposition is trying hard to land a takedown here. Shoo sprawls well and keeps this one on the feet.
Disposition has a takedown stuffed.
Disposition will have to do better than that with his takedown attempts.
A telegraphed takedown attempt from Disposition is defended easily by Shoo.
That's three minutes gone in the round.
Disposition shoots in looking for a double leg takedown. Shoo defends it nicely.
A telegraphed takedown attempt from Disposition is defended easily by Shoo.
Disposition lands a lovely overhand right.
Disposition changes levels and looks for a double leg takedown. Shoo tries to avoid it but Disposition manages to keep hold of a leg and drag Shoo to the ground. Shoo escapes though and pops straight back up to his feet.
Disposition fails with a rather predictable takedown attempt.
Disposition tries to clinch
and Shoo holds on and brings the fighters into a clinch.
That's four minutes gone in the round.
Well. There's a bit of a lull in the action here and the crowd are starting to get restless.
Shoo is working for a takedown up against the cage. He can't get it on this occasion though.
Disposition prevents a takedown attempt there.
Shoo drops down looking for an ankle pick but Disposition pulls his leg out and moves away.
Disposition tries for a takedown but Shoo circles away easily
and Shoo moves into the clinch.
Disposition lands a nice elbow.
Disposition pushes off and fires off an elbow that misses, before clinching up again, against the cage.
Disposition misses with an elbow over the top.
Disposition trying to land knees to the body.
Shoo goes for a takedown in the clinch but Disposition prevents it.
Disposition with an attempt at a knee that misses.

Shoo turns his back and goes for a hip toss. It's a bit messy but it gets the job done and Shoo manages to end up in side control.
The crowd applaud the fighters efforts here as the round comes to an end.
Shoo scores with a couple of short elbows.
Disposition wings away with a couple of strikes but they don't land.
Disposition knows he needs to get back to his feet asap. He's simply no match for Shoo on the ground.
Shoo lands a nice forearm strike.
Sloppy strikes there by Shoo.
And thats the end of the round the fighters go back to their corners.
Cloudy Disposition dominated that second round.
The cut man is working on Moo Shoo's cut.
That's time! Disposition's corner gives him a slap on the ass as he gets ready to fight. This is the final round!

Disposition tries to clinch up
and Shoo counters by moving into the clinch.
Shoo has hold of a leg and is looking for a trip takedown. Disposition avoids it nicely though and we remain in the clinch.
Disposition scores with a shot to the side of Shoo's head.
Disposition prevents the takedown attempt.
Disposition stays in close to his opponent and throws a right hand to the body.
Disposition drops down for a takedown but doesn't get it.
Shoo takes an elbow to the forehead.
Disposition pushes Shoo back against the cage and unloads with a body punch.
Shoo goes for a takedown attempt but Disposition pushes him away and we're back to fighting at a distance.
Cloudy Disposition has stuffed three takedown attempts in the round now. That's going to take a lot out of Moo Shoo.
Disposition tries to clinch but fails miserably
and Shoo counters by clinching up.
Shoo is looking for a takedown up against the cage. Disposition gets underhooks though and prevents the takedown attempt.
Shoo drops down for a takedown but doesn't get it.
Both fighters are breathing heavily.
Disposition looks to throw an elbow but misses.
That's one minute gone in the round.
Shoo tries for a takedown. No joy.
A body shot lands from Disposition.
Disposition prevents the takedown attempt.
Shoo takes an elbow to the forehead.
Disposition gets double underhooks to prevent a takedown attempt from Shoo.
Shoo wants a takedown but no success here.
A short right from Disposition.
Disposition gets an overhook and lands an elbow to the side of the head.
Disposition throws a knee to the head but misses.
An uppercut to the body lands inside from Disposition.
Shoo tries to score a body lock takedown but Disposition shows good agility there to stay on his feet.
Shoo is trying to drag Disposition to the mat but Disposition just about manages to keep his footing. He used the cage to his advantage there.
Shoo changes levels and goes for a takedown here. Disposition fights it off and pushes away nicely.
Disposition tries to clinch but Shoo moves away
and Shoo counters into the clinch. Nicely done.
Shoo looking for a takedown.
Disposition gets double underhooks to prevent a takedown attempt from Shoo.
Disposition lands an elbow that stopped Shoo in his tracks for a moment.
Moo Shoo has stepped it up - he knows he needs a finish here!
That's two minutes gone in the round.
Disposition prevents a takedown attempt there.
Disposition works on Shoo's body with a couple of short punches.
An uppercut to the body lands inside from Disposition.
Disposition prevents a takedown attempt there.
Disposition lands with a short punch from the clinch.
Disposition prevents the takedown attempt.
A right hook to the body lands for Disposition.
A short left from Disposition.
Disposition stops a takedown attempt from Shoo.
Shoo changes levels and goes for a takedown here. Disposition fights it off and pushes away nicely.
Shoo stuffs the takedown attempt from Disposition. Disposition gets slowly back to his feet.
Disposition shoots in but Shoo avoids the takedown attempt easily.
That's three minutes gone in the round.
Disposition fails with a takedown attempt from distance.
Disposition tries to clinch
and Shoo counters by clinching up.
Shoo goes for a takedown in the clinch but Disposition prevents it.
Shoo is trying to drag Disposition to the mat but Disposition just about manages to keep his footing. He used the cage to his advantage there.
Shoo is working for a takedown up against the cage. He can't get it on this occasion though.
Shoo tries a body shot but Disposition blocks it.
Disposition prevents the takedown attempt.
Shoo looking for a takedown.
Knees to the body from Disposition.
Shoo drops down looking for an ankle pick but Disposition pulls his leg out and moves away.
Disposition shoots in for a takedown. "I don't think so" says Shoo as he avoids it easily.
That's four minutes gone in the round.
Shoo stuffs the takedown.
Shoo is looking to clinch.
Disposition shoots in but doesn't get the takedown
and Shoo moves into the clinch.
Shoo looking for a takedown.
Disposition prevents a takedown attempt there.
Disposition trying to land knees to the body.
Shoo tries for a takedown but Disposition manages to get underhooks.
Disposition gets double underhooks to prevent a takedown attempt from Shoo.
Shoo can't get the takedown.
Shoo looking for a takedown.
Shoo wants a takedown.
Shoo is working for takedown but Disposition is calmly controlling the position for now.
With the fighters up against the cage, Disposition throws an elbow but misses.
And that's the end of the fight!
Cloudy Disposition showed his dominance in that final round.
Well I reckon that's a shut out for Disposition, winning every round. Will the judges agree? They are the ones who matter, even if they are often depressingly incompetent. Over to the ring announcer for the scorecards.
Ladies and gentlemen, after 3 rounds of action, we go to the scorecards for a decision.
Judge Aafke Stam scores the fight 30:27
Judge Paul Aken scores the fight 30:27
Judge Paulsen Ambrosius scores the fight 30:27
In favor of your winner, by unanimous decision... Cloudy Disposition!
|
|
|
|
|
|
|
|
|
|
|
|
|
|
|
|
|
|
|
|
|
|
|
| S |
C
A |
G |
S |
C
B |
G |
|
S |
C |
G |
|
energy
A | B |
|
hype
A | B |
|
pop
A | B |
|
mgr
A | B |
|
FIGHT
RATING
78% |
|
|
|
|
|
|
