|
|
PBP Commentary |
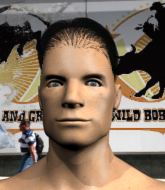
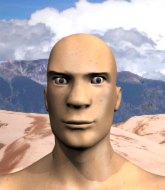
Coming up we have a super heavyweight MMA rules bout between Smaash Destroy (ranked 0 p4p, 0 weight class) and Gedo Sake (ranked 0 p4p, 0 weight class). Smaash Destroy looks tired to me. Hopefully he has got enough gas left in the tank to put in a good performance.
 |
|
 |
| 225 cm
22
300 lbs
2 - 4 - 0 |
|
220 cm
19
290 lbs
3 - 6 - 0 |
BJJ White Belt
Great elbows
Experienced |
|
BJJ Blue Belt
Brawler
Knockout power |
|
| |
|
Ladies and gentlemen. This fight is 3 rounds, in the super heavyweight division.
Introducing the fighter to my left, fighting out of the red corner.
With a record of
2 - 4 - 0, fighting out of Rio de Janeiro, Smaash Destroy!
And introducing the fighter to my right, fighting out of the blue corner.
With a record of
3 - 6 - 0, fighting out of Rio de Janeiro, Gedo Sake!
The judges for this bout are Leandro Rodrigues, Mauricio Rocha and Paulo Santos.

The bell rings for round one and we are underway!
Destroy cracks Sake with a good shot that sees him stumbling back into the cage.

It looks like Gedo Sake has been cut.
Sake looks really tired already! That doesn't bode well for a good, competitive fight!

Destroy shoots in for a takedown from distance. He catches Sake napping and manages to drive through into side control!
Destroy creates some space and throws a big elbow, but Sake sees it coming and moves his head just enough to avoid the strike.

Destroy decides to stand up, so the ref orders Sake to his feet.
Destroy closes the distance and clinches up with Sake, looking for a takedown. Destroy pushes Sake against the cage but Sake circles to the side and manages to break the clinch.
Sake fails miserably with a takedown attempt.
Sake looks for a takedown here. Will he get it? Destroy is fending him off so far but Sake persists. Nope, Destroy circles away and we're back to standing.
Sake shoots in looking for a double leg takedown. Destroy defends it nicely.
Smaash Destroy has stuffed three takedown attempts in the round now. That's going to take a lot out of Gedo Sake.
Destroy lands a straight punch to the body, keeping Sake at a distance.
This is a great period of action - very entertaining stuff!
Destroy changes levels and scores with a jab to the body.
Destroy displaying good standup as he scores with a three punch combination.
Sake checks a leg kick nicely.
Destroy scores with a big left there. The judges will like that one.

Destroy darts in and clinches Sake up against the cage.
Sake changes levels and goes for a takedown here. Destroy fights it off and pushes away nicely.
Destroy lands a nice shot to the body.

That's one minute gone in the round.
Jab, cross, leg kick. Nice combination by Destroy!
The fighters circle momentarily. Destroy darts into range and connects with a nice straight punch.
Destroy pushes Sake up against the cage in a clinch.
Destroy works for underhooks and lands a body shot in the process.
Destroy effectively controlling the action here.
Sake tries to pull guard but Destroy won't allow it.
Destroy throws a hook to the body. More of an arm punch but it's all scoring with the judges.
Destroy displaying some good clinch control by pressing Sake up against the cage.
Sake gets control of Destroy's arms and successfully pulls guard. Sake will no doubt be looking for submissions off his back.
Sake striking off his back but it's not causing Destroy any problems.
Destroy gets to his feet - Sake follows without any prompting.
Destroy rushes Sake and pushes him back against the cage in a clinch.

That's two minutes gone in the round.
Destroy lands a shoulder strike that jolts his opponent's head backwards.
Sake has Destroy pressed against the cage, preventing Destroy from circling away and getting back to striking at range.

Sake escapes the clinch and we're back to striking.
Sake shoots in for a takedown - he's clinched up with Destroy but Destroy pushes him off and we're back to square one.
Sake shoots in but no luck this time.
Destroy bobs and weaves and throws out a fast jab that snaps Sake's head backwards.
Sake shoots in and drives through. Destroy sprawls well.
Destroy lands a powerful looking uppercut that connected with his opponent's jaw.
Destroy misses with a low kick.
Sake scores a trip takedown into side control. Nice.
Sake trying to control the action but Destroy is working from the bottom.
Destroy is trying to get back to half guard.

That's three minutes gone in the round.
Sake decides to stand back up. Sake steps back and let's Destroy get back to his feet.
No luck with that takedown attempt from Sake.
Sake shoots in looking for a takedown. Destroy tries to sprawl out of it but Sake keeps driving through. The fighters are pinned against the cage. Destroy manages to get underhooks and after a bit of a struggle, circles away and we're back to standing.
Sake stuffs a takedown. It's all about dictating where the fight takes place and Sake wants it to stay on the feet.
Destroy throws a right and a left that Sake avoids nicely.
Sake fails with a rather predictable takedown attempt.
Destroy lands a jab, followed by a cross and another cross, as Sake backs up against the cage.
Nice straight punches there by Destroy. You know Roy Jones Jr respects the hands of Destroy.
Destroy defends well against a solid takedown attempt from Sake.

That's four minutes gone in the round.
Sake closes this distance looking for a takedown but Destroy circles away.
Destroy misses with a kick to the body.
Sake misses with a takedown attempt - Destroy sprawls well and throws a nice strike on the way out which just misses.
Sake tries to clinch there but Destroy circles away.
Destroy closes the distance and clinches.
Sake jumps guard but his hands slip and he falls flat on his back. Well, he's made himself look a right mug there, as Destroy walks away with a smile on his face. Sake gets slowly back to his feet and shakes his head.
Destroy wants to clinch up but Sake keeps it at a distance.
Sake throws a nice head kick!
Destroy leaves Sake with his face pressed against the mat as he sprawls beautifully, defending against a solid takedown attempt.
Sake closes the distance but Destroy moves to the side
and Destroy counters with a straight right hand.
Sake takes a shot to the body in his stride.
As the round comes to an end the crowd are showing their appreciation for a great round of action.
Destroy stuffs the takedown.
Sake shoots in for a takedown from distance. He catches Destroy napping and manages to drive through into side control!
Sake stands up and beckons Destroy to his feet.
Sake takes a solid shot to the body. That one hurt him but he's trying not to show it.
And thats the end of the round the fighters go back to their corners.
Smaash Destroy dominated that round.
The cut man is working on Gedo Sake's cut.
The fighters' corners scream their final instructions, as the referee calls time. Here we go, back to the action!

Sake shoots in looking for a double leg takedown. Destroy defends it nicely.
Destroy throws out a powerful jab.
Destroy lands with an uppercut that bounces Sake off the cage and back into rage.
This fight brought to you by 5M nutrition - it's mmmmm tasty. Nice jab by Destroy.
Sake fails with a takedown attempt.
Sake shoots in for a takedown but doesn't get it.
Smaash Destroy has stuffed three takedown attempts in the round now. That's going to take a lot out of Gedo Sake.
Sake takes a really solid shot there but just smiles back and shrugs his shoulders.
Sake slaps away a takedown attempt from Destroy, before circling back to the center of the mat.
Destroy tries to close the distance and clinch up against the cage but Sake paws at him with a jab and circles away.
Destroy shoots in for a takedown - he's clinched up with Sake but Sake pushes him off and we're back to square one.
Both fighters are absolutely exhausted here.
Nice takedown defense from Sake. No joy for Destroy on that attempt.
Destroy stuffs the takedown attempt from Sake. Sake gets slowly back to his feet.
Destroy tries to close the distance and clinch up against the cage but Sake paws at him with a jab and circles away.
That's one minute gone in the round.
Sake has his takedown stuffed
and Destroy counters with a stiff right hand.
Sake avoids the head kick by Destroy.
Sake takes a hook to the side of the head. I wonder if that's got his ears ringing.
Smaash Destroy is winning the standup battle so far.
Sake tries to clinch but is not successful on this occasion.
Sake fakes high and shoots in for a takedown but Destroy avoids it really well and circles away.
Destroy clinches.
Sake tries to jump guard but he falls flat on his backside. Destroy smiles and moves away.
Wow, both these guys are really going for it!
A left and a right from Destroy both land. Nice combination.
Smaash Destroy is looking to throw some combinations by the looks of things.
Sake fails miserably with a takedown attempt.
Destroy shoots in for a takedown - he's clinched up with Sake but Sake pushes him off and we're back to square one.
Destroy connects with a right hand. Sake shakes it off.
That's two minutes gone in the round.
Nice uppercut there from Destroy.
Sake is trying hard to land a takedown here. Destroy sprawls well and keeps this one on the feet.
Destroy misses with an attempted mid kick.
Destroy finds nothing but air with that leg kick attempt.
Destroy connects with the punch.
Sake dodges the punch combination from Destroy.
Destroy drives through and clinches with Sake against the cage.
Sake tries to jump guard but he falls flat on his backside. Destroy smiles and moves away.
Destroy looking for a takedown here - he's got it.
Sake being controlled here, momentarily.
Destroy postures up in Sake's guard and throws a big left but Sake blocks it.
That's three minutes gone in the round.
Destroy gets to his feet and steps away from his opponent.
Sake will have to do better than that with his takedown attempts.
Sake takes a body punch but keeps moving.
Destroy feints and as Sake raises his hands in defense, Destroy changes levels and drives through with a takedown into guard.
Destroy trying to stand up but can't free himself from Sake's guard.
Destroy missing there with some ground and pound from the guard.
Destroy gets to his feet. Sake looking to butt scoot but the ref puts an end to that. On your feet son!
Destroy moves into the clinch.
Sake is trying to break free.
A short left from Destroy.
Sake fails to pull the fight into his guard.
Sake doesn't land with the attempted body shot.
That's four minutes gone in the round.
Destroy lands with a left to the head.
Destroy pushes off and circles away, back to the middle of the mat.
Sake fakes with an overhand right and moves in to clinch with Destroy, pushing him back against the cage.
A short right from Destroy.
Destroy throws a hook to the body. More of an arm punch but it's all scoring with the judges.
Sake changes levels and goes for a takedown here. Destroy fights it off and pushes away nicely.
Sake shoots for a double leg takedown but Destroy sprawls well. He's pushed Sake's face into the mat and manages to get back to his feet relatively easily.
Destroy closes the distance and pushes Sake back into the cage.
Destroy working some nice short punches in the clinch.
Sake manages to break the clinch.
Sake closes the distance and clinches up with Destroy, looking for a takedown. Sake pushes Destroy against the cage but Destroy circles to the side and manages to break the clinch.
The crowd applaud the fighters efforts here as the round comes to an end.
Destroy fails with a takedown attempt from distance.
Sake gets his takedown attempt stuffed easily
and Sake takes a counter punch right on the button for his troubles.
Sake shoots in but Destroy avoids the takedown attempt easily.
Sake fails with a rather predictable takedown attempt.
And thats the end of the round the fighters go back to their corners.
Smaash Destroy dominated that second round.
The cut man is working on Gedo Sake's cut.
That's time! Destroy's corner gives him a slap on the ass as he gets ready to fight. The crowd applaud as we get ready to start the final round!

Destroy comes forward and lands a shot to the body, then darts back out of range.
Sake shoots in but no luck this time.
Destroy gets a clinch.
Destroy displaying some good clinch control by pressing Sake up against the cage.
A short uppercut from Destroy.
A short right from Destroy.
The pace slowing considerably in the clinch, as Destroy takes a break from that fighting nonsense to think about the finer things in life.
Sake stalling the fight.
We've had a slow start to the round here - hopefully the action picks up.
Destroy lands an elbow that stopped Sake in his tracks for a moment.
Destroy manages to break the clinch.
Both fighters are breathing heavily.
Destroy gets in close and instigates a clinch.
Sake tries to pull guard but Destroy holds him up against the cage and eventually Sake drops back down to his feet.
Sake crunches a lovely knee into Destroy's ribcage.
That's one minute gone in the round.
Destroy digs a right hand underneath Sake's ribcage. Sake let out a lung full of air as it connected.
Destroy lands a short shot on the inside that snaps the head of Sake backwards.
A short body shot lands from Destroy as the two fighters clinch.
Destroy lands an uppercut.
Sake's corner calls for him to break the clinch, which he does.
Destroy closes the distance and clinches.
Destroy lands a nice uppercut.
A nice left hand lands by Destroy.
Destroy throws a blind hook that connects with the side of Sakes head.
Sake just leaning against Destroy, taking a breather.
An uppercut to the body lands inside from Destroy.
Destroy working on landing some head shots here - that one got through nicely.
Sake has Destroy pressed against the cage, preventing Destroy from circling away and getting back to striking at range.
Destroy lands a body punch in the clinch.
Destroy lands a right hand.
Destroy tries to pull guard but can't drag his opponent to the mat. Sake just stands there and leans against the cage.
Destroy wants to strike at distance but he can't break free of the clinch.
That's two minutes gone in the round.
The crowd are starting to boo a lack of action.
Destroy lands on the inside with an uppercut.
Destroy lands a body punch in the clinch.
Destroy takes an elbow to the forehead.
Destroy lands a right hand.
Destroy avoids a wild elbow strike from Sake.
Sake tries to jump guard but he falls flat on his backside. Destroy smiles and moves away.
Smaash Destroy has stuffed three takedown attempts in the round now. That's going to take a lot out of Gedo Sake.
Destroy fakes with a right hand and throws a good leg kick, right into the thigh. That had to hurt Sake.
Destroy throws a shot to the body.
Sake takes an uppercut right on the button but keeps his composure.
Sake shoots in and gets a takedown into half guard. Sake showed some decent athleticism there.
Destroy keeping his head moving to avoid the ground and pound.
That's three minutes gone in the round.
Sake tries to stand but his hand is stuck under Destroy.
Destroy kicks Sake off and gets back to his feet.
Sake tries to score a power double leg takedown but Destroy sees that one coming and sprawls well. That will dishearten Sake somewhat.
Destroy lands a body shot.
Sake shoots in for a takedown. "I don't think so" says Destroy as he avoids it easily.
Sake has a pretty nasty looking mouse under his right eye.
Sake with a poor takedown
and Destroy counters with a series of strikes. Sake will be more careful next time no doubt.
Sake shoots in and gets a takedown into half guard. Sake showed some decent athleticism there.
Sake stops Destroy from getting back to his feet.
That's four minutes gone in the round.
Destroy has one foot on Sake's thigh - he pushes off and manages to get back to his feet.
Sake shoots in for a takedown - he's clinched up with Destroy but Destroy pushes him off and we're back to square one.
Destroy is looking to take this fight into the clinch.
Destroy punishes Sake's body with a nice straight punch.
Destroy misses with a two punch combination.
Sake looks for a takedown but Destroy sprawls well.
Sake doesn't succeed with the takedown
enabling Destroy to counter with a crisp jab.
Sake takes an uppercut right on the jaw but it doesn't phase him.
Sake shoots in for a takedown. "I don't think so" says Destroy as he avoids it easily.
Smaash Destroy is fighting for a decision here - he's started to take the cautious approach.
Destroy looks to land a combination. Sake sees it coming but can only parry a couple of the shots.
Gedo Sake has stepped it up - he knows he needs a finish here!
Sake avoids a kick to the body.
Sake looking to take his opponent's legs away with the low kicks.
And that's the end of the fight!
Smaash Destroy showed his dominance in that final round.
Well Destroy has outscored his opponent in every aspect of the fight today. Only a scarily incompetent judge or two will keep him from a well deserved win... Over to the ring announcer for the scorecards.
Ladies and gentlemen, after 3 rounds of action, we go to the scorecards for a decision.
Judge Leandro Rodrigues scores the fight 30:27
Judge Mauricio Rocha scores the fight 30:27
Judge Paulo Santos scores the fight 30:27
In favor of your winner, by unanimous decision... Smaash Destroy!
|
|
|
|
|
|
|
|
|
|
|
|
|
|
|
|
|
|
|
|
|
|
|
| S |
C
A |
G |
S |
C
B |
G |
|
S |
C |
G |
|
energy
A | B |
|
hype
A | B |
|
pop
A | B |
|
mgr
A | B |
|
FIGHT
RATING
78% |
|
|
|
|
|
|
