|
|
PBP Commentary |
Coming up we have a light heavyweight MMA rules bout between David Aha (ranked 0 p4p, 0 weight class) and James Grey (ranked 0 p4p, 0 weight class). Grey has a niggling injury. He would have liked to come in 100% fit but that's not always possible. James Grey has the power to score a knockout today if he connects clean with David Aha's chin.
 |
|
 |
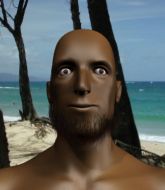
| 190 cm
20
212 lbs
0 - 0 - 0 |
|
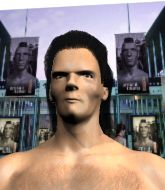
187 cm
18
205 lbs
0 - 1 - 0 |
BJJ Blue Belt
Basic striking
Intelligent |
|
BJJ Blue Belt
Brawler
Powerful |
|
| |
|
Ladies and gentlemen. This fight is 3 rounds, in the light heavyweight division.
Introducing the fighter to my left, fighting out of the red corner.
With a record of
0 - 0 - 0, fighting out of Sydney, David Aha!
And introducing the fighter to my right, fighting out of the blue corner.
With a record of
0 - 1 - 0, fighting out of Sydney, James Grey!
The judges for this bout are Bruno Hogan, Donatello Bradman and John Mangel.

The bell rings for round one and we are underway!
Grey misses the shot to the body.
Grey looks gassed!
Grey throws an uppercut from half a mile away. Aha sees it coming and avoids it easily.
Aha lands with a kick to the temple. Grey shrugs as if to say "is that all you've got?"

Aha looking for a takedown here - he's got it.
Aha working some ground and pound from guard but it's not doing any damage.

Aha gets to his feet and steps away from his opponent.
Grey misses with a body shot.
Horrible takedown by Aha or perhaps it was just good defense by Grey which made him look bad.

Aha closes the distance and presses his opponent up against the cage.
Aha lands a knee to the head.
A hook to the body from Aha.
Aha stalling in the clinch.

That's one minute gone in the round.
The ref breaks the fighters up, due to lack of action by David Aha.
Aha gets to the clinch - let's see what his plan is here.
Aha with a knee to the head.

Aha breaks the clinch.
A swing and a miss from Grey.
A jab lands there for Grey.
Aha darts in and clinches Grey up against the cage.
Grey takes an elbow to the temple.
Aha goes for a takedown in the clinch but Grey prevents it.
Aha avoiding damage.
Aha lands with a short head shot on the inside.
Aha has Grey pushed against the cage.
Aha has a body lock and is looking for a takedown. Grey is bouncing around trying to prevent the takedown and somehow he has indeed managed to stay on his feet.
That's three failed takedown attempts in the round for David Aha. That's going to take a lot out of him.
Aha breaks the clinch.

That's two minutes gone in the round.
Aha drives through with a takedown into guard.
Grey will have to put a bit more behind his punches if he's going to do any damage from this position.
The ref warns both fighters not to hold the cage as they work up against the meshing.
Grey throwing strikes off his back to little effect.
Grey can't do much from the bottom at the moment, as Aha controls the pace.
Aha is looking to work some ground and pound but Grey has wrist control.
Aha stays in close to Grey's body and controls the position.

That's three minutes gone in the round.
Aha trying to control but Grey is working from the bottom.
Grey striking off his back but it's not causing Aha any problems.
Aha pressing down on his opponent's thigh, looking to pass guard. Grey is keeping the position for now.
Aha trying to control the position from guard on top but Grey is wriggling around, looking for whatever he can.
Grey wants to sweep but no luck.

That's four minutes gone in the round.
There's not a lot going on here and the crowd are letting the fighters know they're not willing to tolerate a lack of action.

Well, the referee has seen enough. Neither fighter is active enough on the ground so he's stood them back up.
Grey throws a combination but it was largely blocked by Aha.
Aha shoots in for a takedown and gets it. Oh and he's advanced to full mount straight away.
Aha with a couple of short strikes.
The fighters are pressed up against the cage, both looking to find a bit of space to work.
Grey tries to hold on but Aha postures up.
Aha controlling from the full mount.
Grey can't escape the position.
And thats the end of the round the fighters go back to their corners.
David Aha dominated that round.
That's the end of the round. The referee orders the cornermen out of the cage so we can get back down to business.

Aha tries to close the distance and clinch up against the cage but Grey paws at him with a jab and circles away.
Aha is looking to clinch but Grey is avoiding it.
Aha tries to close the distance and clinch up against the cage but Grey paws at him with a jab and circles away.
Aha clinches up with Grey and pushes him back against the cage.
Aha stalling.
Aha tries to jump guard but he falls flat on his backside. Grey smiles and moves away.
Aha has Grey up against the cage in a clinch.
Aha lands a knee to the body.
Aha has hold of a leg and is looking for a trip takedown. Grey avoids it nicely though and we remain in the clinch.
Aha manages to get underhooks and slows down the pace for a moment.
Aha lands a knee to the body.
Grey is breathing heavily.
Grey is working hard here but doesn't seem to be able to control effectively, up against the cage.
Aha creates a bit of space for himself and sneaks an elbow through Grey's defenses.
That's one minute gone in the round.
Aha has Grey pressed up against the cage and is working for takedown. Grey manages to improve position though and keeps the fight standing.
That's three failed takedown attempts in the round for David Aha. That's going to take a lot out of him.
Aha landing knees to the head.
Aha prevents Grey from breaking the clinch.
Aha throws an elbow but it misses.
The pace really dropping off here, momentarily.
Grey takes a knee right on the jaw!
Aha tries to score a body lock takedown but Grey shows good agility there to stay on his feet.
A knee to the head by Aha.
Aha landing some nice looking knees to the body.
Aha stalling against the cage.
Aha unloads a knee to the mid-section.
That's two minutes gone in the round.
There's not a lot going on here and the crowd are letting the fighters know they're not willing to tolerate a lack of action.
Aha misses with a knee strike.
Aha with a knee to the head.
Aha with a knee to the head.
Aha has moved round to his opponent's back and is looking for a suplex! Oh snap! He's tossed Grey clear over his head and slammed him to the mat!
Aha doesn't have the hooks in and Grey manages to turn into his guard.
Grey trying to control but Aha is working from the bottom.
That's three minutes gone in the round.
Aha wants to stand but Grey is controlling the position.
That's four minutes gone in the round.
My god... these two guys really need to pick up the pace or everyone will leave to go get a beer.
Aha has butterfly guard. He's looking to stand up here. He pushes Grey off him and springs to his feet nicely. The crowd applauds.
Grey defends well against a solid takedown attempt from Aha.
David Aha is looking to throw some combinations by the looks of things.
Aha tries to clinch up.
The crowd thankful this round is nearly over.
Aha tries to score a power double leg takedown but Grey sees that one coming and sprawls well. That will dishearten Aha somewhat.
Aha fails with a takedown attempt from distance.
And thats the end of the round the fighters go back to their corners.
David Aha dominated that second round.
That's the end of the interval. I'm sure that seemed a lot quicker than a minute for our two fighters! Back to the action. This is the final round!

Grey lands a head shot.
James Grey seems to be the more aggressive standup fighter in this bout.
The fighters circling - Grey throws out the jab but it was never going to land.
Grey takes a kick to the side of the head.
Grey fails to land with the punch combination there - jab, cross, hook, miss, miss, miss.
Aha tries to clinch but is not successful on this occasion.
Aha forces Grey back against the cage and clinches.
Grey gets underhooks to prevent Aha's takedown attempt.
Knees in the clinch landing for Aha.
Aha's corner are urging him to control the action in the clinch for a moment, rather than mount any serious offense. I'm sure the crowd appreciate those instructions... not.
Knees in the clinch landing for Aha.
A knee to the head by Aha.
Aha throws a hook to the body. More of an arm punch but it's all scoring with the judges.
Aha avoiding damage.
Both fighters are breathing heavily.
Aha landing knees to the body. They look like they could hurt.
That's one minute gone in the round.
Aha fails to pull guard.
Aha stalling here - the referee won't stand for too much of that.
Aha with a knee to the head.
Aha has Grey pressed against the cage.
Aha breaks the clinch and we return to the middle of the mat.
Aha tries to close the distance and clinch up but Grey swats him away and circles back towards the center.
Aha moves into range and clinches up with Grey.
Aha manages to get underhooks and slows down the pace for a moment.
Aha pushes off and circles away, back to the middle of the mat.
That's two minutes gone in the round.
A few boos can be heard. I'm sure they will multiply if the fighters don't pick up the pace.
Aha tries to close the distance and clinch up but Grey swats him away and circles back towards the center.
Aha closes the distance and clinches.
Aha works on Grey's body with a couple of short punches.
Nice elbow from Aha.
Aha has Grey pushed against the cage.
Aha breaks the clinch.
Nice sprawl there from Grey as Aha shoots in.
That's three failed takedown attempts in the round for David Aha. That's going to take a lot out of him.
No luck for Aha with that takedown attempt.
Aha has taken the fight to the clinch.
Grey on the defensive, avoiding the knees to the body.
Aha looking for a takedown.
Aha throws a vicious knee straight up the middle but Grey blocks it with crossed arms.
Aha is looking to score with knees to the body. Maybe he'll change it up and go body then head. Grey is defending well for now.
Aha tries to jump guard but he falls flat on his backside. Grey smiles and moves away.
That's three minutes gone in the round.
Grey throws a hard body shot but it just misses.
Aha tries to clinch up.
Donk. Grey catches Aha right on the button with a cross.
Aha fakes high and shoots in for a takedown but Grey avoids it really well and circles away.
Aha shoots in for a takedown but doesn't get it.
Grey throws a lazy right hand but Aha sees it coming a mile off and sidesteps it easily.
Grey jabbing away but nothing is landing.
Aha throws a sloppy head kick and Grey moves out of range easily.
No luck with that takedown attempt from Aha.
Grey thuds his right hand into Aha's forehead from close range. That could be painful for both fighters.
James Grey is looking to keep the fight on the feet at all costs.
Grey throws a series of strikes that have Aha backpedaling.
Aha looks for a takedown. He's got it. We're now in half guard.
That's four minutes gone in the round.
Grey slips a foot under and gets full guard. Nice work.
Aha trying to control the position from guard on top but Grey is wriggling around, looking for whatever he can.
Aha slows down the pace of the fight, as he sits in guard.
Grey tries to land a sweep but no joy.
James Grey has stepped it up - he knows he needs a finish here!
David Aha is fighting for a decision here - he's started to take the cautious approach.
Aha stands and throws Grey's legs to the side, diving into side control.
And that's the end of the fight!
David Aha showed his dominance in that final round.
Well I reckon that's a shut out for Aha, winning every round. Will the judges agree? They are the ones who matter, even if they are often depressingly incompetent. Over to the ring announcer for the scorecards.
Ladies and gentlemen, after 3 rounds of action, we go to the scorecards for a decision.
Judge Bruno Hogan scores the fight 30:27
Judge Donatello Bradman scores the fight 30:27
Judge John Mangel scores the fight 30:27
In favor of your winner, by unanimous decision... David Aha!
|
|
|
|
|
|
|
|
|
|
|
|
|
|
|
|
|
|
|
|
|
|
|
| S |
C
A |
G |
S |
C
B |
G |
|
S |
C |
G |
|
energy
A | B |
|
hype
A | B |
|
pop
A | B |
|
mgr
A | B |
|
FIGHT
RATING
40% |
|
|
|
|
|
|
