|
|
PBP Commentary |
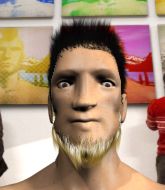
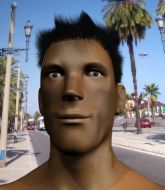
Coming up we have a light heavyweight MMA rules bout between Pannoi Boon Ta (ranked 0 p4p, 0 weight class) and Shunsuke Yamamoto (ranked 0 p4p, 0 weight class). Shunsuke Yamamoto is the more experienced fighter, so let's see if that makes a difference tonight.
 |
|
 |
| 185 cm
20
215 lbs
2 - 1 - 0 |
|
194 cm
20
223 lbs
4 - 1 - 1 |
BJJ Blue Belt
Excellent MT
Cuts easily |
|
Good wrestler
Basic striking
Determined |
|
| |
|
Ladies and gentlemen. This fight is 3 rounds, in the light heavyweight division.
Introducing the fighter to my left, fighting out of the red corner.
With a record of
2 - 1 - 0, fighting out of Tokyo, Pannoi Boon Ta!
And introducing the fighter to my right, fighting out of the blue corner.
With a record of
4 - 1 - 1, fighting out of Tokyo, Shunsuke Yamamoto!
The judges for this bout are Yukihiro Shimada, Sosuke Kotani and Taro Takaoka.

The bell rings for round one and we are underway!
Boon Ta throws a sloppy head kick and Yamamoto moves out of range easily.
Boon Ta pulls out of a head kick attempt.
Boon Ta tries a head kick but it misses.
A head kick misses from Boon Ta.

Yamamoto closes the distance and pushes Boon Ta back into the cage.
Yamamoto scores with a shoulder strike.
Yamamoto scores with a nice hook to the head.
Yamamoto softening up his opponent with strikes, against the cage.

Boon Ta pushes off and circles away, back to the middle of the mat.
A head kick misses from Boon Ta.
Yamamoto drives through and clinches with Boon Ta against the cage.
Yamamoto lands a right hand that snaps the head of Boon Ta backwards.
Boon Ta looking to throw knees to the head but Yamamoto is blocking nicely.
Yamamoto lands with a short head shot on the inside.
Yamamoto works on Boon Ta's body with a couple of short punches.
Yamamoto missing with knees to the body.
Boon Ta wants to get back to striking at distance but Yamamoto won't allow it.
Boon Ta wants to break free. God knows he wants to breaaaak freeee.
Yamamoto has Boon Ta pressed against the cage, preventing Boon Ta from circling away and getting back to striking at range.
Boon Ta with the Thai clinch. He's looking to land a big knee but he's not managed it this time.
Yamamoto works on Boon Ta's body with a couple of short punches.
Yamamoto lands a nice elbow.
Yamamoto using the Thai clinch to land knees to the body.
Boon Ta is breathing heavily.
Boon Ta is looking to control Yamamoto's arms but Yamamoto gets an underhook and turns him. Now Boon Ta has his back to the cage.
Yamamoto presses Boon Ta against the cage and delivers a mid-strength body shot.
The crowd cheering loudly, showing their appreciation for the quality fight we're seeing here.
Yamamoto lands with a right to the head.
Yamamoto working on landing some head shots here - that one got through nicely.
Yamamoto lands a short shot on the inside that snaps the head of Boon Ta backwards.
Yamamoto lands an elbow just above Boon Ta 's eye.
Yamamoto lands a nice elbow.
Yamamoto lands a knee to the body.
A short uppercut from Yamamoto.
Kneeeeees! The crowd are calling for knees to the body. Yamamoto obliges.
Yamamoto throws a knee to the head but misses.
Boon Ta prevents a takedown attempt there.

That's one minute gone in the round.
Yamamoto lands a glancing elbow in the clinch.
Boon Ta takes a shot to the head.
Boon Ta takes an elbow to the forehead.
Yamamoto lands an elbow just above Boon Ta 's eye.
Yamamoto landing knees to the body.
Yamamoto crunches a lovely knee into Boon Ta's ribcage.
A short right from Yamamoto.
Yamamoto lands a hook to the side of the head.
Boon Ta using the Thai plumb to throw knees but Yamamoto has his back arched nicely, preventing the strike.
Boon Ta takes an elbow to the forehead.
Boon Ta is trying to break free.
Yamamoto keeps the fight in the clinch, despite Boon Ta's efforts to push away.
Yamamoto lands a good knee to the midsection. Boon Ta won't want to take too many of those.
Yamamoto comes over the top with an elbow. That landed flush.
Yamamoto lands a good knee to the midsection. Boon Ta won't want to take too many of those.
Yamamoto working on landing some head shots here - that one got through nicely.
Boon Ta tries a knee to the head but he's missed.
Yamamoto lands an elbow inside that Boon Ta shrugs off.
Yamamoto scores with a shoulder strike.
Yamamoto scores a nice knee to the body.
Yamamoto lands a nice elbow from the clinch.
Boon Ta is trying to break free.
Yamamoto lands with a right to the head.
Boon Ta is looking to break free of the clinch but Yamamoto has double underhooks.
Boon Ta tries to circle away but Yamamoto has him pinned against the cage.
Yamamoto lands an elbow inside that Boon Ta shrugs off.

Yamamoto lands a nice trip takedown into half guard.
Yamamoto prevents Boon Ta from standing back up.

That's two minutes gone in the round.
Yamamoto missing with some ground and pound from the half guard.
Boon Ta blocking the ground and pound attempt from Yamamoto.
The fighters are pressed up against the cage, both looking to find a bit of space to work.
Boon Ta wants to get back to his feet.
Yamamoto thows a big elbow that misses, also allowing Boon Ta to regain full guard.
Yamamoto trying to control but Boon Ta is working from the bottom.

That's three minutes gone in the round.
Boon Ta working the defensive guard well to avoid strikes from Yamamoto.

The referee has ruled that neither fighter is active enough on the ground and has stood them back up.
Yamamoto is looking to clinch but Boon Ta is avoiding it.
Boon Ta throws a head kick that misses.
Boon Ta tries a switch kick but it misses it's target.
Yamamoto moves into range and clinches up with Boon Ta.
Boon Ta misses with a knee strike.
Yamamoto lands a glancing elbow in the clinch.
Yamamoto scores with a hook to the body.
Boon Ta is trying to break the clinch but Yamamoto is controlling him.
A right handed body shot lands from Yamamoto.
A frustrated look appears on Boon Ta's face as he tries to break the clinch.
Yamamoto tries a knee to the head but he's missed.
Boon Ta has had enough of the clinch but Yamamoto keeps him there for the moment.
Boon Ta tries to land a knee to the head but Yamamoto blocks with his arms.
Yamamoto lands with a light punch inside.
Boon Ta managing to block the knees to the body from Yamamoto.
Boon Ta with the Thai clinch. He's looking to land a big knee but he's not managed it this time.
Boon Ta misses with a knee to the head.
Boon Ta is trying to work out of this bad position, with his back against the cage.

That's four minutes gone in the round.
Yamamoto comes over the top with an elbow. That landed flush.
Boon Ta tries a knee to the head but Yamamoto blocks it.
Yamamoto lands a hook to the side of the head.
Yamamoto lands with a good tight uppercut to the head.
Yamamoto scores with an uppercut up the middle.
Boon Ta wants to break free. God knows he wants to breaaaak freeee.
Boon Ta tries to break the clinch but Yamamoto is controlling the position.
Yamamoto looking to throw knees to the head but Boon Ta is blocking nicely.
Yamamoto lands with a left to the head.
A real battle for position is taking place between these two warriors.
Yamamoto gets through Boon Ta's defenses to land a nice punch to the side of the head.
Boon Ta wants to strike at distance but he can't break free of the clinch.
Boon Ta can't break the clinch.
Yamamoto works on Boon Ta's body with a couple of short punches.
Boon Ta is trying to break the clinch but Yamamoto has him pressed against the cage.
A frustrated look appears on Boon Ta's face as he tries to break the clinch.
Boon Ta has had enough of the clinch and is looking to separate.
Boon Ta is looking to break free of the clinch but Yamamoto has double underhooks.
Yamamoto softening up his opponent with strikes, against the cage.
Boon Ta is trying to break free.
Yamamoto tries to land a knee to the head but Boon Ta blocks with his arms.
Yamamoto lands a body punch - he's looking to wear down Boon Ta.
The crowd applaud the fighters efforts here as the round comes to an end.
Boon Ta escapes the clinch and we're back to striking.
Boon Ta misses with a half-hearted attempt at a head kick.
Boon Ta throws a head kick but Yamamoto moves out of range.
Boon Ta swats away the attempt to clinch by Yamamoto.
Yamamoto drives through and clinches with Boon Ta against the cage.
And thats the end of the round the fighters go back to their corners.
Shunsuke Yamamoto dominated that round.
That's time! Back to the action!

Yamamoto tries to clinch up.
Boon Ta tries a head kick but it misses.
Boon Ta throws a head kick but Yamamoto moves out of range.
A head kick misses from Boon Ta.
Boon Ta pulls out of a head kick attempt.
Boon Ta throws a sloppy head kick and Yamamoto moves out of range easily.
Yamamoto has taken the fight to the clinch.
Boon Ta wants to push off and get back to the center of the mat but Yamamoto has him pressed against the cage.
Yamamoto creates a bit of space for himself and sneaks an elbow through Boon Ta's defenses.
A short left from Yamamoto.
A short right from Yamamoto.
Yamamoto prevents Boon Ta from breaking the clinch.
Boon Ta can't break the clinch.
Boon Ta is trying to break the clinch but Yamamoto has him pressed against the cage.
Yamamoto scores with a nice hook to the head.
Yamamoto landing knees to the body.
Yamamoto lands a hook to the side of the head.
Boon Ta takes an elbow to the forehead.
Boon Ta with an attempt at a knee that misses.
Yamamoto lands an elbow inside that Boon Ta shrugs off.
Yamamoto tries a knee to the head but he's missed.
Still in the clinch, Yamamoto scores with a nice short uppercut.
Both fighters are absolutely exhausted here.
Yamamoto lands on the inside with an uppercut.
Boon Ta is looking to break free of the clinch but Yamamoto has double underhooks.
Boon Ta is trying to force a seperation but Yamamoto has the dominant position.
A short body shot lands from Yamamoto as the two fighters clinch.
Yamamoto tries to land knees in the clinch but Boon Ta avoids the damage to the body.
Yamamoto pushes Boon Ta back against the cage and unloads with a body punch.
Yamamoto lands a body punch - he's looking to wear down Boon Ta.
That's one minute gone in the round.
Yamamoto pushes off an throws an elbow but Boon Ta leans to the side and avoids it. We're back to clinching against the cage.
A short right from Yamamoto.
Yamamoto unloads a knee to the mid-section.
Yamamoto lands a hook to the body. It's hard to tell if that hurt Boon Ta or not.
Nice body punch from Yamamoto.
Boon Ta wants to break free. God knows he wants to breaaaak freeee.
Yamamoto lands a nice elbow from the clinch.
Yamamoto comes over the top with an elbow. That landed flush.
Yamamoto gets through Boon Ta's defenses to land a nice punch to the side of the head.
Yamamoto tries to score a body lock takedown but Boon Ta shows good agility there to stay on his feet.
Boon Ta is trying to break the clinch but Yamamoto is controlling him.
A frustrated look appears on Boon Ta's face as he tries to break the clinch.
Boon Ta avoiding damage as Yamamoto throws knees to the body.
Boon Ta is looking to break free of the clinch but Yamamoto has double underhooks.
Boon Ta wants to break free. God knows he wants to breaaaak freeee.
Boon Ta wants to break free. God knows he wants to breaaaak freeee.
Boon Ta breaks from the clinch.
We are yet to see a takedown attempt from Yamamoto in the fight. On paper you would think he is the more dominant ground fighter so let's see if these unusual tactics pay off.
Boon Ta throws a head kick but Yamamoto moves out of range.
Yamamoto has taken the fight to the clinch.
Yamamoto presses Boon Ta against the cage and delivers a mid-strength body shot.
Boon Ta tries to stall but Yamamoto uses the opportunity to gain a better position.
Boon Ta is looking to break free of the clinch but Yamamoto has double underhooks.
Yamamoto pushes Boon Ta back against the cage and unloads with a body punch.
Boon Ta tries a knee to the head but he's missed.
A frustrated look appears on Boon Ta's face as he tries to break the clinch.
Yamamoto lands a left hand that snaps the head of Boon Ta backwards.
Boon Ta tries to break free but Yamamoto pushes him back against the cage.
Boon Ta is trying to force a seperation but Yamamoto has the dominant position.
That's two minutes gone in the round.
An uppercut to the body lands inside from Yamamoto.
Boon Ta takes an elbow to the forehead.
Yamamoto lands on the inside with an uppercut.
Yamamoto drops down for a takedown but doesn't get it.
Boon Ta breaks the clinch and we're back to striking at distance.
Boon Ta throws a head kick that misses and slips in the process. He scrambles back to his feet and the fighters circle.
Yamamoto closes the distance and pushes Boon Ta back into the cage.
Yamamoto throws a knee to the head but misses.
Boon Ta has had enough of the clinch and is looking to separate.
Boon Ta has had enough of the clinch and is looking to separate.
Yamamoto working some nice short punches in the clinch.
Boon Ta avoids the elbow strike from Yamamoto, against the cage.
Boon Ta wants to get back to striking at distance but Yamamoto won't allow it.
Yamamoto keeps the fight in the clinch, despite Boon Ta's efforts to push away.
Boon Ta wants to break the clinch but can't.
With the fighters clinched against the cage, Yamamoto creates a bit of distance for himself and scores with a nice uppercut.
A head punch on the inside from Yamamoto fails to land.
Yamamoto pushes off and fires off an elbow that misses, before clinching up again, against the cage.
Yamamoto keeps the fight in the clinch, despite Boon Ta's efforts to push away.
Yamamoto looking to throw knees to the head but Boon Ta is blocking nicely.
Boon Ta avoids the elbow strike from Yamamoto, against the cage.
Boon Ta wants to break free. God knows he wants to breaaaak freeee.
Boon Ta is trying to force a seperation but Yamamoto has the dominant position.
Boon Ta looking to throw knees to the head but Yamamoto is blocking nicely.
That's three minutes gone in the round.
Yamamoto throws a knee to the head but misses.
Yamamoto misses with a shot to the kidneys.
Shunsuke Yamamoto seems to be working more effectively in the clinch in the fight so far.
Boon Ta wants to break free. God knows he wants to breaaaak freeee.
Yamamoto has Boon Ta pressed against the cage, preventing Boon Ta from circling away and getting back to striking at range.
Boon Ta tries to break free but Yamamoto pushes him back against the cage.
A nice glancing elbow lands by Yamamoto.
Boon Ta wants to strike at distance but he can't break free of the clinch.
Boon Ta working hard to break the clinch.
A frustrated look appears on Boon Ta's face as he tries to break the clinch.
Boon Ta breaks the clinch and we're back to striking at distance.
Boon Ta throws a head kick but Yamamoto moves out of range.
Yamamoto moves in looking to clinch but Boon Ta pushes him off.
Yamamoto clinches up with Boon Ta and pushes him back against the cage.
Yamamoto has Boon Ta pressed up against the cage. He's trying to work for a single leg takedown. Yamamoto pulls back from the cage and twists to the side, sending Boon Ta tumbling to the mat - Yamamoto dives into Boon Ta's guard.
Boon Ta is trying to stand up but he's not managed so far.

Yamamoto gets to his feet - Boon Ta follows without any prompting.
That's four minutes gone in the round.
Boon Ta misses with a head kick.
Boon Ta tries a switch kick but it misses it's target.
Yamamoto tries to clinch but Boon Ta moves out of range.
Wow, both these guys are really going for it!
Yamamoto takes a kick to the side of the head.
Boon Ta throws a head kick but Yamamoto moves out of range.
Boon Ta avoids the clinch attempt nicely.
Boon Ta throws a head kick that misses.
Yamamoto tries to clinch but Boon Ta is having none of it.
Boon Ta throws a sloppy head kick and Yamamoto moves out of range easily.
Yamamoto gets in close and instigates a clinch.
Nice elbow from Yamamoto.
Yamamoto scores with a shot to the side of Boon Ta's head.
Boon Ta escapes the clinch and we're back to striking.
Yamamoto darts in and clinches Boon Ta up against the cage.
Yamamoto lands a right uppercut that snaps the head of Boon Ta backwards.
Yamamoto keeps the fight in the clinch, despite Boon Ta's efforts to push away.
Yamamoto misses the knee to the body. Nice hip positioning from Boon Ta.
Yamamoto lands a shoulder strike.
And thats the end of the round the fighters go back to their corners.
Shunsuke Yamamoto showed his class in that round. I'd imagine he'll take it on all the scorecards.
Well, the break between rounds is over. Let's get back to the scrappin! This is the final round!

Boon Ta throws a sloppy head kick and Yamamoto moves out of range easily.
Boon Ta pulls out of a head kick attempt.
Boon Ta swats away the attempt to clinch by Yamamoto.
Boon Ta keeps the fight on the outside.
Boon Ta pulls out of a head kick attempt.
Boon Ta tries a switch kick but it misses it's target.
Boon Ta tries a switch kick but it misses it's target.
Yamamoto avoids the head kick by Boon Ta.
Boon Ta throws a head kick that misses.
Yamamoto forces Boon Ta back against the cage and clinches.
Kneeeeees! The crowd are calling for knees to the body. Yamamoto obliges.
Yamamoto lands an elbow that stopped Boon Ta in his tracks for a moment.
Yamamoto lands a right uppercut that snaps the head of Boon Ta backwards.
Yamamoto working on landing some head shots here - that one got through nicely.
Yamamoto is looking to score with knees to the body. Maybe he'll change it up and go body then head. Boon Ta is defending well for now.
With the two fighters working up against the cage, Yamamoto just misses with a elbow thrown towards Boon Ta's brow.
Yamamoto keeps control of Boon Ta as he tries to wriggle out of the double underhooks.
Yamamoto lands an elbow inside that Boon Ta shrugs off.
Boon Ta has had enough of the clinch and is looking to separate.
Yamamoto lands punches inside but they're not really causing much damage.
Boon Ta is looking to break free of the clinch but Yamamoto has double underhooks.
Both fighters are breathing heavily.
Knees to the body from Yamamoto.
A right hook to the body lands for Yamamoto.
Boon Ta manages to break the clinch.
Yamamoto clinches with his opponent.
That's one minute gone in the round.
Boon Ta can't break the clinch.
Boon Ta tries to circle away but Yamamoto has him pinned against the cage.
Boon Ta wants to break free but Yamamoto has control.
A left hand lands to the body for Yamamoto.
Yamamoto lands a glancing elbow in the clinch.
Yamamoto lands a shoulder strike.
Yamamoto lands a short shot on the inside that snaps the head of Boon Ta backwards.
Yamamoto misses with a knee strike.
Boon Ta can't break the clinch.
Boon Ta is trying to break free.
Boon Ta breaks from the clinch.
Yamamoto instigates a clinch.
Yamamoto keeps the fight in the clinch, despite Boon Ta's efforts to push away.
Boon Ta pushes off and circles away, back to the middle of the mat.
Shunsuke Yamamoto is looking to throw some combinations by the looks of things.
Boon Ta throws a head kick but Yamamoto moves out of range.
Yamamoto clinches.
Yamamoto with the Thai clinch, lands a knee to the head.
Boon Ta tries to circle away but Yamamoto has him pinned against the cage.
A short right from Yamamoto.
Boon Ta with a knee to the head.
Boon Ta trying to stall but Yamamoto improves his position.
Yamamoto misses with an elbow strike.
Boon Ta working hard to break the clinch.
Boon Ta looks like he'd prefer to be striking at range right now.
Boon Ta wants to break free but Yamamoto has control.
Yamamoto landing some nice looking knees to the body.
Boon Ta tries to circle away but Yamamoto has him pinned against the cage.
Shunsuke Yamamoto is fighting for a decision here - he's started to take the cautious approach.
That's two minutes gone in the round.
Boon Ta wants to get back to striking at distance but Yamamoto won't allow it.
Boon Ta tries a knee to the head but Yamamoto blocks it.
Boon Ta wants to break free but Yamamoto has control.
Yamamoto has Boon Ta pressed against the cage, preventing Boon Ta from circling away and getting back to striking at range.
Boon Ta tries to break the clinch but Yamamoto is controlling the position.
Yamamoto keeps the fight in the clinch, despite Boon Ta's efforts to push away.
Boon Ta wants to break free but Yamamoto has control.
Yamamoto lands a damaging elbow.
A frustrated look appears on Boon Ta's face as he tries to break the clinch.
Yamamoto keeps control of Boon Ta as he tries to wriggle out of the double underhooks.
Boon Ta tries a knee to the head but Yamamoto blocks it.
Boon Ta can't break the clinch.
Boon Ta wants to get back to striking at distance but Yamamoto won't allow it.
Boon Ta wants to strike at distance but he can't break free of the clinch.
Yamamoto connects with a nasty looking knee right to Boon Ta's face.
That's three minutes gone in the round.
Boon Ta tries to break the clinch but Yamamoto is controlling the position.
Boon Ta is trying to work out of this bad position, with his back against the cage.
Boon Ta tries to circle away but Yamamoto has him pinned against the cage.
Yamamoto lands a left hand that snaps the head of Boon Ta backwards.
Boon Ta has had enough of the clinch and is looking to separate.
Yamamoto lands with a short head shot on the inside.
Boon Ta wants to break free. God knows he wants to breaaaak freeee.
Yamamoto misses the knee to the body. Nice hip positioning from Boon Ta.
Boon Ta wants to break free. God knows he wants to breaaaak freeee.
Good anti-grappling being displayed by Yamamoto as Boon Ta tries to tie him up.
Boon Ta looks like he'd prefer to be striking at range right now.
Boon Ta is trying to break the clinch but Yamamoto has him pressed against the cage.
Boon Ta escapes the clinch and we're back to striking.
Yamamoto fails with an attempt to clinch.
Boon Ta misses with a half-hearted attempt at a head kick.
Boon Ta throws a head kick that misses and slips in the process. He scrambles back to his feet and the fighters circle.
That's four minutes gone in the round.
My god... these two guys really need to pick up the pace or everyone will leave to go get a beer.
Yamamoto has managed to clinch.
Boon Ta is trying to break the clinch but Yamamoto is controlling him.
Boon Ta tries to break the clinch but Yamamoto is controlling the position.
Boon Ta wants to strike at distance but he can't break free of the clinch.
Pannoi Boon Ta has stepped it up - he knows he needs a finish here!
Boon Ta is looking to break free of the clinch but Yamamoto has double underhooks.
Yamamoto lands a body punch in the clinch.
An uppercut to the body lands inside from Yamamoto.
Yamamoto lands a hook that snaps the head of Boon Ta backwards.
Boon Ta with the Thai clinch. He's looking to land a big knee but he's not managed it this time.
Boon Ta has had enough of the clinch but Yamamoto keeps him there for the moment.
Boon Ta is trying to break the clinch but Yamamoto has him pressed against the cage.
Boon Ta can't break the clinch.
Boon Ta tries to land a knee to the head but Yamamoto blocks with his arms.
The crowd thankful this round is nearly over.
Boon Ta wants to break the clinch but can't.
Boon Ta wants to strike at distance but he can't break free of the clinch.
Yamamoto lands a nice elbow from the clinch.

It looks like Pannoi Boon Ta has been cut.
Boon Ta looks like he'd prefer to be striking at range right now.
And that's the end of the fight!
Shunsuke Yamamoto comfortably won the final round on my scorecard.
I've got Yamamoto winning every round here. Surely the decision will go his way and he'll pick up a well deserved decision victory. Over to the ring announcer for the scorecards.
Ladies and gentlemen, after 3 rounds of action, we go to the scorecards for a decision.
Judge Yukihiro Shimada scores the fight 26:30
Judge Sosuke Kotani scores the fight 26:30
Judge Taro Takaoka scores the fight 26:30
In favor of your winner, by unanimous decision... Shunsuke Yamamoto!
|
|
|
|
|
|
|
|
|
|
|
|
|
|
|
|
|
|
|
|
|
|
|
| S |
C
A |
G |
S |
C
B |
G |
|
S |
C |
G |
|
energy
A | B |
|
hype
A | B |
|
pop
A | B |
|
mgr
A | B |
|
FIGHT
RATING
58% |
|
|
|
|
|
|
