|
|
PBP Commentary |
Coming up we have a heavyweight MMA rules bout between Mitsuyo Maeda (ranked 0 p4p, 0 weight class) and ROBIN HOOD (ranked 0 p4p, 0 weight class). Man, I cannot wait for this one!
 |
|
 |
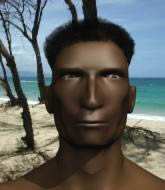
| 190 cm
23
260 lbs
3 - 1 - 0 |
|
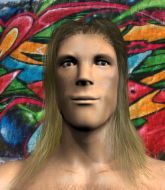
191 cm
23
270 lbs
3 - 3 - 0 |
BJJ Brown Belt
Counter striker
Very quick |
|
BJJ Blue Belt
Good kicks
Knockout power |
|
| |
|
Ladies and gentlemen. This fight is 3 rounds, in the heavyweight division.
Introducing the fighter to my left, fighting out of the red corner.
With a record of
3 - 1 - 0, fighting out of London, Mitsuyo Maeda!
And introducing the fighter to my right, fighting out of the blue corner.
With a record of
3 - 3 - 0, fighting out of London, ROBIN HOOD!
The judges for this bout are Sam Margolis, William Gold and Steven Brown.

The bell rings for round one and we are underway!
HOOD pulls out of a head kick attempt.
Maeda blocks a head kick by HOOD.
ROBIN HOOD seems to be the more aggressive standup fighter in this bout.
HOOD takes a step back and watches a body kick go sailing past his mid section.

Maeda changes levels and drives through with a really nice takedown into side control. HOOD looks really pissed at himself for not defending that better.
HOOD is trying to control Maeda's posture but Maeda avoids it.

Maeda decides to take the fight back to the feet.
Maeda uses some good footwork to avoid the body shot by HOOD.
HOOD swings away with a leg kick that misses.

HOOD lands a big head kick that sends Maeda tumbling to the mat! HOOD takes a step backwards and waves Maeda back to his feet - he wants the finish!

It looks like Mitsuyo Maeda has been cut.
Fantastic stuff here - a very entertaining period of action, which has drawn cheers from the crowd.
HOOD misses with the body kick
and Maeda counters with an inside leg kick.
No joy there for Maeda, who threw a few shots but didn't land.
HOOD misses with a double jab
and Maeda counters with a takedown into side control.
The ref warns both fighters not to hold the cage as they work up against the meshing.
HOOD looks gassed!
HOOD takes a couple of big shots there - the referee warns him that he has to defend himself better.
Maeda is putting a hurting on HOOD here, landing some big shots from side control.

That's one minute gone in the round.

Maeda is trying to get an arm triangle but HOOD is defending well.
Maeda has been looking to land a fair amount of strikes on the ground. He might be looking to soften his opponent up in order to work for a submission.
Maeda is looking for a kimura. He might have it! No, HOOD has escaped the position, nice work there.
Maeda lands an elbow.
Both fighters really going for it on the ground here!
HOOD wants to control but Maeda postures up.
Maeda trying to control the action but HOOD is working from the bottom.
Maeda thinks about going for a far side armbar but bails out and retains the dominant position instead.
HOOD can't do much from the bottom here.
HOOD taking a bit of punishment here - Maeda scoring with strikes.

That's two minutes gone in the round.
HOOD gets back to half guard.
Maeda prevents HOOD from improving his position.
Maeda missing with some ground and pound from the half guard.
Maeda decides he's had enough of the ground and stands up.
HOOD moves into range and lands a nice leg kick.
Maeda slips a straight right by HOOD.
HOOD tries a head kick but it misses.
HOOD throws a sloppy head kick and Maeda moves out of range easily.
HOOD throws a right and a left that both miss.
HOOD throws a lazy head kick
and Maeda decides to take the opportunity to score a takedown. He's landed in HOOD's guard.
HOOD really doesn't want to stay on the ground with Maeda. If he can't get it back to his feet, it's only a matter of time before he'll be tapping out.
We've seen a great period of action over the last minute or so - credit to both fighters for going all out!
Maeda missing there with some ground and pound from the guard.

That's three minutes gone in the round.
HOOD striking off his back but it's not causing Maeda any problems.
HOOD is looking to stand up but Maeda isn't so interested in that idea.
Maeda postures up and lands some nice ground and pound.
Maeda gets to his feet. HOOD looking to butt scoot but the ref puts an end to that. On your feet son!
A kick lands to the mid section there for HOOD.
HOOD ducks down and throws a hook to the body but Maeda moves away.
A head kick by HOOD misses

and Maeda counters by moving into the clinch. Good anticipation by Maeda.
Maeda jumps guard.
HOOD trying to control the position from guard on top but Maeda is wriggling around, looking for whatever he can.
HOOD postures up.
Maeda is looking for a guillotine. You can't force these things though and HOOD defends well.

That's four minutes gone in the round.
HOOD showing good wrestling skills to control the position.
Maeda looking for submissions from the bottom here. Moving his hips around, possibly looking for an armbar.
HOOD throwing elbows and punches but not connecting, as Maeda works some decent striking defense from the bottom.
HOOD trying to land body shots but he keeps hitting the mat.
The crowd are going absolutely nuts as the round comes to an end - what a fantastic round of action!
HOOD gets to his feet and steps away from his opponent.
Maeda tries to score a power double leg takedown but HOOD sees that one coming and sprawls well. That will dishearten Maeda somewhat.
Maeda ducks under an overhand right and circles away with a smile on his face.
And thats the end of the round the fighters go back to their corners.
Mitsuyo Maeda dominated that round.
The cut man is working on Mitsuyo Maeda's cut.
The referee calls time. The cornermen exit stage left and we're back to business.

HOOD lands a nice leg kick that just misses Maeda's sensitive parts.
HOOD keeps the fight on the outside.
Maeda staying out of range there.
HOOD misses with a body kick.
HOOD throws a head kick but Maeda moves out of range.
HOOD throws a head kick that misses.
HOOD lands with a head kick! That's gotta hurt.
A head kick by HOOD misses
and Maeda counters with a shoot takedown into half guard.
We've seen a great period of action over the last minute or so - credit to both fighters for going all out!
HOOD has hold of Maeda's hands but Maeda slips his arm to the side and lands an elbow.
Mitsuyo Maeda overall seems to be getting the better of the ground position in the fight so far.
Maeda is trying for a guillotine from the top but the pressure isn't in the right place so HOOD is just riding it out for now. Maeda eventually gives up the hold.
Maeda looks to score some points with some ground and pound.
Both fighters are absolutely exhausted here.
That's one minute gone in the round.
Maeda tries to stand but his hand is stuck under HOOD.
HOOD works his way to full guard. Good work.
HOOD has control of Maeda's left arm, preventing Maeda from doing any damage.
HOOD is working from a closed guard but he's struggling to control his opponent.
Maeda in full guard, throwing the ground and pound. No damage this time.
Maeda postures up and lands a big shot to HOOD's brow.
Maeda thows a big elbow that misses.
HOOD preventing the ground and pound from doing any damage.
HOOD trying to control the position.
HOOD manages to sweep nicely, so he's now on top. Maeda manages to get himself to full guard.
Maeda had isolated an arm as going for a kimura. HOOD defends it easily.
That's two minutes gone in the round.
Maeda trying to control the position.
Maeda keeping moving, preventing HOOD from controlling successfully.
Maeda controls HOOD momentarily but HOOD frees himself.
HOOD working some ground and pound from guard but it's not doing any damage.
Maeda can't keep his opponent in guard - HOOD advances to half guard, no doubt looking to mount.
HOOD slows the pace down in half guard.
That's three minutes gone in the round.
HOOD wants to take a breather but Maeda is having none of it.
Maeda is trying to stand back up but HOOD is controlling him
HOOD prevents Maeda from improving his position.
HOOD is looking for a kimura here.
Maeda looking for submissions off his back.
That's four minutes gone in the round.
The crowd are hurling abuse towards the fighters... You can hardly blame them though because there isn't a lot going on in the fight.
Maeda is looking to sinch up a guillotine here but HOOD pulls his head out easily.
HOOD stands up out of the half guard.
A jab from HOOD misses.
Maeda moves away from the strike by HOOD.
Maeda defending well as HOOD loads up on a big left hand.
Nice defenses there by Maeda.
HOOD throws the left hand but Maeda avoids the punch easily.
HOOD misses with a head kick.
HOOD misses with a head kick.
And thats the end of the round the fighters go back to their corners.
A close second round but ROBIN HOOD will probably get the nod - 10:9.
The cut man is working on Mitsuyo Maeda's cut.
OK. That's time! The bell goes and we're back to the action. So, we enter the final round. Let's see if either fighter can bring us a finish, or whether we're going to the judges scorecards.

Maeda attempts a leg kick but it's missed by a good margin.
A swing and a miss from HOOD.
Maeda uses good head movement to avoid the hook from HOOD.
HOOD wants to land a leg kick but Maeda is out of range.
A low kick from HOOD is predictable there
and Maeda decides to take the opportunity to score a takedown. He's landed in HOOD's guard.
Maeda won't allow HOOD to sweep him here.
Maeda wants to control from the top but HOOD keeps moving.
HOOD manages to land a sweep and now he's in mount on top!
Maeda is looking to improve his position but HOOD isn't that keen on the idea.
Both fighters are breathing heavily.
That's one minute gone in the round.
HOOD unloads with some shots from mount but Maeda bucks and avoids them well.
Maeda is wriggling around trying to escape.
Maeda tries to lock up and control but HOOD gives him a forearm to the face and pushes him away.
HOOD controlling his opponent.
Maeda keeping his composure momentarily, calmly looking to get back to half guard.
HOOD can't quite control the action as he would like just now, as Maeda is looking to escape.
HOOD controlling from the full mount.
That's two minutes gone in the round.
Well. There's a bit of a lull in the action here and the crowd are starting to get restless.
HOOD tries to control but Maeda wriggling away.
Maeda slips a leg in and gets back to half guard.
Maeda tries to get to full guard but HOOD has control of the leg.
HOOD is looking to take a break and control but Maeda is keeping him honest, looking to work from the bottom.
Maeda is trying to control but can't.
That's three minutes gone in the round.
Maeda looking to work for a kimura from the bottom.
Maeda is looking for a sweep. HOOD is wise to his cunning plan and keeps the top position.
Maeda is trying to stand up here but HOOD is controlling him well.
HOOD working Maeda over with strikes.

The referee has ruled that neither fighter is active enough on the ground and has stood them back up.
HOOD throws a head kick but Maeda moves out of range.
Maeda avoids the head kick by HOOD.
Maeda ducks under a wild hook from HOOD.
Maeda slips under a jab.
Maeda stalks HOOD and leaps in with a furious combination of punches. Uppercuts and crosses smash into HOOD's face. HOOD staggers backwards, shaken.
HOOD keeps the fight standing with a nice sprawl.
That's four minutes gone in the round.
Maeda avoids the head kick by HOOD.
HOOD swings away but doesn't land with a series of punches.
HOOD gets caught flat footed, as Maeda shoots in with a quick takedown into guard.
HOOD is looking to get back to his feet but can't, whilst Maeda is controlling him.
Maeda trying to land body shots but he keeps hitting the mat.
Maeda postures up and lands a big shot to HOOD's brow.
The fighters are pressed up against the cage, both looking to find a bit of space to work.
HOOD avoiding any damage from the ground and pound.
HOOD wants to sweep here but Maeda controlling him for the moment.
Maeda throwing strikes from guard but HOOD blocks nicely.
HOOD tries to land a sweep but no joy.
And that's the end of the fight!
Mitsuyo Maeda showed his dominance in that final round.
I think Maeda has won this one but let's see what the judges have to say. Over to the ring announcer for the scorecards.
Ladies and gentlemen, after 3 rounds of action, we go to the scorecards for a decision.
Judge Sam Margolis scores the fight for Mitsuyo Maeda!
Judge William Gold scores the fight for Mitsuyo Maeda!
Judge Steven Brown scores the fight for Mitsuyo Maeda!
Mitsuyo Maeda wins by unanimous decision!
|
|
|
|
|
|
|
|
|
|
|
|
|
|
|
|
|
|
|
|
|
|
|
| S |
C
A |
G |
S |
C
B |
G |
|
S |
C |
G |
|
energy
A | B |
|
hype
A | B |
|
pop
A | B |
|
mgr
A | B |
|
FIGHT
RATING
67% |
|
|
|
|
|
|

