|
|
PBP Commentary |
Coming up we have a middleweight MMA rules bout between Tompa Hero (ranked 0 p4p, 0 weight class) and Matt Yoshiyuki (ranked 0 p4p, 0 weight class). The crowd seem to be enjoying Yoshiyuki's choice of entrance music: Summer Girl - Stereos. Well, I have no idea who's going to take this one!
 |
|
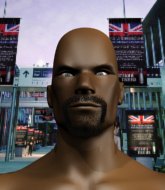 |
| 182 cm
22
180 lbs
2 - 1 - 0 |
|
184 cm
21
190 lbs
0 - 0 - 0 |
BJJ Purple Belt
Counter striker
Cuts easily |
|
BJJ Blue Belt
Basic striking
Inexperienced |
|
| |
|
Ladies and gentlemen. This fight is 3 rounds, in the middleweight division.
Introducing the fighter to my left, fighting out of the red corner.
With a record of
2 - 1 - 0, fighting out of Los Angeles, Tompa Hero!
And introducing the fighter to my right, fighting out of the blue corner.
With a record of
0 - 0 - 0, fighting out of Los Angeles, Matt Yoshiyuki!
The judges for this bout are Timothy Bukovac, and Jack Bonds.

The bell rings for round one and we are underway!
Yoshiyuki throws a right and a left that both miss.
Hero throws a series of punches but Yoshiyuki avoids them all with ease.

Hero clinches.

Yoshiyuki manages to break the clinch.
Hero fails with the takedown.
Yoshiyuki misses with a few strikes there.
Matt Yoshiyuki seems to be the more aggressive standup fighter in this bout.
Yoshiyuki misses with a combination
and Hero counters by moving into the clinch.
Yoshiyuki escapes the clinch and we're back to striking.
Yoshiyuki looks to score with a combo but nothing lands.
Yoshiyuki lands a jab followed by a nice looking cross.
Yoshiyuki misses with a wild combination.

Yoshiyuki shoots in for a takedown and gets it. Oh and he's advanced to full mount straight away.
Yoshiyuki prevents Hero from getting the reversal.
Yoshiyuki throwing shots from mount but they're not landing.
Hero wants to hold on but Yoshiyuki pushes him away.

That's one minute gone in the round.
Poor strikes thrown by Yoshiyuki there. More accuracy and less frantic strikes would help!
Yoshiyuki throws an elbow from mount that misses. Lucky escape for Hero because Yoshiyuki loaded up on that one.
Hero bucks up and manages to get a nice reversal! He's in guard on the top - nicely done!
Hero chips away with some ground and pound.
Hero with a flurry of punches that miss.
Hero thows a big elbow that misses.
Hero wants to control from the top but Yoshiyuki keeps moving.
Yoshiyuki utilising some decent striking defenses from the guard, preventing the ground and pound.
Hero working some ground and pound from guard but it's not doing any damage.
Hero with a nice head shot there.

That's two minutes gone in the round.

Hero gets to his feet and steps away from his opponent.
Hero fails in his attempt to clinch.
Hero closes the distance and clinches up with Yoshiyuki, looking for a takedown. Hero pushes Yoshiyuki against the cage but Yoshiyuki circles to the side and manages to break the clinch.
Hero shoots in but Yoshiyuki avoids the takedown attempt easily.
That's three failed takedown attempts in the round for Tompa Hero. That's going to take a lot out of him.
Hero is breathing heavily.
Hero has a takedown stuffed.
Hero shoots in but no luck this time.
Yoshiyuki misses with a series of wild punches.
Yoshiyuki scores with a nice strike.
Yoshiyuki throws a combination. Hero tries to block but a couple of punches get through.
Hero avoids a punch combination nicely.
Yoshiyuki swinging wilding here.
A nice inside leg kick there by Yoshiyuki. That's going to slow Hero down.

That's three minutes gone in the round.
Yoshiyuki connects with a body shot.
Good leg kick by Yoshiyuki there. It's the ones that make that thud noise that hurt and that was an almighty thud.
Hero tries to move into range but Yoshiyuki moves to the side and lands with a nice right hand.
Hero misses with a takedown attempt - Yoshiyuki sprawls well and throws a nice strike on the way out which just misses.
Hero fails miserably with a takedown attempt.
Yoshiyuki clinches but Hero breaks the clinch
and Hero counters with a shoot takedown. Yoshiyuki fights it but they end up in guard.
The fighters are pressed up against the cage, both looking to find a bit of space to work.
Hero forces his way into half guard.
Hero wants to take a breather but Yoshiyuki is having none of it.
Hero is looking to pass the guard... He's managed it - he's now in full mount!
Hero throws an elbow from mount that misses. Lucky escape for Yoshiyuki because Hero loaded up on that one.

That's four minutes gone in the round.
Hero tucks in and makes sure he doesn't lose the dominant position.
Hero has been looking to land a fair amount of strikes on the ground. He might be looking to soften his opponent up in order to work for a submission.
Yoshiyuki has given up his back here. Will Hero look for the submission or keep pounding away?

Yoshiyuki fending off the submission attempt from Hero.
The crowd are loving this. Great action here.
Hero trying desperately to keep hold of the dominant position.
As the round comes to an end the crowd are showing their appreciation for a great round of action.
Hero is remaining active here, looking for the choke. The more discerning members of the crowd will appreciate his efforts.
And thats the end of the round the fighters go back to their corners.
Tompa Hero dominated that round.
The fighters get back to their feet, the hooter sounds and we're back to the action!

Like a baseball bat into the meat of his leg there - nice leg kick by Yoshiyuki.
A punch combination from Yoshiyuki misses.
Good shot there by Yoshiyuki.
Hero tries to clinch but Yoshiyuki moves out of range.
Hero shoots in for a takedown but doesn't get it.
Yoshiyuki chopping away at his opponent's legs.
Yoshiyuki will need to tighten up his combinations if he doesn't want to gas himself out, swinging at thin air.
Hero shoots for a takedown but Yoshiyuki saw that one coming a mile off and avoided it easily.
Yoshiyuki moves into range and clinches up with Hero.
Yoshiyuki breaks the clinch and we return to the middle of the mat.
Yoshiyuki has managed to clinch.
Yoshiyuki is trying to work for a single leg takedown but Hero pulls him back up using the underhooks.
Yoshiyuki tries to pull guard but Hero holds him up against the cage and eventually Yoshiyuki drops back down to his feet.
Yoshiyuki is looking for a takedown up against the cage. Hero gets underhooks though and prevents the takedown attempt.
Tompa Hero has stuffed three takedown attempts in the round now. That's going to take a lot out of Matt Yoshiyuki.
Yoshiyuki tries to land knees in the clinch but Hero avoids the damage to the body.
Hero tries a knee to the head but he's missed.
Both fighters are absolutely exhausted here.
That's one minute gone in the round.
Hero has a body lock and is looking for a takedown. Yoshiyuki is bouncing around trying to prevent the takedown and somehow he has indeed managed to stay on his feet.
Yoshiyuki breaks the clinch and we're back to striking at distance.
Hero fails with a takedown attempt.
The fight stays on the outside here - Hero looks like he's thinking about clinching though.
Hero avoids a kick to the body.
Yoshiyuki scores with a decent looking hook.
Yoshiyuki lands a jab-cross combination.
Yoshiyuki misses with the combination.
Hero swings wildly with a right hand that was never going to find it's target.
Danga de danga de dang - Yoshiyuki scores with a four punch combination!
Hero chopped to the floor by a nice leg kick but he springs right back up before Yoshiyuki can pounce on him.
A left and a right from Yoshiyuki both land. Nice combination.
Yoshiyuki clinches up against the cage.
Hero wants to break the clinch but can't.
Hero has hold of a leg and is looking for a trip takedown. Yoshiyuki avoids it nicely though and we remain in the clinch.
That's two minutes gone in the round.
Yoshiyuki gets a trip takedown into half guard.
Hero looking to work for a kimura from the bottom.
The fighters are battling for position here. Hero manages to regain full guard. Nice work.
Yoshiyuki must be cautious of submissions here, given that his opponent has the superior Jiu Jitsu.
Hero is active off his back here, looking for submissions.
We've seen a great period of action over the last minute or so - credit to both fighters for leaving it all in the cage!
Hero manages to land a sweep and now he's in mount on top!
Yoshiyuki is squirming around, avoiding Hero's attempts to control the action.
Hero landing strikes from the mount.
That's three minutes gone in the round.
Hero sitting in mount, just looking to control for the moment.
Hero is in full mount, looking to secure a guillotine but Yoshiyuki is surviving well by controlling Hero's body position as best he can.
Yoshiyuki is trying to escape the mount.
Hero landing strikes from the mount.
Hero is in the full mount, landing strikes.
Hero looking to control but Yoshiyuki is working nicely, looking to advance position himself.
That's four minutes gone in the round.
Hero tucks in and makes sure he doesn't lose the dominant position.
Hero cracks Yoshiyuki with a nasty head shot there - the crowd let out an audible gasp there, as the noise reverberated around the arena.
Hero wants to take his opponent's back but he's not managed it.
Hero working Yoshiyuki over with strikes here.
The crowd applaud the fighters efforts here as the round comes to an end.
Yoshiyuki blocking the ground and pound.
Hero has control of Yoshiyuki's right arm, working for a kimura. It's a bit of a token attempt though and Yoshiyuki regains control of the situation pretty easily.
And thats the end of the round the fighters go back to their corners.
Tompa Hero dominated that second round.
The corners get their ten second warning. Both fighters stand from their stools and stare eachother down, ready to get back to the action. This is the final round!

Yoshiyuki forces Hero back against the cage and clinches.
Yoshiyuki is leaning against Hero and scores with a nice uppercut to the body.
Yoshiyuki has had enough of the clinch but Hero keeps him there for the moment.
Hero jumps guard but Yoshiyuki stands there with Hero around his waist. Hero gives up and drops back to his feet. We remain in the clinch.
Yoshiyuki wants a takedown but no success here.
Hero gets underhooks to prevent Yoshiyuki's takedown attempt.
Hero drops down looking for an ankle pick but Yoshiyuki pulls his leg out and moves away.
No joy there for Yoshiyuki, who threw a few shots but didn't land.
Hero moves in looking to clinch but Yoshiyuki pushes him off.
Both fighters are breathing heavily.
Yoshiyuki misses with a takedown attempt. He shot from a bit too far out.
Tompa Hero has stuffed three takedown attempts in the round now. That's going to take a lot out of Matt Yoshiyuki.
Hero shoots for a takedown but Yoshiyuki saw that one coming a mile off and avoided it easily.
Tompa Hero is looking to throw some combinations by the looks of things.
Yoshiyuki throws a wild combination but nothing lands.
Yoshiyuki scores with a hook to the body. Hero takes a step back and tries to catch his breath.
That's one minute gone in the round.
Yoshiyuki tries to close the distance and clinch but Hero swats him to one side with an open hand palm strike and circles away.
Horrible takedown by Hero or perhaps it was just good defense by Yoshiyuki which made him look bad.
Yoshiyuki changes levels and drives through with a really nice takedown into side control. Hero looks really pissed at himself for not defending that better.
Hero manages to get back to half guard.
Hero is looking to sinch up a gullotine here but Yoshiyuki pulls his head out easily.
Hero controlling the position well.
Hero is looking to sinch up a gullotine here but Yoshiyuki pulls his head out easily.
Hero trying to control from the bottom.
That's two minutes gone in the round.
Yoshiyuki tries to stand and escape but Hero is controlling the position.
Hero manages to get to full guard.
Yoshiyuki stands up from guard. Let's bang!
Hero throws a looping left and ducks down for a takedown. He's got his arms around Yoshiyuki's waist but Yoshiyuki gets an underhook and avoids the takedown by throwing Hero off to one side.
A chopping leg kick lands by Yoshiyuki.
Yoshiyuki closes the distance and lands a one-two.
Yoshiyuki throws a series of strikes that have Hero backpedaling.
Yoshiyuki throws a right and a left that both miss.
A right-left combo lands from Yoshiyuki.
Yoshiyuki has Hero up against the cage in a clinch.
Yoshiyuki manages to break the clinch.
Hero closes the distance and gets a double leg, slamming Yoshiyuki to the mat! Yoshiyuki manages to get full guard.
This has been an exciting period of action!
Hero trying to control but Yoshiyuki is working from the bottom.
That's three minutes gone in the round.
Yoshiyuki looking to sweep using the butterfly guard but Hero puts pay to that idea as he passes nicely into half guard.
Hero wants to take a breather but Yoshiyuki is having none of it.
Yoshiyuki blocking the ground and pound attempt from Hero.
Yoshiyuki is not content to let Hero control the position.
Yoshiyuki makes his way to full guard. A much better position for Yoshiyuki.
Matt Yoshiyuki has stepped it up - he knows he needs a finish here!
Hero slows down the pace of the fight for a moment. He'll need to remain active if he doesn't want to see the fight stood back up.
Hero stands up from guard. Let's bang!
That's four minutes gone in the round.
Yoshiyuki looks to score with a jab to the body but Hero is just out of range.
Yoshiyuki looks to score with a jab to the body but Hero is just out of range.
Yoshiyuki misses with a few strikes there.
Hero throws a looping left and ducks down for a takedown. He's got his arms around Yoshiyuki's waist but Yoshiyuki gets an underhook and avoids the takedown by throwing Hero off to one side.
Hero gets his takedown attempt stuffed easily
and Yoshiyuki counters with a left to the body.
Hero tries to clinch up but Yoshiyuki circles away and keeps his distance.
Hero fails with the takedown.
Good leg kick by Hero there. It's the ones that make that thud noise that hurt and that was an almighty thud.
Yoshiyuki stuns Hero with a nice body shot, before stepping back out of range.
Yoshiyuki tries to clinch up.
A nice combination there by Hero.
Yoshiyuki throws a nice looking combination but Hero bobs and weaves to avoid any damage.
Hero lands a high kick!
Yoshiyuki lands with a shot to the body.
The crowd applaud the fighters efforts here as the round comes to an end.
Hero closes this distance looking for a takedown but Yoshiyuki circles away.
Hero fails with a rather predictable takedown attempt.
And that's the end of the fight!
Matt Yoshiyuki comfortably won the final round on my scorecard.
I think Hero has won this one but let's see what the judges have to say. Over to the ring announcer for the scorecards.
Ladies and gentlemen, after 3 rounds of action, we go to the scorecards for a decision.
Judge Timothy Bukovac scores the fight 29:28
Judge Suge Night scores the fight 29:28
Judge Jack Bonds scores the fight 29:28
In favor of your winner, by unanimous decision... Tompa Hero!
|
|
|
|
|
|
|
|
|
|
|
|
|
|
|
|
|
|
|
|
|
|
|
| S |
C
A |
G |
S |
C
B |
G |
|
S |
C |
G |
|
energy
A | B |
|
hype
A | B |
|
pop
A | B |
|
mgr
A | B |
|
FIGHT
RATING
76% |
|
|
|
|
|
|
