|
|
PBP Commentary |
Coming up we have a welterweight MMA rules bout between Greer Morimune (ranked 0 p4p, 0 weight class) and Guybrush Threepwood (ranked 0 p4p, 0 weight class). Guybrush Threepwood has the better chin. Will he look to stand and bang today?
 |
|
 |
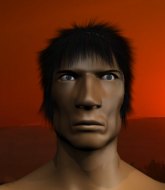
| 182 cm
20
180 lbs
0 - 0 - 0 |
|
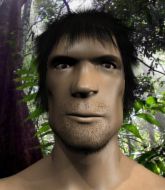
180 cm
22
174 lbs
1 - 2 - 0 |
BJJ Purple Belt
Brawler
Prefers ground |
|
BJJ Blue Belt
Solid Muay Thai
Granite chin |
|
| |
|
Ladies and gentlemen. This fight is 3 rounds, in the welterweight division.
Introducing the fighter to my left, fighting out of the red corner.
With a record of
0 - 0 - 0, fighting out of Tokyo, Greer Morimune!
And introducing the fighter to my right, fighting out of the blue corner.
With a record of
1 - 2 - 0, fighting out of Tokyo, Guybrush Threepwood!
The judges for this bout are Kenichi Hosakawa, Hirohito Nitta and Yuuki Gou.

The bell rings for round one and we are underway!
Morimune scores with a one two! Threepwood had his feet all tangled up there and couldn't avoid the strikes.

Morimune closes the distance and clinches.
Threepwood with the Thai clinch. He's looking to land a big knee but he's not managed it this time.
Threepwood stalling the fight.

Threepwood breaks the clinch and we're back to striking at distance.
Morimune shoots in for a takedown. "Ole!" shouts Threepwood as he jumps to the side.
Morimune shoots in for a takedown but Threepwood shows good takedown defense.
Morimune drives through and clinches with Threepwood against the ropes.

Threepwood pulls guard successfully.
Threepwood keeping moving, preventing Morimune from controlling successfully.
Threepwood really doesn't want to stay on the ground with Morimune. If he can't get it back to his feet, it's only a matter of time before he'll be tapping out.
Morimune tries to free his leg and advance position but Threepwood is retaining full guard.
Morimune stops Threepwood from standing up.
Morimune pushes down on Threepwood's leg and manages to get into half guard.
The fighters are trapped in the ropes so we're going to have a reposition here. The ref calls for a break and repositions the fighters in the center of the ring.
Threepwood looks like he's trying to stand up.
Morimune with a momentary lay and pray from half guard.
Morimune frees up his trapped foot and advances to mount.

That's one minute gone in the round.
Threepwood is working to get back to half guard.
Morimune takes a little breather and maintains the position. The referee will be looking for him to stay active from such a dominant position though.
Threepwood is trying to get to the ropes to help him get back to his feet.
Threepwood is looking to get to half guard.
Morimune avoids the attempt from Threepwood to control.

Morimune jumps to the side looking to secure the arm triangle
. Ooooh, that looks tight
Threepwood is gargling but he's managed to escape! Nice work there by Threepwood and Morimune has given up the dominant position trying to land that submission.
Morimune swings around for an armbar but Threepwood sees it coming a mile off and turns beautifully into Morimune's guard.
Morimune is breathing heavily.
Threepwood postures up to throw the ground and pound strikes but they don't connect.

That's two minutes gone in the round.
Well. There's a bit of a lull in the action here and the crowd are starting to get restless.
Morimune looking to control.
Morimune keeping moving, preventing Threepwood from controlling successfully.
Threepwood trying to pass the guard but can't manage it just yet.
Morimune trying to control the position.
Morimune is working the butterfly guard. He manages to land a nice scissor sweep and is now in half guard on the top. Nice move.
Morimune is trying to work for a kimura but Threepwood is defending well.
Morimune trying to control the action but Threepwood is working from the bottom.
Threepwood is trying to stand up here but Morimune is controlling him well.
Threepwood trying to get back to full guard but Morimune takes advantage of the position and moves to full mount!

That's three minutes gone in the round.
Threepwood gets back to half guard.
Threepwood is trying to get back to full guard.
Threepwood keeping his head moving to avoid the ground and pound.
Threepwood wants to get back to his feet.
Threepwood is pressing down on Morimune's left leg trying to get back to full guard. He's managed it.
Threepwood tries to strike from the bottom.
Morimune trying to control but Threepwood is working from the bottom.
Morimune is trying to work a guillotine from the top, or something like that? Don't know how he thinks he's going to get a finish from there.

The referee decides to stand the fighters back up.
Threepwood tries to clinch but is not successful on this occasion.

That's four minutes gone in the round.
A lull in the action here being met with boos from the crowd.
Threepwood gets a clinch.
Threepwood tries to land a knee to the head but Morimune blocks with his arms.
Threepwood lands an elbow that stopped Morimune in his tracks for a moment.
Threepwood scores a nice knee to the body.
Threepwood tries to score a body lock takedown but Morimune shows good agility there to stay on his feet.
Morimune pulls guard successfully.
Morimune avoiding any damage from the ground and pound.
Morimune looking for submissions off his back, moving his hips, looking for an opening.
Morimune wants to stand but Threepwood is controlling the position.
Threepwood wants to stand but Morimune is controlling his posture from full guard.
Morimune looking for a sweep. Not yet Morimune, not yet.
And thats the end of the round the fighters go back to their corners.
Greer Morimune dominated that round.
The fighters' corners scream their final instructions, as the referee calls time. Here we go, back to the action!

Threepwood has Morimune up against the ropes in a clinch.
Threepwood connects with a knee to the head.
Threepwood using the Thai clinch to land knees to the body.
Morimune is trying to work out of this bad position, with his back against the ropes.
Threepwood avoids the elbow strike from Morimune, against the ropes.
Morimune has had enough of the clinch but Threepwood keeps him there for the moment.
Threepwood drops down looking for an ankle pick but Morimune pulls his leg out and moves away.
Morimune tries to clinch up.
Threepwood keeps the fight on the outside.
Threepwood blocks a head kick by Morimune.
A head kick misses from Morimune.
Threepwood throws a quick head kick that skims the top of Morimune's head.
Greer Morimune is looking to throw some combinations by the looks of things.
Threepwood fails with a takedown attempt.
Threepwood wants to clinch but Morimune slips to the side
and Morimune counters with an inside leg kick.
Morimune scores a trip takedown into side control. Nice.
Morimune misses with the ground and pound.
Both fighters are absolutely exhausted here.
Morimune wants to control but Threepwood is keeping him busy.
Morimune thinks about going for a far side armbar but bails out and retains the dominant position instead.
That's one minute gone in the round.

Threepwood bucks up and manages to escape back to his feet!
A head kick misses from Morimune.
Morimune looks for a takedown. He's got it. We're now in half guard.
Morimune looking for a kimura but he'll have to free his other leg if he wants to finish that. Perhaps he's just using it as a distraction technique.
Morimune is trying a forearm choke
I don't think that's going to do much at this level of the game.
Threepwood is trying to stand up here but Morimune is controlling him well.
That's two minutes gone in the round.
Morimune wants to free his trapped foot but Threepwood is holding on for dear life with his legs.
Threepwood is trying to get back to full guard.
Morimune is pressing down on Threepwood's thigh, looking to free his foot. Threepwood is holding on for now.
Morimune is trying to work for a kimura. He's got his hands clasped together - this could be trouble! No, Threepwood has managed to free his arm - good work.
Threepwood on the receiving end of some nice ground and pound.
Threepwood is looking to regain full guard. Not this time though.
It looks like we're going to have a standup here. Neither fight is doing enough on the ground.
Threepwood closes the distance but Morimune moves to the side
and Morimune cracks him with a counter punch right on the button.
Threepwood avoids a kick to the body.
Threepwood clinches.
Threepwood tries to land a knee to the head but Morimune blocks with his arms.
That's three minutes gone in the round.
Threepwood keeps control of Morimune as he tries to wriggle out of the double underhooks.
Morimune using the Thai plumb to throw knees but Threepwood has his back arched nicely, preventing the strike.
Morimune wants to stall.
Threepwood using the Thai clinch to land knees to the body.
Threepwood lands a knee to the body.
Morimune looking to throw knees to the head but Threepwood is blocking nicely.
Morimune has Threepwood pressed up against the ropes and is working for takedown. Threepwood manages to improve position though and keeps the fight standing.
Morimune drops to a knee looking for a takedown but Threepwood gets the underhooks and prevents it.
Threepwood lands a knee to the head.
Morimune is trying to maintain a safe position but Threepwood gets an underhook and turns Morimune into the ropes.
Morimune can't seem to implement his control oriented gameplan at the moment. That's no bad thing of course, for those of us who want to see a good fight.
Threepwood looking to stall.
Threepwood lands an elbow just above Morimune 's eye.
Threepwood pushes off an throws an elbow but Morimune leans to the side and avoids it. We're back to clinching against the ropes.
Knees to the body from Threepwood.
Threepwood throws a vicious knee straight up the middle but Morimune blocks it with crossed arms.
A nice glancing elbow lands by Threepwood.
Threepwood missing with knees to the body.
Morimune wants to push off and get back to the center of the mat but Threepwood has him pressed against the ropes.
That's four minutes gone in the round.
Threepwood comes over the top with an elbow. That landed flush.
Morimune tries to pull guard but can't drag his opponent to the mat. Threepwood just stands there and leans against the ropes.
That's three failed takedown attempts in the round for Greer Morimune. That's going to take a lot out of him.
Morimune throws an elbow that misses.
Threepwood misses with a knee to the head.
Morimune trying to land knees to the body.
Morimune tries to jump guard but he falls flat on his backside. Threepwood smiles and moves away.
Morimune tries a switch kick but it misses it's target.
Threepwood takes a kick to the side of the head.
Threepwood tries to close the distance and clinch but Morimune swats him to one side with an open hand palm strike and circles away.
Morimune connects with a good right hand that stumbles Threepwood. Threepwood circles away out of range and recomposes himself.
Morimune misses with a head kick.
Morimune throws a head kick that connects with a bit of head and a bit of hand.
Threepwood tries to grapple but his opponent circles
and Morimune counters with a straight punch to the midsection.
Morimune fails with a takedown attempt.
The crowd applaud the fighters efforts here as the round comes to an end.
Morimune misses with a wild combination.
Threepwood gets his takedown attempt stuffed easily
and Morimune decides to take the opportunity to score a takedown. He's landed in Threepwood's guard.
And thats the end of the round the fighters go back to their corners.
Greer Morimune dominated that second round.
OK. That's time! The bell goes and we're back to the action. This is the final round!

Threepwood clinches but Morimune breaks the clinch
and Morimune counters by clinching up.
Threepwood tries a knee to the head but he's missed.
Threepwood lands a nice elbow from the clinch.
Threepwood breaks from the clinch.
Morimune closes the distance and clinches.
Morimune is working for a takedown up against the ropes. He can't get it on this occasion though.
Morimune wants to strike at distance but he can't break free of the clinch.
Threepwood is pressed up against the ropes. Morimune has hold of a leg and is looking to drag Threepwood down to the mat. Threepwood avoids the attempt though and has circled away. We're back to striking at a distance.
Threepwood wants to clinch up but Morimune keeps it at a distance.
Threepwood takes a step back and watches a body kick go sailing past his mid section.
Threepwood tries to clinch but Morimune is having none of it.

Threepwood lands a head kick that stumbles Morimune and the fighters go to the mat.

Morimune is rocked!
Morimune not looking particularly offensive just at the moment.
Oh Morimune is still in real trouble! Will he be able to recover?!!
Morimune isolates an arm and boxes in a triangle. Threepwood stacks Morimune on his neck as he steps over and passes to the side. He's now in a much more dominant position where he can look to do some serious damage. Nice move by Threepwood!
Morimune is looking to slip a leg under and get half guard but Threepwood is one step ahead and moves to full mount!
The fighters are tangled up in the ropes here. We might need a restart if the fighters can't break free themselves.
Morimune is trying to escape the mount.
BOOM! Threepwood connects with a massive shot to the dome!
That's one minute gone in the round.
Threepwood with a couple of short strikes.
Both fighters are breathing heavily.
Threepwood pausing momentarily but resumes with a couple of decent strikes that do a bit of damage.
Threepwood lands a big shot there that rocks Morimune but he's holding on and managing to survive for now.
Morimune is in a horrible position here. Threepwood smacks him with another shot as he tries to escape the position.
This has been an exciting period of action!
Morimune is in a horrible position here. Threepwood smacks him with another shot as he tries to escape the position.
Threepwood connects with a couple of good shots from mount.
Threepwood raining down shots from the mount!
Threepwood scoring with some good ground and pound from mount here. Will he manage to finish Morimune?
Morimune is trying to escape the mount.
Morimune tries to hold on but Threepwood postures up.
That's two minutes gone in the round.
Threepwood putting on the heat here with some good ground and pound!
Threepwood working Morimune over with strikes here.
Threepwood lands a shot to the body, followed up by a shot to the exposed head of his trapped opponent.
Threepwood lands a nice shot to the head.
Morimune working to try and regain half guard.
Threepwood lands a couple of nice shots there from mount.
Morimune is in all sorts of trouble here.
Morimune tries to lock up and control but Threepwood gives him a forearm to the face and pushes him away.
Threepwood lands with some vicious ground and pound - can Morimune hang on?
Threepwood tries to control but Morimune wriggling away.
Morimune is looking to get to half guard.
That's three minutes gone in the round.
Morimune tries to lock up and control but Threepwood gives him a forearm to the face and pushes him away.
Morimune takes a big shot to the head but keeps on trying to improve his position.
Threepwood lands a nice shot to the head.
Threepwood working the ground and pound effectively.
Threepwood prevents Morimune from getting the reversal.
Threepwood scoring with strikes but Morimune is staying in there.
Morimune takes a big shot to the head but keeps on trying to improve his position.
Threepwood lands a big elbow.
Threepwood with a couple of short strikes.
We've seen a great period of action over the last minute or so - credit to both fighters for leaving it all in the cage!
Threepwood is working for a guillotine from mount but Morimune frees his head quite easily.
The crowd growing excited in anticipation of a finish here! Right on cue, Threepwood cracks his opponent with a massive right hand that draws loud cheers!
The crowd growing excited in anticipation of a finish here! Right on cue, Threepwood cracks his opponent with a massive right hand that draws loud cheers!
That's four minutes gone in the round.
Morimune is working to get back to half guard.
Morimune is writhing around trying to get back to his feet.
Threepwood landing strikes from the mount.
Morimune tries to hold on but Threepwood postures up.
Morimune working to try and regain half guard.
Guybrush Threepwood has stepped it up - he knows he needs a finish here!
Threepwood lands a nice shot to the head.
Morimune wants to hold on but Threepwood pushes him away.
The crowd are going absolutely nuts as the round comes to an end - what a fantastic round of action!
Threepwood lands a couple of nice shots there from mount.
Morimune is desperately trying to get back to half guard.
And that's the end of the fight!
Guybrush Threepwood comfortably won the final round on my scorecard.
I think Morimune has won this one but let's see what the judges have to say. Over to the ring announcer for the scorecards.
Ladies and gentlemen, after 3 rounds of action, we go to the scorecards for a decision.
Judge Kenichi Hosakawa scores the fight 28:28
Judge Hirohito Nitta scores the fight 28:28
Judge Yuuki Gou scores the fight 28:28
The fight is ruled a draw!
|
|
|
|
|
|
|
|
|
|
|
|
|
|
|
|
|
|
|
|
|
|
|
| S |
C
A |
G |
S |
C
B |
G |
|
S |
C |
G |
|
energy
A | B |
|
hype
A | B |
|
pop
A | B |
|
mgr
A | B |
|
FIGHT
RATING
100% |
|
|
|
|
|
|

